
:max_bytes(150000):strip_icc():format(webp)/GettyImages-849896688-6d69f22bcf0a4ff092f444abe6e1c19f.jpg)
Updated The Ultimate YouTube to MP4 Converter Comparison for 2024
The Ultimate YouTube to MP4 Converter Comparison
Solution for Choosing Fast YouTube to MP4 Video Converter
An easy yet powerful editor
Numerous effects to choose from
Detailed tutorials provided by the official channel
The need for YouTube to MP4 video converters has drastically risen even though we know that YouTube videos are easily downloadable to loads of formats.

In this guide, we’ll look in detail at the YouTube to MP4 video converters and a lot more related to them.
In this article
01 [The Only Guide You’ll Ever Need to Learn about YouTube to MP4 Video Converter](#Part 1)
02 [Why Choose Online YouTube to MP4 Converter?](#Part 2)
Part 1 The Only Guide You’ll Ever Need to Learn about YouTube to MP4 Video Converter
01What is the MP4 format?

MP4 files were executed under the ISO/IEC 14496-12:2001 standard by the IEC/ISO and Motion Picture Experts Group (MPEG). MP4 is an international specification for audio-visual coding only because of this.
The high degree of compression used in MP4 videos assists the files to be much smaller in size than other video formats. Minimizing the file size doesn’t suddenly affect the file quality, either. Almost the entire original quality retains, making MP4 a web-friendly and portable video format.
They shouldn’t be confused with M4A and MP3, while MP4 files can play audio.
It can also help to store the other kinds of data files, such as different subtitles and still images.
This media container allows a blend of video, audio, subtitles, and still images to be present only in a single file. It also assists in storing advanced content like 3D Graphics, interactivity of the menus, and the users. This tool is highly accessible, and everyone can use it with simplicity.
02Pros and Cons of the MP4 format
Pros of the MP4 format
One of the critical merits of the MP4 format is that it can be valuable on different platforms.
● It consists of a high degree of compression while producing smaller file sizes, making it a perfect fit for compressing or video streaming HD audio-video files.
● An MP4 file can contain metadata and Extensible Meta Data Platform such as images based on PNG or JPEG format, subtitles, among others, and PDF.
● Compatible with metadata integrable with 3D graphics, user navigation or menus options, and other user interaction features.
● There are numerous open-source players, such as VLC Media Player, that offer full format support, even used on Linux OS.
● It is also versatile. For example, audio files coded with the M4A extension and MPEG-4 visual bitstreams encoded in the M4V extension.
Cons of the MP4 format
Note that the format is a container. This means that instead of storing the ode for the file, it keeps the data. Moreover, a specific MP4 file is based upon particular codecs because it does not have a native way of managing the involved coding.
A possible drawback is that there are hundreds of codecs available. Therefore, a media player must run a set of codecs concerning a particular MP4 file.
Yet, because the container format has become widely used, widely-supported codecs have become standards.
● Audio can drift out of the way or connect with the video in specific scenarios because of codec-player or codecs compatibility issues.
● Because a single file can contain video and audio and different metadata, editing or playback or editing needs various computing resources.
● It is still a lossy format. A higher compression format and smaller file size would result in audio and video quality losses.
● The familiarity of the MP4 format, coupled with its portability, has also enabled the illegal distribution of copyrighted audio-video files.
03Is it possible to convert videos to MP4 without any software?
No, it’s impossible to do this conversion task without using any YouTube to MP4 video converter. So you need to either get help from free YouTube to MP4 converter or YouTube MP4 converter HD for the purpose.
04Is it secure to convert YouTube videos to MP4?
It may not be wholly safe to use an online YouTube to MP4 video converter for online conversion. So you have to look for different factors to get a secure YouTube to MP4 converter online, free, or in the software version.
However, we must mention that using software is a pretty dependable thing if you’re looking for the highest security concerns. Here, we’d like to highly suggest Wondershare Filmora as the safest platform for video editing, which can also convert formats on the main interface without any hassle. Moreover, it has different options to set or export the project in multiple formats. It will help you do the conversion more seamlessly than other software.
Part 2 Why Choose Online YouTube to MP4 Converter?
There’s a reason people used to choose YouTube to MP4 converter online, the major being the avoidance of downloading software versions. However, you need to be highly conscious while using the YouTube to MP4 converter online, which is why we tell our readers to go for the software version due to safety.
01How to convert and download videos from YouTube to MP4?
Convert YouTube Video to MP4 UsingYmp4
Ymp4 YouTube to MP4 is an online YouTube to MP4 video converter that will convert your YouTube videos to MP4 in 1080p HD format. Here’s how you can use Ymp4.
Step 1: Go to the Ymp4 website.

Step 2: Copy-paste the YouTube video URL you wish to convert to MP4 and download. Tap the “Go“ button.

Step 3: Hit the “Download Video“ tab to save and download your video. You can also choose among the higher resolution video from the menu.

Converting Video to MP4 with Filmora Video Editor
Filmora is an ideal software solution for videos with enough editing experience. However, if you’re a newbie and wandering for a more straightforward video converter, the Filmora video editor will better suit the purpose.
Converting video to MP4 format is simplistic in Filmora. Here are the ultimate steps:
Step 1: Import Video Clip to Filmora
Filmora is compatible with a wide variety of video formats, and you can transfer the video shot with your iPhone, action camera, or a regular camera to it.

You can import videos in various formats directly to Wondershare Filmora Video Editor without any issues.
Step 2: Place Footage in Order
Drag and drop the media to the Filmora’s timeline. If you merge several footage into one bigger file, you can place them in order.

Wondershare Filmora
Get started easily with Filmora’s powerful performance, intuitive interface, and countless effects!
Try It Free Try It Free Try It Free Learn More >

Step 3: Remove Unwanted Part and Edit (Optional)
Filmora contains some quick tools to edit videos. For instance, you can use the Splitter tab to split the video into several parts, delete unwanted parts, add some titles, filters, and effects.
Step 4: Export and Convert
Hit the Export tab to convert and save the video in MP4 format. Despite MP4 format, you can also save it in MKV, MOV, AVI, or MP3 files.

02Can You Download Entire Playlists from YouTube?

ddownr is a free online YouTube downloader that is also compatible with downloading entire playlists. You’re only required to paste the playlist URL into the text box, mention the range of videos from the playlist you wish to download (up to 250), and click the Download button to confirm. The videos save in a Zip file.
There are various file format options for downloading YouTube playlists from ddownr: M4A, MP3, and WEBM audio formats, plus various WEBM and MP4 video formats, from 360p to 8k.
There are different extra options in settings, namely the email notifications for when the download is ready, an opportunity to write subtitles, and a few server locations you can choose among.
Key Takeaways from This Episode
● The solution to different queries related to YouTube to MP4 video converter.
● The step-by-step guide of using YouTube to MP4 converter online and knowing a ready answer to edit downloaded videos.
● Understanding how to download an entire playlist of YouTube videos.
The need for YouTube to MP4 video converters has drastically risen even though we know that YouTube videos are easily downloadable to loads of formats.
In this guide, we’ll look in detail at the YouTube to MP4 video converters and a lot more related to them.
In this article
01 [The Only Guide You’ll Ever Need to Learn about YouTube to MP4 Video Converter](#Part 1)
02 [Why Choose Online YouTube to MP4 Converter?](#Part 2)
Part 1 The Only Guide You’ll Ever Need to Learn about YouTube to MP4 Video Converter
01What is the MP4 format?
MP4 files were executed under the ISO/IEC 14496-12:2001 standard by the IEC/ISO and Motion Picture Experts Group (MPEG). MP4 is an international specification for audio-visual coding only because of this.
The high degree of compression used in MP4 videos assists the files to be much smaller in size than other video formats. Minimizing the file size doesn’t suddenly affect the file quality, either. Almost the entire original quality retains, making MP4 a web-friendly and portable video format.
They shouldn’t be confused with M4A and MP3, while MP4 files can play audio.
It can also help to store the other kinds of data files, such as different subtitles and still images.
This media container allows a blend of video, audio, subtitles, and still images to be present only in a single file. It also assists in storing advanced content like 3D Graphics, interactivity of the menus, and the users. This tool is highly accessible, and everyone can use it with simplicity.
02Pros and Cons of the MP4 format
Pros of the MP4 format
One of the critical merits of the MP4 format is that it can be valuable on different platforms.
● It consists of a high degree of compression while producing smaller file sizes, making it a perfect fit for compressing or video streaming HD audio-video files.
● An MP4 file can contain metadata and Extensible Meta Data Platform such as images based on PNG or JPEG format, subtitles, among others, and PDF.
● Compatible with metadata integrable with 3D graphics, user navigation or menus options, and other user interaction features.
● There are numerous open-source players, such as VLC Media Player, that offer full format support, even used on Linux OS.
● It is also versatile. For example, audio files coded with the M4A extension and MPEG-4 visual bitstreams encoded in the M4V extension.
Cons of the MP4 format
Note that the format is a container. This means that instead of storing the ode for the file, it keeps the data. Moreover, a specific MP4 file is based upon particular codecs because it does not have a native way of managing the involved coding.
A possible drawback is that there are hundreds of codecs available. Therefore, a media player must run a set of codecs concerning a particular MP4 file.
Yet, because the container format has become widely used, widely-supported codecs have become standards.
● Audio can drift out of the way or connect with the video in specific scenarios because of codec-player or codecs compatibility issues.
● Because a single file can contain video and audio and different metadata, editing or playback or editing needs various computing resources.
● It is still a lossy format. A higher compression format and smaller file size would result in audio and video quality losses.
● The familiarity of the MP4 format, coupled with its portability, has also enabled the illegal distribution of copyrighted audio-video files.
03Is it possible to convert videos to MP4 without any software?
No, it’s impossible to do this conversion task without using any YouTube to MP4 video converter. So you need to either get help from free YouTube to MP4 converter or YouTube MP4 converter HD for the purpose.
04Is it secure to convert YouTube videos to MP4?
It may not be wholly safe to use an online YouTube to MP4 video converter for online conversion. So you have to look for different factors to get a secure YouTube to MP4 converter online, free, or in the software version.
However, we must mention that using software is a pretty dependable thing if you’re looking for the highest security concerns. Here, we’d like to highly suggest Wondershare Filmora as the safest platform for video editing, which can also convert formats on the main interface without any hassle. Moreover, it has different options to set or export the project in multiple formats. It will help you do the conversion more seamlessly than other software.
Part 2 Why Choose Online YouTube to MP4 Converter?
There’s a reason people used to choose YouTube to MP4 converter online, the major being the avoidance of downloading software versions. However, you need to be highly conscious while using the YouTube to MP4 converter online, which is why we tell our readers to go for the software version due to safety.
01How to convert and download videos from YouTube to MP4?
Convert YouTube Video to MP4 UsingYmp4
Ymp4 YouTube to MP4 is an online YouTube to MP4 video converter that will convert your YouTube videos to MP4 in 1080p HD format. Here’s how you can use Ymp4.
Step 1: Go to the Ymp4 website.
Step 2: Copy-paste the YouTube video URL you wish to convert to MP4 and download. Tap the “Go“ button.
Step 3: Hit the “Download Video“ tab to save and download your video. You can also choose among the higher resolution video from the menu.
Converting Video to MP4 with Filmora Video Editor
Filmora is an ideal software solution for videos with enough editing experience. However, if you’re a newbie and wandering for a more straightforward video converter, the Filmora video editor will better suit the purpose.
Converting video to MP4 format is simplistic in Filmora. Here are the ultimate steps:
Step 1: Import Video Clip to Filmora
Filmora is compatible with a wide variety of video formats, and you can transfer the video shot with your iPhone, action camera, or a regular camera to it.
You can import videos in various formats directly to Wondershare Filmora Video Editor without any issues.
Step 2: Place Footage in Order
Drag and drop the media to the Filmora’s timeline. If you merge several footage into one bigger file, you can place them in order.
Wondershare Filmora
Get started easily with Filmora’s powerful performance, intuitive interface, and countless effects!
Try It Free Try It Free Try It Free Learn More >
Step 3: Remove Unwanted Part and Edit (Optional)
Filmora contains some quick tools to edit videos. For instance, you can use the Splitter tab to split the video into several parts, delete unwanted parts, add some titles, filters, and effects.
Step 4: Export and Convert
Hit the Export tab to convert and save the video in MP4 format. Despite MP4 format, you can also save it in MKV, MOV, AVI, or MP3 files.
02Can You Download Entire Playlists from YouTube?
ddownr is a free online YouTube downloader that is also compatible with downloading entire playlists. You’re only required to paste the playlist URL into the text box, mention the range of videos from the playlist you wish to download (up to 250), and click the Download button to confirm. The videos save in a Zip file.
There are various file format options for downloading YouTube playlists from ddownr: M4A, MP3, and WEBM audio formats, plus various WEBM and MP4 video formats, from 360p to 8k.
There are different extra options in settings, namely the email notifications for when the download is ready, an opportunity to write subtitles, and a few server locations you can choose among.
Key Takeaways from This Episode
● The solution to different queries related to YouTube to MP4 video converter.
● The step-by-step guide of using YouTube to MP4 converter online and knowing a ready answer to edit downloaded videos.
● Understanding how to download an entire playlist of YouTube videos.
Converting a Video to GIF Has Never Been Easier, Thanks to These Carefully Reviewed Video-to-GIF Converter Apps. Read Through to Get One that Will Suit Your Needs
GIF pictures are becoming more popular among users due to their ability to communicate many data. GIFs are a good option when you can’t fit large movies into your project but want to offer more precise visual information. Making GIFs is as simple as converting a video clip to GIF. If the GIF file is still too huge, cutting it is excellent.
After a careful review, we picked together the best tools to convert video to GIFs to help you produce GIFs with ease. They’re gif video creators that work on both Windows and Mac.
- Filmora
- Movavi
- Gifski
- Freemore
- GIF Brewery by Gfycat
- Any GIF Animator
- KickMyGraphics
- Instagiffer
- Microsoft GIF Animator
- VideoSolo Video to GIF Converter
- Movie to GIF
- 12 Best Video To GIF Converter Online
- Media.io
- Ezgif-F
- Adobe
- Cloudconvert
- Vistacreate
- Online Converter
- GIPHY
- IMG2GO
- MakeAGIF
- Convertio
- HNET
- ImgFlip
- 5 Best Video To GIF Converter for iPhone/iPad/Android Phone
What’s the Difference Between a Video and a GIF?
GIFs are very popular among digital marketers (and anybody who uses the internet). These little bursts of repeating material may breathe new life into otherwise dull blog posts, emails, web pages, infographics, and other documents. Isn’t it thrilling?
While GIFs and videos may seem identical, the two forms of media are highly distinct, and the differences begin when the file types are first gathered.
GIFs are basically soundless picture collections that have been modified to resemble a video. On the other hand, videos are gathered as a kind of rich media that includes both motion and sound. What’s more, the viewing experiences for these two file kinds are somewhat different.
But why would someone want to convert a video to a GIF, to begin with? There are several explanations for this
GIFs are inexpensive
When converting a video to a GIF, you’re repurposing existing material to create something new. Why not get the most out of your video marketing strategy?
GIFs are simple to create
You don’t need to be a video expert in producing a GIF. Creating a GIF using one of the video-to-GIF converters listed below may take a few minutes.
GIFs are simple to use
GIFs offer motion and excitement to digital information without needing the viewer to devote a significant amount of time and attention - a significant advantage given the typical human attention span of roughly 8 seconds.
GIFs are effective
When Dell executed a GIF-centric marketing campaign, it experienced a 109 percent boost in sales, indicating that consumers appreciate (and react to) this basic but fascinating medium. Check out these video-to-GIF converters below to pick the best one for you.
14 Best Video Splitter for Windows/Mac
1. Filmora
You may quickly create a classic GIF picture as an output using Wondershare Filmora’s interactive platform. All common video file types, such as MKV, WMV, AVI, and MP4, are supported. The greatest thing is that Filmora does not impose any file size restrictions during conversion so that users may convert HD films to GIF graphics.
It’s a powerful image editor with many appealing features that allow you to personalize your picture completely. To create original GIFs, feel free to use complex components, animations, text, overlays, and so on.
In addition, Filmora enables you to extract still photos from videos of the same resolution. The retrieved PNG pictures may be combined and edited to create an intriguing GIF.
Platform: Windows/Mac
Price: Free Trial
Features
- 4k editing support enables users to edit and export videos at a resolution of up to 4k.
- scene detection
- audio equalizer
- GIF stabilization
Pros
- Easy to use, very intuitive interface.
- Plenty of effects and presets. Useful for less experienced people.
- Very many online resources, tutorials, preset packs, effects, etc.
- Outstanding and responsive support. In live chats always polite and professional.
- It is constantly updated.
Cons
- 4K editing sucks sometines
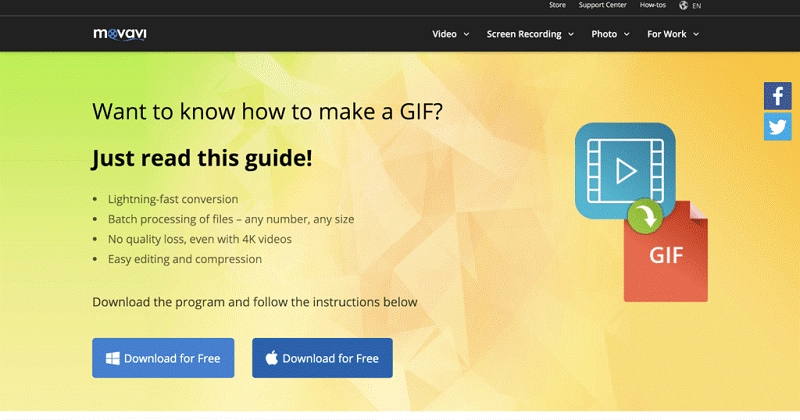
2. Movavi
Movavi Video Editor is a pioneer in the video editing industry due to its simplicity of use and dependable video editing capabilities. This software, available for both Windows and Mac OS, has quickly become a popular favorite. It is one of the best MP4-to-GIF converters because of its speed and reliability. It will let you produce GIFs from your movies in no time.
This program’s ability to batch export files is one of its best features, making producing and converting many GIFs simpler. Therefore, it is the most practical for frequent GIF makers, whether for personal or professional usage.
Though you may need to buy Movavi to get all of these excellent features, a free trial version is available for those who want to check it out before buying. The trial version is also ideal for individuals who need to convert movies to GIFs once.
Platform: Windows/Mac
Price: $49.95/year for 1PC
Features
- Fast processing of 4K videos.
- Timeline markers.
- Keyframe animation.
- Built-in media pack.
- Automatic video creation.
Pros
- Has editing options
- Clear interface
- Supports many formats
Cons
- Only a trial version with limited period is free.
- It’s very basic
- No copy pasting options
3. Gifski
You can convert videos to GIFs using Gifski . Drop a file into the Gifski window or use the Open button to search your Mac for a video. The segment of the video you wish to transform into a GIF will be readily selected.
You may choose the size of your GIF, the frame rate, graphic quality, and how many times it loops using this Mac GIF creator. You can have it repeat indefinitely, and you can also make it bounce (this is where it plays to the end, then plays backward, then forward again, and so on).

Platform: Mac
**Price:**Free
Features
- High-quality GIFs
- Command-based conversion
Pros
- Ihe software is safe to use.
- It support is good
Cons
- It doesn’t work offline
- Some users complain about the search function
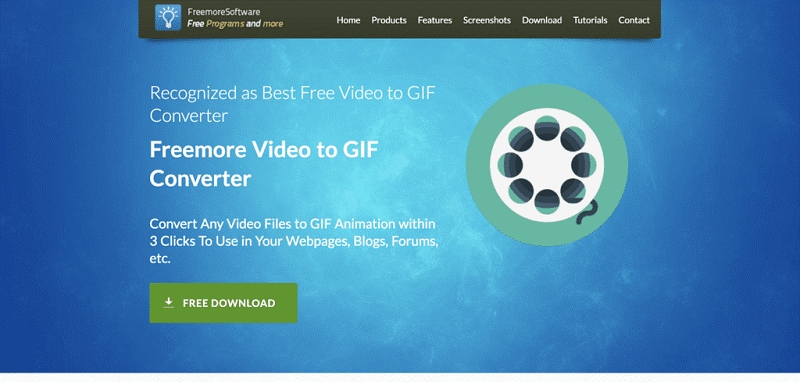
4. Freemore
Freemore Video to GIF Converter is software that converts videos into animated GIFs, enabling you to pick the precise frames to include in the GIF and change the frame’s width and height if you have a unique use case.
This program is completely free and supports all of the most common video formats, including MP4, MPEG, MOV, FLV, etc. While this tool is free, it wasn’t necessarily created to be attractive; if you download Freemore, anticipate a more practical design that, while very functional, isn’t particularly pleasing to the eye.
Freemore Video to GIF Converter is only accessible for download on Windows, unfortunate for Mac users.
Platform: Windows/Mac
**Price:**Free
Features
- Convert video files to animated GIFs;
- Make GIFs for a website, mobile phone screensaver, signature, etc.
- Clip video to create GIF;
- Adjust the width and height to suit your needs;
- Support all key video formats.
Pros
- Support multi-core CPU
- Less burden on your system
- Abundant guide content & online support
- Free, safe & no restrictions
Cons
- The maximum input video size is 10 MB
- It might be unstable on a new OS like Windows 10
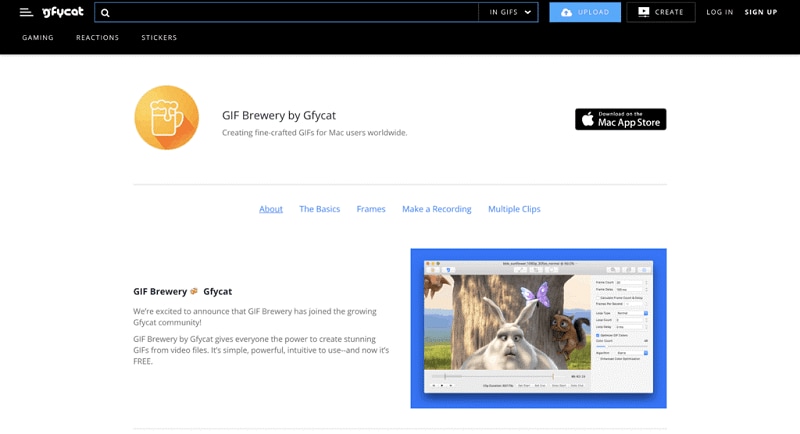
5. GIF Brewery by Gfycat
Look no farther than GIF Brewery by Gfycat for Mac users searching for a simple video to GIF converter tool.
You may begin by importing a movie, producing a screen recording, or recording straight from your camera using GIF Brewery. You may then customize your GIF by scaling the video, changing the frame rate, and adding filters and overlays to give it a unique style.
Finally, save your GIF to your computer or send it to someone else using iMessage or Mail. The app gets excellent reviews in the app store and is free to download.
**Platform:**Mac
**Price:**Free
Features
- It gives everyone the power to create stunning GIFs from video files.
- It’s simple yet powerful.
Pros
- The GIF Brewery design is good.
- The performance of GIF Brewery is good.
- he GIF Brewery is compatible with lots of devices.
- The support of GIF Brewery is excellent and useful.
- The price of GIF Brewery is free or perhaps freemium.
Cons
- GIF Brewery 3 by Gfycat Reduce battery consumption
- Loads very slowly
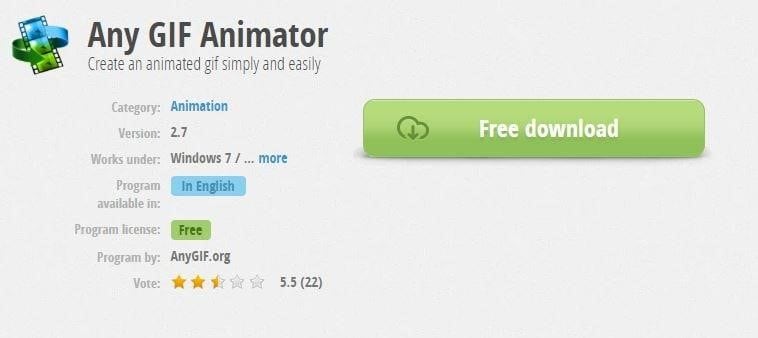
6. Any GIF Animator
Any GIF converter app’s simple and powerful design can instantly convert your favorite movies into interactive GIFs. It can play a variety of file types, including WEBM, ASF, MPG, FLV, and AVI. The greatest aspect is that this program also enables users to import media files from optical storage devices such as DVDs and even analyze camera-captured displays. Users may easily select frame rate start and finish time markers, and complex text overlays, loops, and resolution effects are available for customization.
**Platform:**Windows/Mac
**Price:**free with ads
Features
- Its simple and intuitive layout allows you to operate it without consulting the user manual.
- It’s straightforward and hassle-free.
- With the aid of an animation wizard, you can polish your GIF animation. It’s a simple and fast approach to customizing and enhancing your GIF animation.
- You receive a built-in picture editor with a full collection of editing capabilities.
- On Any GIF Animator, you may convert video to gif in various visual formats. PNG, JPEG, TIFF, BMP, GIF, ICO, PSD, PCX, RLE, PIC, DIB, AVI, PCD, WMF, and more formats are included.
Pros
- Easy to install
- Neat interface
- Clips can be edited
- Accepts any video file
Cons
- Sometimes crashes
- Cannot animate photos
- Upload time takes long
- Converting takes long
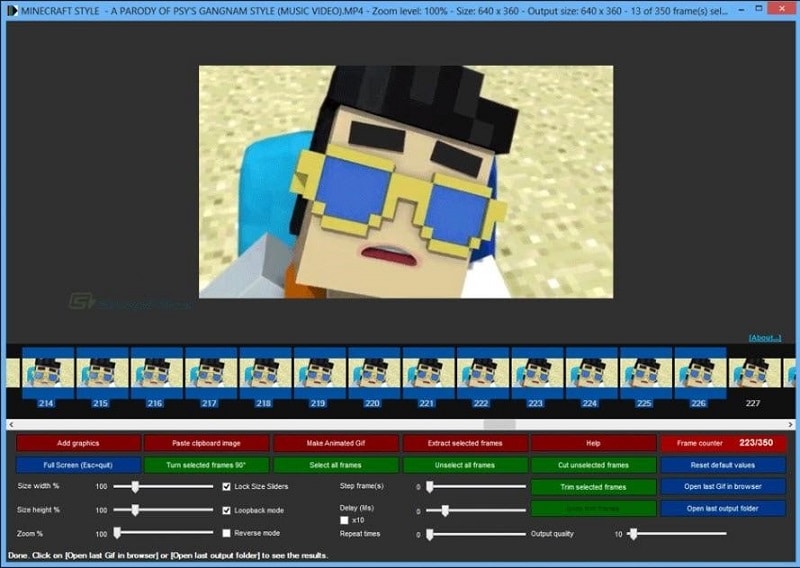
7. KickMyGraphics
Here’s a simple yet effective GIF converter that can record, generate, and manipulate GIF pictures to deliver high-quality customized output. Users may effortlessly upload animated clips in common file formats such as PNG, BMP, JPG, ordinary GIF, and animated GIF to this site. Users may simply change the output file format, size, and quality parameters. Rotate, trim, stretch, loopback, scale, and many more options are available in the advanced editor.
**Platform:**Windows/Mac
**Price:**Free
Features
- It’s a little piece of shareware that converts video to gif.
- You may also import video files in MPG, AVI, MP4, ASF, etc. Animated Gif, Jpg, Bmp, and Png
- files may all be imported.
- Animated GIF pictures may be recorded directly.
- Loop, stretch, pan, reverse, and many more editing options are available.
Pros
- Offers 90 degree image rotation facility.
- Comes with professional level settings.
- Allows users to create an animated GIF from local images.
Cons
- It is complicated for beginners.
- Support limited file formats.
- Has limited functions.
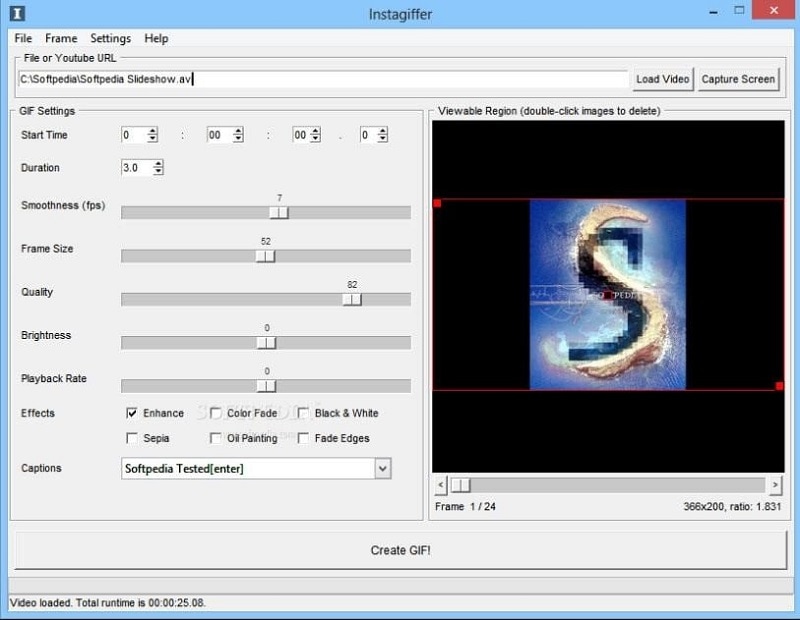
8. Instagiffer
Instagiffer allows users to quickly grab memorable stills from their screens and then process them interactively to create GIFs. Instagiffer can let you import any of your chosen moments for making GIFs, whether they are from your favorite YouTube video, a cute Vine start, or anything amusing from Netflix. This fast professional picture editing application’s loops, filters, and text capabilities are extensive. It is completely free, and there are no viruses, malware, or irritating advertisements on our platform.
**Platform:**Windows/Mac
**Price:**Free
Features
- You can immediately record the most GIF-worthy moments on your screen.
- Text, filters, loops, and more may be added.
- Completely free video to gif conversion.
- Text and unique logos may be added quickly and easily.
- There will be no watermarks on your gifs if you use Instagriffer.
Pros
- Can make 3D GIFs
- Has a portable version
- The Instagiffer software is safe to use
Cons
- On the Instagriffer website, finding a suitable software installation is tough.
- The program may seem difficult to a novice.
- Its interface is outdated.
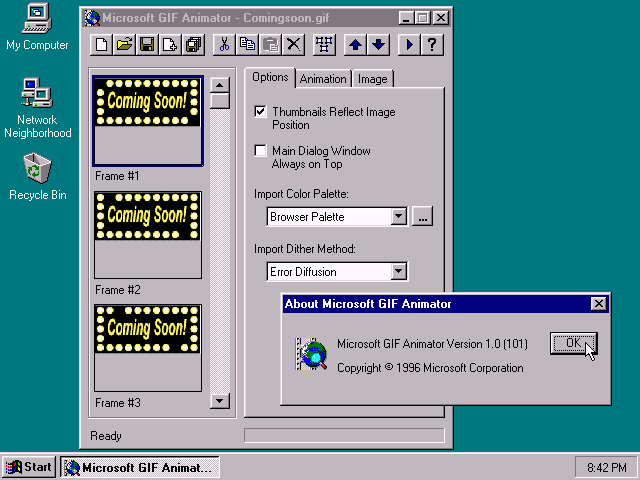
9. Microsoft GIF Animator
It is a prominent Microsoft product . This is a free version that you can get from the Microsoft shop. It may be used with Windows 10. You must first sign in with your Microsoft account to download this program. It offers a straightforward user interface with clear controls. You must upload the necessary amount of photographs in file types such as.JPEG,.bmp,.bpg,.png, etc. Set the settings for frame delay, frame count, and so forth. Finally, use the ‘Create’ button to create your GIF animation. Following your selected GIF animation preview, you may download the file.
**Platform:**Windows
Price:$60.00 one-time payment
FeaturesFree
- Upload numerous photos into the GIF list box quickly.
- The photographs are quickly assembled into GIF frames as animation with a single click of the ‘Create’ button.
- Set the frame interval to suit your requirements.
Pros
- The free version is enough for creating high-quality GIF animations.
- The findings are simple to utilize on social networking platforms.
- Cost-effective.
Cons
- There are just a few choices for customizing GIF pictures.
- Only suitable for beginners.
- Internet speed can affect how the GIF is played.
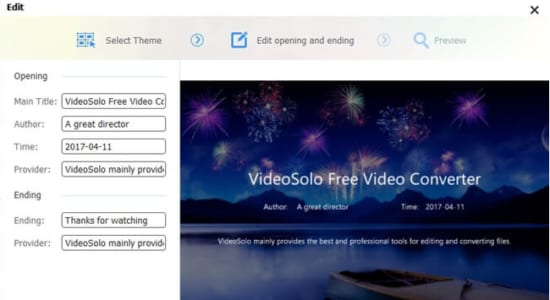
10. VideoSolo Video to GIF Converter
When producing animations, VideoSolo video-to-GIF converter program offers several possibilities. It contains features for trimming videos, selecting certain portions of films, and joining bits of several videos to create a GIF file. It contains an integrated video editor that allows you to make changes to your final result. To make your GIF more appealing, you may trim, modify contrast and saturation, and change the video color, among other things. This movie-to-GIF program comes with the bonus of allowing you to add a photo overlay or text to your GIF to make it even more enjoyable. If you’re unhappy with the picture quality or frame rate, you may change them to suit your needs.
**Platform:**Windows/Mac
**Price:**Free
Features
- Make professional-looking GIFs with no technical knowledge.
- Supports almost all video formats going.
- Create cool avatars for games.
Pros
- Several editing options
- Not very resource-intensive
- Supports multiple video formats
Cons
- Some aspects may be difficult to locate.
- The Mac version receives fewer updates than the Windows version.
- You need to download it on your computer.
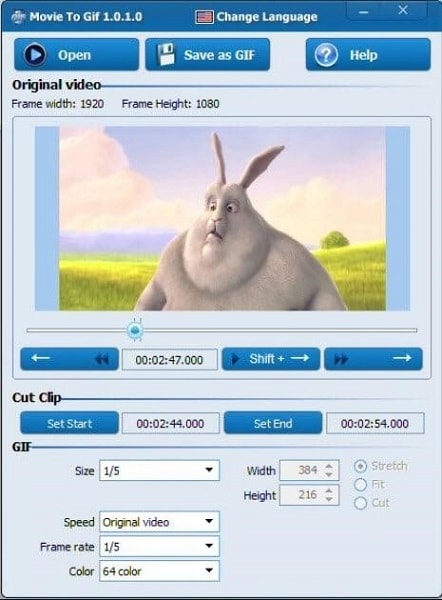
11. Movie to GIF
**Platform:**Windows
**Price:**Free/Premium($49.99/mo)
Features
- Convert video to GIF with ease.
- GIF files may be used to play video snippets.
- Increase the frame rate to make the output GIF look like the source video.
- The GIF’s width and height may be changed. An easy-to-use UI.
Pros
- Easy to use.
- Convert videos in batch code.
- Multilingual interface including English, Japanese, Spanish, etc.
- Fast conversion rate.
- HD output quality.
Cons
- Windows version only
- It’s time consuming
- The premium version is very expensive
12 Best Video To GIF Converter Online
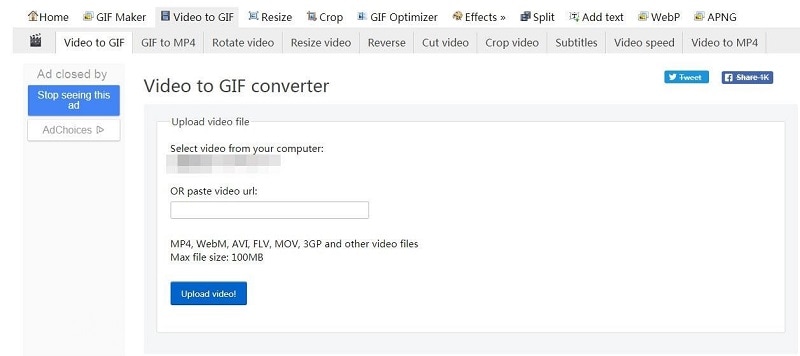
2. Ezgif-F
This application is a free GIF animator that may be used in an online mode without any registration. Windows and web browsers are both supported. Choose the ‘GIF Maker’ option on the official website and upload the photographs by hitting the ‘Choose files’ button. You may effortlessly upload many photographs in any format. To produce a high-quality GIF animation, hit the ‘Upload and Create a GIF’ option once you’ve finished uploading.
**Price:**Free
Features
- Up to 2000 picture files may be uploaded.
- GIF, PNG, JPEG, APNG, MNG, WebP, and other image file types are all supported.
- Allows you to submit a zip file of photos.
- You have complete control over frame speed.
Pros
- Multiple picture files may be uploaded at once.
- Automate settings to reduce the size of all images in the picture list to the shortest dimension.
- There is no need to pay a subscription fee.
Cons
- When there are a large number of photos in the list, this program takes a long time to make GIF animation.
- Advertisements sometimes disrupt the operation.
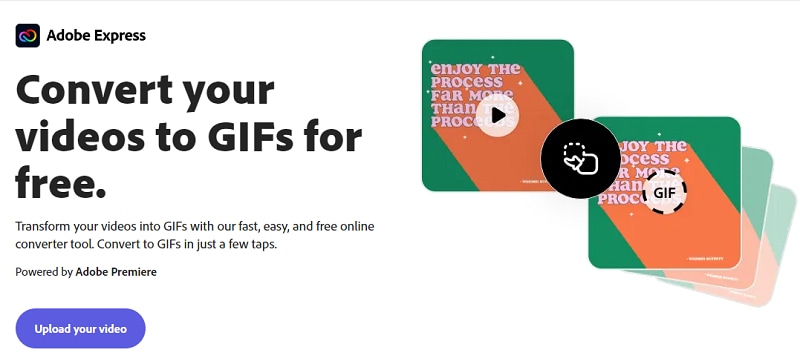
3. Adobe
Adobe is a world leading video to GIF converter and other marketing solutions. Everyone – from young artists to big companies – can use our creative, marketing, and document solutions to bring digital ideas to life and deliver comprehensive, compelling GIFs to the right spot at the right time for the best outcomes.
**Price:**Free
Features
- Offers support for raster graphics
- Rich text
- Audio-video embedding
Pros
- The adaptability of what Adobe Animate can do makes it so helpful.
- Utilizing Adobe Animate recordings on sites is typical, so individuals are accustomed to seeing it and have the essential modules introduced.
- The GIFs are little, and is extremely smooth.
Cons
- Cumbersome interface
- Outdated technology
- Limited capabilities
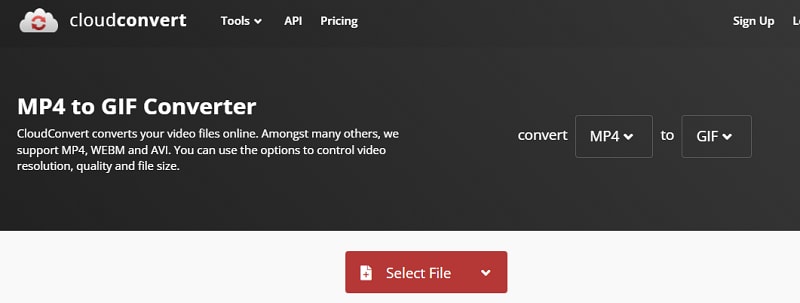
4. Cloudconvert
Online cloudconvert converts your mp4 media files to GIF. Cloudconvert supports a wide range of music, video, document, ebook, archive, image, spreadsheet, and presentation formats, including mp4, webm, and AVI. The video resolution, quality, and file size can all be customized. No software needs to be downloaded or installed.
**Price:**Free
Features
- It can adapt 256 colors and uses a lossless compression technique to contain images.
- It can also contain texts.
- It can contain low sized image animation. So it is frequently used in web publishing.
Pros
- One can set preset properties for the file conversion
- Saves you time and can convert files into the format you are looking for
- Very good price
Cons
- It is confusing in the beginning for the interface and knowing which button to press
- Limits you to your bandwidth, so it is complicated to convert big files because sometimes it throws a timeout error.
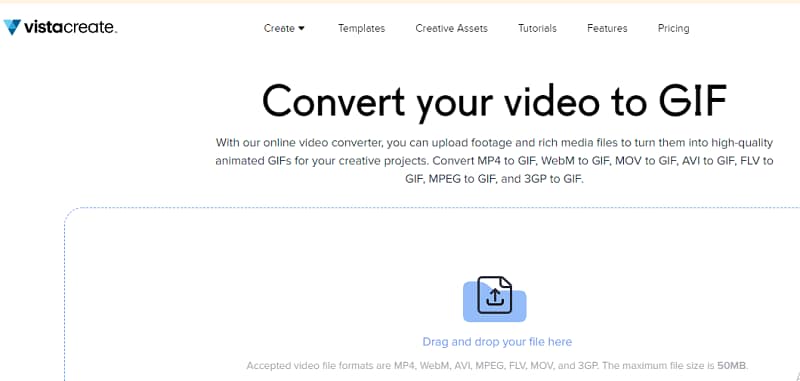
5. Vistacreate
When you need to convert video files into elevated animated GIFs, VistaCreate is the tool to use. You can trim the video file, specify the desired GIF size (Original, 800px), choose a video processing method, and GIF length dependent on the frame rate you choose, much like with Ezgif. Even though the maximum file size is limited to 50MB, MP4, WebM, AVI, MPEG, FLV, MOV, and 3GP are all acceptable formats.
If you have a transparent video, don’t worry; the transparency will be preserved in the final animated GIF. Keep in mind that the converted GIF must be downloaded as soon as possible before it is erased from the server.
**Price:**Free
Features
- Video splitter and joiner
Pros
- It allows you to convert videos into GIFs for use on social media, web design, marketing, or blogging.
- It presents a GIF editor tool to help you refine the GIF further.
- It allows you to create both long and short GIFs.
- It boasts flexibility in look, conversion speed, and quality of the output GIF.
Cons
- The templates, icons, animations and stock imagery that come with Crello are impressive.
- They create an impact and attract a lot of comments and engagement when posted.
- The quality and range of posts and videos I can create using their templates have improved my engagement and really stand out.
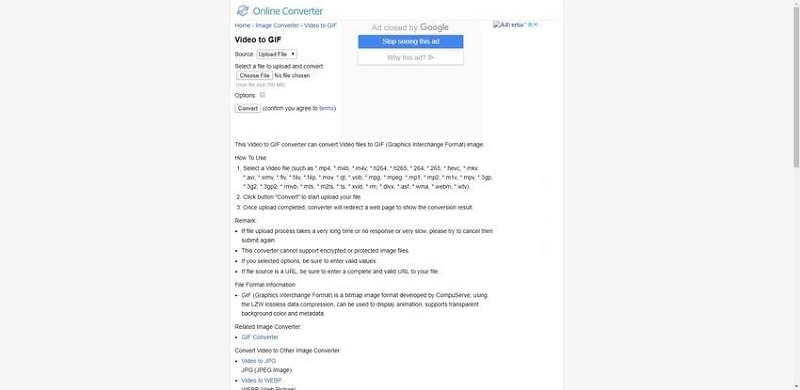
6. Online Converter
Create animated GIFs from movies and photos using thisfree online tool . It can convert photos to GIFs in addition to being a video converter. It can play a variety of video and picture formats, including mp4, .m4b,.m4v, and.mkv. The converter, however, does not handle picture files that are protected and/or encrypted.
**Price:**Free
Features
- It can convert PDF files to GIF images.
- Converting RAW picture files to GIF is supported.
Pros
- Conveys messages better.
- Small file size.
- Conveys messages better.
Cons
- Internet connection matters.
- Editing is not possible.
- Limited color pattern.
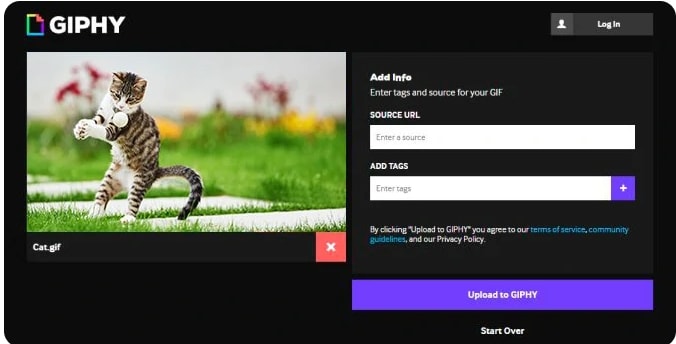
7. GIPHY
Giphy is the most popular online GIF site, with millions of people visiting it every day. It is well-liked since it is simple to use. Before selecting “create,” you enter your video URL into the window’s appropriate area. Simple tools, such as drag-and-drop options for importing films and photographs from your local storage, are also available on this site.
This site, unlike several others, enables you to add sound clips to GIFs, making them more intriguing than their muted equivalents. You can also use tags and descriptions to make your GIFs more appealing.
**Price:**Free
Features
- Intuitive web interface
- Add sound to GIF
- Create 3d GIFs
Pros
- Supports sounds
- Easy to use
Cons
- It is not available offline.
- Some people are unhappy with the search feature.
8. IMG2GO
This online file converter provides comprehensive options for altering the quality and look of animated GIFs. This free online program allows you to make animated GIFS from any video clip, including MP4, AVI, and WEBM. Additional functions include resizing, picture reduction, photo editing, and more.
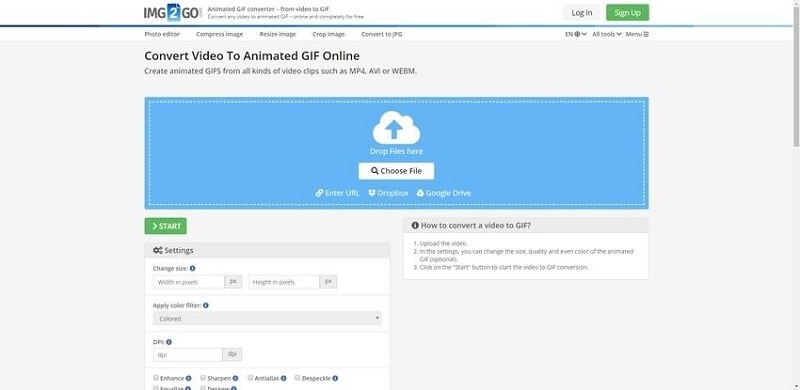
**Price:**Free
Features
- SSL encryption protects files and servers. As a result, emailing your data is completely secure.
- It can play 3GP, AVI, FLV, MOV, MP4, WebM, and WMV files.
- It allows you to apply filter changes, pixel scaling, and DPI.
Pros
- Modern interface
- Quick video and image to GIF conversion
- No loss in quality
Cons
- Loaded with tons of ads
- Not many flexible options
- Adds unnecessary black border to the GIFs
9. MakeAGIF
MakeAGIF isn’t simply a video to GIF converter; it can convert almost anything to GIF. You may upload a video, record a video, paste a video link, or even submit a collection of photographs to create your own GIF on this simple website.
Then you may customize the output by adding stickers and captions, changing the GIF’s pace, and choosing a start and end time. The one drawback to this video to GIF converter is that each GIF has a MakeAGIF watermark; to remove the company’s branding from your clip, you’ll need to pay to the premium version, which costs $11.95 per month.
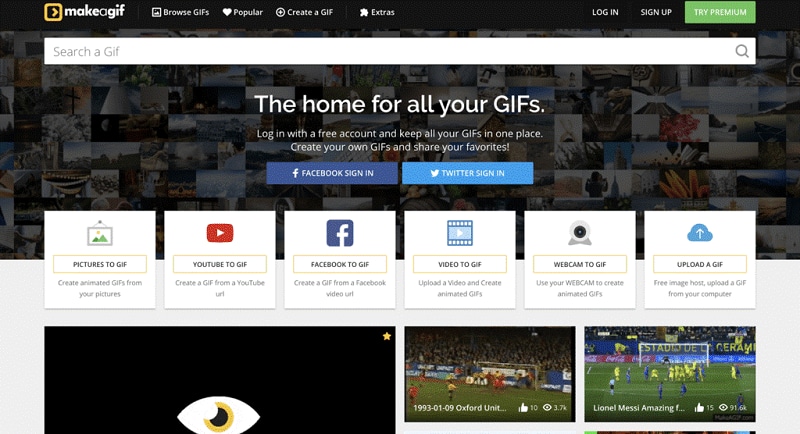
Price:$11.95/mo
Features
- Powerful GIF editing features like speed, framerate, and resolution
Pros
- Easy to use
- You can customize output to your liking
Cons
- Free version has watermarks
- It does not give the best quality output
10.Convertio
One of the easiest programs on our list isConvertio . To convert a video to a GIF, just drag it onto the tool or upload it from your Google Drive or Dropbox account, then click “convert” to finish the process.
Use this tool just if you don’t care about details. Convertio is simple to use, however you can’t set the start and finish of your GIF or the frame rate.
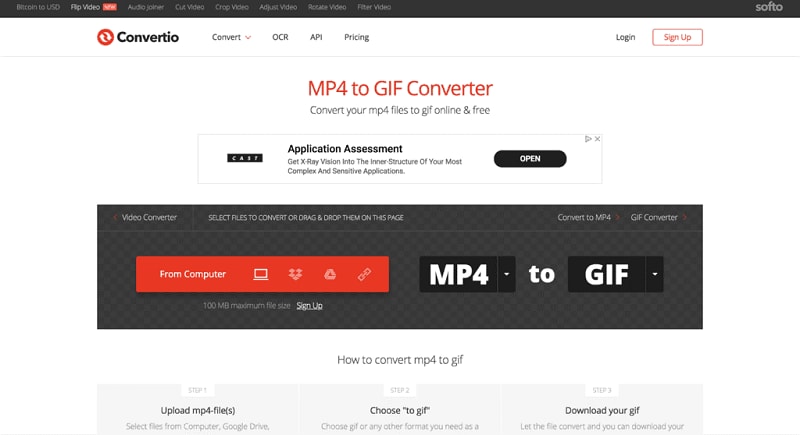
**Price:**Free
Features
- Share files to Drive, DropBox
- Edit FPS
Pros
- Ability to pick source footage from hard disk, Dropbox, Google Drive, or URL.
- Integrates Google Drive and Dropbox services
- Supports batch processing
- Offers an API to app developers
- Safe and secure online tool
- Fast and easy to use
Cons
- Converts a file of only up to 100 MB (for unregistered free users).
11. HNET
Virtually any video (mp4, flv, mpeg, webm, mov, avi, 3gp, etc.) may be converted to animated GIF format withthis online tool . Your video to gif conversion takes place in the cloud, so it won’t take up any of your computer or phone’s resources. This implies it runs on all major operating systems. After one hour, all of the files you submitted and converted will be permanently erased from the server. Your files are private; no one else may see or download them except you.
You may post your GIF picture on imgur, Pinterest, Reddit, Tumblr, 4chan, Deviantart, Flickr, and other popular image sharing sites once your video clip has been converted to GIF format.
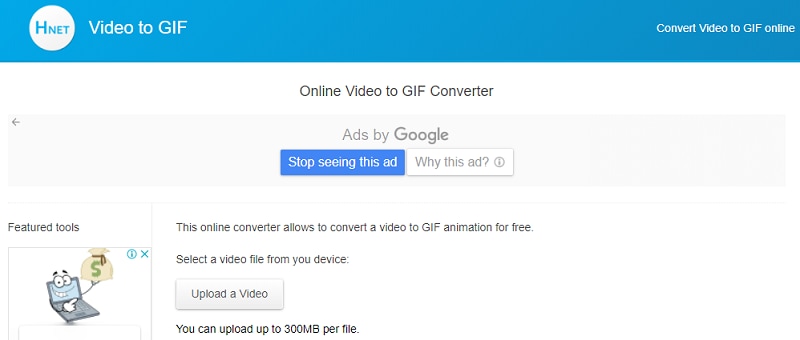
**Price:**Free
Features
- Supports all OS
- File sharing after conversion
- Support many file formats
Pros
- Very easy to use
- Free version comes with handy features
Cons
- It has a file size limit
- Your will be deleted after an hour in case you want to retrieve it.
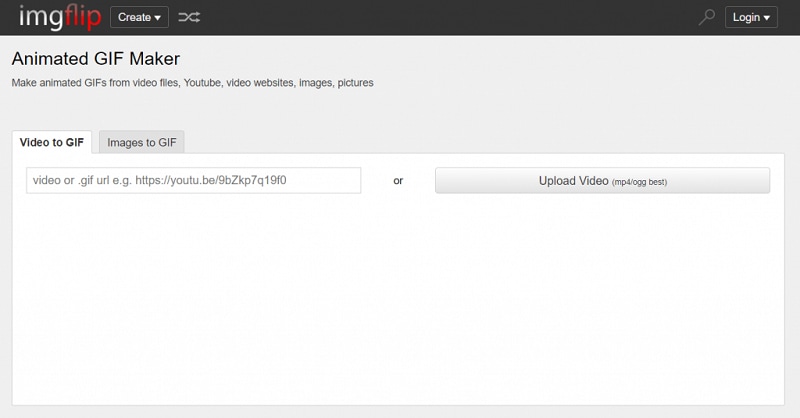
12. ImgFlip
Imgflip GIF Maker is a simple, fast video to GIF converter that converts mp4 files into animated GIFs. You can turn your clip into a GIF using the Imgflip editor and tinker with parameters like frame rate, size, and more. Because of its sharing features, Imgflip truly shines. You may share your GIF on Facebook, Pinterest, Twitter, Tumblr, and other social media sites by downloading the file, copying the file link, or using the HTML5 image format code. Imgflip is a great alternative to consider if you need to get your GIFs out there quickly.
**Price:**Free
Features
- Video editor
- File sharing
- Parameter control
Pros
- Simple and lightweight
- Fast and accurate conversion
Cons
- I glitches when the file size is big
5 Best Video To GIF Converter for iPhone/iPad/Android Phone
1. GIF Maker - Video to GIF, GIF Editor
The comprehensive GIF generator for your Android smartphone is the final app on our list. It’s a great tool for editing all sorts of GIF pictures on your phone, as the name suggests. Although it lacks preset settings like filters and music, it gives everything needed to edit films to their full potential. Any picture or video may be converted and edited.
Platform: Android
**Price:**Free
Features
- Add filters and effects to GIFs
Pros
- The UI is simple to use.
- Editing capabilities are extensive.
Cons
- There are no filters available.
- There are no options for adding music or text to your GIF pictures.
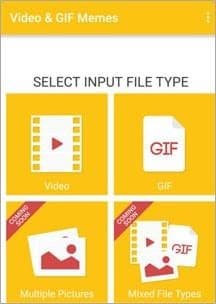
2. Videos & GIF maker
This software provides everything you need to make humorous memes and animated GIFs on your iPhone phone. As the tool’s name suggests, you may easily add captions to your photos. You may also choose the output format for the GIF picture and the movie and the start and finish lengths.
**Platform:**iPhone
**Price:**free
Features
- Select the output format of your GIF
Pros
- The most user-friendly UI.
- The GIF graphics and memes are simple to make.
- Even on older devices, it does not crash and runs well.
- Instagram has many options for creating and sharing square photographs.
Cons
- There are no editing options for GIF pictures.
- There were some issues with posting images to social networking sites.
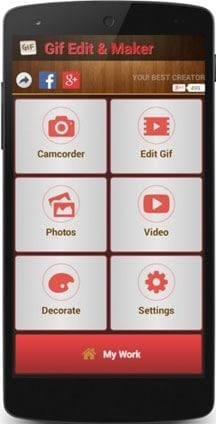
3. Gif Maker
You should install this application if you want an all-in-one freeGIF maker for your Android phone. In the programs, many attractive effects can be applied with a single click and modify the entire appearance of your images. Additionally, you may utilize the application’s camera to capture movies directly from the app. The nicest thing about this program is that it supports many languages and allows you to generate GIF images with 50 photographs.

**Platform:**Android
**Price:**Free
Features
- Concert up to 50 photos
- Convert real-time videos from the camera
Pros
- Free applications with a lot of functionality.
- It is available in many languages.
- Have a variety of picture effects to use.
Cons
- On certain devices, the app slows and crashes.
- Problems with sharing and uploading photographs with others.
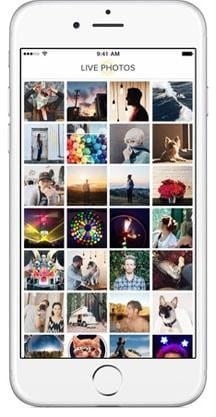
4. Live GIF
This program converts live photos to GIF images on your iPhone. There are no difficult settings to worry about; all you have to do is upload the photographs to the app and make minor adjustments. The finished photographs may be downloaded or shared on social media sites like Facebook and Twitter.
**Platform:**iPhone
**Price:**Free
Features
- Share your GIFs on social media
Pros
- An easy-to-use UI.
- The iPhone 6S and 6S Plus have full 3D Touch capability.
- Sharing images on Twitter and Facebook is simple.
- There are no advertisements in the application.
Cons
- The price is a bit more than the features it offers.
- GIF pictures have no options for changing their resolution.
- There are no possibilities for adding text or music to GIF pictures.
5. Gift
Gift is another iPhone software that effortlessly converts photographs and movies to GIF images. Although this program does not convert Live Images, it is a solid alternative for converting regular photos and movies on older iPhone versions. According to the makers, the program is free to use and has several packages to add different effects and text to your photographs; however, most of the effects are only available in the premium version, which costs money. You may also share GIF pictures from the app on social media sites like Facebook, Twitter, Instagram, and Tumblr.
**Platform:**iPhone
**Price:**Free Version
Features
- Add text to GIFs
- Several effects available
Pros
- Basic editing is free to use.
- It is simple to use and does not need an internet connection.
- Over 70 effects to personalize your images and videos.
- The GIF picture may be saved to your iPhone.
Cons
- The finished GIF picture has a watermark.
- There are no video editing options available.
- Too expensive for the things it offers.
How to Convert a Video to GIF by Using Filmora
Step1Download, Launch and Import Media File to Filmora
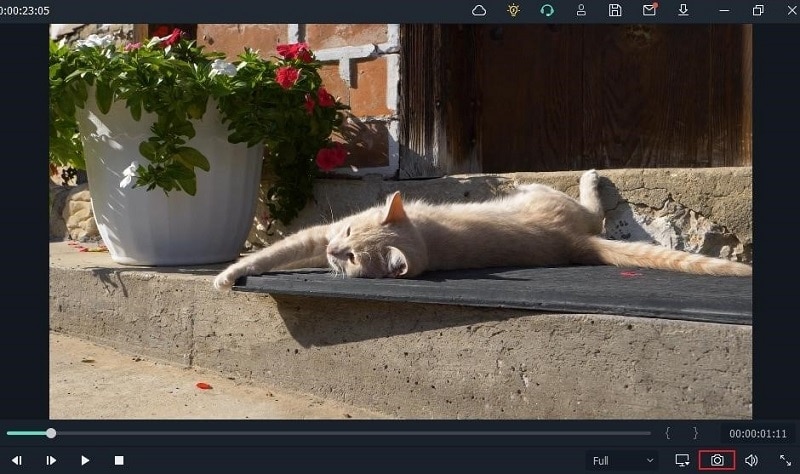
To enter the interface, click New Project and then Import Media Files Here. Then drag and drop or add it straight to the window. You may also take a screenshot of the video and extract the shots or frames from it. The recovered photographs will appear in the media library, where you may add numerous video clips.

Step2Edit Video Based on Your Preference and Add Pictures (Optional)
To begin, drag & drop your video clip into the Timeline. Before choosing Export, you may trim, apply an effect, add a subtitle, and other features to the video. To convert the movie to GIF, click the Export option once everything is in order.

Step3Save and Export GIF
After hitting the Export option, a new window will appear where you may choose your export format. Choose GIF as your preferred format. When you’re through editing, click the Export option to save your work as a.gif file.
Note: A Setting button underneath the Resolution allows you to change the file resolution, frame rate, and bit rate.

Notice and Tips When Converting Video to GIF
Choosing software to save a video as a GIF
All operating systems have a way to convert video to GIF, as you can see in this article. All you have to do now is choose the right one. In a nutshell, here’s how you choose the right platform for your GIFs:
**Usability:**The video to GIF platform you use should be simple to use. You want a high-performance converter that’s also simple to use.
Tools: The platform should have all of the tools you’ll need to make an intriguing GIF, such as speed modification, filters, subtitles, and more.
Quality: To avoid pixelation, your platform must be able to make GIFs with a high resolution.
**Speed:**Because you don’t want to waste time waiting for your file to save, the speed at which the video converts to GIF is also significant.
Bottom Line
GIF files are efficient when played in browsers and provide good visual quality. GIFs are now often used to show How-To instructions and post memes on social media sites such as Facebook.
However, a quality video to GIF converter is a must-have tool. You can obtain more control over the source material and the created outputs using professional software rather than free web services. Download Wondershare Filmora today to enjoy the handy video to GIF conversion features that will give you the best experience.
- Media.io
- Ezgif-F
- Adobe
- Cloudconvert
- Vistacreate
- Online Converter
- GIPHY
- IMG2GO
- MakeAGIF
- Convertio
- HNET
- ImgFlip
- 5 Best Video To GIF Converter for iPhone/iPad/Android Phone
What’s the Difference Between a Video and a GIF?
GIFs are very popular among digital marketers (and anybody who uses the internet). These little bursts of repeating material may breathe new life into otherwise dull blog posts, emails, web pages, infographics, and other documents. Isn’t it thrilling?
While GIFs and videos may seem identical, the two forms of media are highly distinct, and the differences begin when the file types are first gathered.
GIFs are basically soundless picture collections that have been modified to resemble a video. On the other hand, videos are gathered as a kind of rich media that includes both motion and sound. What’s more, the viewing experiences for these two file kinds are somewhat different.
But why would someone want to convert a video to a GIF, to begin with? There are several explanations for this
GIFs are inexpensive
When converting a video to a GIF, you’re repurposing existing material to create something new. Why not get the most out of your video marketing strategy?
GIFs are simple to create
You don’t need to be a video expert in producing a GIF. Creating a GIF using one of the video-to-GIF converters listed below may take a few minutes.
GIFs are simple to use
GIFs offer motion and excitement to digital information without needing the viewer to devote a significant amount of time and attention - a significant advantage given the typical human attention span of roughly 8 seconds.
GIFs are effective
When Dell executed a GIF-centric marketing campaign, it experienced a 109 percent boost in sales, indicating that consumers appreciate (and react to) this basic but fascinating medium. Check out these video-to-GIF converters below to pick the best one for you.
14 Best Video Splitter for Windows/Mac
1. Filmora
You may quickly create a classic GIF picture as an output using Wondershare Filmora’s interactive platform. All common video file types, such as MKV, WMV, AVI, and MP4, are supported. The greatest thing is that Filmora does not impose any file size restrictions during conversion so that users may convert HD films to GIF graphics.
It’s a powerful image editor with many appealing features that allow you to personalize your picture completely. To create original GIFs, feel free to use complex components, animations, text, overlays, and so on.
In addition, Filmora enables you to extract still photos from videos of the same resolution. The retrieved PNG pictures may be combined and edited to create an intriguing GIF.
Platform: Windows/Mac
Price: Free Trial
Features
- 4k editing support enables users to edit and export videos at a resolution of up to 4k.
- scene detection
- audio equalizer
- GIF stabilization
Pros
- Easy to use, very intuitive interface.
- Plenty of effects and presets. Useful for less experienced people.
- Very many online resources, tutorials, preset packs, effects, etc.
- Outstanding and responsive support. In live chats always polite and professional.
- It is constantly updated.
Cons
- 4K editing sucks sometines
2. Movavi
Movavi Video Editor is a pioneer in the video editing industry due to its simplicity of use and dependable video editing capabilities. This software, available for both Windows and Mac OS, has quickly become a popular favorite. It is one of the best MP4-to-GIF converters because of its speed and reliability. It will let you produce GIFs from your movies in no time.
This program’s ability to batch export files is one of its best features, making producing and converting many GIFs simpler. Therefore, it is the most practical for frequent GIF makers, whether for personal or professional usage.
Though you may need to buy Movavi to get all of these excellent features, a free trial version is available for those who want to check it out before buying. The trial version is also ideal for individuals who need to convert movies to GIFs once.
Platform: Windows/Mac
Price: $49.95/year for 1PC
Features
- Fast processing of 4K videos.
- Timeline markers.
- Keyframe animation.
- Built-in media pack.
- Automatic video creation.
Pros
- Has editing options
- Clear interface
- Supports many formats
Cons
- Only a trial version with limited period is free.
- It’s very basic
- No copy pasting options
3. Gifski
You can convert videos to GIFs using Gifski . Drop a file into the Gifski window or use the Open button to search your Mac for a video. The segment of the video you wish to transform into a GIF will be readily selected.
You may choose the size of your GIF, the frame rate, graphic quality, and how many times it loops using this Mac GIF creator. You can have it repeat indefinitely, and you can also make it bounce (this is where it plays to the end, then plays backward, then forward again, and so on).
Platform: Mac
**Price:**Free
Features
- High-quality GIFs
- Command-based conversion
Pros
- Ihe software is safe to use.
- It support is good
Cons
- It doesn’t work offline
- Some users complain about the search function
4. Freemore
Freemore Video to GIF Converter is software that converts videos into animated GIFs, enabling you to pick the precise frames to include in the GIF and change the frame’s width and height if you have a unique use case.
This program is completely free and supports all of the most common video formats, including MP4, MPEG, MOV, FLV, etc. While this tool is free, it wasn’t necessarily created to be attractive; if you download Freemore, anticipate a more practical design that, while very functional, isn’t particularly pleasing to the eye.
Freemore Video to GIF Converter is only accessible for download on Windows, unfortunate for Mac users.
Platform: Windows/Mac
**Price:**Free
Features
- Convert video files to animated GIFs;
- Make GIFs for a website, mobile phone screensaver, signature, etc.
- Clip video to create GIF;
- Adjust the width and height to suit your needs;
- Support all key video formats.
Pros
- Support multi-core CPU
- Less burden on your system
- Abundant guide content & online support
- Free, safe & no restrictions
Cons
- The maximum input video size is 10 MB
- It might be unstable on a new OS like Windows 10
5. GIF Brewery by Gfycat
Look no farther than GIF Brewery by Gfycat for Mac users searching for a simple video to GIF converter tool.
You may begin by importing a movie, producing a screen recording, or recording straight from your camera using GIF Brewery. You may then customize your GIF by scaling the video, changing the frame rate, and adding filters and overlays to give it a unique style.
Finally, save your GIF to your computer or send it to someone else using iMessage or Mail. The app gets excellent reviews in the app store and is free to download.
**Platform:**Mac
**Price:**Free
Features
- It gives everyone the power to create stunning GIFs from video files.
- It’s simple yet powerful.
Pros
- The GIF Brewery design is good.
- The performance of GIF Brewery is good.
- he GIF Brewery is compatible with lots of devices.
- The support of GIF Brewery is excellent and useful.
- The price of GIF Brewery is free or perhaps freemium.
Cons
- GIF Brewery 3 by Gfycat Reduce battery consumption
- Loads very slowly
6. Any GIF Animator
Any GIF converter app’s simple and powerful design can instantly convert your favorite movies into interactive GIFs. It can play a variety of file types, including WEBM, ASF, MPG, FLV, and AVI. The greatest aspect is that this program also enables users to import media files from optical storage devices such as DVDs and even analyze camera-captured displays. Users may easily select frame rate start and finish time markers, and complex text overlays, loops, and resolution effects are available for customization.
**Platform:**Windows/Mac
**Price:**free with ads
Features
- Its simple and intuitive layout allows you to operate it without consulting the user manual.
- It’s straightforward and hassle-free.
- With the aid of an animation wizard, you can polish your GIF animation. It’s a simple and fast approach to customizing and enhancing your GIF animation.
- You receive a built-in picture editor with a full collection of editing capabilities.
- On Any GIF Animator, you may convert video to gif in various visual formats. PNG, JPEG, TIFF, BMP, GIF, ICO, PSD, PCX, RLE, PIC, DIB, AVI, PCD, WMF, and more formats are included.
Pros
- Easy to install
- Neat interface
- Clips can be edited
- Accepts any video file
Cons
- Sometimes crashes
- Cannot animate photos
- Upload time takes long
- Converting takes long
7. KickMyGraphics
Here’s a simple yet effective GIF converter that can record, generate, and manipulate GIF pictures to deliver high-quality customized output. Users may effortlessly upload animated clips in common file formats such as PNG, BMP, JPG, ordinary GIF, and animated GIF to this site. Users may simply change the output file format, size, and quality parameters. Rotate, trim, stretch, loopback, scale, and many more options are available in the advanced editor.
**Platform:**Windows/Mac
**Price:**Free
Features
- It’s a little piece of shareware that converts video to gif.
- You may also import video files in MPG, AVI, MP4, ASF, etc. Animated Gif, Jpg, Bmp, and Png
- files may all be imported.
- Animated GIF pictures may be recorded directly.
- Loop, stretch, pan, reverse, and many more editing options are available.
Pros
- Offers 90 degree image rotation facility.
- Comes with professional level settings.
- Allows users to create an animated GIF from local images.
Cons
- It is complicated for beginners.
- Support limited file formats.
- Has limited functions.
8. Instagiffer
Instagiffer allows users to quickly grab memorable stills from their screens and then process them interactively to create GIFs. Instagiffer can let you import any of your chosen moments for making GIFs, whether they are from your favorite YouTube video, a cute Vine start, or anything amusing from Netflix. This fast professional picture editing application’s loops, filters, and text capabilities are extensive. It is completely free, and there are no viruses, malware, or irritating advertisements on our platform.
**Platform:**Windows/Mac
**Price:**Free
Features
- You can immediately record the most GIF-worthy moments on your screen.
- Text, filters, loops, and more may be added.
- Completely free video to gif conversion.
- Text and unique logos may be added quickly and easily.
- There will be no watermarks on your gifs if you use Instagriffer.
Pros
- Can make 3D GIFs
- Has a portable version
- The Instagiffer software is safe to use
Cons
- On the Instagriffer website, finding a suitable software installation is tough.
- The program may seem difficult to a novice.
- Its interface is outdated.
9. Microsoft GIF Animator
It is a prominent Microsoft product . This is a free version that you can get from the Microsoft shop. It may be used with Windows 10. You must first sign in with your Microsoft account to download this program. It offers a straightforward user interface with clear controls. You must upload the necessary amount of photographs in file types such as.JPEG,.bmp,.bpg,.png, etc. Set the settings for frame delay, frame count, and so forth. Finally, use the ‘Create’ button to create your GIF animation. Following your selected GIF animation preview, you may download the file.
**Platform:**Windows
Price:$60.00 one-time payment
FeaturesFree
- Upload numerous photos into the GIF list box quickly.
- The photographs are quickly assembled into GIF frames as animation with a single click of the ‘Create’ button.
- Set the frame interval to suit your requirements.
Pros
- The free version is enough for creating high-quality GIF animations.
- The findings are simple to utilize on social networking platforms.
- Cost-effective.
Cons
- There are just a few choices for customizing GIF pictures.
- Only suitable for beginners.
- Internet speed can affect how the GIF is played.
10. VideoSolo Video to GIF Converter
When producing animations, VideoSolo video-to-GIF converter program offers several possibilities. It contains features for trimming videos, selecting certain portions of films, and joining bits of several videos to create a GIF file. It contains an integrated video editor that allows you to make changes to your final result. To make your GIF more appealing, you may trim, modify contrast and saturation, and change the video color, among other things. This movie-to-GIF program comes with the bonus of allowing you to add a photo overlay or text to your GIF to make it even more enjoyable. If you’re unhappy with the picture quality or frame rate, you may change them to suit your needs.
**Platform:**Windows/Mac
**Price:**Free
Features
- Make professional-looking GIFs with no technical knowledge.
- Supports almost all video formats going.
- Create cool avatars for games.
Pros
- Several editing options
- Not very resource-intensive
- Supports multiple video formats
Cons
- Some aspects may be difficult to locate.
- The Mac version receives fewer updates than the Windows version.
- You need to download it on your computer.
11. Movie to GIF
**Platform:**Windows
**Price:**Free/Premium($49.99/mo)
Features
- Convert video to GIF with ease.
- GIF files may be used to play video snippets.
- Increase the frame rate to make the output GIF look like the source video.
- The GIF’s width and height may be changed. An easy-to-use UI.
Pros
- Easy to use.
- Convert videos in batch code.
- Multilingual interface including English, Japanese, Spanish, etc.
- Fast conversion rate.
- HD output quality.
Cons
- Windows version only
- It’s time consuming
- The premium version is very expensive
12 Best Video To GIF Converter Online
2. Ezgif-F
This application is a free GIF animator that may be used in an online mode without any registration. Windows and web browsers are both supported. Choose the ‘GIF Maker’ option on the official website and upload the photographs by hitting the ‘Choose files’ button. You may effortlessly upload many photographs in any format. To produce a high-quality GIF animation, hit the ‘Upload and Create a GIF’ option once you’ve finished uploading.
**Price:**Free
Features
- Up to 2000 picture files may be uploaded.
- GIF, PNG, JPEG, APNG, MNG, WebP, and other image file types are all supported.
- Allows you to submit a zip file of photos.
- You have complete control over frame speed.
Pros
- Multiple picture files may be uploaded at once.
- Automate settings to reduce the size of all images in the picture list to the shortest dimension.
- There is no need to pay a subscription fee.
Cons
- When there are a large number of photos in the list, this program takes a long time to make GIF animation.
- Advertisements sometimes disrupt the operation.
3. Adobe
Adobe is a world leading video to GIF converter and other marketing solutions. Everyone – from young artists to big companies – can use our creative, marketing, and document solutions to bring digital ideas to life and deliver comprehensive, compelling GIFs to the right spot at the right time for the best outcomes.
**Price:**Free
Features
- Offers support for raster graphics
- Rich text
- Audio-video embedding
Pros
- The adaptability of what Adobe Animate can do makes it so helpful.
- Utilizing Adobe Animate recordings on sites is typical, so individuals are accustomed to seeing it and have the essential modules introduced.
- The GIFs are little, and is extremely smooth.
Cons
- Cumbersome interface
- Outdated technology
- Limited capabilities
4. Cloudconvert
Online cloudconvert converts your mp4 media files to GIF. Cloudconvert supports a wide range of music, video, document, ebook, archive, image, spreadsheet, and presentation formats, including mp4, webm, and AVI. The video resolution, quality, and file size can all be customized. No software needs to be downloaded or installed.
**Price:**Free
Features
- It can adapt 256 colors and uses a lossless compression technique to contain images.
- It can also contain texts.
- It can contain low sized image animation. So it is frequently used in web publishing.
Pros
- One can set preset properties for the file conversion
- Saves you time and can convert files into the format you are looking for
- Very good price
Cons
- It is confusing in the beginning for the interface and knowing which button to press
- Limits you to your bandwidth, so it is complicated to convert big files because sometimes it throws a timeout error.
5. Vistacreate
When you need to convert video files into elevated animated GIFs, VistaCreate is the tool to use. You can trim the video file, specify the desired GIF size (Original, 800px), choose a video processing method, and GIF length dependent on the frame rate you choose, much like with Ezgif. Even though the maximum file size is limited to 50MB, MP4, WebM, AVI, MPEG, FLV, MOV, and 3GP are all acceptable formats.
If you have a transparent video, don’t worry; the transparency will be preserved in the final animated GIF. Keep in mind that the converted GIF must be downloaded as soon as possible before it is erased from the server.
**Price:**Free
Features
- Video splitter and joiner
Pros
- It allows you to convert videos into GIFs for use on social media, web design, marketing, or blogging.
- It presents a GIF editor tool to help you refine the GIF further.
- It allows you to create both long and short GIFs.
- It boasts flexibility in look, conversion speed, and quality of the output GIF.
Cons
- The templates, icons, animations and stock imagery that come with Crello are impressive.
- They create an impact and attract a lot of comments and engagement when posted.
- The quality and range of posts and videos I can create using their templates have improved my engagement and really stand out.
6. Online Converter
Create animated GIFs from movies and photos using thisfree online tool . It can convert photos to GIFs in addition to being a video converter. It can play a variety of video and picture formats, including mp4, .m4b,.m4v, and.mkv. The converter, however, does not handle picture files that are protected and/or encrypted.
**Price:**Free
Features
- It can convert PDF files to GIF images.
- Converting RAW picture files to GIF is supported.
Pros
- Conveys messages better.
- Small file size.
- Conveys messages better.
Cons
- Internet connection matters.
- Editing is not possible.
- Limited color pattern.
7. GIPHY
Giphy is the most popular online GIF site, with millions of people visiting it every day. It is well-liked since it is simple to use. Before selecting “create,” you enter your video URL into the window’s appropriate area. Simple tools, such as drag-and-drop options for importing films and photographs from your local storage, are also available on this site.
This site, unlike several others, enables you to add sound clips to GIFs, making them more intriguing than their muted equivalents. You can also use tags and descriptions to make your GIFs more appealing.
**Price:**Free
Features
- Intuitive web interface
- Add sound to GIF
- Create 3d GIFs
Pros
- Supports sounds
- Easy to use
Cons
- It is not available offline.
- Some people are unhappy with the search feature.
8. IMG2GO
This online file converter provides comprehensive options for altering the quality and look of animated GIFs. This free online program allows you to make animated GIFS from any video clip, including MP4, AVI, and WEBM. Additional functions include resizing, picture reduction, photo editing, and more.
**Price:**Free
Features
- SSL encryption protects files and servers. As a result, emailing your data is completely secure.
- It can play 3GP, AVI, FLV, MOV, MP4, WebM, and WMV files.
- It allows you to apply filter changes, pixel scaling, and DPI.
Pros
- Modern interface
- Quick video and image to GIF conversion
- No loss in quality
Cons
- Loaded with tons of ads
- Not many flexible options
- Adds unnecessary black border to the GIFs
9. MakeAGIF
MakeAGIF isn’t simply a video to GIF converter; it can convert almost anything to GIF. You may upload a video, record a video, paste a video link, or even submit a collection of photographs to create your own GIF on this simple website.
Then you may customize the output by adding stickers and captions, changing the GIF’s pace, and choosing a start and end time. The one drawback to this video to GIF converter is that each GIF has a MakeAGIF watermark; to remove the company’s branding from your clip, you’ll need to pay to the premium version, which costs $11.95 per month.
Price:$11.95/mo
Features
- Powerful GIF editing features like speed, framerate, and resolution
Pros
- Easy to use
- You can customize output to your liking
Cons
- Free version has watermarks
- It does not give the best quality output
10.Convertio
One of the easiest programs on our list isConvertio . To convert a video to a GIF, just drag it onto the tool or upload it from your Google Drive or Dropbox account, then click “convert” to finish the process.
Use this tool just if you don’t care about details. Convertio is simple to use, however you can’t set the start and finish of your GIF or the frame rate.
**Price:**Free
Features
- Share files to Drive, DropBox
- Edit FPS
Pros
- Ability to pick source footage from hard disk, Dropbox, Google Drive, or URL.
- Integrates Google Drive and Dropbox services
- Supports batch processing
- Offers an API to app developers
- Safe and secure online tool
- Fast and easy to use
Cons
- Converts a file of only up to 100 MB (for unregistered free users).
11. HNET
Virtually any video (mp4, flv, mpeg, webm, mov, avi, 3gp, etc.) may be converted to animated GIF format withthis online tool . Your video to gif conversion takes place in the cloud, so it won’t take up any of your computer or phone’s resources. This implies it runs on all major operating systems. After one hour, all of the files you submitted and converted will be permanently erased from the server. Your files are private; no one else may see or download them except you.
You may post your GIF picture on imgur, Pinterest, Reddit, Tumblr, 4chan, Deviantart, Flickr, and other popular image sharing sites once your video clip has been converted to GIF format.
**Price:**Free
Features
- Supports all OS
- File sharing after conversion
- Support many file formats
Pros
- Very easy to use
- Free version comes with handy features
Cons
- It has a file size limit
- Your will be deleted after an hour in case you want to retrieve it.
12. ImgFlip
Imgflip GIF Maker is a simple, fast video to GIF converter that converts mp4 files into animated GIFs. You can turn your clip into a GIF using the Imgflip editor and tinker with parameters like frame rate, size, and more. Because of its sharing features, Imgflip truly shines. You may share your GIF on Facebook, Pinterest, Twitter, Tumblr, and other social media sites by downloading the file, copying the file link, or using the HTML5 image format code. Imgflip is a great alternative to consider if you need to get your GIFs out there quickly.
**Price:**Free
Features
- Video editor
- File sharing
- Parameter control
Pros
- Simple and lightweight
- Fast and accurate conversion
Cons
- I glitches when the file size is big
5 Best Video To GIF Converter for iPhone/iPad/Android Phone
1. GIF Maker - Video to GIF, GIF Editor
The comprehensive GIF generator for your Android smartphone is the final app on our list. It’s a great tool for editing all sorts of GIF pictures on your phone, as the name suggests. Although it lacks preset settings like filters and music, it gives everything needed to edit films to their full potential. Any picture or video may be converted and edited.
Platform: Android
**Price:**Free
Features
- Add filters and effects to GIFs
Pros
- The UI is simple to use.
- Editing capabilities are extensive.
Cons
- There are no filters available.
- There are no options for adding music or text to your GIF pictures.
2. Videos & GIF maker
This software provides everything you need to make humorous memes and animated GIFs on your iPhone phone. As the tool’s name suggests, you may easily add captions to your photos. You may also choose the output format for the GIF picture and the movie and the start and finish lengths.
**Platform:**iPhone
**Price:**free
Features
- Select the output format of your GIF
Pros
- The most user-friendly UI.
- The GIF graphics and memes are simple to make.
- Even on older devices, it does not crash and runs well.
- Instagram has many options for creating and sharing square photographs.
Cons
- There are no editing options for GIF pictures.
- There were some issues with posting images to social networking sites.
3. Gif Maker
You should install this application if you want an all-in-one freeGIF maker for your Android phone. In the programs, many attractive effects can be applied with a single click and modify the entire appearance of your images. Additionally, you may utilize the application’s camera to capture movies directly from the app. The nicest thing about this program is that it supports many languages and allows you to generate GIF images with 50 photographs.
**Platform:**Android
**Price:**Free
Features
- Concert up to 50 photos
- Convert real-time videos from the camera
Pros
- Free applications with a lot of functionality.
- It is available in many languages.
- Have a variety of picture effects to use.
Cons
- On certain devices, the app slows and crashes.
- Problems with sharing and uploading photographs with others.
4. Live GIF
This program converts live photos to GIF images on your iPhone. There are no difficult settings to worry about; all you have to do is upload the photographs to the app and make minor adjustments. The finished photographs may be downloaded or shared on social media sites like Facebook and Twitter.
**Platform:**iPhone
**Price:**Free
Features
- Share your GIFs on social media
Pros
- An easy-to-use UI.
- The iPhone 6S and 6S Plus have full 3D Touch capability.
- Sharing images on Twitter and Facebook is simple.
- There are no advertisements in the application.
Cons
- The price is a bit more than the features it offers.
- GIF pictures have no options for changing their resolution.
- There are no possibilities for adding text or music to GIF pictures.
5. Gift
Gift is another iPhone software that effortlessly converts photographs and movies to GIF images. Although this program does not convert Live Images, it is a solid alternative for converting regular photos and movies on older iPhone versions. According to the makers, the program is free to use and has several packages to add different effects and text to your photographs; however, most of the effects are only available in the premium version, which costs money. You may also share GIF pictures from the app on social media sites like Facebook, Twitter, Instagram, and Tumblr.
**Platform:**iPhone
**Price:**Free Version
Features
- Add text to GIFs
- Several effects available
Pros
- Basic editing is free to use.
- It is simple to use and does not need an internet connection.
- Over 70 effects to personalize your images and videos.
- The GIF picture may be saved to your iPhone.
Cons
- The finished GIF picture has a watermark.
- There are no video editing options available.
- Too expensive for the things it offers.
How to Convert a Video to GIF by Using Filmora
Step1Download, Launch and Import Media File to Filmora
To enter the interface, click New Project and then Import Media Files Here. Then drag and drop or add it straight to the window. You may also take a screenshot of the video and extract the shots or frames from it. The recovered photographs will appear in the media library, where you may add numerous video clips.

Step2Edit Video Based on Your Preference and Add Pictures (Optional)
To begin, drag & drop your video clip into the Timeline. Before choosing Export, you may trim, apply an effect, add a subtitle, and other features to the video. To convert the movie to GIF, click the Export option once everything is in order.

Step3Save and Export GIF
After hitting the Export option, a new window will appear where you may choose your export format. Choose GIF as your preferred format. When you’re through editing, click the Export option to save your work as a.gif file.
Note: A Setting button underneath the Resolution allows you to change the file resolution, frame rate, and bit rate.

Notice and Tips When Converting Video to GIF
Choosing software to save a video as a GIF
All operating systems have a way to convert video to GIF, as you can see in this article. All you have to do now is choose the right one. In a nutshell, here’s how you choose the right platform for your GIFs:
**Usability:**The video to GIF platform you use should be simple to use. You want a high-performance converter that’s also simple to use.
Tools: The platform should have all of the tools you’ll need to make an intriguing GIF, such as speed modification, filters, subtitles, and more.
Quality: To avoid pixelation, your platform must be able to make GIFs with a high resolution.
**Speed:**Because you don’t want to waste time waiting for your file to save, the speed at which the video converts to GIF is also significant.
Bottom Line
GIF files are efficient when played in browsers and provide good visual quality. GIFs are now often used to show How-To instructions and post memes on social media sites such as Facebook.
However, a quality video to GIF converter is a must-have tool. You can obtain more control over the source material and the created outputs using professional software rather than free web services. Download Wondershare Filmora today to enjoy the handy video to GIF conversion features that will give you the best experience.
From Novice to Pro: 5 Essential Facts About the 16X9 Ratio Calculator
5 Facts About 16x9 Ratio Calculator You Didn’t Know
An easy yet powerful editor
Numerous effects to choose from
Detailed tutorials provided by the official channel
This article explains major concepts about 16x9 ratio calculator and applies them even if you are a novice.
Read it to conclude the aspect ratio and the type of editing you need for your videos.
In this article
01 [What is Aspect Ratio?](#Part 1)
02 [What’s 16:9 Ratio Calculator?](#Part 2)
03 [Top 16:9 Resolutions](#Part 3)
04 [How to Calculate 16:9 Aspect Ratios?](#Part 4)
05 [How to Use Aspect Ratio Calculator?](#Part 5)
06 [How to Shift Through Aspect Ratio You Prefer in Filmora?](#Part 6)
Part 1 What is aspect ratio?
Aspect ratio is the proportionality ratio that relates between the width and height of the image. When you set your television screen, you often see something like 16:9 in the aspect ratio. These numbers are not related to the quality of the images whatsoever. They mean that the screen’s width will be almost twice as high as its height.
However, most television screens have an aspect ratio that looks like a square. The same does not apply to most cinema screens found in a hall. Thanks to the electricians who made those screens to be rectangular. That makes sure that you don’t miss out on any movie clip because of the low aspect ratio.
Initially, the aspect ratio mainly got restricted to Mathematical aspects like geometry. With time, the term got introduced in the films where it was used to relate the width and height of various images on screens, hence the16*9 aspect ratio calculator.
Usually, the aspect ratio refers to the long side concerning the shorter side of the shape. For example, it can be represented by two unknowns, x: y. The values do not mean much because numbers can substitute them.
Perhaps you have encountered these common aspect ratios: IMAX (1.43:1), Academy Film standard (1.43:1), and the famous golden video with an aspect ratio of 1.6180:1.
Having adequate knowledge about aspect ratios is of great importance. You will have to use an aspect ratio calculator when you want to resize your image to fit the specific location without cutting some sections.
Part 2 What is the 16:9 aspect ratio calculator?
The most significant similarity is the aspect ratio of 16:9. The 16:9 ratio dates back to 2009, when the ratio introduced was declared to be used globally. To prove it, take a minute and check the aspect ratios of your television screen or smartphone. Also, confirm the next time you go to the cinema to watch a movie.
You can take a beautiful photo with a nice image before posting on social media because of the 16:9 aspect ratio. Nowadays, this aspect ratio is a part of most screens and cameras. Even the HD videos always get recorded in the international format ratio.
The16 * 9 aspect ratiocalculator will help you operate correctly for high-quality images. It also helps in the conversion of inches to centimeters and vice versa. For a digital device, pixels are the most common units of images.
Part 3 Top 16:9 resolutions
These are the most common resolutions that are available. The units are in pixels, in descending order.
● 15360×8640 (16K UHD)
● 7680 × 4320 (8K UHD)
● 5120 × 2880 (5K)
● 3840 × 2160 (4K UHD)
● 3200 × 1800 (QHD+)
● 2560 × 1440 (QHD)
● 1920 × 1080 (Full HD)
● 1600 × 900 (HD+)
● 1366 × 768 (WXGA)
● 1280 × 720 (HD)
● 960 × 540 (qHD)
● 854 × 480 (FWVGA)
● 640 × 360 (nHD)
Part 4 How to calculate the 16:9 Aspect ratio?
First, let’s look at the correct pronunciation of the ratio. You can either say it as 16 by 9 or 16 × 9. It implies 16 units of the longest side for each shortest side. It could also mean 32 by 18 or higher values which can still simplify to 16:9. We can also represent the ratio differently when simplified. In this case, a decimal point separates the ratios. For example, 16:9 is represented as 1.78:1 after being simplified.
Earlier screens and monitors produced old ratios like the 4:3. After the recognition of the 16:9 ratios, have made replacements for them. The16*9 ratio calculatoris also the most common. Have you heard of 720p HD, 1080p HD, and others? All of them are still under the 16:9 ratios but expressed differently. For example, a screen of 1920 × 1080p. Check it out here: 2920/1080 equals 16:9.
First, here’s the formula that we will use in this section.
Width (W) /Height (H) = 1.778
Dividing the width and height gives you 1.778, which is still an aspect ratio of 16:9.
1.778 is a constant in the formula that you can use interchangeably to determine the width or height. Here is a couple of examples to illustrate this.
Example 1:
Ben’s video measures 32 panels wide. Find the number of panels he needs to build a 26:9 display.
W/H = 16/9
32/H = 16/9
H =32 × 9/16
H = 18
Therefore, Ben will need 18 panels to install the display unit.
Example 2
Nancy decides to design an image for a post in the ratio 16:9. If it has 720 pixels, calculate the width of the image needed.
W/H = 19/6
W/720 = 19/6
W = 730 × 19/6
Nancy will need 1280 pixels for her image.
Part 5 How to use an aspect ratio calculator?
These calculations may be easy when you’re used to them. Not interested in many calculations? Use the online aspect ratio calculator instead. That will make it easier and save on time. You will only need to have the width and height of the image that if needed. The 16 *9 ratio calculator will give the remaining distance.
Using the calculator is the most preferred method because it is very precise. Supposing you don’t have any idea about the width or height of your image, just key in the aspect ratio and wait for an instant answer. The aspect ratio will still give the same answer, but the calculator is convenient.
The better part, this calculator provides calculations for landscape and portrait orientation for images. Follow these steps to use the calculator:
Step 1: Go to https://insaneimpact.com/aspect-ratio-calculator/
Step 2: Enter units of width and height in the respective tabs provided and instantly get your aspect ratio.

Part 6 How to shift through aspect ratio you prefer in Filmora?
As you edit videos, adjust them to ensure they fit in an email as an attachment. That will help you upload them easily after you have used some video editing tools. This article elaborates more by using Wondershare Filmora.
Here’s why we recommend Wondershare Filmora Video Editor
The obvious reason is many features that will help you edit the video like a pro. For instance, you can resize, zoom and highlight the best parts of the video. These are some features of Wondershare Filmora’s video editing capabilities.
● Effortlessly resize the sizes of videos and aspect ratios
● Cropping the video to highlight an object
● Addition of effects and more videos
● Uploading edited videos online
● Supports diverse operating systems for smartphones and desktops
Navigating Through Various Aspect Ratios Using Wondershare Filmora

Wondershare Filmora - Best Video Editor for Mac/Windows
5,481,435 people have downloaded it.
Build unique custom animations without breaking a sweat.
Focus on creating epic stories and leave the details to Filmora’s auto features.
Start a creative adventure with drag & drop effects and endless possibilities.
Filmora simplifies advanced features to save you time and effort.
Filmora cuts out repetition so you can move on to your next creative breakthrough.
Different social media platforms will only allow users to upload videos of specified sizes. Therefore, it is imperative to know the right size for your videos. Let me take you through ways of changing an aspect ratio for the image to have the required height and width.
Step 1: Select your projects’ aspect ratio.

Upon opening Wondershare Filmora, a window will pop up on the screen to allow you to select the aspect ratio. There are three options to choose widescreen, standard, and portrait with aspect ratios of 16:9, 4:3, and 1.1, respectively. select the one that you require and click “New Project.”
Step 2: Set the new aspect ratio for the project

Go to File, choose a new project, and then aspect ratio in the editing panel. Please select the one you wish to use and alter it according to your desired format. For instance, you can select a video of 16:9 and reduce it to 1:1.
Step 3: Save the video

Select “Export” to export the video and save it in different formats in the Format tab. Do you feel like playing the video on your phone or any other device? Please move to the device tab and ply it on your smartphone or transfer it into a DVD drive format.
Filmora also provides more advanced features for video editing like rotating, cropping, and scaling. You can also match the colors on your videos, include animations, add effects, track the sounds and even record some background sounds for the video to look good. Go ahead and download for a free trial below to start editing your videos!
Key Takeaways from This Episode
● 1 – A detailed overview of the aspect ratio and aspect ratio calculator.
● 2 – Understanding how to calculate aspect ratios manually and through an aspect ratio calculator.
● 3 – Navigation through different aspect ratios via the wonderful editor, i.e., Wondershare Filmora.
● Finally, a16×9 aspect ratio calculatoris simple to use, provided you follow the steps given. However, an online calculator will make your videos fit in the equipped area. Use Wondershare Filmora for easy editing and changing of the aspect ratio. It is a pro image and video editor and the easiest to use. Start with its trial version by downloading it for free.
This article explains major concepts about 16x9 ratio calculator and applies them even if you are a novice.
Read it to conclude the aspect ratio and the type of editing you need for your videos.
In this article
01 [What is Aspect Ratio?](#Part 1)
02 [What’s 16:9 Ratio Calculator?](#Part 2)
03 [Top 16:9 Resolutions](#Part 3)
04 [How to Calculate 16:9 Aspect Ratios?](#Part 4)
05 [How to Use Aspect Ratio Calculator?](#Part 5)
06 [How to Shift Through Aspect Ratio You Prefer in Filmora?](#Part 6)
Part 1 What is aspect ratio?
Aspect ratio is the proportionality ratio that relates between the width and height of the image. When you set your television screen, you often see something like 16:9 in the aspect ratio. These numbers are not related to the quality of the images whatsoever. They mean that the screen’s width will be almost twice as high as its height.
However, most television screens have an aspect ratio that looks like a square. The same does not apply to most cinema screens found in a hall. Thanks to the electricians who made those screens to be rectangular. That makes sure that you don’t miss out on any movie clip because of the low aspect ratio.
Initially, the aspect ratio mainly got restricted to Mathematical aspects like geometry. With time, the term got introduced in the films where it was used to relate the width and height of various images on screens, hence the16*9 aspect ratio calculator.
Usually, the aspect ratio refers to the long side concerning the shorter side of the shape. For example, it can be represented by two unknowns, x: y. The values do not mean much because numbers can substitute them.
Perhaps you have encountered these common aspect ratios: IMAX (1.43:1), Academy Film standard (1.43:1), and the famous golden video with an aspect ratio of 1.6180:1.
Having adequate knowledge about aspect ratios is of great importance. You will have to use an aspect ratio calculator when you want to resize your image to fit the specific location without cutting some sections.
Part 2 What is the 16:9 aspect ratio calculator?
The most significant similarity is the aspect ratio of 16:9. The 16:9 ratio dates back to 2009, when the ratio introduced was declared to be used globally. To prove it, take a minute and check the aspect ratios of your television screen or smartphone. Also, confirm the next time you go to the cinema to watch a movie.
You can take a beautiful photo with a nice image before posting on social media because of the 16:9 aspect ratio. Nowadays, this aspect ratio is a part of most screens and cameras. Even the HD videos always get recorded in the international format ratio.
The16 * 9 aspect ratiocalculator will help you operate correctly for high-quality images. It also helps in the conversion of inches to centimeters and vice versa. For a digital device, pixels are the most common units of images.
Part 3 Top 16:9 resolutions
These are the most common resolutions that are available. The units are in pixels, in descending order.
● 15360×8640 (16K UHD)
● 7680 × 4320 (8K UHD)
● 5120 × 2880 (5K)
● 3840 × 2160 (4K UHD)
● 3200 × 1800 (QHD+)
● 2560 × 1440 (QHD)
● 1920 × 1080 (Full HD)
● 1600 × 900 (HD+)
● 1366 × 768 (WXGA)
● 1280 × 720 (HD)
● 960 × 540 (qHD)
● 854 × 480 (FWVGA)
● 640 × 360 (nHD)
Part 4 How to calculate the 16:9 Aspect ratio?
First, let’s look at the correct pronunciation of the ratio. You can either say it as 16 by 9 or 16 × 9. It implies 16 units of the longest side for each shortest side. It could also mean 32 by 18 or higher values which can still simplify to 16:9. We can also represent the ratio differently when simplified. In this case, a decimal point separates the ratios. For example, 16:9 is represented as 1.78:1 after being simplified.
Earlier screens and monitors produced old ratios like the 4:3. After the recognition of the 16:9 ratios, have made replacements for them. The16*9 ratio calculatoris also the most common. Have you heard of 720p HD, 1080p HD, and others? All of them are still under the 16:9 ratios but expressed differently. For example, a screen of 1920 × 1080p. Check it out here: 2920/1080 equals 16:9.
First, here’s the formula that we will use in this section.
Width (W) /Height (H) = 1.778
Dividing the width and height gives you 1.778, which is still an aspect ratio of 16:9.
1.778 is a constant in the formula that you can use interchangeably to determine the width or height. Here is a couple of examples to illustrate this.
Example 1:
Ben’s video measures 32 panels wide. Find the number of panels he needs to build a 26:9 display.
W/H = 16/9
32/H = 16/9
H =32 × 9/16
H = 18
Therefore, Ben will need 18 panels to install the display unit.
Example 2
Nancy decides to design an image for a post in the ratio 16:9. If it has 720 pixels, calculate the width of the image needed.
W/H = 19/6
W/720 = 19/6
W = 730 × 19/6
Nancy will need 1280 pixels for her image.
Part 5 How to use an aspect ratio calculator?
These calculations may be easy when you’re used to them. Not interested in many calculations? Use the online aspect ratio calculator instead. That will make it easier and save on time. You will only need to have the width and height of the image that if needed. The 16 *9 ratio calculator will give the remaining distance.
Using the calculator is the most preferred method because it is very precise. Supposing you don’t have any idea about the width or height of your image, just key in the aspect ratio and wait for an instant answer. The aspect ratio will still give the same answer, but the calculator is convenient.
The better part, this calculator provides calculations for landscape and portrait orientation for images. Follow these steps to use the calculator:
Step 1: Go to https://insaneimpact.com/aspect-ratio-calculator/
Step 2: Enter units of width and height in the respective tabs provided and instantly get your aspect ratio.
Part 6 How to shift through aspect ratio you prefer in Filmora?
As you edit videos, adjust them to ensure they fit in an email as an attachment. That will help you upload them easily after you have used some video editing tools. This article elaborates more by using Wondershare Filmora.
Here’s why we recommend Wondershare Filmora Video Editor
The obvious reason is many features that will help you edit the video like a pro. For instance, you can resize, zoom and highlight the best parts of the video. These are some features of Wondershare Filmora’s video editing capabilities.
● Effortlessly resize the sizes of videos and aspect ratios
● Cropping the video to highlight an object
● Addition of effects and more videos
● Uploading edited videos online
● Supports diverse operating systems for smartphones and desktops
Navigating Through Various Aspect Ratios Using Wondershare Filmora
Wondershare Filmora - Best Video Editor for Mac/Windows
5,481,435 people have downloaded it.
Build unique custom animations without breaking a sweat.
Focus on creating epic stories and leave the details to Filmora’s auto features.
Start a creative adventure with drag & drop effects and endless possibilities.
Filmora simplifies advanced features to save you time and effort.
Filmora cuts out repetition so you can move on to your next creative breakthrough.
Different social media platforms will only allow users to upload videos of specified sizes. Therefore, it is imperative to know the right size for your videos. Let me take you through ways of changing an aspect ratio for the image to have the required height and width.
Step 1: Select your projects’ aspect ratio.
Upon opening Wondershare Filmora, a window will pop up on the screen to allow you to select the aspect ratio. There are three options to choose widescreen, standard, and portrait with aspect ratios of 16:9, 4:3, and 1.1, respectively. select the one that you require and click “New Project.”
Step 2: Set the new aspect ratio for the project
Go to File, choose a new project, and then aspect ratio in the editing panel. Please select the one you wish to use and alter it according to your desired format. For instance, you can select a video of 16:9 and reduce it to 1:1.
Step 3: Save the video
Select “Export” to export the video and save it in different formats in the Format tab. Do you feel like playing the video on your phone or any other device? Please move to the device tab and ply it on your smartphone or transfer it into a DVD drive format.
Filmora also provides more advanced features for video editing like rotating, cropping, and scaling. You can also match the colors on your videos, include animations, add effects, track the sounds and even record some background sounds for the video to look good. Go ahead and download for a free trial below to start editing your videos!
Key Takeaways from This Episode
● 1 – A detailed overview of the aspect ratio and aspect ratio calculator.
● 2 – Understanding how to calculate aspect ratios manually and through an aspect ratio calculator.
● 3 – Navigation through different aspect ratios via the wonderful editor, i.e., Wondershare Filmora.
● Finally, a16×9 aspect ratio calculatoris simple to use, provided you follow the steps given. However, an online calculator will make your videos fit in the equipped area. Use Wondershare Filmora for easy editing and changing of the aspect ratio. It is a pro image and video editor and the easiest to use. Start with its trial version by downloading it for free.
Stop Motion Animation: A Step-by-Step Guide to Studio and Beyond
Stop motion animation has been a huge trend. People use this technique to tell stories through their pictures. There are many videos editing software available in the market to create easy stop motion animations. It depends on the project you want to shoot and using what equipment.
You can create animation online or using an app. There is an extremely powerful desktop software to create simple stop motion movies-Wondershare Filmora Video Editor . You will also find many user-friendly applications available for both Android and iOS. One of the best apps out there is Stop Motion Pro, which lets you create movies on Stop Motion Studio in a better way.
For Win 7 or later (64-bit)
For macOS 10.12 or later
Part 1. What is Stop Motion Studio?
Stop Motion Studio is the world’s easiest app for stop motion moviemaking. It has an easy-to-use interface to create beautiful animated movies easily.
You can install Stop Motion Studio Pc or go for its iPhone, iPad, or Android version. However, you must make in-app purchases if you wish to export your projects in 4K resolution or import images from your device to create the animation. Let’s look at its features in detail-
Basic functions:
- Overlay mode that shows the differences between frames
- Position the objects accordingly
- Copy, paste, cut, and insert frames wherever required
- Interactive interface to easily access it.
Unique features
- Add titles, credits, and text cards or create your very own with the built-in editor
- Enhance your movie with different video filters
- Add different foregrounds, backgrounds, aspect ratios, and fade effects
- Add built-in music, sound effects, songs from your music library.
Camera control
- Full camera control to capture with an adjustable time interval feature
- Adjust white balance, focus, and exposure, ISO, and shutter speed manually.
An image editor:
- Add titles and other text on the animation
- Enhance images, sketch, and paint
- Use the eraser tool to wipe away unwanted objects
- Merge frames to simulate fast movement
Part 2. How to Use Stop Motion Studio?
With the help of Stop Motion Studio, you can make animation by combining multiple pictures. You need to download Stop Motion Studio Pro for your iOS or Android device to use the app. You can also download it for PC.

Step 1: Once you have downloaded the app, install it to work on your animation project right away. To create a new movie, click on the plus icon to create a new movie.

Step 2: Set the object you wish to capture in the frame. Let us consider one example where we will turn over an object. Click the camera icon to capture the shot. Move the thing a little and again tap on the shutter icon. Repeat the process until you have moved it all the way around. Once done, click on the play button. It will appear as if the object is in motion and moving on its own.

Tip: To ensure that your object is in the right place, you can use different controls like grid and onion skin. The grid will give you an idea of where you placed the subject in the frame. The onion skin puts the last frame you captured on top of your camera’s live view. In this way, you can see how far you moved your subject between frames.
Step 3: You can click as many pictures as you need to convey your story. After clicking all the pictures, you can edit them as per your requirements. To increase or decrease the speed at which your video plays, change the frame rate by choosing the number of pictures to be shown per second when you play the video. Play the video to see how your work turned out. If you like the end result, exit the editor.
Step 4: Now select the animation that you just saved. Click on the export icon which you will find at the top left of the screen—select animated GIF from the pulldown menu. Export the file to Google drive, mail yourself or upload it on your social media profile. AirDrop the file to other iPhone users if you are an iPhone user.

Step 5: You are done!! Yes, it was that simple and easy to create a great stop motion video yourself.
If you want to make a basic video and add audio, the Stop Motion Studio free version is ideal for you. But if you’re going to explore more app features, you need to buy Stop Motion Studio Pro Windows, a paid version of the app.
Part 3. 4 Stop Motion Studio Alternative Software
1. Life Lapse Stop Motion Maker
Price: Free, offers in-app purchases
Compatibility: iOS, Android
User Ratings: 4.8 on App Store, 3.6 on Google Play
This app is undoubtedly a lifesaving stop motion apps ever created. Why do we say this? It offers unlimited tools to shoot on an unlimited number of projects. As well as use audio tracks and effects from the built-in library.
While shooting a video on the app, you can add and remove various objects from frames, adjust the focus, and apply many other effects. It has built-in editing tools to change frame rates, apply visual effects, or make soundtracks from royalty-free songs. Video creators can import photos from the mobile phone to add to the animation you create.
Life Lapse permits you to use other color correction tools to set saturation, brightness, contrast, or white balance values manually. You can import audio files to your projects or export videos without a watermark on this app. The pro version lets you record footage in 4K resolution. Isn’t that amazing?
2. Stop Motion Maker

Price: Free, offers in-app purchases
Compatibility: iOS
User Ratings: 4.0
You can easily take a sequence of images and make your own stop-motion video on this app. Once you launch the app and tap on the Create button, the device’s camera will open. Press the camera button and make a new frame.
Tap on the Done button once you are done arranging the photos.
You have the option to preview the result once you are done. Then, you can quickly proceed to export the video. The app doesn’t allow you to record voiceovers or create soundtracks, and you must use another video editing app for iOS devices if you want to further edit a stop motion video.
Make sure you give Stop Motion Maker access to your phone’s camera and photo library for it to function correctly.
3. Pic-Pac Stop Motion & Time Lapse

Price: Free, offers in-app purchase
Compatibility: Android
User Ratings: 4.0
If you are still learning to create stop motion animations, you should consider installing PicPac Stop Motion & Time Lapse. One can take photos or import images from the gallery or Instagram on this app. On the free version, you can even reorder pictures. It also enables you to change the order of frames and perform simple edits like removing small objects.
Users can search online music or add local music and record their audio on Pic Pac. You can edit existing projects and share your animations with the YouTube community if you are a signed-in user. To keep track of your projects, add a logo at the end of the videos. The Timelapse-manual mode enables you to bring your stop motion ideas to life. The pro version lets you export videos in resolutions larger than 360p.
4. iMotion

Price: Free, but offers in-app purchases
Compatibility: iOS
User Ratings: 4.4
This app lets iPhone, and iPad users create both time-lapse and stop motion videos. It has a quick and smooth interface to create good quality animations easily. You can also add an audio soundtrack to your movie with iPod import, microphone, and AudioPaste (In-App Full Version required).
On iMotion, the user can manually control focus, exposure, or white balance. It has unlimited movie length, and you can also preview your projects at different frame rates. There is an option to autosave and directly preview your creation. If you want to do reverse playback, you can do that too.
Export all the video projects iMotion in 4K, 1080p, or 720p resolutions. However, only newer versions of iPhones and iPads can support 4k resolution. The free version of iMotion offers only limited options; get the full version to use the advanced features.
Closing Word
Stop motion animation is a simple and exciting way to create movement on a screen. Taking hundreds of photos to create a stop motion animation is not a huge task anymore. Anyone can easily do it on their smartphone camera, or it’s even better if you use a DSLR.
Stop Motion Studio is rightly called a studio as it has all the tools needed to create a stop motion animation. It gives you complete control over all camera settings and editing features.
So, bring your photos to life today with stop motion studio free or stop motion pro.
For macOS 10.12 or later
Part 1. What is Stop Motion Studio?
Stop Motion Studio is the world’s easiest app for stop motion moviemaking. It has an easy-to-use interface to create beautiful animated movies easily.
You can install Stop Motion Studio Pc or go for its iPhone, iPad, or Android version. However, you must make in-app purchases if you wish to export your projects in 4K resolution or import images from your device to create the animation. Let’s look at its features in detail-
Basic functions:
- Overlay mode that shows the differences between frames
- Position the objects accordingly
- Copy, paste, cut, and insert frames wherever required
- Interactive interface to easily access it.
Unique features
- Add titles, credits, and text cards or create your very own with the built-in editor
- Enhance your movie with different video filters
- Add different foregrounds, backgrounds, aspect ratios, and fade effects
- Add built-in music, sound effects, songs from your music library.
Camera control
- Full camera control to capture with an adjustable time interval feature
- Adjust white balance, focus, and exposure, ISO, and shutter speed manually.
An image editor:
- Add titles and other text on the animation
- Enhance images, sketch, and paint
- Use the eraser tool to wipe away unwanted objects
- Merge frames to simulate fast movement
Part 2. How to Use Stop Motion Studio?
With the help of Stop Motion Studio, you can make animation by combining multiple pictures. You need to download Stop Motion Studio Pro for your iOS or Android device to use the app. You can also download it for PC.
Step 1: Once you have downloaded the app, install it to work on your animation project right away. To create a new movie, click on the plus icon to create a new movie.
Step 2: Set the object you wish to capture in the frame. Let us consider one example where we will turn over an object. Click the camera icon to capture the shot. Move the thing a little and again tap on the shutter icon. Repeat the process until you have moved it all the way around. Once done, click on the play button. It will appear as if the object is in motion and moving on its own.
Tip: To ensure that your object is in the right place, you can use different controls like grid and onion skin. The grid will give you an idea of where you placed the subject in the frame. The onion skin puts the last frame you captured on top of your camera’s live view. In this way, you can see how far you moved your subject between frames.
Step 3: You can click as many pictures as you need to convey your story. After clicking all the pictures, you can edit them as per your requirements. To increase or decrease the speed at which your video plays, change the frame rate by choosing the number of pictures to be shown per second when you play the video. Play the video to see how your work turned out. If you like the end result, exit the editor.
Step 4: Now select the animation that you just saved. Click on the export icon which you will find at the top left of the screen—select animated GIF from the pulldown menu. Export the file to Google drive, mail yourself or upload it on your social media profile. AirDrop the file to other iPhone users if you are an iPhone user.
Step 5: You are done!! Yes, it was that simple and easy to create a great stop motion video yourself.
If you want to make a basic video and add audio, the Stop Motion Studio free version is ideal for you. But if you’re going to explore more app features, you need to buy Stop Motion Studio Pro Windows, a paid version of the app.
Part 3. 4 Stop Motion Studio Alternative Software
1. Life Lapse Stop Motion Maker
Price: Free, offers in-app purchases
Compatibility: iOS, Android
User Ratings: 4.8 on App Store, 3.6 on Google Play
This app is undoubtedly a lifesaving stop motion apps ever created. Why do we say this? It offers unlimited tools to shoot on an unlimited number of projects. As well as use audio tracks and effects from the built-in library.
While shooting a video on the app, you can add and remove various objects from frames, adjust the focus, and apply many other effects. It has built-in editing tools to change frame rates, apply visual effects, or make soundtracks from royalty-free songs. Video creators can import photos from the mobile phone to add to the animation you create.
Life Lapse permits you to use other color correction tools to set saturation, brightness, contrast, or white balance values manually. You can import audio files to your projects or export videos without a watermark on this app. The pro version lets you record footage in 4K resolution. Isn’t that amazing?
2. Stop Motion Maker
Price: Free, offers in-app purchases
Compatibility: iOS
User Ratings: 4.0
You can easily take a sequence of images and make your own stop-motion video on this app. Once you launch the app and tap on the Create button, the device’s camera will open. Press the camera button and make a new frame.
Tap on the Done button once you are done arranging the photos.
You have the option to preview the result once you are done. Then, you can quickly proceed to export the video. The app doesn’t allow you to record voiceovers or create soundtracks, and you must use another video editing app for iOS devices if you want to further edit a stop motion video.
Make sure you give Stop Motion Maker access to your phone’s camera and photo library for it to function correctly.
3. Pic-Pac Stop Motion & Time Lapse
Price: Free, offers in-app purchase
Compatibility: Android
User Ratings: 4.0
If you are still learning to create stop motion animations, you should consider installing PicPac Stop Motion & Time Lapse. One can take photos or import images from the gallery or Instagram on this app. On the free version, you can even reorder pictures. It also enables you to change the order of frames and perform simple edits like removing small objects.
Users can search online music or add local music and record their audio on Pic Pac. You can edit existing projects and share your animations with the YouTube community if you are a signed-in user. To keep track of your projects, add a logo at the end of the videos. The Timelapse-manual mode enables you to bring your stop motion ideas to life. The pro version lets you export videos in resolutions larger than 360p.
4. iMotion
Price: Free, but offers in-app purchases
Compatibility: iOS
User Ratings: 4.4
This app lets iPhone, and iPad users create both time-lapse and stop motion videos. It has a quick and smooth interface to create good quality animations easily. You can also add an audio soundtrack to your movie with iPod import, microphone, and AudioPaste (In-App Full Version required).
On iMotion, the user can manually control focus, exposure, or white balance. It has unlimited movie length, and you can also preview your projects at different frame rates. There is an option to autosave and directly preview your creation. If you want to do reverse playback, you can do that too.
Export all the video projects iMotion in 4K, 1080p, or 720p resolutions. However, only newer versions of iPhones and iPads can support 4k resolution. The free version of iMotion offers only limited options; get the full version to use the advanced features.
Closing Word
Stop motion animation is a simple and exciting way to create movement on a screen. Taking hundreds of photos to create a stop motion animation is not a huge task anymore. Anyone can easily do it on their smartphone camera, or it’s even better if you use a DSLR.
Stop Motion Studio is rightly called a studio as it has all the tools needed to create a stop motion animation. It gives you complete control over all camera settings and editing features.
So, bring your photos to life today with stop motion studio free or stop motion pro.
Also read:
- New Maximize Your Storage Tips and Tricks for Liberating Space for FCPX
- New Remove TikTok Logos with Ease Best Online Watermark Removers
- Trim Your Videos with Ease Top 10 PC and Web Solutions for 2024
- Updated In 2024, How to Blur Parts of a Video Online for Free A Beginners Guide
- Updated In 2024, Edit Like a Pro Top HD Video Editing Software
- New Free Video Shrinking Tools Our Top Picks for Windows 10 for 2024
- In 2024, Save Money, Get Great Images Free Commercial Use Resources
- New In 2024, The Ultimate List 10 Best Video Maker Apps for Android
- Updated 2024 Approved Get Started with Video Editing on Mac OS X Yosemite A Quick Start Guide
- New In 2024, The Text-to-Audio Revolution Essential Conversion Tips and Tricks
- New From Beginner to Expert The Wav Converter Blueprint for 2024
- New Mac Video Editing Made Easy Discover the Best Software for You
- New 2024 Approved Learn Video Editing Online A Comprehensive Guide to Downloading and Editing
- New Syncing Colors Across Clips The Ultimate PowerDirector Tutorial for 2024
- New Dont Lose Your Work! A Quick Guide to Saving FCP Projects for 2024
- 2024 Approved Unlock the Power of Freeze Frames Tips and Tricks for Video Editors
- New In 2024, Bringing Your Nikon Videos to Life Editing Software and Techniques
- 2024 Approved Video Brightness Boosting Solutions
- New Free Video Splitter Software Top-Rated Options for This Year for 2024
- Updated 2024 Approved Stop Motion Magic Top-Rated Apps for iPhone and Android
- New 2024 Approved Beyond the Basics 5 Advanced Facts About 16X9 Ratio Calculators
- New The Best Free Video Trimmers with No Watermark Restrictions
- The Face Swap Revolution Top Apps for iPhone and Android for 2024
- Updated 2024 Approved The Best of Windows Video Editing Top 6 Tools to Try
- New In 2024, The Ultimate List 10 Vegas Pro Alternatives for Mac Users (Free and Paid)
- Updated The Ultimate List of Windows Movie Maker Alternatives for 2024
- New In 2024, From Shaky to Smooth Adobe Premiere Pro Video Stabilization Tutorial
- In 2024, The Ultimate List of Aspect Ratio Calculators for Designers
- New In 2024, Top 5 Free Video Rotator Apps for iPhone Users 2023 Edition
- Updated In 2024, Free Stock Photos for Commercial Use Best Websites to Explore
- Updated How to Create Captions in Final Cut Pro X A Comprehensive Guide for 2024
- New Top Movie Making Tools Convert Memories Into Professional DVDs
- New Mobile Video Makers with a Beat The Best Apps for Android and iPhone
- Updated In 2024, MP4 Video Tag Editing Software Reviews and Comparisons for Windows and Mac
- New 2024 Approved IMovie on Android? Not Exactly, But These 10 Alternatives Come Close
- New In 2024, The Best TikTok Watermark Removers for Creators on a Budget
- Updated Bring Your Vision to Life Best 1080P Video Editing Software Reviewed for 2024
- Updated 2024 Approved We Tried VN Video Editor Pro Heres What We Found Out
- New Say Goodbye to Software Top Easy Video Joiner Alternatives for 2024
- Updated The 6 Most Popular Audio Converter Programs Reviewed for 2024
- In 2024, Resize Your Images in a Snap Top Online Options
- Updated 2024 Approved The Article Introduces some of the Best Free Online Video Loopers for Windows, Mac and Linux
- In 2024, Say Goodbye to Shaky Footage Video Stabilization in Adobe Premiere Pro Made Easy
- Updated In 2024, Boost Views with Custom LinkedIn Video Thumbnails Tips and Tricks
- In 2024, How To Bypass Samsung Galaxy A34 5G FRP In 3 Different Ways
- Easy steps to recover deleted photos from Poco .
- How To Transfer Data From iPhone 13 Pro Max To Others Android Devices? | Dr.fone
- Complete Review & Guide to Techeligible FRP Bypass and More For Xiaomi Civi 3
- Android Safe Mode - How to Turn off Safe Mode on Honor Play 7T? | Dr.fone
- 4 Easy Ways for Your Samsung Galaxy F34 5G Hard Reset | Dr.fone
- If You Want to Color Grading Your Video, Adobe Lightroom Will Be the Right Choice. This Article Will Teach You How to Use Lightroom to Apply Color Grading to Videos with Ease
- Top IMEI Unlokers for Your Xiaomi Redmi Note 12 Pro 4G Phone
- How to Remove Activation Lock From the iPhone 14 Pro Max Without Previous Owner?
- How to Track Apple iPhone 12 Pro Location without Installing Software? | Dr.fone
- Simplify Your Workflow Top Aspect Ratio Calculators Online for 2024
- Best Ways on How to Unlock/Bypass/Swipe/Remove Vivo V30 Lite 5G Fingerprint Lock
- 3 Solutions to Find Your Lava Yuva 3 Pro Current Location of a Mobile Number | Dr.fone
- How to Fix Unfortunately, Contacts Has Stopped Error on OnePlus 12 | Dr.fone
- In 2024, How To Pause Life360 Location Sharing For Honor X7b | Dr.fone
- In 2024, Add Zoom Blur Effect In Photoshop Step by Step
- In 2024, Top 10 Password Cracking Tools For Motorola Moto G34 5G
- 3uTools Virtual Location Not Working On Nokia XR21? Fix Now | Dr.fone
- Title: Updated The Ultimate YouTube to MP4 Converter Comparison for 2024
- Author: Morgan
- Created at : 2024-04-28 05:35:35
- Updated at : 2024-04-29 05:35:35
- Link: https://ai-video-tools.techidaily.com/updated-the-ultimate-youtube-to-mp4-converter-comparison-for-2024/
- License: This work is licensed under CC BY-NC-SA 4.0.
