
:max_bytes(150000):strip_icc():format(webp)/copilot-b197f8dd690845d5bf8ebbc082c89c20.jpg)
Updated S Top Video Editors for 4K Proxy Files A Comprehensive Guide for 2024
‘S Top Video Editors for 4K Proxy Files: A Comprehensive Guide
Top 8 Video Editing Apps for 4K Proxy Video Editing

Max Wales
Mar 27, 2024• Proven solutions
Shooting videos in high resolutions can help you create visually impressive content your followers on social media are going to adore. The only trouble is that the size of 4K videos can slow you down during the video editing process if your computer doesn’t have enough RAM memory or processing power. Additionally, quite a few inexpensive or free video editing apps don’t allow their users to create low-resolution proxy files that make the process of editing 4K videos much faster. That’s why in this article we are going to take you through the best 8 video editors you can use for 4K proxy video editing.
The Best Video Editing Apps for Proxy Editing in 2020
Some of the video editing apps we featured in this article can only run on computers that already have the advanced hardware setups. However, even if you have a computer setup that can easily support processing of the 4K video files, proxy editing can still be useful as it can reduce the amount of time you will have to spend on performing complex video editing tasks. Let’s take a look at some of the best video editors that support proxy editing.
1. Filmora
Price: Free version available, subscription plans start at $49.99 per year
Compatibility: macOS, Windows


The wide range of video editing options, support for nearly all popular video file formats or quick and simple exporting process are only a few reasons why Filmora is one of the best video editors you can use this year. Creating proxy files in Filmora is not a difficult task, because the software generates them automatically for you. You just have to choose between the 1280x720p or 1920x1080p resolutions and Filmora will create proxies for all media files that are larger than the resolution you’ve selected. However, the amount of time Filmora is going to need to create proxies depends on your computer’s processing power, but also on the size and the number of the RAW files you imported into a project.
2. Adobe Premiere Pro CC
Price: $20,99 per month, different subscription plans available
Compatibility: Windows, macOS
This is probably one of the best, if not the best non-linear video editing software ever created, so it is hardly surprising that you can easily create proxy files for all videos you use in a project you create in Adobe Premiere Pro. So, to create proxy files you just need to open the folder that contains those files from the Media Browser and then click on the Ingest button. You should then click on the wrench tool and pick the Create Proxies option from the drop-down menu located next to the Ingest option. Afterward, you should select one of the available resolution presets and proceed to import the footage into the project. However, before you can start editing with proxies you have to click on the Toggle Proxy button.
3. Final Cut Pro X
Price: Free trial available, $299,99
Compatibility: macOS
Transcoding media with FCPX doesn’t require too much effort, as the software offers a couple of options that make the editing process faster. You can opt to generate optimized media files by transcoding the original video clips into Apple ProRes 422 codec format that shortens the amount of time needed for rendering and provides excellent quality of color that is required for compositing. The proxy media files will also be created by transcoding the videos to Apple ProRes 422 codec format that retains original aspect ratio and frame rate of the video clips you transcoded. It is also worth noting that FCPX transcodes all mp3 files you import into a project to MOV audio files.
4. Vegas Pro
Price: Subscription plans start from $249,00
Compatibility: Windows
This video editor is often overlooked in conversations about the most powerful video editing apps, but the tools it offers are powerful enough to enable you to edit videos at a professional level. Creating proxy files in Vegas Pro is remarkably easy, as you just have to import the files into a new project, select each file you want to transcode and then choose the Create Video Proxy option from the right-click menu. Just keep in mind that you must create proxy files before you do any actual editing because otherwise, the transcoding process is not going work.
5. Blender
Price: Free
Compatibility: Linux, macOS, Windows
Blender is a 3D modeling and VFX software that lets you track objects or use 3D painting tools among numerous other options. Even though creating proxies with this app is not a particularly complicated process, you still have to be familiar with Blender in order to make full use of its transcoding options. The software allows you to generate proxy files whose size is only 25% of the video’s original size, although you can also create proxies that have 50% and 75% of the video’s original size. After you’ve adjusted the transcoding settings you should simply click on the Rebuild Proxy and Timecode Indices button.
6. Shotcut
Price: Free
Compatibility: Windows, macOS, Linux
Despite the fact that this cross-platform video editor supports 4K and ProRes files that can cause it to lag at times, creating proxies in Shotcut is a highly technical process. In case you decide to make a proxy file by yourself, you will have to export a version of the file that is two or four times smaller than the original. You must also remember that you have to go through the entire process of creating proxies before you make any edits. The trick to creating proxies in Shotcut is to make a project file with the larger version of the video, then replace the larger version of the file with a smaller version of that same video file, before you actually start editing. Once you’ve completed the editing process, you can then once again add the larger source file to the project and export your video in high resolution.
7. Lightworks
Price: Free trial available, subscription plans start at $24,99 per month
Compatibility: Linux, macOS, Windows
The process of creating proxies in Lightworks is rather simple since you just have to import the video files you’d like to edit into the software and make sure they are selected before you right-click on them. Once the right-click menu appears on the screen you should click on the Media submenu and select the Make Proxies option. The amount of time Lightworks is going to need to generate the proxy files depends on the number of the source files and their size. You can then proceed to add the proxies to the timeline, edit them and Lightworks will automatically use the source files instead of proxies during the rendering process.
8. HitFilm Express
Price: Free
Compatibility: macOS, Windows
Once you create a new project and import all video clips you want to use in that project into the editor you should just go to the Assets menu that is located in the Media panel and click on the Make Proxy option. You will be able to continue editing while the transcoding process is still in progress, and after the source files are transcoded they will be replaced by proxies. However, making adjustments to a proxy version of a composite shot will invalidate that proxy file, which is why it is important to make all edits on that shot before you create its proxy.
Conclusion
Reducing the size of video clips you use in your projects is going to save you a lot of time during the video editing process. Each video editing software we featured in this article allows its users to generate proxy files effortlessly. Which video editor are you going to be using for proxy video editing? Leave a comment below and let us know.
Max Wales
Max Wales is a writer and a lover of all things video.
Follow @Max Wales
Max Wales
Mar 27, 2024• Proven solutions
Shooting videos in high resolutions can help you create visually impressive content your followers on social media are going to adore. The only trouble is that the size of 4K videos can slow you down during the video editing process if your computer doesn’t have enough RAM memory or processing power. Additionally, quite a few inexpensive or free video editing apps don’t allow their users to create low-resolution proxy files that make the process of editing 4K videos much faster. That’s why in this article we are going to take you through the best 8 video editors you can use for 4K proxy video editing.
The Best Video Editing Apps for Proxy Editing in 2020
Some of the video editing apps we featured in this article can only run on computers that already have the advanced hardware setups. However, even if you have a computer setup that can easily support processing of the 4K video files, proxy editing can still be useful as it can reduce the amount of time you will have to spend on performing complex video editing tasks. Let’s take a look at some of the best video editors that support proxy editing.
1. Filmora
Price: Free version available, subscription plans start at $49.99 per year
Compatibility: macOS, Windows
The wide range of video editing options, support for nearly all popular video file formats or quick and simple exporting process are only a few reasons why Filmora is one of the best video editors you can use this year. Creating proxy files in Filmora is not a difficult task, because the software generates them automatically for you. You just have to choose between the 1280x720p or 1920x1080p resolutions and Filmora will create proxies for all media files that are larger than the resolution you’ve selected. However, the amount of time Filmora is going to need to create proxies depends on your computer’s processing power, but also on the size and the number of the RAW files you imported into a project.
2. Adobe Premiere Pro CC
Price: $20,99 per month, different subscription plans available
Compatibility: Windows, macOS
This is probably one of the best, if not the best non-linear video editing software ever created, so it is hardly surprising that you can easily create proxy files for all videos you use in a project you create in Adobe Premiere Pro. So, to create proxy files you just need to open the folder that contains those files from the Media Browser and then click on the Ingest button. You should then click on the wrench tool and pick the Create Proxies option from the drop-down menu located next to the Ingest option. Afterward, you should select one of the available resolution presets and proceed to import the footage into the project. However, before you can start editing with proxies you have to click on the Toggle Proxy button.
3. Final Cut Pro X
Price: Free trial available, $299,99
Compatibility: macOS
Transcoding media with FCPX doesn’t require too much effort, as the software offers a couple of options that make the editing process faster. You can opt to generate optimized media files by transcoding the original video clips into Apple ProRes 422 codec format that shortens the amount of time needed for rendering and provides excellent quality of color that is required for compositing. The proxy media files will also be created by transcoding the videos to Apple ProRes 422 codec format that retains original aspect ratio and frame rate of the video clips you transcoded. It is also worth noting that FCPX transcodes all mp3 files you import into a project to MOV audio files.
4. Vegas Pro
Price: Subscription plans start from $249,00
Compatibility: Windows
This video editor is often overlooked in conversations about the most powerful video editing apps, but the tools it offers are powerful enough to enable you to edit videos at a professional level. Creating proxy files in Vegas Pro is remarkably easy, as you just have to import the files into a new project, select each file you want to transcode and then choose the Create Video Proxy option from the right-click menu. Just keep in mind that you must create proxy files before you do any actual editing because otherwise, the transcoding process is not going work.
5. Blender
Price: Free
Compatibility: Linux, macOS, Windows
Blender is a 3D modeling and VFX software that lets you track objects or use 3D painting tools among numerous other options. Even though creating proxies with this app is not a particularly complicated process, you still have to be familiar with Blender in order to make full use of its transcoding options. The software allows you to generate proxy files whose size is only 25% of the video’s original size, although you can also create proxies that have 50% and 75% of the video’s original size. After you’ve adjusted the transcoding settings you should simply click on the Rebuild Proxy and Timecode Indices button.
6. Shotcut
Price: Free
Compatibility: Windows, macOS, Linux
Despite the fact that this cross-platform video editor supports 4K and ProRes files that can cause it to lag at times, creating proxies in Shotcut is a highly technical process. In case you decide to make a proxy file by yourself, you will have to export a version of the file that is two or four times smaller than the original. You must also remember that you have to go through the entire process of creating proxies before you make any edits. The trick to creating proxies in Shotcut is to make a project file with the larger version of the video, then replace the larger version of the file with a smaller version of that same video file, before you actually start editing. Once you’ve completed the editing process, you can then once again add the larger source file to the project and export your video in high resolution.
7. Lightworks
Price: Free trial available, subscription plans start at $24,99 per month
Compatibility: Linux, macOS, Windows
The process of creating proxies in Lightworks is rather simple since you just have to import the video files you’d like to edit into the software and make sure they are selected before you right-click on them. Once the right-click menu appears on the screen you should click on the Media submenu and select the Make Proxies option. The amount of time Lightworks is going to need to generate the proxy files depends on the number of the source files and their size. You can then proceed to add the proxies to the timeline, edit them and Lightworks will automatically use the source files instead of proxies during the rendering process.
8. HitFilm Express
Price: Free
Compatibility: macOS, Windows
Once you create a new project and import all video clips you want to use in that project into the editor you should just go to the Assets menu that is located in the Media panel and click on the Make Proxy option. You will be able to continue editing while the transcoding process is still in progress, and after the source files are transcoded they will be replaced by proxies. However, making adjustments to a proxy version of a composite shot will invalidate that proxy file, which is why it is important to make all edits on that shot before you create its proxy.
Conclusion
Reducing the size of video clips you use in your projects is going to save you a lot of time during the video editing process. Each video editing software we featured in this article allows its users to generate proxy files effortlessly. Which video editor are you going to be using for proxy video editing? Leave a comment below and let us know.
Max Wales
Max Wales is a writer and a lover of all things video.
Follow @Max Wales
No Cost, No Problem: Top 10 Free Game Download Sites for PC and Android Users
Top 10 Best Free Game Download Sites [PC & Android][2024]

Ollie Mattison
Mar 27, 2024• Proven solutions
We all know and firmly believe that games are an integral part of our life. But the world has progressed, and we yearn to achieve real-life experiences through virtual reality instead of experiencing the actual thing. Online games are not only mentally stimulating, but they are also very addictive. Not everyone wants to pay to play games for a couple of hours, so here is a list of top free game downloading sites. You can download full versions of your favorite games for free.
Recommended Video Recorder & Editor for Gameplay: Filmora
If you want to edit a video recorded from games with more effects and templates, we recommend using Filmora . It is an easy-to-use video editor. It offers various title templates. You can also use it to record game videos. Just download it to have a try. Don’t know how to make a video? Visit the Wondershare Video Community and get some inspiration in video creation.
Part 1: Best Free PC Game Download Sites
1 Acid Play
Platforms: OS X and Windows

Key Features:
- Huge gaming library
The acid play has a gigantic collection of games of various types. The games at acid play have been categorized into action, arcade, board games, RPG, card games, puzzles, driving games, simulation, etc.
- Custom Search
The customized search helps you find the exact game you are looking for. It saves time since you cannot browse through thousands of games.
- Ratings
If you are new to this site or looking for a new game to play, you can choose only without trying every game to decide the best one. Just check the ratings provided by other players, and it will solve your problem. You can also rate a game according to your liking.
Pros:
- The games are easily downloadable and free.
- There is a large variety of games available to play.
Cons:
- The site is not updated, and no new games are introduced.
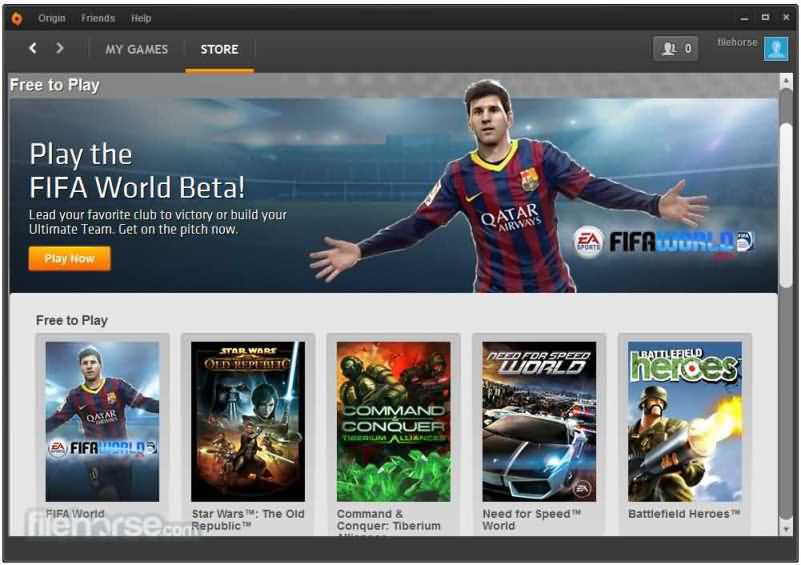
2 Origin Games
Platforms: OS X and Windows
Origin games are another best-known digital distribution platform for a free online gaming experience. It contains a fairly large library of premium games, but origin games provide links for free downloads for a limited time.
Key Features:
- Social Features
Origin provides its users with many social features like profile management, networking with friends through chatting, and video streaming via TwitchTV. You can also share your game library and community integration through social media and networking sites like Facebook, Xbox Live, PlayStation Network, and Nintendo Network.
- Variety in games
It provides various games, from PC games to Fifa and even classic games like Plant Vs. Zombies are also available.
- On-the-house games
The on-the-house features allow the customers to download a free trial of a premium game.
Pros:
- It provides great game streaming features.
- is developed by a renowned and successful company so that it can be trusted.
- The ‘on-the-house specials’ are appreciated by many gamers, allowing them to play a paid game for free now and then.
Cons:
- It has a lot of updates and takes an unreasonable amount of time to install and update the software.
- Customers have complained that they provide expired discount codes.
- Customer service needs to be improved as it is not very responsive.
3 AllGamesAtoZ
Platforms: OS X and Windows
If you want the best full version of a game for free, then AllGamesAtoZ is where you should go.
Key Features:
- The website is full of addictive games from different genres like action, arcade, shooting, role-playing, adventure, racing, simulation, etc.
- Multiple links for downloading a single game are available.
- A customized search bar is available so that you can locate the exact game you are looking for without having to browse through thousands of games.
- The games on AllGamesAtoZ are available on Windows, Linux, and Mac.
- A forum for game reviews is provided, so it is easier to decide which game you want to download without trying them all.
Pros:
- The gaming library is enormous.
- The game reviews make it easier to make a decision and save time.
- The website does not transfer viruses and is entirely safe from scams.
Cons:
- The downloading process is quite long.
- The website is not updated with new games.
4 Mega Games
Platforms: OS X and Windows
It is another highly recommended online gaming site. It not only provides PC games for free but also offers 3D PlayStation games to be downloaded on your PC without any charge.

Key Features:
- Search and download
Mega games allow a search and download option for every game published on their site.
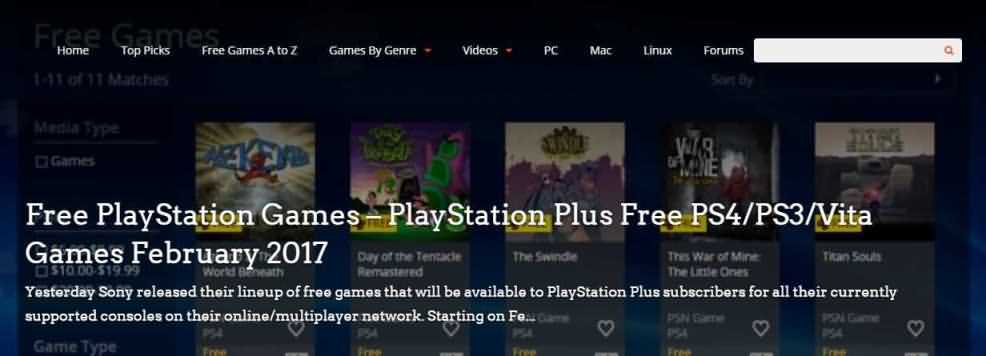
- PlayStation games
It has provided its customers with not only PC games but also 3D PlayStation games that can be downloaded for free.
- Cheat codes
Apart from all the standard gaming features, mega games also provide free cheat codes for the games.
Pros:
- The games are easily downloaded.
- The games have variety.
Cons:
- The website stops working after a while, and the download gets interrupted
5 Caiman.us
Platforms: OS X and Windows
It is another digital distribution platform for free online gaming. After the death of the site’s developer, the site has gone offline.

Key Features:
- It has a vast collection of games and over twenty free games categories.
- 2D and 3D gaming experiences are also provided.
- A customized search is available to make it easier for players to find the game they are looking for.
Pros:
- There is a vast collection of free games to download and play.
Cons:
- The site is not well organized and confusing.
- The search bar is at the very bottom of the page, so a person might find it hard to locate.
- Since the site has gone offline, the games are not updated, so there are no new games.
Part 2: Best Android Game Download Sites to Download Free Android Games
Android is growing very fast; now, almost everyone uses it and prefers it over any other software. Here are the best websites from where you can download free android apps:
1 Google Play
Google Play is the most common website to download free android apps. It is free, it is fast, and it is efficient. You can not only use this from your android mobile but also operate it and download apps using your laptop.

Key Features:
- The apps are easily downloaded, depending upon your internet connection.
- The purchase methods are through credit cards, and the procedure is straightforward.
- The platform allows everyone and anyone to sell their games.
- Sign up through your Google account is necessary to access these features.
Pros:
- It is easily accessible.
- It is pre-installed on all android supported devices.
- It contains a massive collection of unique apps, from books to music, workout, and games of various types.
Cons:
- Since everyone and anyone can access it without paying any registration fee, it is exposed to scams and harassment.
- A few games do not function and keep crashing.
2 Android Games Room

It contains thousands of free gaming apps in different categories like action, arcade, adventure, simulation, song games, and puzzle games. The download links are readily available; you can even access this site from your mobile by scanning a QR code. This site is a pretty good platform to download free games but has certain flaws. It does not allow a multiplayer gaming experience, and no customer services are provided.
3 Android Apps
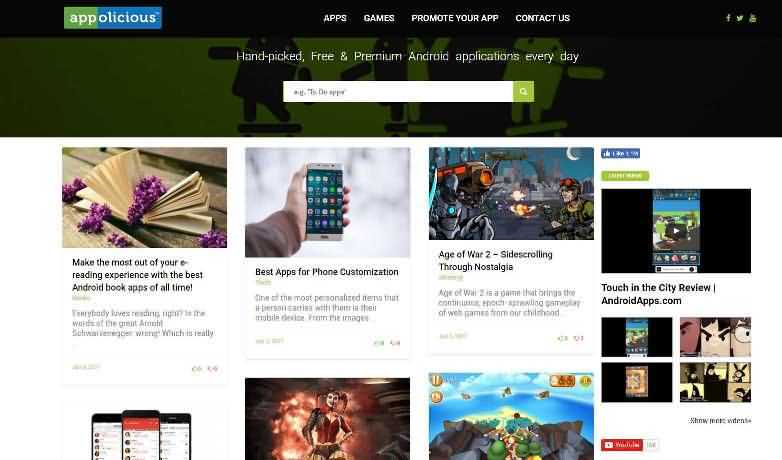
It is another platform to download android apps for free. This site is pretty good since it updates games that developers handpick almost daily. You can also promote your app using the ‘promote your app’ feature. The site has a lot of updates and takes an unreasonable amount of time to install and update the software. Furthermore, you can say that they do not have a customer service function because nobody ever responds to the customer’s queries.
4 1 Mobile
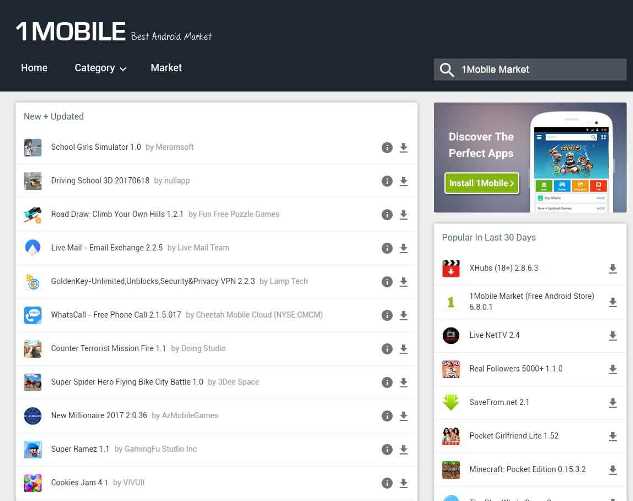
One mobile is a free android store. It provides its users the easiest way to locate, download and manage free apps. 1 Mobile has over eighty (80) million apps. One mobile has just been recently updated, has a brand new interface design, and operates much smoother. The content is more prosperous, smoother, and a thousand times better than before the latest update. All the apps and games are 100% free forever without hidden charges. It supports various languages like English, Korean, Chinese, French, Spanish, Japanese, and Portugal.
5 Approx

It provides the best free apps not only for android but OS as well. You can download it on your phone by scanning a QR code. This software has been functioning for the past six years and is free from viruses or malware.
To furnish your gameplay videos, Filmora also provides some cool effects, transitions, and elements, such as camera shake chaos effects, distortion effects, 3D change, speed blur transitions, and more. Moreover, you can always find some specially designed gaming effects in the Filmstock effects store.
Ollie Mattison
Ollie Mattison is a writer and a lover of all things video.
Follow @Ollie Mattison
Ollie Mattison
Mar 27, 2024• Proven solutions
We all know and firmly believe that games are an integral part of our life. But the world has progressed, and we yearn to achieve real-life experiences through virtual reality instead of experiencing the actual thing. Online games are not only mentally stimulating, but they are also very addictive. Not everyone wants to pay to play games for a couple of hours, so here is a list of top free game downloading sites. You can download full versions of your favorite games for free.
Recommended Video Recorder & Editor for Gameplay: Filmora
If you want to edit a video recorded from games with more effects and templates, we recommend using Filmora . It is an easy-to-use video editor. It offers various title templates. You can also use it to record game videos. Just download it to have a try. Don’t know how to make a video? Visit the Wondershare Video Community and get some inspiration in video creation.
Part 1: Best Free PC Game Download Sites
1 Acid Play
Platforms: OS X and Windows
Key Features:
- Huge gaming library
The acid play has a gigantic collection of games of various types. The games at acid play have been categorized into action, arcade, board games, RPG, card games, puzzles, driving games, simulation, etc.
- Custom Search
The customized search helps you find the exact game you are looking for. It saves time since you cannot browse through thousands of games.
- Ratings
If you are new to this site or looking for a new game to play, you can choose only without trying every game to decide the best one. Just check the ratings provided by other players, and it will solve your problem. You can also rate a game according to your liking.
Pros:
- The games are easily downloadable and free.
- There is a large variety of games available to play.
Cons:
- The site is not updated, and no new games are introduced.
2 Origin Games
Platforms: OS X and Windows
Origin games are another best-known digital distribution platform for a free online gaming experience. It contains a fairly large library of premium games, but origin games provide links for free downloads for a limited time.
Key Features:
- Social Features
Origin provides its users with many social features like profile management, networking with friends through chatting, and video streaming via TwitchTV. You can also share your game library and community integration through social media and networking sites like Facebook, Xbox Live, PlayStation Network, and Nintendo Network.
- Variety in games
It provides various games, from PC games to Fifa and even classic games like Plant Vs. Zombies are also available.
- On-the-house games
The on-the-house features allow the customers to download a free trial of a premium game.
Pros:
- It provides great game streaming features.
- is developed by a renowned and successful company so that it can be trusted.
- The ‘on-the-house specials’ are appreciated by many gamers, allowing them to play a paid game for free now and then.
Cons:
- It has a lot of updates and takes an unreasonable amount of time to install and update the software.
- Customers have complained that they provide expired discount codes.
- Customer service needs to be improved as it is not very responsive.
3 AllGamesAtoZ
Platforms: OS X and Windows
If you want the best full version of a game for free, then AllGamesAtoZ is where you should go.
Key Features:
- The website is full of addictive games from different genres like action, arcade, shooting, role-playing, adventure, racing, simulation, etc.
- Multiple links for downloading a single game are available.
- A customized search bar is available so that you can locate the exact game you are looking for without having to browse through thousands of games.
- The games on AllGamesAtoZ are available on Windows, Linux, and Mac.
- A forum for game reviews is provided, so it is easier to decide which game you want to download without trying them all.
Pros:
- The gaming library is enormous.
- The game reviews make it easier to make a decision and save time.
- The website does not transfer viruses and is entirely safe from scams.
Cons:
- The downloading process is quite long.
- The website is not updated with new games.
4 Mega Games
Platforms: OS X and Windows
It is another highly recommended online gaming site. It not only provides PC games for free but also offers 3D PlayStation games to be downloaded on your PC without any charge.
Key Features:
- Search and download
Mega games allow a search and download option for every game published on their site.
- PlayStation games
It has provided its customers with not only PC games but also 3D PlayStation games that can be downloaded for free.
- Cheat codes
Apart from all the standard gaming features, mega games also provide free cheat codes for the games.
Pros:
- The games are easily downloaded.
- The games have variety.
Cons:
- The website stops working after a while, and the download gets interrupted
5 Caiman.us
Platforms: OS X and Windows
It is another digital distribution platform for free online gaming. After the death of the site’s developer, the site has gone offline.
Key Features:
- It has a vast collection of games and over twenty free games categories.
- 2D and 3D gaming experiences are also provided.
- A customized search is available to make it easier for players to find the game they are looking for.
Pros:
- There is a vast collection of free games to download and play.
Cons:
- The site is not well organized and confusing.
- The search bar is at the very bottom of the page, so a person might find it hard to locate.
- Since the site has gone offline, the games are not updated, so there are no new games.
Part 2: Best Android Game Download Sites to Download Free Android Games
Android is growing very fast; now, almost everyone uses it and prefers it over any other software. Here are the best websites from where you can download free android apps:
1 Google Play
Google Play is the most common website to download free android apps. It is free, it is fast, and it is efficient. You can not only use this from your android mobile but also operate it and download apps using your laptop.
Key Features:
- The apps are easily downloaded, depending upon your internet connection.
- The purchase methods are through credit cards, and the procedure is straightforward.
- The platform allows everyone and anyone to sell their games.
- Sign up through your Google account is necessary to access these features.
Pros:
- It is easily accessible.
- It is pre-installed on all android supported devices.
- It contains a massive collection of unique apps, from books to music, workout, and games of various types.
Cons:
- Since everyone and anyone can access it without paying any registration fee, it is exposed to scams and harassment.
- A few games do not function and keep crashing.
2 Android Games Room
It contains thousands of free gaming apps in different categories like action, arcade, adventure, simulation, song games, and puzzle games. The download links are readily available; you can even access this site from your mobile by scanning a QR code. This site is a pretty good platform to download free games but has certain flaws. It does not allow a multiplayer gaming experience, and no customer services are provided.
3 Android Apps
It is another platform to download android apps for free. This site is pretty good since it updates games that developers handpick almost daily. You can also promote your app using the ‘promote your app’ feature. The site has a lot of updates and takes an unreasonable amount of time to install and update the software. Furthermore, you can say that they do not have a customer service function because nobody ever responds to the customer’s queries.
4 1 Mobile
One mobile is a free android store. It provides its users the easiest way to locate, download and manage free apps. 1 Mobile has over eighty (80) million apps. One mobile has just been recently updated, has a brand new interface design, and operates much smoother. The content is more prosperous, smoother, and a thousand times better than before the latest update. All the apps and games are 100% free forever without hidden charges. It supports various languages like English, Korean, Chinese, French, Spanish, Japanese, and Portugal.
5 Approx
It provides the best free apps not only for android but OS as well. You can download it on your phone by scanning a QR code. This software has been functioning for the past six years and is free from viruses or malware.
To furnish your gameplay videos, Filmora also provides some cool effects, transitions, and elements, such as camera shake chaos effects, distortion effects, 3D change, speed blur transitions, and more. Moreover, you can always find some specially designed gaming effects in the Filmstock effects store.
Ollie Mattison
Ollie Mattison is a writer and a lover of all things video.
Follow @Ollie Mattison
FCP Transition Tutorial: 3 Easy Steps to Enhance Your Footage
3 Ways To Add Transitions In Final Cut Pro

Benjamin Arango
Mar 27, 2024• Proven solutions
When professionals edit their video films, they often need to switch directly between different recorded scenes to create customized outcomes at the end. If these transitions between different scenes are not well optimized then definitely they will affect the flow of the film and make it appear annoying with a little blanking period in between.
If you make use of Final Cut Pro for video editing then it becomes much easier to adjust these transitions so that edited films can run smoothly. The information below will help you to get complete knowledge about managing transitions in videos using FCP.
Those who are not familiar with Final Cut Pro platform and finding it a little complex as a beginner can switch to Wondershare Filmora for Mac as it is one of the easiest professional tools available from Mac devices.
This software is loaded with all powerful features and possesses an interactive user interface for those who are just starting out with Video Editing.
Download Mac Version ](https://tools.techidaily.com/wondershare/filmora/download/ )
You may also like: How to add effects in Final Cut Pro >>
3 Ways to add or modify the transitions in Final Cut Pro
- Part 1: Using Shortcut to Apply Transitions >>
- Part 2: Use Browser to Apply Transition >>
- Part 3: Use Menu Bar to Apply Transition >>
Part 1: Using Shortcut to Apply Transitions:

It is possible to apply transitions with a simple shortcut; all that you need to do is either blade your video clip into several scenes as per need or add two or more different scenes to be joined to your software timeline.
It is desired because the transition effect can be applied only if you have more than one clip on the timeline. Also, you can see more keyboard shortcuts here.

Once you have obtained your two scenes for which you need to add transition effect then select the very first scene from the timeline. Now open the Video animation window on your device, it can be done by pressing Shift+V; find the Compositing option, and then apply default transitions by simply dragging timeline handle towards both sides of the composite window. In FCP, Cross dissolve will be selected as the default transition.

Part 2: Use Browser to Apply Transition:
- Go to the media toolbar and then hit the transition icon. It can be identified as a shaded box over which X is written.

- Now choose your favorite transition from Browser and drag it to your timeline.
- It is time to place the dragged transition between two video clips that you need to edit here.
In order to change the duration of transition:
- Simply right-click on the timeline and select the Change duration option.

- It can be selected from Ctrl+D options also.
- You can use the precision editor option to adjust transition duration.

- Users can also edit preferences for transition on Final Cut Pro software tool as per need.

Part 3: Use Menu Bar to Apply Transition:
- Click on the available cut between two clips on your timeline.
- Now from the appeared menu bar select Edit and then choose Add Cross Dissolve for your transitions.

Related article: How to fade in/out audio in FCP >>
Conclusion:
It is much easier to use Final Cut Pro for audio fade-in and out needs. This advanced software tool can be operated with simple to remember keyboard shortcuts and even beginners can develop new customized projects using it.
Benjamin Arango
Benjamin Arango is a writer and a lover of all things video.
Follow @Benjamin Arango
Benjamin Arango
Mar 27, 2024• Proven solutions
When professionals edit their video films, they often need to switch directly between different recorded scenes to create customized outcomes at the end. If these transitions between different scenes are not well optimized then definitely they will affect the flow of the film and make it appear annoying with a little blanking period in between.
If you make use of Final Cut Pro for video editing then it becomes much easier to adjust these transitions so that edited films can run smoothly. The information below will help you to get complete knowledge about managing transitions in videos using FCP.
Those who are not familiar with Final Cut Pro platform and finding it a little complex as a beginner can switch to Wondershare Filmora for Mac as it is one of the easiest professional tools available from Mac devices.
This software is loaded with all powerful features and possesses an interactive user interface for those who are just starting out with Video Editing.
Download Mac Version ](https://tools.techidaily.com/wondershare/filmora/download/ )
You may also like: How to add effects in Final Cut Pro >>
3 Ways to add or modify the transitions in Final Cut Pro
- Part 1: Using Shortcut to Apply Transitions >>
- Part 2: Use Browser to Apply Transition >>
- Part 3: Use Menu Bar to Apply Transition >>
Part 1: Using Shortcut to Apply Transitions:
It is possible to apply transitions with a simple shortcut; all that you need to do is either blade your video clip into several scenes as per need or add two or more different scenes to be joined to your software timeline.
It is desired because the transition effect can be applied only if you have more than one clip on the timeline. Also, you can see more keyboard shortcuts here.
Once you have obtained your two scenes for which you need to add transition effect then select the very first scene from the timeline. Now open the Video animation window on your device, it can be done by pressing Shift+V; find the Compositing option, and then apply default transitions by simply dragging timeline handle towards both sides of the composite window. In FCP, Cross dissolve will be selected as the default transition.
Part 2: Use Browser to Apply Transition:
- Go to the media toolbar and then hit the transition icon. It can be identified as a shaded box over which X is written.
- Now choose your favorite transition from Browser and drag it to your timeline.
- It is time to place the dragged transition between two video clips that you need to edit here.
In order to change the duration of transition:
- Simply right-click on the timeline and select the Change duration option.
- It can be selected from Ctrl+D options also.
- You can use the precision editor option to adjust transition duration.
- Users can also edit preferences for transition on Final Cut Pro software tool as per need.
Part 3: Use Menu Bar to Apply Transition:
- Click on the available cut between two clips on your timeline.
- Now from the appeared menu bar select Edit and then choose Add Cross Dissolve for your transitions.
Related article: How to fade in/out audio in FCP >>
Conclusion:
It is much easier to use Final Cut Pro for audio fade-in and out needs. This advanced software tool can be operated with simple to remember keyboard shortcuts and even beginners can develop new customized projects using it.
Benjamin Arango
Benjamin Arango is a writer and a lover of all things video.
Follow @Benjamin Arango
The Art of Speed: Learn to Create Time Lapse Videos in Minutes [2 Methods]
Time Lapse Software: Create Time Lapse Video
Ollie Mattison
Mar 27, 2024• Proven solutions
You may have seen some time lapse videos already. A sunset motion, flower blooming, traffic and city lights and more time lapse videos. Time lapse is an amazing technique often used to make everything in the video seems moving much faster than in real life, like speed up a video clip and give the illusion of compressed time.
If you have a GoPro Hero 5 Black action camera, check our article abouthow to shoot a time-lapse video with GoPro.
Some phones also allow you to shoot time-lapse video , but we recommend you to use a good camera and video editing software to make better time lapse videos. If you are looking for a time lapse software to make a time lapse video, we recommend Filmora video editor , which is easy to use on both Windows PC and Mac. How to create a time-lapse video with Filmora? Download the software and follow the step-by-step tutorial below.
In this article, we will introduce two methods of creating time lapse video in Filmora:
With built-in slow/fast motion effects, you can use Filmora to make time lapse effects in drag-and-drop. If you want to add filters to your video, Filmora offers more than 150 free filters to use. Check the new features of Filmora to empower your imagination. Download it to have a try!
Download Mac Version ](https://tools.techidaily.com/wondershare/filmora/download/ )
Before we get started, we have summarized some tips for shooting time-lapse videos, hope that will help to shoot a good video footage. If you have some other tips and tricks about shooting time lapse videos, please share it on the comment below.
Tip 1: Keep the Camera/phone stable with camera stabilizer or tripod.
Tip 2: Make sure there is enough space for shooting time-lapse video. Large capacity memory cards are always welcomed.
Tip 3: Charge the battery fully before shooting and prepare a standby battery if you have.
If you wanna make a time lapse video with photos, you need set up your camera to take photos at a proper interval, such as take photo at every five second or use the built-in time lapse shooting settings in your camera. It is recommended to record or take photos for at least 20 minutes because the time lapse video will speed up. OK, now let’s start making the time lapse video:
Tips for Recording Time Lapse Video on iPhone
Method 1: Creating time lapse video from photos
1 Import the original photos to Filmora
After installing and launch Filmora video editor, import the shot time lapse photos to it. Click New Project and then click the Import button to add your photos to the media library. You can also directly drag and drop your video to the program. Then all the imported files will appear as thumbnails in the left of the window.

You can also import the photos from the video shooting device. Just plug in the video camera, click Import from Phone or Camera option in Import menu, and then transfer the target media files to Filmora.
After that, you need to select and drag and drop all the photos to the first video track.
2 Preview the photos
After all your photos are placed in timeline, you can zoom in the timeline or preview it in the Preview window to check if it needs any order adjustment or deletion.
3 Adjust Photo Duration to Create Time lapse Video
Select one of the photos in the timeline and right click on it to select Speed and Duration to open the Custom Speed panel. Go to Duration section, and change the duration of the photo to 00:00:00:01 or other duration based on your needs, and then click OK.

You can also add a background music to make time lapse more professional. You can choose a music sound from the built-in music library or import your own audio file.
4 Export your new video
Place the timeline playhead at the beginner, and play it in Preview window to check the time lapse effects. If everything works fine, click the Export tab and choose the target format and click SETTINGS to output the time lapse video. Here you can change the video format and video and audio parameters such as Bit Rate, Encoder, Resolution and so on.
If you want to save and play your video on iPhone, iPod, iPad and other devices, just switch to the Device tab and choose from the device list. What’s more, you can upload the newly made video file to all popular video sites such as YouTube and Vimeo directly from the interface of Filmora. Or turn to DVD tab to burn your video to DVD for playing on TV.

Method 2: Speed Up to Make a Time lapse Video
In case that you want to make a time lapse video with video footage, below are the step-by-step tutorial:
1 Import Video Footage
Just like importing photos to Filmora, follow the steps to import the video clips to media library.
2 Cut out part of the video for time lapse editing (optional)
Next, drag your video onto the video column in the timeline. Select the loaded video and click the “Play” button. While playing the video, drag the slider bar at the start time and hit the “Split” icon to cut out the part you want to do time lapse editing.

3 Speed up to create time lapse video
Right click on the video clip in the timeline to select Speed and Duration. Then a window will pop up for you to adjust the settings of video. Find the Speed option and drag the slider bar to the right to increase the speed. If you set the playback speed to play at 200% the original speed, then the 30-second clip be only 15 seconds (twice the speed). After that click OK. Click the Play button to preview the result. Filmora now support up to 100x fast mo and 0.01x slow mo.
4 Export your new time lapse video
If you are satisfied with the newly made time lapse video, just click Export to output the video footage.
Conclusion
That’s how to make a cool time lapse video with the time lapse video software Filmora, no matter whether you want to make a time lapse video from photos, or speed up the video to make a time lapse video, you can achieve that with a few clicks.
Download Mac Version ](https://tools.techidaily.com/wondershare/filmora/download/ )
Ollie Mattison
Ollie Mattison is a writer and a lover of all things video.
Follow @Ollie Mattison
Ollie Mattison
Mar 27, 2024• Proven solutions
You may have seen some time lapse videos already. A sunset motion, flower blooming, traffic and city lights and more time lapse videos. Time lapse is an amazing technique often used to make everything in the video seems moving much faster than in real life, like speed up a video clip and give the illusion of compressed time.
If you have a GoPro Hero 5 Black action camera, check our article abouthow to shoot a time-lapse video with GoPro.
Some phones also allow you to shoot time-lapse video , but we recommend you to use a good camera and video editing software to make better time lapse videos. If you are looking for a time lapse software to make a time lapse video, we recommend Filmora video editor , which is easy to use on both Windows PC and Mac. How to create a time-lapse video with Filmora? Download the software and follow the step-by-step tutorial below.
In this article, we will introduce two methods of creating time lapse video in Filmora:
With built-in slow/fast motion effects, you can use Filmora to make time lapse effects in drag-and-drop. If you want to add filters to your video, Filmora offers more than 150 free filters to use. Check the new features of Filmora to empower your imagination. Download it to have a try!
Download Mac Version ](https://tools.techidaily.com/wondershare/filmora/download/ )
Before we get started, we have summarized some tips for shooting time-lapse videos, hope that will help to shoot a good video footage. If you have some other tips and tricks about shooting time lapse videos, please share it on the comment below.
Tip 1: Keep the Camera/phone stable with camera stabilizer or tripod.
Tip 2: Make sure there is enough space for shooting time-lapse video. Large capacity memory cards are always welcomed.
Tip 3: Charge the battery fully before shooting and prepare a standby battery if you have.
If you wanna make a time lapse video with photos, you need set up your camera to take photos at a proper interval, such as take photo at every five second or use the built-in time lapse shooting settings in your camera. It is recommended to record or take photos for at least 20 minutes because the time lapse video will speed up. OK, now let’s start making the time lapse video:
Tips for Recording Time Lapse Video on iPhone
Method 1: Creating time lapse video from photos
1 Import the original photos to Filmora
After installing and launch Filmora video editor, import the shot time lapse photos to it. Click New Project and then click the Import button to add your photos to the media library. You can also directly drag and drop your video to the program. Then all the imported files will appear as thumbnails in the left of the window.
You can also import the photos from the video shooting device. Just plug in the video camera, click Import from Phone or Camera option in Import menu, and then transfer the target media files to Filmora.
After that, you need to select and drag and drop all the photos to the first video track.
2 Preview the photos
After all your photos are placed in timeline, you can zoom in the timeline or preview it in the Preview window to check if it needs any order adjustment or deletion.
3 Adjust Photo Duration to Create Time lapse Video
Select one of the photos in the timeline and right click on it to select Speed and Duration to open the Custom Speed panel. Go to Duration section, and change the duration of the photo to 00:00:00:01 or other duration based on your needs, and then click OK.
You can also add a background music to make time lapse more professional. You can choose a music sound from the built-in music library or import your own audio file.
4 Export your new video
Place the timeline playhead at the beginner, and play it in Preview window to check the time lapse effects. If everything works fine, click the Export tab and choose the target format and click SETTINGS to output the time lapse video. Here you can change the video format and video and audio parameters such as Bit Rate, Encoder, Resolution and so on.
If you want to save and play your video on iPhone, iPod, iPad and other devices, just switch to the Device tab and choose from the device list. What’s more, you can upload the newly made video file to all popular video sites such as YouTube and Vimeo directly from the interface of Filmora. Or turn to DVD tab to burn your video to DVD for playing on TV.
Method 2: Speed Up to Make a Time lapse Video
In case that you want to make a time lapse video with video footage, below are the step-by-step tutorial:
1 Import Video Footage
Just like importing photos to Filmora, follow the steps to import the video clips to media library.
2 Cut out part of the video for time lapse editing (optional)
Next, drag your video onto the video column in the timeline. Select the loaded video and click the “Play” button. While playing the video, drag the slider bar at the start time and hit the “Split” icon to cut out the part you want to do time lapse editing.
3 Speed up to create time lapse video
Right click on the video clip in the timeline to select Speed and Duration. Then a window will pop up for you to adjust the settings of video. Find the Speed option and drag the slider bar to the right to increase the speed. If you set the playback speed to play at 200% the original speed, then the 30-second clip be only 15 seconds (twice the speed). After that click OK. Click the Play button to preview the result. Filmora now support up to 100x fast mo and 0.01x slow mo.
4 Export your new time lapse video
If you are satisfied with the newly made time lapse video, just click Export to output the video footage.
Conclusion
That’s how to make a cool time lapse video with the time lapse video software Filmora, no matter whether you want to make a time lapse video from photos, or speed up the video to make a time lapse video, you can achieve that with a few clicks.
Download Mac Version ](https://tools.techidaily.com/wondershare/filmora/download/ )
Ollie Mattison
Ollie Mattison is a writer and a lover of all things video.
Follow @Ollie Mattison
Also read:
- New The Best Web-Based Video Editors for Chrome OS
- In 2024, Say Goodbye to Typing Best Mac Speech-to-Text Apps You Can Use Right Away Free & No Download Necessary
- New Beyond PowerDirector The Best Mobile Video Editing Apps for 2024
- New In 2024, Remove Filmora Logo A Step-by-Step Guide
- Updated 2024 Approved Demystifying HD Video Pixel Size A Simple Explanation
- New In 2024, The Ultimate Jaycut Guide Tips and Tricks for Free Online Video Editing
- New In 2024, The Ultimate List of Free VOB Video Editors
- Updated Free Video Editing Software Like iMovie The Top Options for 2024
- 2024 Approved S Top Free CCTV Software for Home and Business Security
- The Ultimate FCPX Plugin Troubleshooting Checklist (Updated 2023) for 2024
- New 2024 Approved The Art of Time Lapse 2 Proven Methods for Stunning Videos
- The Ultimate List 10 iMovie Alternatives for Android Users for 2024
- Updated In 2024, Level Up Your Edits Top 10 Premiere Pro Transition Plugins
- New Unlock Seamless Audio A Step-by-Step Guide to L-Cuts and J-Cuts in FCPX
- In 2024, Online Video Promotion Experts
- Updated Bend Reality with These 10 Glitch Art Video Editing Apps for iOS and Android for 2024
- Updated 2024 Approved Best MTS Video Editors Top Picks and Reviews
- 2024 Approved MOD Video Editing Without the Cost Top 5 Free Editors
- Updated 2024 Approved Mac Movie Magic 8 Essential Video Editing Tools
- Updated Top 16 AVI Video Cutters Trim/Cut AVI Videos Windows, MAC, Android, iPhone, and Online for 2024
- New IPhone App Essentials Top Downloads, Ratings, and Reviews for 2024
- In 2024, Apple ID is Greyed Out On iPhone X How to Bypass?
- 2024 Approved Step by Step to Cut Videos in Lightworks
- Updated In 2024, Free Online Subtitle Software Top 10 Recommendations
- What To Do if Your Vivo V29 Pro Auto Does Not Work | Dr.fone
- In 2024, How to Change Location On Facebook Dating for your Realme Narzo 60 Pro 5G | Dr.fone
- In 2024, How to Bypass Apple iPhone 15 Pro Max Passcode Easily Video Inside | Dr.fone
- Updated In 2024, GIF to JPG Is as Simple as a Blink of an Eye
- Full Guide How To Fix Connection Is Not Private on Oppo F25 Pro 5G | Dr.fone
- How to Hide/Fake Snapchat Location on Your Apple iPhone 14 Plus | Dr.fone
- In 2024, Ultimate Guide to Catch the Regional-Located Pokemon For Vivo Y36 | Dr.fone
- In 2024, A Quick Guide to HTC FRP Bypass Instantly
- How to Reset your Realme V30 Lock Screen Password
- Ways to trade pokemon go from far away On Samsung Galaxy S24? | Dr.fone
- In 2024, Top-Notch Solutions for Disabled Apple ID From Apple iPhone 14 Making It Possible
- Android Safe Mode - How to Turn off Safe Mode on Google Pixel 7a? | Dr.fone
- In 2024, How to Change your Apple iPhone 11 Pro Max Location on Twitter | Dr.fone
- How to Use Phone Clone to Migrate Your Tecno Pop 7 Pro Data? | Dr.fone
- 2024 Approved If You Are Looking for an Open-Source, Cross-Platform Video Editor, Shotcut Is a Great Choice? But Is It Truly the Best Video Editor or Is There a Better Alternative Available?
- In 2024, How to Unlock Samsung Galaxy S24+ PIN Code/Pattern Lock/Password
- New In 2024, The Most Straightforward Guide to Learning How to Clone Your Voice
- In 2024, Edit Your Way to Viral Top 10 Vlog Editing Apps for Mobile
- Title: Updated S Top Video Editors for 4K Proxy Files A Comprehensive Guide for 2024
- Author: Morgan
- Created at : 2024-04-28 05:30:17
- Updated at : 2024-04-29 05:30:17
- Link: https://ai-video-tools.techidaily.com/updated-s-top-video-editors-for-4k-proxy-files-a-comprehensive-guide-for-2024/
- License: This work is licensed under CC BY-NC-SA 4.0.
