
:max_bytes(150000):strip_icc():format(webp)/iPad-Mini-Splash-ef002ffe8db643d2a2b4de772ff46790.jpg)
Updated In 2024, The Art of Chroma Keying in FCP X Expert Techniques for Stunning Results
The Art of Chroma Keying in FCP X: Expert Techniques for Stunning Results
FCP X: Create a Chroma-Key (Green-screen) Effect

Benjamin Arango
Mar 27, 2024• Proven solutions
Chroma-key (also called “green screen”) effects are a staple in video production. What FCP X effect does is allow you to make the background behind an actor transparent so you can place the actor into a different environment than a studio.
This is a basic tutorial about Apple Final Cut Pro X, professional video editing software. However, if video editing is new to you, consider Wondershare Filmora for Mac . This is a powerful but easy-to-use tool for users just starting out. Download the free trial version below.
 Download Mac Version ](https://tools.techidaily.com/wondershare/filmora/download/ )
Getting Started
First, the best thing you can do to improve the quality of your keys is to improve how you shoot them. Here are seven basic production rules:
- Actors should be at least 10 feet in front of the green screen. This avoids light from the background “spilling” around their body or shoulders.
- In general, don’t cast shadows on the green screen. Be very careful shooting feet.
- The green background should be as smooth as possible. Paint is always better than fabric; avoid wrinkles and folds.
- The green background should be lit smoothly, both from side to side and top to bottom. I try to have the green background display between 40-50% level on the waveform monitor.
- There is NO relationship between how the background is lit and how your actors are lit. This article will illustrate that.
- Light your background for smoothness. Light your actors for drama.
- Don’t worry about having the green background fill the frame. It only needs to completely surround the edges of your actors. Garbage mattes are used to get rid of junk around the edges.
Setting up the Key

The green screen image is always placed above the background. You can place either the green screen or background image into the Primary Storyline. I find it easier to put the background in the Primary Storyline, because it makes editing the green screen image easier. But this is purely personal choice.
Step 1: Select the green screen clip
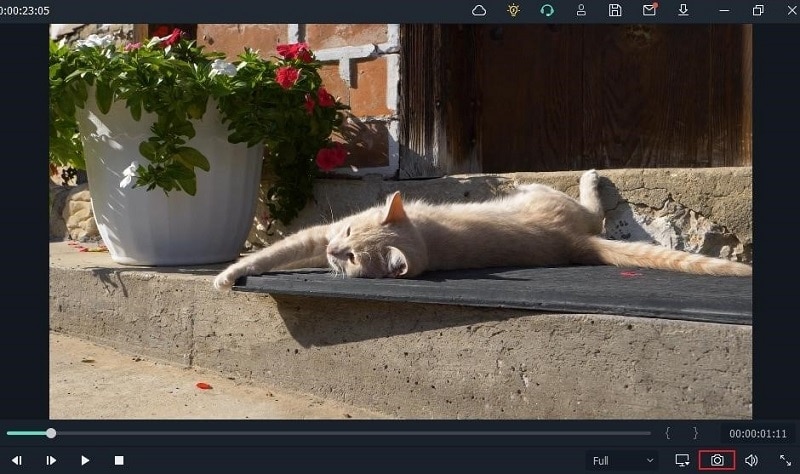
From the Effects Browser > Keying category, double-click the Keyer effect, which applies it to the selected clip. (You can also drag the effect on top of the clip, if you forgot to select the green-screen clip first.)

Don’t panic if your image looks weird – we will fix it.

Click the Sample Color icon. This allows fine-tuning the selection of the background color.

In the green-screen image, drag to select a representative section of the background. I try to get close to the face, but not so close that I accidentally select loose hair or skin.
Your key should look better immediately. Most of the time, you can probably stop here. But there are three other adjustments that can make your key look even better:
- Cleaning up the matte
- Edge adjustments
- Light wrap

Click the Matte button to display your key as a white foreground on a black background.

Your goal is the make the foreground solid white, which means opaque, and the background solid black, which means transparent. Adjust the Fill Holes and Edge Distance sliders until your key looks solid. (For REALLY bad keys, you’ll need to also adjust Color Selection, mentioned below.)

If an edge is too pronounced, or needs help, click the Edges icon.

Step 2: Tweaks Video
Then, click and drag a line from the foreground to the background in the Canvas. Drag the midpoint slider (where my cursor is) until the edge looks the best it can. Different video formats make this easy (ProRes), while others (HDV, avchd) make this much harder. Perfection is impossible – do the best you can.

Final Cut provides four additional tweaks at the bottom of the keyer filter:
- Color Selection
- Matte Tools
- Spill Suppression
- Light Wrap
The first three are designed to clean up poorly shot keys – read the FCP X Help files to learn how these work. (I used the Color Selection tools to clean up the very dark key I use an example later in this article.)
Light wrap, though, is aesthetic. What it does is blend colors from the background into the edges of the foreground, to make the entire key look more “organic,” as if the foreground and background were actually in the same space.
This is a subtle effect, but very cool.

Twirl down Light Wrap and adjust the Amount slider and watch what happens. Drag the other sliders around and see what happens. The nice thing about this setting is that when it looks good to you, it is good. The amount of the effect is totally up to you. Remember, Light Wrap only affects the edges of the foreground and should be used subtly.

When you are done, you have a great looking key!
Clean up the Image with a Garbage Mask

Sometimes, however, you don’t have, ah, perhaps, the best green-screen image to work with. Here, for example, there are lighting instruments in the foreground, with a very inadequately lit green screen in the background. (Sigh… this is just pitiful.)
Once you pull the key – which is film-speak for creating a green-screen shot, as I described above – and get it looking as good as possible, there’s one more step: adding a garbage matte to get rid of all the garbage surrounding your actors.

Once you get your key looking as good as you can – which in this case isn’t all that good – drag the Mask effect (Effects > Keying > Mask) on top of the green-screen clip.
NOTE: The Mask effect should always be added after the Keying effect, so that the Mask is below the Keyer in the Inspector.

Then, drag each of the four circles to create a shape such that your foreground image is contained inside it, and everything you want to exclude is outside. Here, for instance, we removed the light stand, the edge of the green background and the tearing at the top of the image. I’ve found this Mask effect works best when applied to a connected clip.
However, the big limitation of the Mask effect is that you only have four points to work with. That’s where a free effect comes in, which allows you to create far more flexible shapes with it. It’s written by Alex Gollner and is available on his website – alex4d.wordpress.com/fcpx/ – I recommend his effects highly.
How to Create a Chroma-Key in easier ways?
Chroma-key, or green screen, is an essential part of every editor to make all kinds of effects. Is there any way to make this sophisticated procedure easier way? Yes, try Filmora.
In version 10.5 for Mac, Filmora added a new feature: AI portrait. It allows you to do a green screen effect with just one click.
By adopting AI portrait, you can add those stunning effects in simple steps: How to Remove or Change Video Background in One Step?
Or: How to Add a Shake Effect to your Videos?
Conclusion
The chroma-key filter in FCP X allows us to create some amazing effects. If you want to use green screen effects more easily, here is Filmora for you. You can appaly Chroma-Key effects with just a few click. Have fun playing with it.
Download Mac Version ](https://tools.techidaily.com/wondershare/filmora/download/ )
Benjamin Arango
Benjamin Arango is a writer and a lover of all things video.
Follow @Benjamin Arango
Benjamin Arango
Mar 27, 2024• Proven solutions
Chroma-key (also called “green screen”) effects are a staple in video production. What FCP X effect does is allow you to make the background behind an actor transparent so you can place the actor into a different environment than a studio.
This is a basic tutorial about Apple Final Cut Pro X, professional video editing software. However, if video editing is new to you, consider Wondershare Filmora for Mac . This is a powerful but easy-to-use tool for users just starting out. Download the free trial version below.
Download Mac Version ](https://tools.techidaily.com/wondershare/filmora/download/ )
Getting Started
First, the best thing you can do to improve the quality of your keys is to improve how you shoot them. Here are seven basic production rules:
- Actors should be at least 10 feet in front of the green screen. This avoids light from the background “spilling” around their body or shoulders.
- In general, don’t cast shadows on the green screen. Be very careful shooting feet.
- The green background should be as smooth as possible. Paint is always better than fabric; avoid wrinkles and folds.
- The green background should be lit smoothly, both from side to side and top to bottom. I try to have the green background display between 40-50% level on the waveform monitor.
- There is NO relationship between how the background is lit and how your actors are lit. This article will illustrate that.
- Light your background for smoothness. Light your actors for drama.
- Don’t worry about having the green background fill the frame. It only needs to completely surround the edges of your actors. Garbage mattes are used to get rid of junk around the edges.
Setting up the Key
The green screen image is always placed above the background. You can place either the green screen or background image into the Primary Storyline. I find it easier to put the background in the Primary Storyline, because it makes editing the green screen image easier. But this is purely personal choice.
Step 1: Select the green screen clip
From the Effects Browser > Keying category, double-click the Keyer effect, which applies it to the selected clip. (You can also drag the effect on top of the clip, if you forgot to select the green-screen clip first.)
Don’t panic if your image looks weird – we will fix it.
Click the Sample Color icon. This allows fine-tuning the selection of the background color.
In the green-screen image, drag to select a representative section of the background. I try to get close to the face, but not so close that I accidentally select loose hair or skin.
Your key should look better immediately. Most of the time, you can probably stop here. But there are three other adjustments that can make your key look even better:
- Cleaning up the matte
- Edge adjustments
- Light wrap
Click the Matte button to display your key as a white foreground on a black background.
Your goal is the make the foreground solid white, which means opaque, and the background solid black, which means transparent. Adjust the Fill Holes and Edge Distance sliders until your key looks solid. (For REALLY bad keys, you’ll need to also adjust Color Selection, mentioned below.)
If an edge is too pronounced, or needs help, click the Edges icon.
Step 2: Tweaks Video
Then, click and drag a line from the foreground to the background in the Canvas. Drag the midpoint slider (where my cursor is) until the edge looks the best it can. Different video formats make this easy (ProRes), while others (HDV, avchd) make this much harder. Perfection is impossible – do the best you can.
Final Cut provides four additional tweaks at the bottom of the keyer filter:
- Color Selection
- Matte Tools
- Spill Suppression
- Light Wrap
The first three are designed to clean up poorly shot keys – read the FCP X Help files to learn how these work. (I used the Color Selection tools to clean up the very dark key I use an example later in this article.)
Light wrap, though, is aesthetic. What it does is blend colors from the background into the edges of the foreground, to make the entire key look more “organic,” as if the foreground and background were actually in the same space.
This is a subtle effect, but very cool.
Twirl down Light Wrap and adjust the Amount slider and watch what happens. Drag the other sliders around and see what happens. The nice thing about this setting is that when it looks good to you, it is good. The amount of the effect is totally up to you. Remember, Light Wrap only affects the edges of the foreground and should be used subtly.
When you are done, you have a great looking key!
Clean up the Image with a Garbage Mask
Sometimes, however, you don’t have, ah, perhaps, the best green-screen image to work with. Here, for example, there are lighting instruments in the foreground, with a very inadequately lit green screen in the background. (Sigh… this is just pitiful.)
Once you pull the key – which is film-speak for creating a green-screen shot, as I described above – and get it looking as good as possible, there’s one more step: adding a garbage matte to get rid of all the garbage surrounding your actors.
Once you get your key looking as good as you can – which in this case isn’t all that good – drag the Mask effect (Effects > Keying > Mask) on top of the green-screen clip.
NOTE: The Mask effect should always be added after the Keying effect, so that the Mask is below the Keyer in the Inspector.
Then, drag each of the four circles to create a shape such that your foreground image is contained inside it, and everything you want to exclude is outside. Here, for instance, we removed the light stand, the edge of the green background and the tearing at the top of the image. I’ve found this Mask effect works best when applied to a connected clip.
However, the big limitation of the Mask effect is that you only have four points to work with. That’s where a free effect comes in, which allows you to create far more flexible shapes with it. It’s written by Alex Gollner and is available on his website – alex4d.wordpress.com/fcpx/ – I recommend his effects highly.
How to Create a Chroma-Key in easier ways?
Chroma-key, or green screen, is an essential part of every editor to make all kinds of effects. Is there any way to make this sophisticated procedure easier way? Yes, try Filmora.
In version 10.5 for Mac, Filmora added a new feature: AI portrait. It allows you to do a green screen effect with just one click.
By adopting AI portrait, you can add those stunning effects in simple steps: How to Remove or Change Video Background in One Step?
Or: How to Add a Shake Effect to your Videos?
Conclusion
The chroma-key filter in FCP X allows us to create some amazing effects. If you want to use green screen effects more easily, here is Filmora for you. You can appaly Chroma-Key effects with just a few click. Have fun playing with it.
Download Mac Version ](https://tools.techidaily.com/wondershare/filmora/download/ )
Benjamin Arango
Benjamin Arango is a writer and a lover of all things video.
Follow @Benjamin Arango
Fast Forward: Best GIF Speed Editors for Any Device
Top 10 Best GIF Speed Changers

Shanoon Cox
Mar 27, 2024• Proven solutions
The world is shifting, with more and more businesses and companies using online imagery and video content as a means of reaching their target audience and demographic wherever they may be - and GIF’s represent one of the biggest growing trends of the decade.
But not all GIF’s are perfect. Some react far too quickly, while some are very slow and clunky in their movement – with video editors and animators finding that simply changing the speed of a GIF can have a huge impact on the way it is viewed and used by consumers.
Part 1: Best GIF Speed Changer Software: Wondershare Filmora
If you are looking for a gif editor that empowers you to create gifs better, you should try some desktop tools. Here I recommend you using Filmora to change gif speed and edit further.
Wondershare Filmora is an easy-to-use video editor for all creators. With its user-friendly interface, a wide range of editing tools, and tons of video effects, you can create videos and change the speed of gifs easily.
How To Change GIF Speed In Filmora Video Editor?
Below is a brief step by step tutorial about changing the speed of gif with Filmora. Click to get more details about how to convert and edit gifs with Filmora.
- With your gifs open on the screen, right click and select Speed and Duration .
- In the Custom Speed window, you will see a speed slider locates at the middle, which indicates the default 1.x speed. And the Duration option suggests the duration of the gif.
- To change the speed of gif, you can drag the speed slider forward or backward to speed up or slow down the playback. Or, you can just enter the number to a specific duration.
- With such an easy process for changing the GIF speed, users will find they can adjust the clip to their hearts content, until they achieve the perfect finish.

Part 2: Best Free GIF Speed Changers That Can Be Found Online
There are a few GIF speed changers which can be found online, free of charge, with varying levels of effectiveness and ease of usability dependent on the device you are using to create your GIF.
1. EZGIF.com
This online GIF speed editor offers all the usability of a basic Windows image or video editing program, but with all the technological expertise of a modern video editor. GIF’s can be edited as GIF’s or as MP4 files, and though the site takes a while to download the completed files, the end result is high in quality and creates a seamless pattern of movement. Other features include:
- No registration is required and there is no user limit – this really is a free editing site
- Colour editing and text overlay can be instantly added to any GIF footage

To change the speed of your GIF using EzGIF, visit this page https://ezgif.com/speed .
Once your GIF is uploaded to the free-to-use site, you can alter the percentage of current speed using a basic drop down – something which should always be altered based on the idea of 100% representing the original speed. Changing the percentage to 200% will make the GIF run 2x faster, and so on.
2. Veed.io
This site, found at https://www.veed.io/tools/gif-speed-changer is a great way of editing your GIF speed quickly and easily – using just a few basic steps. Once users have arrived on the site and clicked on the big blue ‘Get Started’ button, they will find themselves faced with a very simple upload tool.

From there the size, speed and colouring can be altered on their GIF, with the ability to add music also available. Changing the speed can be done using a selection of pre-programmed buttons – ranging from 0.5x (half the original speed) up to 2x (double the original speed). Users can also select the custom speed button and play around with a speed of their own making.
3. Lunapic

What we like about Lunapic is the way that the site allows us to change not only the GIF speed but also the order in which different images and visuals are presented – giving the user a chance to upload new content to add into their GIF or else simply adjust the speed and timing delay on the original clip. Users can add animation to certain aspects and parts of the video or image and can set the looping option of their GIF to start and end at any point – altering the way the end consumer views the starting image. The speeds included on the site may be determined in advance giving you a limited choice, but the range available means this isn’t too much of a problem.
4. GifGit

Cheesy website names aside, this online tool is super easy to use with a very basic user interface. Found through this site - https://www.gifgit.com/gif/edit - editing GIF’s is a simple case of uploading the GIF clip and using the Delay tool as a way of setting the speed using the delay of milliseconds on each frame. This number, in the example sitting at 80, refers to the number of milliseconds that will be spent on each frame of the GIF – with a lower number enabling the GIF to move faster while a larger delay number will make your GIF play much slower.
This site is good if you’re happy to experiment with a little trial and error!
5. IMG Flip
As with many online tools, this site does come with limitations – however, in our opinion the vast range of customisable options and editing features outweigh the fact that your GIF’s can only be stored up to 4MB before you have to start paying. For the most part, this is a site which is ideal for those who are simply looking to edit one or two GIF’s – if you’re looking to make a habit of it, then you would be best looking at one of the other sites which offers more in terms of storage and free uses.

Get familiar with IMG Flip through this link - https://imgflip.com/gif-maker - and spend some time working through the different options available. To change the speed you simply need upload your clip and then adjust the speed as a percentage of the original clip – 100% being the starting point, with 200% running the GIF at twice the speed and 50% running it at half speed.
Part 3: Best GIF Speed Changers for iOS And Android
There is little that can’t be done on a smartphone in today’s world. Our phones are what we have with us at all times, and so it follows that any kind of editing we hope to do should be achievable using these portable devices – after all, modern smartphones are now fitted with cameras which surpass the capability of even some of the most expensive cameras on the market. So, which are the best GIF speed changers for phones?
1. GIF Maker - ImgPlay
We start with a simple one which can be found on the app store using any search for a GIF app. This particular app plays on the concept of building your own memes, giving users a chance to enhance their own comic value on platforms like WhatsApp and Facebook using their own images or multiple GIF’s strung together. We particularly love the fact that ImgPlay’s platform allows users to add their own text and emojis over the top of the visuals, completely personalising the end product and creating something which is unique for their own use. A simple slider tool allows for easy editing of the GIF speed, presenting an all-round great tool for beginners and experience GIF makers alike.
2. Imgur – Funny Meme and GIF Maker
Available for both Android and iOS users

The Imgur app is one of the most popular GIF creation tools out there – offering users with a platform which allows them edit as many GIFs as they like, play with the speed of existing and new GIFs, and share their creations with other users who can share your designs and help you go viral. As much an online community as a GIF editing tool, Imgur could well be the new Instagram – if Instagram suddenly decided to wave goodbye to the influencers and adverts and make way for user built content and humorous motion videos instead!
3. GIF Camera
Exclusive to Android

This is a tool which supports the creation of GIFs using actions and movements which you capture on camera straight into the app. Opening the app, you simply select the camera feature and capture the movement or motion – before diving into the editing of speed, colour, appearance and overlays. A great tool which is instant to use and allows you to create funny and more serious GIFs depending on the movement you capture.
4. Gifx
Launched as an iPhone tool

This platform is designed to allow users to edit and add to existing GIFs which they may want to adjust, add filters to and overlay with music. As with many of the other portable device tools created for Android and iPhone, the main features of this app are its user friendly interface and the fact that all GIFs created can be downloaded directly to the phone or uploaded straight to social media – depending on how the user intends to use their GIF.
5. GIF Studio
Finally, an Android tool.

One of the fastest tools both to understand and to use, GIF studio really lets you feel like you are in a proper video editing studio – even when using the limited screen size of your phone. Users can edit the speed on existing GIFs or can create new collages with multiple GIFs, benefitting from added animation and colour and visual effects without losing the quality of the original imagery or footage.
GIF Speed Changer FAQ
Can I slow down a GIF?
In short, yes. How you do this will depend on the platform you use, however for the most part, any platform which allows the GIF to be sped up will also allow you to slow it down.
How do you change the speed of a GIF in PowerPoint?
Unfortunately, there is no tool within PowerPoint that allows users to adjust the speed of an external GIF. The small animations and movements of images and words created and controlled within PowerPoint can be adjusted in the settings of each animation tool – however, at present, GIFs themselves are unable to be altered in PowerPoint itself.
How do you make a GIF 30fps?
This number refers to the frame control time, with most computer displays running at around 60fps. To adjust this number to 30fps, the user will need to enter the settings of the GIF and set the run time at 30 for a delay of 0.03 seconds on each frame.
Why is frame rate important in GIF animation and how do you change frame rate in GIF exportation?
Frame rate comes into play when watching back the GIF as a piece of complete footage – with frame rate affecting the overall smooth transition of the GIF from frame to frame and back to the beginning. If your frame rate isn’t controlled, the finish will be jumpy and won’t look good. When you move to convert and export your GIF, you will have an option to adjust the loop setting and timeline setting – as well as the frames per second. Setting this at 30 will provide you with a seamless and consistently high quality finish – perfect for your brand new GIF.
Shanoon Cox
Shanoon Cox is a writer and a lover of all things video.
Follow @Shanoon Cox
Shanoon Cox
Mar 27, 2024• Proven solutions
The world is shifting, with more and more businesses and companies using online imagery and video content as a means of reaching their target audience and demographic wherever they may be - and GIF’s represent one of the biggest growing trends of the decade.
But not all GIF’s are perfect. Some react far too quickly, while some are very slow and clunky in their movement – with video editors and animators finding that simply changing the speed of a GIF can have a huge impact on the way it is viewed and used by consumers.
Part 1: Best GIF Speed Changer Software: Wondershare Filmora
If you are looking for a gif editor that empowers you to create gifs better, you should try some desktop tools. Here I recommend you using Filmora to change gif speed and edit further.
Wondershare Filmora is an easy-to-use video editor for all creators. With its user-friendly interface, a wide range of editing tools, and tons of video effects, you can create videos and change the speed of gifs easily.
How To Change GIF Speed In Filmora Video Editor?
Below is a brief step by step tutorial about changing the speed of gif with Filmora. Click to get more details about how to convert and edit gifs with Filmora.
- With your gifs open on the screen, right click and select Speed and Duration .
- In the Custom Speed window, you will see a speed slider locates at the middle, which indicates the default 1.x speed. And the Duration option suggests the duration of the gif.
- To change the speed of gif, you can drag the speed slider forward or backward to speed up or slow down the playback. Or, you can just enter the number to a specific duration.
- With such an easy process for changing the GIF speed, users will find they can adjust the clip to their hearts content, until they achieve the perfect finish.
Part 2: Best Free GIF Speed Changers That Can Be Found Online
There are a few GIF speed changers which can be found online, free of charge, with varying levels of effectiveness and ease of usability dependent on the device you are using to create your GIF.
1. EZGIF.com
This online GIF speed editor offers all the usability of a basic Windows image or video editing program, but with all the technological expertise of a modern video editor. GIF’s can be edited as GIF’s or as MP4 files, and though the site takes a while to download the completed files, the end result is high in quality and creates a seamless pattern of movement. Other features include:
- No registration is required and there is no user limit – this really is a free editing site
- Colour editing and text overlay can be instantly added to any GIF footage
To change the speed of your GIF using EzGIF, visit this page https://ezgif.com/speed .
Once your GIF is uploaded to the free-to-use site, you can alter the percentage of current speed using a basic drop down – something which should always be altered based on the idea of 100% representing the original speed. Changing the percentage to 200% will make the GIF run 2x faster, and so on.
2. Veed.io
This site, found at https://www.veed.io/tools/gif-speed-changer is a great way of editing your GIF speed quickly and easily – using just a few basic steps. Once users have arrived on the site and clicked on the big blue ‘Get Started’ button, they will find themselves faced with a very simple upload tool.
From there the size, speed and colouring can be altered on their GIF, with the ability to add music also available. Changing the speed can be done using a selection of pre-programmed buttons – ranging from 0.5x (half the original speed) up to 2x (double the original speed). Users can also select the custom speed button and play around with a speed of their own making.
3. Lunapic
What we like about Lunapic is the way that the site allows us to change not only the GIF speed but also the order in which different images and visuals are presented – giving the user a chance to upload new content to add into their GIF or else simply adjust the speed and timing delay on the original clip. Users can add animation to certain aspects and parts of the video or image and can set the looping option of their GIF to start and end at any point – altering the way the end consumer views the starting image. The speeds included on the site may be determined in advance giving you a limited choice, but the range available means this isn’t too much of a problem.
4. GifGit
Cheesy website names aside, this online tool is super easy to use with a very basic user interface. Found through this site - https://www.gifgit.com/gif/edit - editing GIF’s is a simple case of uploading the GIF clip and using the Delay tool as a way of setting the speed using the delay of milliseconds on each frame. This number, in the example sitting at 80, refers to the number of milliseconds that will be spent on each frame of the GIF – with a lower number enabling the GIF to move faster while a larger delay number will make your GIF play much slower.
This site is good if you’re happy to experiment with a little trial and error!
5. IMG Flip
As with many online tools, this site does come with limitations – however, in our opinion the vast range of customisable options and editing features outweigh the fact that your GIF’s can only be stored up to 4MB before you have to start paying. For the most part, this is a site which is ideal for those who are simply looking to edit one or two GIF’s – if you’re looking to make a habit of it, then you would be best looking at one of the other sites which offers more in terms of storage and free uses.
Get familiar with IMG Flip through this link - https://imgflip.com/gif-maker - and spend some time working through the different options available. To change the speed you simply need upload your clip and then adjust the speed as a percentage of the original clip – 100% being the starting point, with 200% running the GIF at twice the speed and 50% running it at half speed.
Part 3: Best GIF Speed Changers for iOS And Android
There is little that can’t be done on a smartphone in today’s world. Our phones are what we have with us at all times, and so it follows that any kind of editing we hope to do should be achievable using these portable devices – after all, modern smartphones are now fitted with cameras which surpass the capability of even some of the most expensive cameras on the market. So, which are the best GIF speed changers for phones?
1. GIF Maker - ImgPlay
We start with a simple one which can be found on the app store using any search for a GIF app. This particular app plays on the concept of building your own memes, giving users a chance to enhance their own comic value on platforms like WhatsApp and Facebook using their own images or multiple GIF’s strung together. We particularly love the fact that ImgPlay’s platform allows users to add their own text and emojis over the top of the visuals, completely personalising the end product and creating something which is unique for their own use. A simple slider tool allows for easy editing of the GIF speed, presenting an all-round great tool for beginners and experience GIF makers alike.
2. Imgur – Funny Meme and GIF Maker
Available for both Android and iOS users
The Imgur app is one of the most popular GIF creation tools out there – offering users with a platform which allows them edit as many GIFs as they like, play with the speed of existing and new GIFs, and share their creations with other users who can share your designs and help you go viral. As much an online community as a GIF editing tool, Imgur could well be the new Instagram – if Instagram suddenly decided to wave goodbye to the influencers and adverts and make way for user built content and humorous motion videos instead!
3. GIF Camera
Exclusive to Android
This is a tool which supports the creation of GIFs using actions and movements which you capture on camera straight into the app. Opening the app, you simply select the camera feature and capture the movement or motion – before diving into the editing of speed, colour, appearance and overlays. A great tool which is instant to use and allows you to create funny and more serious GIFs depending on the movement you capture.
4. Gifx
Launched as an iPhone tool
This platform is designed to allow users to edit and add to existing GIFs which they may want to adjust, add filters to and overlay with music. As with many of the other portable device tools created for Android and iPhone, the main features of this app are its user friendly interface and the fact that all GIFs created can be downloaded directly to the phone or uploaded straight to social media – depending on how the user intends to use their GIF.
5. GIF Studio
Finally, an Android tool.
One of the fastest tools both to understand and to use, GIF studio really lets you feel like you are in a proper video editing studio – even when using the limited screen size of your phone. Users can edit the speed on existing GIFs or can create new collages with multiple GIFs, benefitting from added animation and colour and visual effects without losing the quality of the original imagery or footage.
GIF Speed Changer FAQ
Can I slow down a GIF?
In short, yes. How you do this will depend on the platform you use, however for the most part, any platform which allows the GIF to be sped up will also allow you to slow it down.
How do you change the speed of a GIF in PowerPoint?
Unfortunately, there is no tool within PowerPoint that allows users to adjust the speed of an external GIF. The small animations and movements of images and words created and controlled within PowerPoint can be adjusted in the settings of each animation tool – however, at present, GIFs themselves are unable to be altered in PowerPoint itself.
How do you make a GIF 30fps?
This number refers to the frame control time, with most computer displays running at around 60fps. To adjust this number to 30fps, the user will need to enter the settings of the GIF and set the run time at 30 for a delay of 0.03 seconds on each frame.
Why is frame rate important in GIF animation and how do you change frame rate in GIF exportation?
Frame rate comes into play when watching back the GIF as a piece of complete footage – with frame rate affecting the overall smooth transition of the GIF from frame to frame and back to the beginning. If your frame rate isn’t controlled, the finish will be jumpy and won’t look good. When you move to convert and export your GIF, you will have an option to adjust the loop setting and timeline setting – as well as the frames per second. Setting this at 30 will provide you with a seamless and consistently high quality finish – perfect for your brand new GIF.
Shanoon Cox
Shanoon Cox is a writer and a lover of all things video.
Follow @Shanoon Cox
28 Essential Video to GIF Converters for Social Media Enthusiasts
GIF pictures are becoming more popular among users due to their ability to communicate many data. GIFs are a good option when you can’t fit large movies into your project but want to offer more precise visual information. Making GIFs is as simple as converting a video clip to GIF. If the GIF file is still too huge, cutting it is excellent.
After a careful review, we picked together the best tools to convert video to GIFs to help you produce GIFs with ease. They’re gif video creators that work on both Windows and Mac.
- Filmora
- Movavi
- Gifski
- Freemore
- GIF Brewery by Gfycat
- Any GIF Animator
- KickMyGraphics
- Instagiffer
- Microsoft GIF Animator
- VideoSolo Video to GIF Converter
- Movie to GIF
- 12 Best Video To GIF Converter Online
- Media.io
- Ezgif-F
- Adobe
- Cloudconvert
- Vistacreate
- Online Converter
- GIPHY
- IMG2GO
- MakeAGIF
- Convertio
- HNET
- ImgFlip
- 5 Best Video To GIF Converter for iPhone/iPad/Android Phone
What’s the Difference Between a Video and a GIF?
GIFs are very popular among digital marketers (and anybody who uses the internet). These little bursts of repeating material may breathe new life into otherwise dull blog posts, emails, web pages, infographics, and other documents. Isn’t it thrilling?
While GIFs and videos may seem identical, the two forms of media are highly distinct, and the differences begin when the file types are first gathered.
GIFs are basically soundless picture collections that have been modified to resemble a video. On the other hand, videos are gathered as a kind of rich media that includes both motion and sound. What’s more, the viewing experiences for these two file kinds are somewhat different.
But why would someone want to convert a video to a GIF, to begin with? There are several explanations for this
GIFs are inexpensive
When converting a video to a GIF, you’re repurposing existing material to create something new. Why not get the most out of your video marketing strategy?
GIFs are simple to create
You don’t need to be a video expert in producing a GIF. Creating a GIF using one of the video-to-GIF converters listed below may take a few minutes.
GIFs are simple to use
GIFs offer motion and excitement to digital information without needing the viewer to devote a significant amount of time and attention - a significant advantage given the typical human attention span of roughly 8 seconds.
GIFs are effective
When Dell executed a GIF-centric marketing campaign, it experienced a 109 percent boost in sales, indicating that consumers appreciate (and react to) this basic but fascinating medium. Check out these video-to-GIF converters below to pick the best one for you.
14 Best Video Splitter for Windows/Mac
1. Filmora
You may quickly create a classic GIF picture as an output using Wondershare Filmora’s interactive platform. All common video file types, such as MKV, WMV, AVI, and MP4, are supported. The greatest thing is that Filmora does not impose any file size restrictions during conversion so that users may convert HD films to GIF graphics.
It’s a powerful image editor with many appealing features that allow you to personalize your picture completely. To create original GIFs, feel free to use complex components, animations, text, overlays, and so on.
In addition, Filmora enables you to extract still photos from videos of the same resolution. The retrieved PNG pictures may be combined and edited to create an intriguing GIF.
Platform: Windows/Mac
Price: Free Trial
Features
- 4k editing support enables users to edit and export videos at a resolution of up to 4k.
- scene detection
- audio equalizer
- GIF stabilization
Pros
- Easy to use, very intuitive interface.
- Plenty of effects and presets. Useful for less experienced people.
- Very many online resources, tutorials, preset packs, effects, etc.
- Outstanding and responsive support. In live chats always polite and professional.
- It is constantly updated.
Cons
- 4K editing sucks sometines
2. Movavi
Movavi Video Editor is a pioneer in the video editing industry due to its simplicity of use and dependable video editing capabilities. This software, available for both Windows and Mac OS, has quickly become a popular favorite. It is one of the best MP4-to-GIF converters because of its speed and reliability. It will let you produce GIFs from your movies in no time.
This program’s ability to batch export files is one of its best features, making producing and converting many GIFs simpler. Therefore, it is the most practical for frequent GIF makers, whether for personal or professional usage.
Though you may need to buy Movavi to get all of these excellent features, a free trial version is available for those who want to check it out before buying. The trial version is also ideal for individuals who need to convert movies to GIFs once.
Platform: Windows/Mac
Price: $49.95/year for 1PC
Features
- Fast processing of 4K videos.
- Timeline markers.
- Keyframe animation.
- Built-in media pack.
- Automatic video creation.
Pros
- Has editing options
- Clear interface
- Supports many formats
Cons
- Only a trial version with limited period is free.
- It’s very basic
- No copy pasting options
3. Gifski
You can convert videos to GIFs using Gifski . Drop a file into the Gifski window or use the Open button to search your Mac for a video. The segment of the video you wish to transform into a GIF will be readily selected.
You may choose the size of your GIF, the frame rate, graphic quality, and how many times it loops using this Mac GIF creator. You can have it repeat indefinitely, and you can also make it bounce (this is where it plays to the end, then plays backward, then forward again, and so on).

Platform: Mac
**Price:**Free
Features
- High-quality GIFs
- Command-based conversion
Pros
- Ihe software is safe to use.
- It support is good
Cons
- It doesn’t work offline
- Some users complain about the search function
4. Freemore
Freemore Video to GIF Converter is software that converts videos into animated GIFs, enabling you to pick the precise frames to include in the GIF and change the frame’s width and height if you have a unique use case.
This program is completely free and supports all of the most common video formats, including MP4, MPEG, MOV, FLV, etc. While this tool is free, it wasn’t necessarily created to be attractive; if you download Freemore, anticipate a more practical design that, while very functional, isn’t particularly pleasing to the eye.
Freemore Video to GIF Converter is only accessible for download on Windows, unfortunate for Mac users.
Platform: Windows/Mac
**Price:**Free
Features
- Convert video files to animated GIFs;
- Make GIFs for a website, mobile phone screensaver, signature, etc.
- Clip video to create GIF;
- Adjust the width and height to suit your needs;
- Support all key video formats.
Pros
- Support multi-core CPU
- Less burden on your system
- Abundant guide content & online support
- Free, safe & no restrictions
Cons
- The maximum input video size is 10 MB
- It might be unstable on a new OS like Windows 10
5. GIF Brewery by Gfycat
Look no farther than GIF Brewery by Gfycat for Mac users searching for a simple video to GIF converter tool.
You may begin by importing a movie, producing a screen recording, or recording straight from your camera using GIF Brewery. You may then customize your GIF by scaling the video, changing the frame rate, and adding filters and overlays to give it a unique style.
Finally, save your GIF to your computer or send it to someone else using iMessage or Mail. The app gets excellent reviews in the app store and is free to download.
**Platform:**Mac
**Price:**Free
Features
- It gives everyone the power to create stunning GIFs from video files.
- It’s simple yet powerful.
Pros
- The GIF Brewery design is good.
- The performance of GIF Brewery is good.
- he GIF Brewery is compatible with lots of devices.
- The support of GIF Brewery is excellent and useful.
- The price of GIF Brewery is free or perhaps freemium.
Cons
- GIF Brewery 3 by Gfycat Reduce battery consumption
- Loads very slowly
6. Any GIF Animator
Any GIF converter app’s simple and powerful design can instantly convert your favorite movies into interactive GIFs. It can play a variety of file types, including WEBM, ASF, MPG, FLV, and AVI. The greatest aspect is that this program also enables users to import media files from optical storage devices such as DVDs and even analyze camera-captured displays. Users may easily select frame rate start and finish time markers, and complex text overlays, loops, and resolution effects are available for customization.
**Platform:**Windows/Mac
**Price:**free with ads
Features
- Its simple and intuitive layout allows you to operate it without consulting the user manual.
- It’s straightforward and hassle-free.
- With the aid of an animation wizard, you can polish your GIF animation. It’s a simple and fast approach to customizing and enhancing your GIF animation.
- You receive a built-in picture editor with a full collection of editing capabilities.
- On Any GIF Animator, you may convert video to gif in various visual formats. PNG, JPEG, TIFF, BMP, GIF, ICO, PSD, PCX, RLE, PIC, DIB, AVI, PCD, WMF, and more formats are included.
Pros
- Easy to install
- Neat interface
- Clips can be edited
- Accepts any video file
Cons
- Sometimes crashes
- Cannot animate photos
- Upload time takes long
- Converting takes long
7. KickMyGraphics
Here’s a simple yet effective GIF converter that can record, generate, and manipulate GIF pictures to deliver high-quality customized output. Users may effortlessly upload animated clips in common file formats such as PNG, BMP, JPG, ordinary GIF, and animated GIF to this site. Users may simply change the output file format, size, and quality parameters. Rotate, trim, stretch, loopback, scale, and many more options are available in the advanced editor.
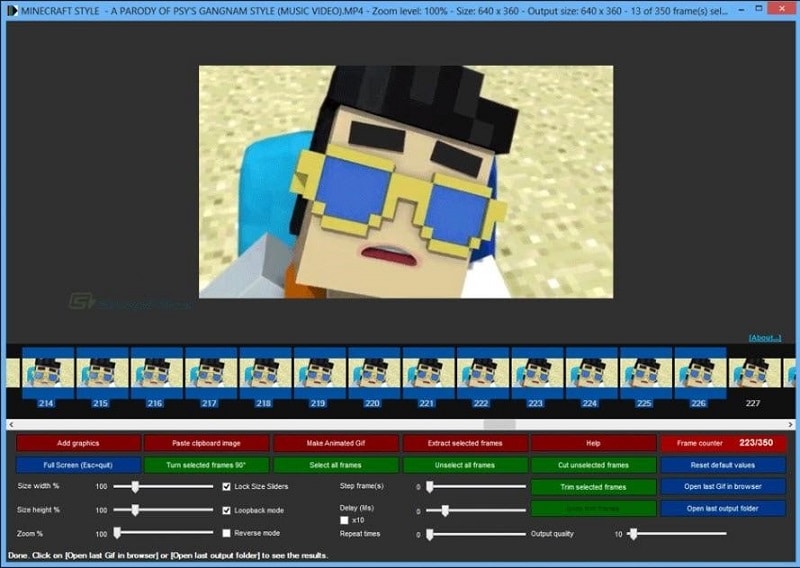
**Platform:**Windows/Mac
**Price:**Free
Features
- It’s a little piece of shareware that converts video to gif.
- You may also import video files in MPG, AVI, MP4, ASF, etc. Animated Gif, Jpg, Bmp, and Png
- files may all be imported.
- Animated GIF pictures may be recorded directly.
- Loop, stretch, pan, reverse, and many more editing options are available.
Pros
- Offers 90 degree image rotation facility.
- Comes with professional level settings.
- Allows users to create an animated GIF from local images.
Cons
- It is complicated for beginners.
- Support limited file formats.
- Has limited functions.
8. Instagiffer
Instagiffer allows users to quickly grab memorable stills from their screens and then process them interactively to create GIFs. Instagiffer can let you import any of your chosen moments for making GIFs, whether they are from your favorite YouTube video, a cute Vine start, or anything amusing from Netflix. This fast professional picture editing application’s loops, filters, and text capabilities are extensive. It is completely free, and there are no viruses, malware, or irritating advertisements on our platform.
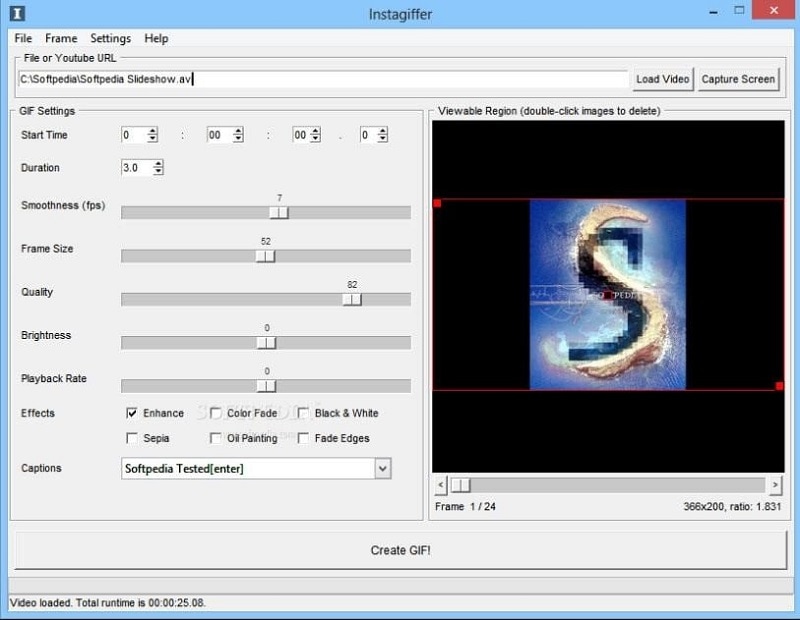
**Platform:**Windows/Mac
**Price:**Free
Features
- You can immediately record the most GIF-worthy moments on your screen.
- Text, filters, loops, and more may be added.
- Completely free video to gif conversion.
- Text and unique logos may be added quickly and easily.
- There will be no watermarks on your gifs if you use Instagriffer.
Pros
- Can make 3D GIFs
- Has a portable version
- The Instagiffer software is safe to use
Cons
- On the Instagriffer website, finding a suitable software installation is tough.
- The program may seem difficult to a novice.
- Its interface is outdated.
9. Microsoft GIF Animator
It is a prominent Microsoft product . This is a free version that you can get from the Microsoft shop. It may be used with Windows 10. You must first sign in with your Microsoft account to download this program. It offers a straightforward user interface with clear controls. You must upload the necessary amount of photographs in file types such as.JPEG,.bmp,.bpg,.png, etc. Set the settings for frame delay, frame count, and so forth. Finally, use the ‘Create’ button to create your GIF animation. Following your selected GIF animation preview, you may download the file.
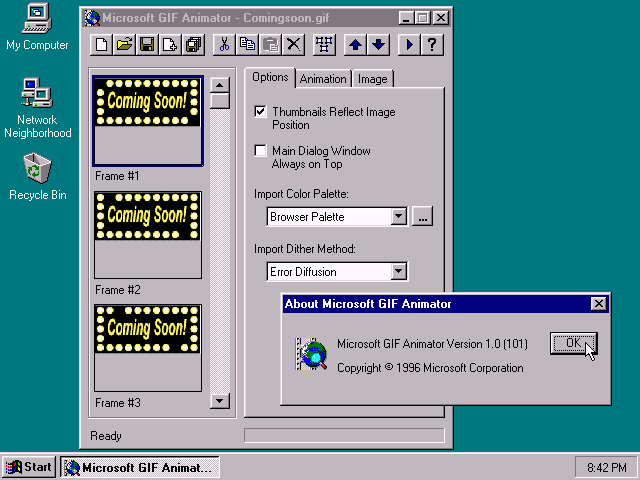
**Platform:**Windows
Price:$60.00 one-time payment
FeaturesFree
- Upload numerous photos into the GIF list box quickly.
- The photographs are quickly assembled into GIF frames as animation with a single click of the ‘Create’ button.
- Set the frame interval to suit your requirements.
Pros
- The free version is enough for creating high-quality GIF animations.
- The findings are simple to utilize on social networking platforms.
- Cost-effective.
Cons
- There are just a few choices for customizing GIF pictures.
- Only suitable for beginners.
- Internet speed can affect how the GIF is played.
10. VideoSolo Video to GIF Converter
When producing animations, VideoSolo video-to-GIF converter program offers several possibilities. It contains features for trimming videos, selecting certain portions of films, and joining bits of several videos to create a GIF file. It contains an integrated video editor that allows you to make changes to your final result. To make your GIF more appealing, you may trim, modify contrast and saturation, and change the video color, among other things. This movie-to-GIF program comes with the bonus of allowing you to add a photo overlay or text to your GIF to make it even more enjoyable. If you’re unhappy with the picture quality or frame rate, you may change them to suit your needs.
**Platform:**Windows/Mac
**Price:**Free
Features
- Make professional-looking GIFs with no technical knowledge.
- Supports almost all video formats going.
- Create cool avatars for games.
Pros
- Several editing options
- Not very resource-intensive
- Supports multiple video formats
Cons
- Some aspects may be difficult to locate.
- The Mac version receives fewer updates than the Windows version.
- You need to download it on your computer.
11. Movie to GIF
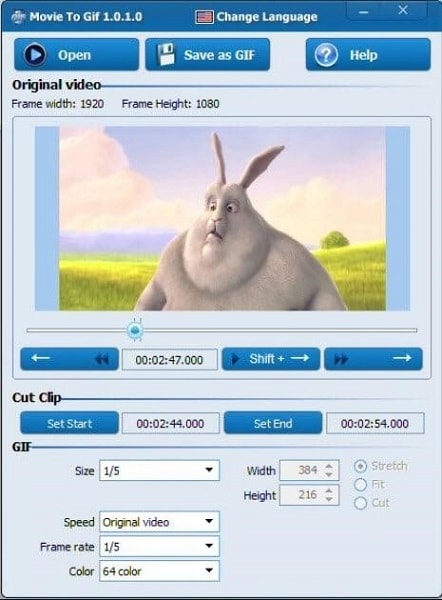
**Platform:**Windows
**Price:**Free/Premium($49.99/mo)
Features
- Convert video to GIF with ease.
- GIF files may be used to play video snippets.
- Increase the frame rate to make the output GIF look like the source video.
- The GIF’s width and height may be changed. An easy-to-use UI.
Pros
- Easy to use.
- Convert videos in batch code.
- Multilingual interface including English, Japanese, Spanish, etc.
- Fast conversion rate.
- HD output quality.
Cons
- Windows version only
- It’s time consuming
- The premium version is very expensive
12 Best Video To GIF Converter Online
2. Ezgif-F
This application is a free GIF animator that may be used in an online mode without any registration. Windows and web browsers are both supported. Choose the ‘GIF Maker’ option on the official website and upload the photographs by hitting the ‘Choose files’ button. You may effortlessly upload many photographs in any format. To produce a high-quality GIF animation, hit the ‘Upload and Create a GIF’ option once you’ve finished uploading.
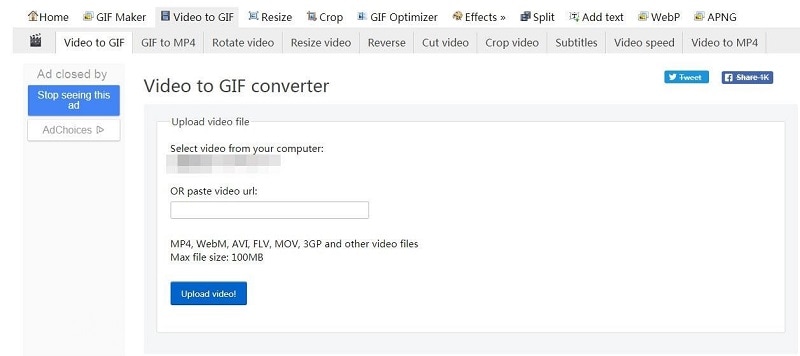
**Price:**Free
Features
- Up to 2000 picture files may be uploaded.
- GIF, PNG, JPEG, APNG, MNG, WebP, and other image file types are all supported.
- Allows you to submit a zip file of photos.
- You have complete control over frame speed.
Pros
- Multiple picture files may be uploaded at once.
- Automate settings to reduce the size of all images in the picture list to the shortest dimension.
- There is no need to pay a subscription fee.
Cons
- When there are a large number of photos in the list, this program takes a long time to make GIF animation.
- Advertisements sometimes disrupt the operation.
3. Adobe
Adobe is a world leading video to GIF converter and other marketing solutions. Everyone – from young artists to big companies – can use our creative, marketing, and document solutions to bring digital ideas to life and deliver comprehensive, compelling GIFs to the right spot at the right time for the best outcomes.
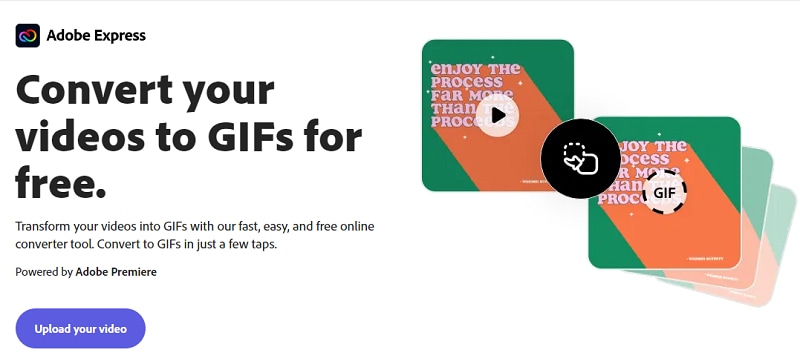
**Price:**Free
Features
- Offers support for raster graphics
- Rich text
- Audio-video embedding
Pros
- The adaptability of what Adobe Animate can do makes it so helpful.
- Utilizing Adobe Animate recordings on sites is typical, so individuals are accustomed to seeing it and have the essential modules introduced.
- The GIFs are little, and is extremely smooth.
Cons
- Cumbersome interface
- Outdated technology
- Limited capabilities
4. Cloudconvert
Online cloudconvert converts your mp4 media files to GIF. Cloudconvert supports a wide range of music, video, document, ebook, archive, image, spreadsheet, and presentation formats, including mp4, webm, and AVI. The video resolution, quality, and file size can all be customized. No software needs to be downloaded or installed.
**Price:**Free
Features
- It can adapt 256 colors and uses a lossless compression technique to contain images.
- It can also contain texts.
- It can contain low sized image animation. So it is frequently used in web publishing.
Pros
- One can set preset properties for the file conversion
- Saves you time and can convert files into the format you are looking for
- Very good price
Cons
- It is confusing in the beginning for the interface and knowing which button to press
- Limits you to your bandwidth, so it is complicated to convert big files because sometimes it throws a timeout error.
5. Vistacreate
When you need to convert video files into elevated animated GIFs, VistaCreate is the tool to use. You can trim the video file, specify the desired GIF size (Original, 800px), choose a video processing method, and GIF length dependent on the frame rate you choose, much like with Ezgif. Even though the maximum file size is limited to 50MB, MP4, WebM, AVI, MPEG, FLV, MOV, and 3GP are all acceptable formats.
If you have a transparent video, don’t worry; the transparency will be preserved in the final animated GIF. Keep in mind that the converted GIF must be downloaded as soon as possible before it is erased from the server.
**Price:**Free
Features
- Video splitter and joiner
Pros
- It allows you to convert videos into GIFs for use on social media, web design, marketing, or blogging.
- It presents a GIF editor tool to help you refine the GIF further.
- It allows you to create both long and short GIFs.
- It boasts flexibility in look, conversion speed, and quality of the output GIF.
Cons
- The templates, icons, animations and stock imagery that come with Crello are impressive.
- They create an impact and attract a lot of comments and engagement when posted.
- The quality and range of posts and videos I can create using their templates have improved my engagement and really stand out.
6. Online Converter
Create animated GIFs from movies and photos using thisfree online tool . It can convert photos to GIFs in addition to being a video converter. It can play a variety of video and picture formats, including mp4, .m4b,.m4v, and.mkv. The converter, however, does not handle picture files that are protected and/or encrypted.
**Price:**Free
Features
- It can convert PDF files to GIF images.
- Converting RAW picture files to GIF is supported.
Pros
- Conveys messages better.
- Small file size.
- Conveys messages better.
Cons
- Internet connection matters.
- Editing is not possible.
- Limited color pattern.
7. GIPHY
Giphy is the most popular online GIF site, with millions of people visiting it every day. It is well-liked since it is simple to use. Before selecting “create,” you enter your video URL into the window’s appropriate area. Simple tools, such as drag-and-drop options for importing films and photographs from your local storage, are also available on this site.
This site, unlike several others, enables you to add sound clips to GIFs, making them more intriguing than their muted equivalents. You can also use tags and descriptions to make your GIFs more appealing.
**Price:**Free
Features
- Intuitive web interface
- Add sound to GIF
- Create 3d GIFs
Pros
- Supports sounds
- Easy to use
Cons
- It is not available offline.
- Some people are unhappy with the search feature.
8. IMG2GO
This online file converter provides comprehensive options for altering the quality and look of animated GIFs. This free online program allows you to make animated GIFS from any video clip, including MP4, AVI, and WEBM. Additional functions include resizing, picture reduction, photo editing, and more.
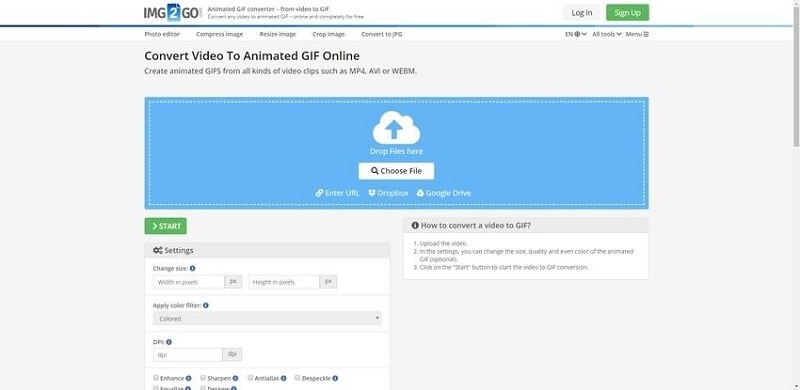
**Price:**Free
Features
- SSL encryption protects files and servers. As a result, emailing your data is completely secure.
- It can play 3GP, AVI, FLV, MOV, MP4, WebM, and WMV files.
- It allows you to apply filter changes, pixel scaling, and DPI.
Pros
- Modern interface
- Quick video and image to GIF conversion
- No loss in quality
Cons
- Loaded with tons of ads
- Not many flexible options
- Adds unnecessary black border to the GIFs
9. MakeAGIF
MakeAGIF isn’t simply a video to GIF converter; it can convert almost anything to GIF. You may upload a video, record a video, paste a video link, or even submit a collection of photographs to create your own GIF on this simple website.
Then you may customize the output by adding stickers and captions, changing the GIF’s pace, and choosing a start and end time. The one drawback to this video to GIF converter is that each GIF has a MakeAGIF watermark; to remove the company’s branding from your clip, you’ll need to pay to the premium version, which costs $11.95 per month.
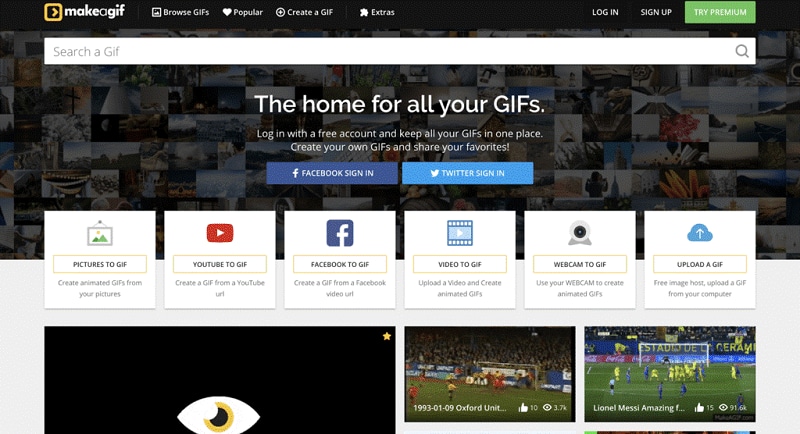
Price:$11.95/mo
Features
- Powerful GIF editing features like speed, framerate, and resolution
Pros
- Easy to use
- You can customize output to your liking
Cons
- Free version has watermarks
- It does not give the best quality output
10.Convertio
One of the easiest programs on our list isConvertio . To convert a video to a GIF, just drag it onto the tool or upload it from your Google Drive or Dropbox account, then click “convert” to finish the process.
Use this tool just if you don’t care about details. Convertio is simple to use, however you can’t set the start and finish of your GIF or the frame rate.
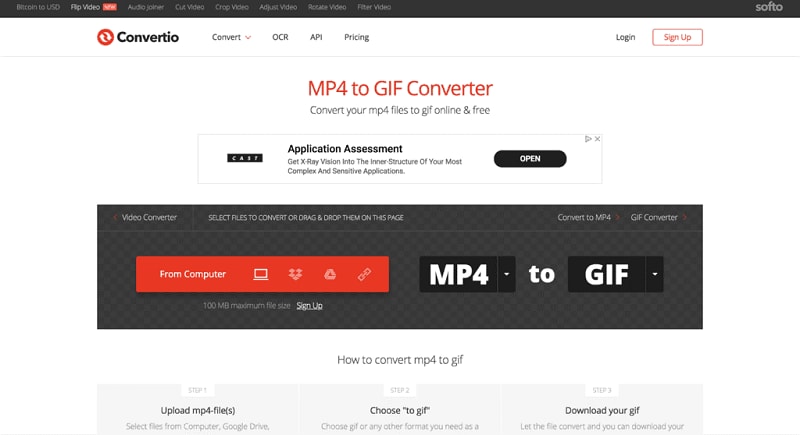
**Price:**Free
Features
- Share files to Drive, DropBox
- Edit FPS
Pros
- Ability to pick source footage from hard disk, Dropbox, Google Drive, or URL.
- Integrates Google Drive and Dropbox services
- Supports batch processing
- Offers an API to app developers
- Safe and secure online tool
- Fast and easy to use
Cons
- Converts a file of only up to 100 MB (for unregistered free users).
11. HNET
Virtually any video (mp4, flv, mpeg, webm, mov, avi, 3gp, etc.) may be converted to animated GIF format withthis online tool . Your video to gif conversion takes place in the cloud, so it won’t take up any of your computer or phone’s resources. This implies it runs on all major operating systems. After one hour, all of the files you submitted and converted will be permanently erased from the server. Your files are private; no one else may see or download them except you.
You may post your GIF picture on imgur, Pinterest, Reddit, Tumblr, 4chan, Deviantart, Flickr, and other popular image sharing sites once your video clip has been converted to GIF format.
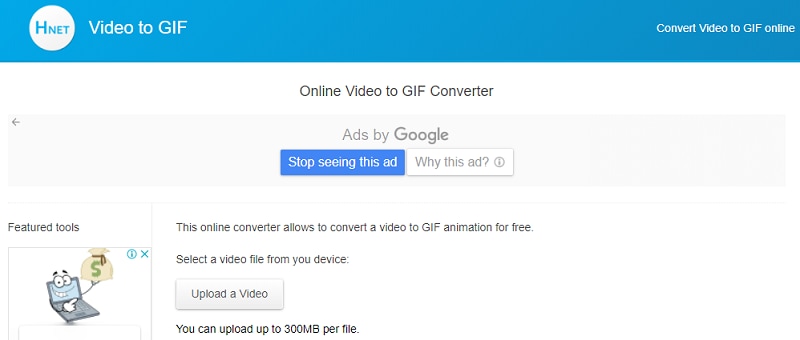
**Price:**Free
Features
- Supports all OS
- File sharing after conversion
- Support many file formats
Pros
- Very easy to use
- Free version comes with handy features
Cons
- It has a file size limit
- Your will be deleted after an hour in case you want to retrieve it.
12. ImgFlip
Imgflip GIF Maker is a simple, fast video to GIF converter that converts mp4 files into animated GIFs. You can turn your clip into a GIF using the Imgflip editor and tinker with parameters like frame rate, size, and more. Because of its sharing features, Imgflip truly shines. You may share your GIF on Facebook, Pinterest, Twitter, Tumblr, and other social media sites by downloading the file, copying the file link, or using the HTML5 image format code. Imgflip is a great alternative to consider if you need to get your GIFs out there quickly.
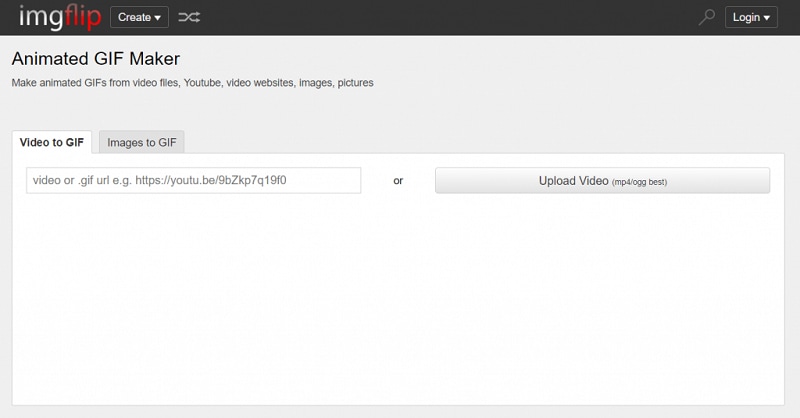
**Price:**Free
Features
- Video editor
- File sharing
- Parameter control
Pros
- Simple and lightweight
- Fast and accurate conversion
Cons
- I glitches when the file size is big
5 Best Video To GIF Converter for iPhone/iPad/Android Phone
1. GIF Maker - Video to GIF, GIF Editor
The comprehensive GIF generator for your Android smartphone is the final app on our list. It’s a great tool for editing all sorts of GIF pictures on your phone, as the name suggests. Although it lacks preset settings like filters and music, it gives everything needed to edit films to their full potential. Any picture or video may be converted and edited.
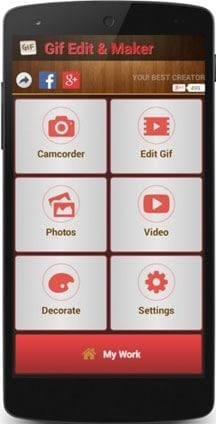
Platform: Android
**Price:**Free
Features
- Add filters and effects to GIFs
Pros
- The UI is simple to use.
- Editing capabilities are extensive.
Cons
- There are no filters available.
- There are no options for adding music or text to your GIF pictures.
2. Videos & GIF maker
This software provides everything you need to make humorous memes and animated GIFs on your iPhone phone. As the tool’s name suggests, you may easily add captions to your photos. You may also choose the output format for the GIF picture and the movie and the start and finish lengths.
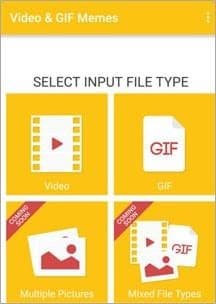
**Platform:**iPhone
**Price:**free
Features
- Select the output format of your GIF
Pros
- The most user-friendly UI.
- The GIF graphics and memes are simple to make.
- Even on older devices, it does not crash and runs well.
- Instagram has many options for creating and sharing square photographs.
Cons
- There are no editing options for GIF pictures.
- There were some issues with posting images to social networking sites.
3. Gif Maker
You should install this application if you want an all-in-one freeGIF maker for your Android phone. In the programs, many attractive effects can be applied with a single click and modify the entire appearance of your images. Additionally, you may utilize the application’s camera to capture movies directly from the app. The nicest thing about this program is that it supports many languages and allows you to generate GIF images with 50 photographs.

**Platform:**Android
**Price:**Free
Features
- Concert up to 50 photos
- Convert real-time videos from the camera
Pros
- Free applications with a lot of functionality.
- It is available in many languages.
- Have a variety of picture effects to use.
Cons
- On certain devices, the app slows and crashes.
- Problems with sharing and uploading photographs with others.
4. Live GIF
This program converts live photos to GIF images on your iPhone. There are no difficult settings to worry about; all you have to do is upload the photographs to the app and make minor adjustments. The finished photographs may be downloaded or shared on social media sites like Facebook and Twitter.
**Platform:**iPhone
**Price:**Free
Features
- Share your GIFs on social media
Pros
- An easy-to-use UI.
- The iPhone 6S and 6S Plus have full 3D Touch capability.
- Sharing images on Twitter and Facebook is simple.
- There are no advertisements in the application.
Cons
- The price is a bit more than the features it offers.
- GIF pictures have no options for changing their resolution.
- There are no possibilities for adding text or music to GIF pictures.
5. Gift
Gift is another iPhone software that effortlessly converts photographs and movies to GIF images. Although this program does not convert Live Images, it is a solid alternative for converting regular photos and movies on older iPhone versions. According to the makers, the program is free to use and has several packages to add different effects and text to your photographs; however, most of the effects are only available in the premium version, which costs money. You may also share GIF pictures from the app on social media sites like Facebook, Twitter, Instagram, and Tumblr.
**Platform:**iPhone
**Price:**Free Version
Features
- Add text to GIFs
- Several effects available
Pros
- Basic editing is free to use.
- It is simple to use and does not need an internet connection.
- Over 70 effects to personalize your images and videos.
- The GIF picture may be saved to your iPhone.
Cons
- The finished GIF picture has a watermark.
- There are no video editing options available.
- Too expensive for the things it offers.
How to Convert a Video to GIF by Using Filmora
Step1Download, Launch and Import Media File to Filmora
To enter the interface, click New Project and then Import Media Files Here. Then drag and drop or add it straight to the window. You may also take a screenshot of the video and extract the shots or frames from it. The recovered photographs will appear in the media library, where you may add numerous video clips.

Step2Edit Video Based on Your Preference and Add Pictures (Optional)
To begin, drag & drop your video clip into the Timeline. Before choosing Export, you may trim, apply an effect, add a subtitle, and other features to the video. To convert the movie to GIF, click the Export option once everything is in order.

Step3Save and Export GIF
After hitting the Export option, a new window will appear where you may choose your export format. Choose GIF as your preferred format. When you’re through editing, click the Export option to save your work as a.gif file.
Note: A Setting button underneath the Resolution allows you to change the file resolution, frame rate, and bit rate.

Notice and Tips When Converting Video to GIF
Choosing software to save a video as a GIF
All operating systems have a way to convert video to GIF, as you can see in this article. All you have to do now is choose the right one. In a nutshell, here’s how you choose the right platform for your GIFs:
**Usability:**The video to GIF platform you use should be simple to use. You want a high-performance converter that’s also simple to use.
Tools: The platform should have all of the tools you’ll need to make an intriguing GIF, such as speed modification, filters, subtitles, and more.
Quality: To avoid pixelation, your platform must be able to make GIFs with a high resolution.
**Speed:**Because you don’t want to waste time waiting for your file to save, the speed at which the video converts to GIF is also significant.
Bottom Line
GIF files are efficient when played in browsers and provide good visual quality. GIFs are now often used to show How-To instructions and post memes on social media sites such as Facebook.
However, a quality video to GIF converter is a must-have tool. You can obtain more control over the source material and the created outputs using professional software rather than free web services. Download Wondershare Filmora today to enjoy the handy video to GIF conversion features that will give you the best experience.
- Media.io
- Ezgif-F
- Adobe
- Cloudconvert
- Vistacreate
- Online Converter
- GIPHY
- IMG2GO
- MakeAGIF
- Convertio
- HNET
- ImgFlip
- 5 Best Video To GIF Converter for iPhone/iPad/Android Phone
What’s the Difference Between a Video and a GIF?
GIFs are very popular among digital marketers (and anybody who uses the internet). These little bursts of repeating material may breathe new life into otherwise dull blog posts, emails, web pages, infographics, and other documents. Isn’t it thrilling?
While GIFs and videos may seem identical, the two forms of media are highly distinct, and the differences begin when the file types are first gathered.
GIFs are basically soundless picture collections that have been modified to resemble a video. On the other hand, videos are gathered as a kind of rich media that includes both motion and sound. What’s more, the viewing experiences for these two file kinds are somewhat different.
But why would someone want to convert a video to a GIF, to begin with? There are several explanations for this
GIFs are inexpensive
When converting a video to a GIF, you’re repurposing existing material to create something new. Why not get the most out of your video marketing strategy?
GIFs are simple to create
You don’t need to be a video expert in producing a GIF. Creating a GIF using one of the video-to-GIF converters listed below may take a few minutes.
GIFs are simple to use
GIFs offer motion and excitement to digital information without needing the viewer to devote a significant amount of time and attention - a significant advantage given the typical human attention span of roughly 8 seconds.
GIFs are effective
When Dell executed a GIF-centric marketing campaign, it experienced a 109 percent boost in sales, indicating that consumers appreciate (and react to) this basic but fascinating medium. Check out these video-to-GIF converters below to pick the best one for you.
14 Best Video Splitter for Windows/Mac
1. Filmora
You may quickly create a classic GIF picture as an output using Wondershare Filmora’s interactive platform. All common video file types, such as MKV, WMV, AVI, and MP4, are supported. The greatest thing is that Filmora does not impose any file size restrictions during conversion so that users may convert HD films to GIF graphics.
It’s a powerful image editor with many appealing features that allow you to personalize your picture completely. To create original GIFs, feel free to use complex components, animations, text, overlays, and so on.
In addition, Filmora enables you to extract still photos from videos of the same resolution. The retrieved PNG pictures may be combined and edited to create an intriguing GIF.
Platform: Windows/Mac
Price: Free Trial
Features
- 4k editing support enables users to edit and export videos at a resolution of up to 4k.
- scene detection
- audio equalizer
- GIF stabilization
Pros
- Easy to use, very intuitive interface.
- Plenty of effects and presets. Useful for less experienced people.
- Very many online resources, tutorials, preset packs, effects, etc.
- Outstanding and responsive support. In live chats always polite and professional.
- It is constantly updated.
Cons
- 4K editing sucks sometines
2. Movavi
Movavi Video Editor is a pioneer in the video editing industry due to its simplicity of use and dependable video editing capabilities. This software, available for both Windows and Mac OS, has quickly become a popular favorite. It is one of the best MP4-to-GIF converters because of its speed and reliability. It will let you produce GIFs from your movies in no time.
This program’s ability to batch export files is one of its best features, making producing and converting many GIFs simpler. Therefore, it is the most practical for frequent GIF makers, whether for personal or professional usage.
Though you may need to buy Movavi to get all of these excellent features, a free trial version is available for those who want to check it out before buying. The trial version is also ideal for individuals who need to convert movies to GIFs once.
Platform: Windows/Mac
Price: $49.95/year for 1PC
Features
- Fast processing of 4K videos.
- Timeline markers.
- Keyframe animation.
- Built-in media pack.
- Automatic video creation.
Pros
- Has editing options
- Clear interface
- Supports many formats
Cons
- Only a trial version with limited period is free.
- It’s very basic
- No copy pasting options
3. Gifski
You can convert videos to GIFs using Gifski . Drop a file into the Gifski window or use the Open button to search your Mac for a video. The segment of the video you wish to transform into a GIF will be readily selected.
You may choose the size of your GIF, the frame rate, graphic quality, and how many times it loops using this Mac GIF creator. You can have it repeat indefinitely, and you can also make it bounce (this is where it plays to the end, then plays backward, then forward again, and so on).
Platform: Mac
**Price:**Free
Features
- High-quality GIFs
- Command-based conversion
Pros
- Ihe software is safe to use.
- It support is good
Cons
- It doesn’t work offline
- Some users complain about the search function
4. Freemore
Freemore Video to GIF Converter is software that converts videos into animated GIFs, enabling you to pick the precise frames to include in the GIF and change the frame’s width and height if you have a unique use case.
This program is completely free and supports all of the most common video formats, including MP4, MPEG, MOV, FLV, etc. While this tool is free, it wasn’t necessarily created to be attractive; if you download Freemore, anticipate a more practical design that, while very functional, isn’t particularly pleasing to the eye.
Freemore Video to GIF Converter is only accessible for download on Windows, unfortunate for Mac users.
Platform: Windows/Mac
**Price:**Free
Features
- Convert video files to animated GIFs;
- Make GIFs for a website, mobile phone screensaver, signature, etc.
- Clip video to create GIF;
- Adjust the width and height to suit your needs;
- Support all key video formats.
Pros
- Support multi-core CPU
- Less burden on your system
- Abundant guide content & online support
- Free, safe & no restrictions
Cons
- The maximum input video size is 10 MB
- It might be unstable on a new OS like Windows 10
5. GIF Brewery by Gfycat
Look no farther than GIF Brewery by Gfycat for Mac users searching for a simple video to GIF converter tool.
You may begin by importing a movie, producing a screen recording, or recording straight from your camera using GIF Brewery. You may then customize your GIF by scaling the video, changing the frame rate, and adding filters and overlays to give it a unique style.
Finally, save your GIF to your computer or send it to someone else using iMessage or Mail. The app gets excellent reviews in the app store and is free to download.
**Platform:**Mac
**Price:**Free
Features
- It gives everyone the power to create stunning GIFs from video files.
- It’s simple yet powerful.
Pros
- The GIF Brewery design is good.
- The performance of GIF Brewery is good.
- he GIF Brewery is compatible with lots of devices.
- The support of GIF Brewery is excellent and useful.
- The price of GIF Brewery is free or perhaps freemium.
Cons
- GIF Brewery 3 by Gfycat Reduce battery consumption
- Loads very slowly
6. Any GIF Animator
Any GIF converter app’s simple and powerful design can instantly convert your favorite movies into interactive GIFs. It can play a variety of file types, including WEBM, ASF, MPG, FLV, and AVI. The greatest aspect is that this program also enables users to import media files from optical storage devices such as DVDs and even analyze camera-captured displays. Users may easily select frame rate start and finish time markers, and complex text overlays, loops, and resolution effects are available for customization.
**Platform:**Windows/Mac
**Price:**free with ads
Features
- Its simple and intuitive layout allows you to operate it without consulting the user manual.
- It’s straightforward and hassle-free.
- With the aid of an animation wizard, you can polish your GIF animation. It’s a simple and fast approach to customizing and enhancing your GIF animation.
- You receive a built-in picture editor with a full collection of editing capabilities.
- On Any GIF Animator, you may convert video to gif in various visual formats. PNG, JPEG, TIFF, BMP, GIF, ICO, PSD, PCX, RLE, PIC, DIB, AVI, PCD, WMF, and more formats are included.
Pros
- Easy to install
- Neat interface
- Clips can be edited
- Accepts any video file
Cons
- Sometimes crashes
- Cannot animate photos
- Upload time takes long
- Converting takes long
7. KickMyGraphics
Here’s a simple yet effective GIF converter that can record, generate, and manipulate GIF pictures to deliver high-quality customized output. Users may effortlessly upload animated clips in common file formats such as PNG, BMP, JPG, ordinary GIF, and animated GIF to this site. Users may simply change the output file format, size, and quality parameters. Rotate, trim, stretch, loopback, scale, and many more options are available in the advanced editor.
**Platform:**Windows/Mac
**Price:**Free
Features
- It’s a little piece of shareware that converts video to gif.
- You may also import video files in MPG, AVI, MP4, ASF, etc. Animated Gif, Jpg, Bmp, and Png
- files may all be imported.
- Animated GIF pictures may be recorded directly.
- Loop, stretch, pan, reverse, and many more editing options are available.
Pros
- Offers 90 degree image rotation facility.
- Comes with professional level settings.
- Allows users to create an animated GIF from local images.
Cons
- It is complicated for beginners.
- Support limited file formats.
- Has limited functions.
8. Instagiffer
Instagiffer allows users to quickly grab memorable stills from their screens and then process them interactively to create GIFs. Instagiffer can let you import any of your chosen moments for making GIFs, whether they are from your favorite YouTube video, a cute Vine start, or anything amusing from Netflix. This fast professional picture editing application’s loops, filters, and text capabilities are extensive. It is completely free, and there are no viruses, malware, or irritating advertisements on our platform.
**Platform:**Windows/Mac
**Price:**Free
Features
- You can immediately record the most GIF-worthy moments on your screen.
- Text, filters, loops, and more may be added.
- Completely free video to gif conversion.
- Text and unique logos may be added quickly and easily.
- There will be no watermarks on your gifs if you use Instagriffer.
Pros
- Can make 3D GIFs
- Has a portable version
- The Instagiffer software is safe to use
Cons
- On the Instagriffer website, finding a suitable software installation is tough.
- The program may seem difficult to a novice.
- Its interface is outdated.
9. Microsoft GIF Animator
It is a prominent Microsoft product . This is a free version that you can get from the Microsoft shop. It may be used with Windows 10. You must first sign in with your Microsoft account to download this program. It offers a straightforward user interface with clear controls. You must upload the necessary amount of photographs in file types such as.JPEG,.bmp,.bpg,.png, etc. Set the settings for frame delay, frame count, and so forth. Finally, use the ‘Create’ button to create your GIF animation. Following your selected GIF animation preview, you may download the file.
**Platform:**Windows
Price:$60.00 one-time payment
FeaturesFree
- Upload numerous photos into the GIF list box quickly.
- The photographs are quickly assembled into GIF frames as animation with a single click of the ‘Create’ button.
- Set the frame interval to suit your requirements.
Pros
- The free version is enough for creating high-quality GIF animations.
- The findings are simple to utilize on social networking platforms.
- Cost-effective.
Cons
- There are just a few choices for customizing GIF pictures.
- Only suitable for beginners.
- Internet speed can affect how the GIF is played.
10. VideoSolo Video to GIF Converter
When producing animations, VideoSolo video-to-GIF converter program offers several possibilities. It contains features for trimming videos, selecting certain portions of films, and joining bits of several videos to create a GIF file. It contains an integrated video editor that allows you to make changes to your final result. To make your GIF more appealing, you may trim, modify contrast and saturation, and change the video color, among other things. This movie-to-GIF program comes with the bonus of allowing you to add a photo overlay or text to your GIF to make it even more enjoyable. If you’re unhappy with the picture quality or frame rate, you may change them to suit your needs.
**Platform:**Windows/Mac
**Price:**Free
Features
- Make professional-looking GIFs with no technical knowledge.
- Supports almost all video formats going.
- Create cool avatars for games.
Pros
- Several editing options
- Not very resource-intensive
- Supports multiple video formats
Cons
- Some aspects may be difficult to locate.
- The Mac version receives fewer updates than the Windows version.
- You need to download it on your computer.
11. Movie to GIF
**Platform:**Windows
**Price:**Free/Premium($49.99/mo)
Features
- Convert video to GIF with ease.
- GIF files may be used to play video snippets.
- Increase the frame rate to make the output GIF look like the source video.
- The GIF’s width and height may be changed. An easy-to-use UI.
Pros
- Easy to use.
- Convert videos in batch code.
- Multilingual interface including English, Japanese, Spanish, etc.
- Fast conversion rate.
- HD output quality.
Cons
- Windows version only
- It’s time consuming
- The premium version is very expensive
12 Best Video To GIF Converter Online
2. Ezgif-F
This application is a free GIF animator that may be used in an online mode without any registration. Windows and web browsers are both supported. Choose the ‘GIF Maker’ option on the official website and upload the photographs by hitting the ‘Choose files’ button. You may effortlessly upload many photographs in any format. To produce a high-quality GIF animation, hit the ‘Upload and Create a GIF’ option once you’ve finished uploading.
**Price:**Free
Features
- Up to 2000 picture files may be uploaded.
- GIF, PNG, JPEG, APNG, MNG, WebP, and other image file types are all supported.
- Allows you to submit a zip file of photos.
- You have complete control over frame speed.
Pros
- Multiple picture files may be uploaded at once.
- Automate settings to reduce the size of all images in the picture list to the shortest dimension.
- There is no need to pay a subscription fee.
Cons
- When there are a large number of photos in the list, this program takes a long time to make GIF animation.
- Advertisements sometimes disrupt the operation.
3. Adobe
Adobe is a world leading video to GIF converter and other marketing solutions. Everyone – from young artists to big companies – can use our creative, marketing, and document solutions to bring digital ideas to life and deliver comprehensive, compelling GIFs to the right spot at the right time for the best outcomes.
**Price:**Free
Features
- Offers support for raster graphics
- Rich text
- Audio-video embedding
Pros
- The adaptability of what Adobe Animate can do makes it so helpful.
- Utilizing Adobe Animate recordings on sites is typical, so individuals are accustomed to seeing it and have the essential modules introduced.
- The GIFs are little, and is extremely smooth.
Cons
- Cumbersome interface
- Outdated technology
- Limited capabilities
4. Cloudconvert
Online cloudconvert converts your mp4 media files to GIF. Cloudconvert supports a wide range of music, video, document, ebook, archive, image, spreadsheet, and presentation formats, including mp4, webm, and AVI. The video resolution, quality, and file size can all be customized. No software needs to be downloaded or installed.
**Price:**Free
Features
- It can adapt 256 colors and uses a lossless compression technique to contain images.
- It can also contain texts.
- It can contain low sized image animation. So it is frequently used in web publishing.
Pros
- One can set preset properties for the file conversion
- Saves you time and can convert files into the format you are looking for
- Very good price
Cons
- It is confusing in the beginning for the interface and knowing which button to press
- Limits you to your bandwidth, so it is complicated to convert big files because sometimes it throws a timeout error.
5. Vistacreate
When you need to convert video files into elevated animated GIFs, VistaCreate is the tool to use. You can trim the video file, specify the desired GIF size (Original, 800px), choose a video processing method, and GIF length dependent on the frame rate you choose, much like with Ezgif. Even though the maximum file size is limited to 50MB, MP4, WebM, AVI, MPEG, FLV, MOV, and 3GP are all acceptable formats.
If you have a transparent video, don’t worry; the transparency will be preserved in the final animated GIF. Keep in mind that the converted GIF must be downloaded as soon as possible before it is erased from the server.
**Price:**Free
Features
- Video splitter and joiner
Pros
- It allows you to convert videos into GIFs for use on social media, web design, marketing, or blogging.
- It presents a GIF editor tool to help you refine the GIF further.
- It allows you to create both long and short GIFs.
- It boasts flexibility in look, conversion speed, and quality of the output GIF.
Cons
- The templates, icons, animations and stock imagery that come with Crello are impressive.
- They create an impact and attract a lot of comments and engagement when posted.
- The quality and range of posts and videos I can create using their templates have improved my engagement and really stand out.
6. Online Converter
Create animated GIFs from movies and photos using thisfree online tool . It can convert photos to GIFs in addition to being a video converter. It can play a variety of video and picture formats, including mp4, .m4b,.m4v, and.mkv. The converter, however, does not handle picture files that are protected and/or encrypted.
**Price:**Free
Features
- It can convert PDF files to GIF images.
- Converting RAW picture files to GIF is supported.
Pros
- Conveys messages better.
- Small file size.
- Conveys messages better.
Cons
- Internet connection matters.
- Editing is not possible.
- Limited color pattern.
7. GIPHY
Giphy is the most popular online GIF site, with millions of people visiting it every day. It is well-liked since it is simple to use. Before selecting “create,” you enter your video URL into the window’s appropriate area. Simple tools, such as drag-and-drop options for importing films and photographs from your local storage, are also available on this site.
This site, unlike several others, enables you to add sound clips to GIFs, making them more intriguing than their muted equivalents. You can also use tags and descriptions to make your GIFs more appealing.
**Price:**Free
Features
- Intuitive web interface
- Add sound to GIF
- Create 3d GIFs
Pros
- Supports sounds
- Easy to use
Cons
- It is not available offline.
- Some people are unhappy with the search feature.
8. IMG2GO
This online file converter provides comprehensive options for altering the quality and look of animated GIFs. This free online program allows you to make animated GIFS from any video clip, including MP4, AVI, and WEBM. Additional functions include resizing, picture reduction, photo editing, and more.
**Price:**Free
Features
- SSL encryption protects files and servers. As a result, emailing your data is completely secure.
- It can play 3GP, AVI, FLV, MOV, MP4, WebM, and WMV files.
- It allows you to apply filter changes, pixel scaling, and DPI.
Pros
- Modern interface
- Quick video and image to GIF conversion
- No loss in quality
Cons
- Loaded with tons of ads
- Not many flexible options
- Adds unnecessary black border to the GIFs
9. MakeAGIF
MakeAGIF isn’t simply a video to GIF converter; it can convert almost anything to GIF. You may upload a video, record a video, paste a video link, or even submit a collection of photographs to create your own GIF on this simple website.
Then you may customize the output by adding stickers and captions, changing the GIF’s pace, and choosing a start and end time. The one drawback to this video to GIF converter is that each GIF has a MakeAGIF watermark; to remove the company’s branding from your clip, you’ll need to pay to the premium version, which costs $11.95 per month.
Price:$11.95/mo
Features
- Powerful GIF editing features like speed, framerate, and resolution
Pros
- Easy to use
- You can customize output to your liking
Cons
- Free version has watermarks
- It does not give the best quality output
10.Convertio
One of the easiest programs on our list isConvertio . To convert a video to a GIF, just drag it onto the tool or upload it from your Google Drive or Dropbox account, then click “convert” to finish the process.
Use this tool just if you don’t care about details. Convertio is simple to use, however you can’t set the start and finish of your GIF or the frame rate.
**Price:**Free
Features
- Share files to Drive, DropBox
- Edit FPS
Pros
- Ability to pick source footage from hard disk, Dropbox, Google Drive, or URL.
- Integrates Google Drive and Dropbox services
- Supports batch processing
- Offers an API to app developers
- Safe and secure online tool
- Fast and easy to use
Cons
- Converts a file of only up to 100 MB (for unregistered free users).
11. HNET
Virtually any video (mp4, flv, mpeg, webm, mov, avi, 3gp, etc.) may be converted to animated GIF format withthis online tool . Your video to gif conversion takes place in the cloud, so it won’t take up any of your computer or phone’s resources. This implies it runs on all major operating systems. After one hour, all of the files you submitted and converted will be permanently erased from the server. Your files are private; no one else may see or download them except you.
You may post your GIF picture on imgur, Pinterest, Reddit, Tumblr, 4chan, Deviantart, Flickr, and other popular image sharing sites once your video clip has been converted to GIF format.
**Price:**Free
Features
- Supports all OS
- File sharing after conversion
- Support many file formats
Pros
- Very easy to use
- Free version comes with handy features
Cons
- It has a file size limit
- Your will be deleted after an hour in case you want to retrieve it.
12. ImgFlip
Imgflip GIF Maker is a simple, fast video to GIF converter that converts mp4 files into animated GIFs. You can turn your clip into a GIF using the Imgflip editor and tinker with parameters like frame rate, size, and more. Because of its sharing features, Imgflip truly shines. You may share your GIF on Facebook, Pinterest, Twitter, Tumblr, and other social media sites by downloading the file, copying the file link, or using the HTML5 image format code. Imgflip is a great alternative to consider if you need to get your GIFs out there quickly.
**Price:**Free
Features
- Video editor
- File sharing
- Parameter control
Pros
- Simple and lightweight
- Fast and accurate conversion
Cons
- I glitches when the file size is big
5 Best Video To GIF Converter for iPhone/iPad/Android Phone
1. GIF Maker - Video to GIF, GIF Editor
The comprehensive GIF generator for your Android smartphone is the final app on our list. It’s a great tool for editing all sorts of GIF pictures on your phone, as the name suggests. Although it lacks preset settings like filters and music, it gives everything needed to edit films to their full potential. Any picture or video may be converted and edited.
Platform: Android
**Price:**Free
Features
- Add filters and effects to GIFs
Pros
- The UI is simple to use.
- Editing capabilities are extensive.
Cons
- There are no filters available.
- There are no options for adding music or text to your GIF pictures.
2. Videos & GIF maker
This software provides everything you need to make humorous memes and animated GIFs on your iPhone phone. As the tool’s name suggests, you may easily add captions to your photos. You may also choose the output format for the GIF picture and the movie and the start and finish lengths.
**Platform:**iPhone
**Price:**free
Features
- Select the output format of your GIF
Pros
- The most user-friendly UI.
- The GIF graphics and memes are simple to make.
- Even on older devices, it does not crash and runs well.
- Instagram has many options for creating and sharing square photographs.
Cons
- There are no editing options for GIF pictures.
- There were some issues with posting images to social networking sites.
3. Gif Maker
You should install this application if you want an all-in-one freeGIF maker for your Android phone. In the programs, many attractive effects can be applied with a single click and modify the entire appearance of your images. Additionally, you may utilize the application’s camera to capture movies directly from the app. The nicest thing about this program is that it supports many languages and allows you to generate GIF images with 50 photographs.
**Platform:**Android
**Price:**Free
Features
- Concert up to 50 photos
- Convert real-time videos from the camera
Pros
- Free applications with a lot of functionality.
- It is available in many languages.
- Have a variety of picture effects to use.
Cons
- On certain devices, the app slows and crashes.
- Problems with sharing and uploading photographs with others.
4. Live GIF
This program converts live photos to GIF images on your iPhone. There are no difficult settings to worry about; all you have to do is upload the photographs to the app and make minor adjustments. The finished photographs may be downloaded or shared on social media sites like Facebook and Twitter.
**Platform:**iPhone
**Price:**Free
Features
- Share your GIFs on social media
Pros
- An easy-to-use UI.
- The iPhone 6S and 6S Plus have full 3D Touch capability.
- Sharing images on Twitter and Facebook is simple.
- There are no advertisements in the application.
Cons
- The price is a bit more than the features it offers.
- GIF pictures have no options for changing their resolution.
- There are no possibilities for adding text or music to GIF pictures.
5. Gift
Gift is another iPhone software that effortlessly converts photographs and movies to GIF images. Although this program does not convert Live Images, it is a solid alternative for converting regular photos and movies on older iPhone versions. According to the makers, the program is free to use and has several packages to add different effects and text to your photographs; however, most of the effects are only available in the premium version, which costs money. You may also share GIF pictures from the app on social media sites like Facebook, Twitter, Instagram, and Tumblr.
**Platform:**iPhone
**Price:**Free Version
Features
- Add text to GIFs
- Several effects available
Pros
- Basic editing is free to use.
- It is simple to use and does not need an internet connection.
- Over 70 effects to personalize your images and videos.
- The GIF picture may be saved to your iPhone.
Cons
- The finished GIF picture has a watermark.
- There are no video editing options available.
- Too expensive for the things it offers.
How to Convert a Video to GIF by Using Filmora
Step1Download, Launch and Import Media File to Filmora
To enter the interface, click New Project and then Import Media Files Here. Then drag and drop or add it straight to the window. You may also take a screenshot of the video and extract the shots or frames from it. The recovered photographs will appear in the media library, where you may add numerous video clips.

Step2Edit Video Based on Your Preference and Add Pictures (Optional)
To begin, drag & drop your video clip into the Timeline. Before choosing Export, you may trim, apply an effect, add a subtitle, and other features to the video. To convert the movie to GIF, click the Export option once everything is in order.

Step3Save and Export GIF
After hitting the Export option, a new window will appear where you may choose your export format. Choose GIF as your preferred format. When you’re through editing, click the Export option to save your work as a.gif file.
Note: A Setting button underneath the Resolution allows you to change the file resolution, frame rate, and bit rate.

Notice and Tips When Converting Video to GIF
Choosing software to save a video as a GIF
All operating systems have a way to convert video to GIF, as you can see in this article. All you have to do now is choose the right one. In a nutshell, here’s how you choose the right platform for your GIFs:
**Usability:**The video to GIF platform you use should be simple to use. You want a high-performance converter that’s also simple to use.
Tools: The platform should have all of the tools you’ll need to make an intriguing GIF, such as speed modification, filters, subtitles, and more.
Quality: To avoid pixelation, your platform must be able to make GIFs with a high resolution.
**Speed:**Because you don’t want to waste time waiting for your file to save, the speed at which the video converts to GIF is also significant.
Bottom Line
GIF files are efficient when played in browsers and provide good visual quality. GIFs are now often used to show How-To instructions and post memes on social media sites such as Facebook.
However, a quality video to GIF converter is a must-have tool. You can obtain more control over the source material and the created outputs using professional software rather than free web services. Download Wondershare Filmora today to enjoy the handy video to GIF conversion features that will give you the best experience.
Ranking the Top Hand-Drawn Whiteboard Animation Software
Top 5 Hand Drawing Whiteboard Animation Makers [Online Tools Included]

Ollie Mattison
Mar 27, 2024• Proven solutions
Maximizing the conversion rates is the ultimate goal of every web marketing professional. The statistics clearly indicate that video content boosts conversion rates, more than any other type of online content, which is the reason why a growing number of marketers choose to incorporate video into their social media marketing strategies. Whiteboard animations have been around since the early days of animation, but their spike in popularity coincides with the rise of digital marketing in the mid-2000s. A little over a decade later, whiteboard animations are used for a wide array of purposes that range from explainer to educational videos. We’ve combed the Internet to find the best whiteboard animation makers in 2020, so let’s dive in and see what these software products and web-based platforms have to offer.
In fact, if you are already a Filmora user, you can try making whiteboard animation with Filmora, which gives you 100% freedom of what you want to make.

Top Five Hand Drawing Whiteboard Animation Makers in 2021
The so-called doodle videos are entertaining to watch because the viewer can see a hand drawing shapes or writing in front of their eyes. Creating this type of animated videos no longer requires years of training and hours of hard work, since there are countless options that enable marketers to produce whiteboard animations in just a few minutes. Here are some of the best whiteboard animation makers online you can find on the market in 2020.
1. Moovly
Price: Free trial available, subscription plans start at $24.92 per month billed annually
Compatibility: web-based
Moovly is much more than an online destination where you can create whiteboard animations effortlessly as it grants you access to more than a million royalty free images, videos, and sounds. The platform’s video editor lets you choose the gender of the hand that is drawing the animation or its skin color. In addition to simulating the hand drawing process of virtually any object you can think of, the Moovly’s editor also enables you to adjust the size of the elements you add to your story or incorporate handwritten text into the animation video you’re producing. The free version of the platform watermarks all videos you export and lacks any of the advanced features that are available if you opt for one of the education or subscription plans. Even so, Moovly is still one of the best web-based whiteboard animation makers you can find on the Internet because it lets you create new videos in just a few quick steps.

2. VideoScribe
Price: Free version available, subscription plans start at $25 per month for a single user
Compatibility: cloud-based or downloadable software for Mac and PC computers
In case you need cloud-based software you can use for free to create animations in a short period of time, then VideoScribe is probably one of the best choices you can make. The software features huge image, video and music libraries that are well-suited for a broad range of whiteboard animations, and it also offers a wide array of hands, pens, and erasers. In addition, you can import assets you’ve created and VideoScribe will animate them for you. The voiceover feature is particularly useful if you are looking to add narration to your explainer and educational videos or product reviews. VideoScribe can only be used offline if you purchase its Pro version and you won’t be able to export HD video files if you opt to create your whiteboard animations with the free version of this software. This whiteboard animation maker is an excellent option for businesses that want to improve their social media presence through the production of animated whiteboard explainer videos or educational institutions that are looking for a way to keep their students engaged.

3. Explaindio
Price: Subscription plans start at $37 per month
Compatibility: macOS, Windows
You can make attention-grabbing whiteboard animations with Explaindio even if you have no previous experience as an animator. The software is equipped with more than 800 doodle sketches, hundreds of HD video backgrounds, 200 ready-made animated scenes, over 300 fonts, and countless full 3D animations. Explaindio also lets you import your own fonts, audio files or external 3D elements and it features a timeline with multiple videos and audio tracks. What’s more, the software has a rich library of transitions you can use to avoid hard cuts between the shots or to change scenes in your whiteboard animations smoothly. Besides whiteboard animations, you can use Explaindio to animate typography, create intros and outros for YouTube videos and to make logo strings. Cloud storage is also available so that you can access your creations while you’re on the go, which is one of the reasons why more than 35.000 YouTubers, marketers, and animators are already using Explaindio.

4. Doodly
Price: Pricing plans start at $39 per month
Compatibility: Windows, macOS
Hiring professional animators to create your whiteboard animations for you is both expensive and time-consuming. Doodly solves both of these issues by enabling you to simply drag and drop animated elements to the timeline and produce visually attractive hand-drawn animations at a reasonable price. The software features an extensive collection of male and female hands whose skin color you can adjust with a single click. There are hundreds of pre-made sketches available, and you just have to add the one you like to the canvas and Doodly will automatically animate the drawing for you. You can also choose if you want to use a whiteboard, blackboard or glassboard surface as a background for your animation. The Doodly Smart Draw technology lets you import and animate any hand drawing so you don’t have to rely on the software’s built-in library of doodles. The best part is that you can export all animations you create with Doodly in Full HD resolution.

5. Vyond
Price: 14-day free trial available, subscription plans start at $299 per year for a single user
Compatibility: web-based
Formerly known as GoAnimate, Vyond has been one of the best cloud-based video animation platforms for more than a decade. Its Whiteboard Animation theme offers a huge selection of props, character actions and other animated elements that can be useful for videos that cover a broad spectrum of topics. Simply select an element you want to add to your video, fine-tune its size on the screen and it will be drawn automatically. Vyond also enables you to import assets you’ve created which grants you more creative freedom, as you don’t necessarily have to rely solely on the built-in whiteboard animation elements this platform offers. The only downside is that you can’t record voiceovers directly from Vyond, and you either have to use an online voice recording service or utilize a desktop-based software product that enables you to record the narration for your upcoming animated video.

Conclusion
Finding ways to attract the attention of your potential customers is never a simple task, but software products and cloud-based video animation platforms make this process somewhat easier. You don’t have to be a skilled animator in order to create hand drawing whiteboard animations since each of the options we featured in this article requires a minimum amount of technical skill.
However, if you somehow think about making more than just whiteboard video, say normal video editing, why not try out Filmora ? With Filmora, you can make any type of video that you want, including whiteboard videos.
Ollie Mattison
Ollie Mattison is a writer and a lover of all things video.
Follow @Ollie Mattison
Ollie Mattison
Mar 27, 2024• Proven solutions
Maximizing the conversion rates is the ultimate goal of every web marketing professional. The statistics clearly indicate that video content boosts conversion rates, more than any other type of online content, which is the reason why a growing number of marketers choose to incorporate video into their social media marketing strategies. Whiteboard animations have been around since the early days of animation, but their spike in popularity coincides with the rise of digital marketing in the mid-2000s. A little over a decade later, whiteboard animations are used for a wide array of purposes that range from explainer to educational videos. We’ve combed the Internet to find the best whiteboard animation makers in 2020, so let’s dive in and see what these software products and web-based platforms have to offer.
In fact, if you are already a Filmora user, you can try making whiteboard animation with Filmora, which gives you 100% freedom of what you want to make.
Top Five Hand Drawing Whiteboard Animation Makers in 2021
The so-called doodle videos are entertaining to watch because the viewer can see a hand drawing shapes or writing in front of their eyes. Creating this type of animated videos no longer requires years of training and hours of hard work, since there are countless options that enable marketers to produce whiteboard animations in just a few minutes. Here are some of the best whiteboard animation makers online you can find on the market in 2020.
1. Moovly
Price: Free trial available, subscription plans start at $24.92 per month billed annually
Compatibility: web-based
Moovly is much more than an online destination where you can create whiteboard animations effortlessly as it grants you access to more than a million royalty free images, videos, and sounds. The platform’s video editor lets you choose the gender of the hand that is drawing the animation or its skin color. In addition to simulating the hand drawing process of virtually any object you can think of, the Moovly’s editor also enables you to adjust the size of the elements you add to your story or incorporate handwritten text into the animation video you’re producing. The free version of the platform watermarks all videos you export and lacks any of the advanced features that are available if you opt for one of the education or subscription plans. Even so, Moovly is still one of the best web-based whiteboard animation makers you can find on the Internet because it lets you create new videos in just a few quick steps.
2. VideoScribe
Price: Free version available, subscription plans start at $25 per month for a single user
Compatibility: cloud-based or downloadable software for Mac and PC computers
In case you need cloud-based software you can use for free to create animations in a short period of time, then VideoScribe is probably one of the best choices you can make. The software features huge image, video and music libraries that are well-suited for a broad range of whiteboard animations, and it also offers a wide array of hands, pens, and erasers. In addition, you can import assets you’ve created and VideoScribe will animate them for you. The voiceover feature is particularly useful if you are looking to add narration to your explainer and educational videos or product reviews. VideoScribe can only be used offline if you purchase its Pro version and you won’t be able to export HD video files if you opt to create your whiteboard animations with the free version of this software. This whiteboard animation maker is an excellent option for businesses that want to improve their social media presence through the production of animated whiteboard explainer videos or educational institutions that are looking for a way to keep their students engaged.
3. Explaindio
Price: Subscription plans start at $37 per month
Compatibility: macOS, Windows
You can make attention-grabbing whiteboard animations with Explaindio even if you have no previous experience as an animator. The software is equipped with more than 800 doodle sketches, hundreds of HD video backgrounds, 200 ready-made animated scenes, over 300 fonts, and countless full 3D animations. Explaindio also lets you import your own fonts, audio files or external 3D elements and it features a timeline with multiple videos and audio tracks. What’s more, the software has a rich library of transitions you can use to avoid hard cuts between the shots or to change scenes in your whiteboard animations smoothly. Besides whiteboard animations, you can use Explaindio to animate typography, create intros and outros for YouTube videos and to make logo strings. Cloud storage is also available so that you can access your creations while you’re on the go, which is one of the reasons why more than 35.000 YouTubers, marketers, and animators are already using Explaindio.
4. Doodly
Price: Pricing plans start at $39 per month
Compatibility: Windows, macOS
Hiring professional animators to create your whiteboard animations for you is both expensive and time-consuming. Doodly solves both of these issues by enabling you to simply drag and drop animated elements to the timeline and produce visually attractive hand-drawn animations at a reasonable price. The software features an extensive collection of male and female hands whose skin color you can adjust with a single click. There are hundreds of pre-made sketches available, and you just have to add the one you like to the canvas and Doodly will automatically animate the drawing for you. You can also choose if you want to use a whiteboard, blackboard or glassboard surface as a background for your animation. The Doodly Smart Draw technology lets you import and animate any hand drawing so you don’t have to rely on the software’s built-in library of doodles. The best part is that you can export all animations you create with Doodly in Full HD resolution.
5. Vyond
Price: 14-day free trial available, subscription plans start at $299 per year for a single user
Compatibility: web-based
Formerly known as GoAnimate, Vyond has been one of the best cloud-based video animation platforms for more than a decade. Its Whiteboard Animation theme offers a huge selection of props, character actions and other animated elements that can be useful for videos that cover a broad spectrum of topics. Simply select an element you want to add to your video, fine-tune its size on the screen and it will be drawn automatically. Vyond also enables you to import assets you’ve created which grants you more creative freedom, as you don’t necessarily have to rely solely on the built-in whiteboard animation elements this platform offers. The only downside is that you can’t record voiceovers directly from Vyond, and you either have to use an online voice recording service or utilize a desktop-based software product that enables you to record the narration for your upcoming animated video.
Conclusion
Finding ways to attract the attention of your potential customers is never a simple task, but software products and cloud-based video animation platforms make this process somewhat easier. You don’t have to be a skilled animator in order to create hand drawing whiteboard animations since each of the options we featured in this article requires a minimum amount of technical skill.
However, if you somehow think about making more than just whiteboard video, say normal video editing, why not try out Filmora ? With Filmora, you can make any type of video that you want, including whiteboard videos.
Ollie Mattison
Ollie Mattison is a writer and a lover of all things video.
Follow @Ollie Mattison
Also read:
- New Top-Rated Online Video Editors for Chromebook Users for 2024
- New 2024 Approved The Complete Guide to Optimizing Your Social Media Visuals
- Updated 2024 Approved Unleash Your Creativity A Comprehensive Guide to Video Editing with Windows Movie Maker
- New Merge Videos Online for Free The Best Options This Year for 2024
- 2024 Approved Top-Rated WebM to MP3 Conversion Software
- Updated 2024 Approved Say Goodbye to Hiss and Hum Mastering Noise Reduction in Final Cut Pro X
- New In 2024, Beyond PowerDirector The Best Mobile Video Editing Apps Of
- New 2024 Approved 10 Must-Try Video Editing Apps for Kids, Featuring Free and Paid Choices
- 2024 Approved Macs Top Video Editing Software Adobe Premiere Pro for Pros
- 2024 Approved Movie Magic on Android A Comprehensive App Guide
- New 2024 Approved The Ultimate FCPX Plugin Collection Top 10 Picks for Video Editors
- Updated The Best Way to Convert Audio Files on a Mac Top MP3 Converters for 2024
- New Top Video Speed Controllers for PC and Mac Free & Paid Options
- New The Best of Google Play Top Android Apps
- Updated Get Stunning Images for Free Commercial Use Made Easy for 2024
- New 2024 Approved Blur, Hide, Protect The Ultimate Guide to Face Blurring in Video
- New 2024 Approved Top Mac Video Editing Software Create Stunning Videos in Minutes
- New 2024 Approved Easy Video Editor for Mac MKVtoolnix Review
- Updated 2024 Approved Free Video Hosting for All 10 Platforms for Personal, Business, and Everything in Between
- Updated VirtualDub Replacement Top Picks for Video Editing Software for 2024
- Updated 2024 Approved Get Started with Filmora 13 Free Video Editor Download
- New Mastering Final Cut Pro The Ultimate 2024 Guide
- Updated Free Video Looper Tools for Endless Playback on Windows and Mac for 2024
- New Free Animation Software Roundup Windows and Mac Compatible for 2024
- In 2024, Stop Motion on Instagram Like a Pro A Beginners Guide
- Updated The Ultimate Guide 10 Best Video Players with Slow Motion for 2024
- Updated The Top iPhone Video Editing Apps You Cant Live Without for 2024
- 2024 Approved Vloggers Paradise 14 Best Video Editing Software for Hot Platforms
- Updated 2024 Approved MP4 to MP3 Conversion on Mobile The Best Apps and Tools
- Updated 2024 Approved No-Cost Video Watermark Solutions Our Top 5 Recommendations
- The Ultimate Guide to Screen Recording with Filmora Scrn Best Practices and More for 2024
- Updated In 2024, Sizing Up Success The Perfect Facebook Video Cover Formula
- Updated In 2024, Best of the Web Top-Rated Free Online Video Combiners
- New In 2024, The Ultimate Guide to Pinnacle Studio Alternatives on Mac
- New The Great DVR Debate TiVo vs Comcast Xfinity
- New In 2024, The Most Talented Lego Stop Motion Artists This Year
- Updated 2024 Approved Create Engaging WhatsApp Videos with These Tools
- New Optimizing Your TikTok Videos Aspect Ratio Tips and Tricks
- Updated The Art of Time Manipulation Speeding Up/Down Videos in Camtasia for 2024
- Updated In 2024, The Best of the Best 10 Cartoon Video Maker Apps for Android and iPhone
- New The Ultimate MP4 Editor for Windows 8 Fast and User-Friendly
- Updated Where to Find Filmora Torrent for Free without Any Virus and Risk? In This Article, I Will Show You a 100 Safe and Useful Way to Get the Filmora Free Torrent
- In 2024, VN Video Editor for Mac Install Now or Discover Alternatives
- New In 2024, From Snapshots to Blockbusters Top Photo Music Video Makers
- How to Remove a Previously Synced Google Account from Your Samsung Galaxy A23 5G
- 10 Free Video Editing Software for Windows 10 Trim, Cut, and More
- Ways to trade pokemon go from far away On Realme 11X 5G? | Dr.fone
- In 2024, How to Change Location on TikTok to See More Content On your Vivo S17e | Dr.fone
- In 2024, Bypass iCloud Activation Lock with IMEI Code From your iPhone 14 Pro
- In 2024, How To Fix OEM Unlock Missing on Vivo Y27s?
- In 2024, Best Pokemons for PVP Matches in Pokemon Go For Nokia C12 | Dr.fone
- In 2024, How To Unlock SIM Cards Of Vivo Y100 5G Without PUK Codes
- 7 Solutions to Fix Error Code 963 on Google Play Of Realme C51 | Dr.fone
- In 2024, Forgotten The Voicemail Password Of Nokia C32? Try These Fixes
- New What Are the 10 Best GIF Creator for 2024
- How to find lost iPhone 14 Pro Max Backup files on Windows PC? | Stellar
- How To Leave a Life360 Group On Vivo Y27 5G Without Anyone Knowing? | Dr.fone
- Universal Unlock Pattern for Samsung Galaxy F15 5G
- Title: Updated In 2024, The Art of Chroma Keying in FCP X Expert Techniques for Stunning Results
- Author: Morgan
- Created at : 2024-04-28 05:32:11
- Updated at : 2024-04-29 05:32:11
- Link: https://ai-video-tools.techidaily.com/updated-in-2024-the-art-of-chroma-keying-in-fcp-x-expert-techniques-for-stunning-results/
- License: This work is licensed under CC BY-NC-SA 4.0.
