

TikTok Video Size and Aspect Ratio A Beginners Guide for 2024
TikTok Video Size and Aspect Ratio: A Beginner’s Guide
2022 Full Guide about TikTok Aspect Ratio
An easy yet powerful editor
Numerous effects to choose from
Detailed tutorials provided by the official channel
TikTok videos are booming these days. The reason behind that is extraordinary content and the perfect TikTok video ratio. No videos will get popular until they are made properly.
In this article
01 [What Is TikTok Aspect Ratio?](#Part 1)
02 [Top 6 Tips for TikTok Video Ads](#Part 2)
Part 1 What Is TikTok Aspect Ratio?
01TikTok Video Maximum Size
When you talk about the TikTok videos then they can be uploaded in more than a single measurement. This means that the maximum size varies according to the dimensions, TikTok video size ratio, lengths and the device which you are using to upload the videos.
02TikTok Video Dimensions: Portrait or Landscape?
You can upload TikTok videos in both portrait and landscape form. However, it is advised to upload the videos in portrait as the social platforms prefer vertical videos. This is because the mainly used device is mobile phone and vertical videos are perfect for them. This also boosts the engagement of the audience. You can also make such videos through smartphones. Additionally, you get an option for selecting the video mode if you create videos using TikTok.
03What is the Maximum Size of a TikTok Video?
The file size for TikTok videos can vary according to iOS and android users. If you are uploading via android then it must be 72MB and for iPhone, it gets increased around 4 times. For iPhones, the maximum file size should be 287.6 MB. This size becomes 500 MB if you talk about the ad videos of TikTok.
04What is the Length of a Video on TikTok?
As far as the length of TikTok videos is concerned, if you are shooting the videos on the app then it could be no longer than 60 seconds. However, the most recommended length of the videos is 15 seconds. The videos that are more than 15 seconds get posted in different segments of 15 seconds. Also, you can upload videos of more than 60 seconds if they are made elsewhere.
Part 2 Top 6 Tips for TikTok Video Ads
01Types of TikTok Video Ads
● Infeed ads: These ads are displayed on the news feed of the user. They can see these ads as they scroll the ‘for you’ section of TikTok. They very well suited to the feed of TikTok. The user can easily scroll around the ads and news feed. When creating a feed ad you must keep in mind that the video should be full screen so that it would make the user stay back to the video. This is the most popular advertising format amongst businesses.
● Top view ads: These ads are shown on the news feed for some seconds. As the user signs in to TikTok and the news feed is opened, these video ads pop up after 3 seconds. However, you get the option to skip the ads. Also, these ads are subjected to sound and auto-play.
● Branded effects ads: These ads allow the user that they can create the videos and ads by using their own custom filters. Through this, they can optimize their videos according to their requirements.
● Brand takeover ads: user will see these ads as soon he opens TikTok. As the name suggests the takeover ads take over the screen for 3 to 4 seconds and then they change into an in-feed video ad. This can be an excellent option to create awareness and generate sales.
● Branded hash tag ads: in these ads you can ask the user to create some in line videos with your product and then post them with a particular hash tag. These ads are perfect to make a reach among the audience and also boost brand awareness.
02How to Optimize TikTok Videos with a Clideo
If you want to optimize your video using Clideo for making it smartphone perfect, then here are some simple steps to do so:
Step 1: first of all, when you are going to optimize video through Clideo, you will need to log in to Clideo.com. Further, upload the video using your personal computer, DropBox account, or Google Drive account. If your video is already posted then it can also be optimized. All you need to do is simply copy-paste the URL and edit it in Clideo.
Step 2: The next step is to resize and optimize the video. As your video will get uploaded an editor will open. Here you have to click on the input custom or preset dimensions. As you are editing TikTok videos you will need to select an aspect ratio of 9:16 or 1:If you want to crop the video you can do it using the editors and position selectors. This tool also allows zooming in and out of the particular frame. You can also change the background colors.
Step 3: After this you will need to download the edited file. Before downloading do not forget to take the preview of the output file and then simply download the video in your device.

03How to Resize Your TikTok Video File
Resizing the TikTok video file is absolutely easy. All you have to do is select or upload the video and resize it using the options given in the app. You can resize the videos according to your choice. Further, save the resized video or simply upload it.
04Top 6 Tips for TikTok Video Ads
Vertical videos: For TikTok videos ads, the easiest way to share them is in the vertical mode. This mode is specially optimized for smartphones and also it gives the best possible view of what you are sharing.
Attention of the audience: It is very essential to grab the attention of your audience. As there is so much traffic on social platforms, it is very important to get the views properly. For this, you will have to make your video eye-catching as well as insert some such things that hold the user back to your video.
Magic of music: TikTok is the platform which has a different magic of music. So don’t forget to add music in your video ads. Keep yourself updated with what is trending in the market so that you can make your videos accordingly.
Centralize the content: It is important to centralize your content or else it will not give you the expected results. Do not add stuff in your video. Make sure that your video is up to the mark and you are offering only what you want to.
Length of videos: The ideal length for TikTok videos is suggested to be 9 to 15 seconds. So assure that your video is not so lengthy and free from stuff.
Use the proper tools: like all the other things, it is also very important to use the proper tools to create and edit the videos. No matter if you creating a video or editing it, all you need to do is use the latest Wondershare Filmora Video Editor tool. By using this tool, you can make your videos exceptionally outstanding. Here you get a number of filters, transitions, text editing and much more to do with your videos. Also the color changing options make this a must using tool.
For Win 7 or later (64-bit)
For macOS 10.12 or later
Key Takeaways from This Episode
● TikTok is a leading app these days that is booming with its visual content. This is loved by the marketers as well as the customers too.
● The audience is keen to see some fresh content and this is what TikTok up to. Videos made with perfect dimensions, sizes, aspect ratios, and background filters get a massive popularity.
● The videos can also be optimized and made better using various latest tools like Wondershare Filmora. These tools are capable of making your video more engaging and interesting.
TikTok videos are booming these days. The reason behind that is extraordinary content and the perfect TikTok video ratio. No videos will get popular until they are made properly.
In this article
01 [What Is TikTok Aspect Ratio?](#Part 1)
02 [Top 6 Tips for TikTok Video Ads](#Part 2)
Part 1 What Is TikTok Aspect Ratio?
01TikTok Video Maximum Size
When you talk about the TikTok videos then they can be uploaded in more than a single measurement. This means that the maximum size varies according to the dimensions, TikTok video size ratio, lengths and the device which you are using to upload the videos.
02TikTok Video Dimensions: Portrait or Landscape?
You can upload TikTok videos in both portrait and landscape form. However, it is advised to upload the videos in portrait as the social platforms prefer vertical videos. This is because the mainly used device is mobile phone and vertical videos are perfect for them. This also boosts the engagement of the audience. You can also make such videos through smartphones. Additionally, you get an option for selecting the video mode if you create videos using TikTok.
03What is the Maximum Size of a TikTok Video?
The file size for TikTok videos can vary according to iOS and android users. If you are uploading via android then it must be 72MB and for iPhone, it gets increased around 4 times. For iPhones, the maximum file size should be 287.6 MB. This size becomes 500 MB if you talk about the ad videos of TikTok.
04What is the Length of a Video on TikTok?
As far as the length of TikTok videos is concerned, if you are shooting the videos on the app then it could be no longer than 60 seconds. However, the most recommended length of the videos is 15 seconds. The videos that are more than 15 seconds get posted in different segments of 15 seconds. Also, you can upload videos of more than 60 seconds if they are made elsewhere.
Part 2 Top 6 Tips for TikTok Video Ads
01Types of TikTok Video Ads
● Infeed ads: These ads are displayed on the news feed of the user. They can see these ads as they scroll the ‘for you’ section of TikTok. They very well suited to the feed of TikTok. The user can easily scroll around the ads and news feed. When creating a feed ad you must keep in mind that the video should be full screen so that it would make the user stay back to the video. This is the most popular advertising format amongst businesses.
● Top view ads: These ads are shown on the news feed for some seconds. As the user signs in to TikTok and the news feed is opened, these video ads pop up after 3 seconds. However, you get the option to skip the ads. Also, these ads are subjected to sound and auto-play.
● Branded effects ads: These ads allow the user that they can create the videos and ads by using their own custom filters. Through this, they can optimize their videos according to their requirements.
● Brand takeover ads: user will see these ads as soon he opens TikTok. As the name suggests the takeover ads take over the screen for 3 to 4 seconds and then they change into an in-feed video ad. This can be an excellent option to create awareness and generate sales.
● Branded hash tag ads: in these ads you can ask the user to create some in line videos with your product and then post them with a particular hash tag. These ads are perfect to make a reach among the audience and also boost brand awareness.
02How to Optimize TikTok Videos with a Clideo
If you want to optimize your video using Clideo for making it smartphone perfect, then here are some simple steps to do so:
Step 1: first of all, when you are going to optimize video through Clideo, you will need to log in to Clideo.com. Further, upload the video using your personal computer, DropBox account, or Google Drive account. If your video is already posted then it can also be optimized. All you need to do is simply copy-paste the URL and edit it in Clideo.
Step 2: The next step is to resize and optimize the video. As your video will get uploaded an editor will open. Here you have to click on the input custom or preset dimensions. As you are editing TikTok videos you will need to select an aspect ratio of 9:16 or 1:If you want to crop the video you can do it using the editors and position selectors. This tool also allows zooming in and out of the particular frame. You can also change the background colors.
Step 3: After this you will need to download the edited file. Before downloading do not forget to take the preview of the output file and then simply download the video in your device.
03How to Resize Your TikTok Video File
Resizing the TikTok video file is absolutely easy. All you have to do is select or upload the video and resize it using the options given in the app. You can resize the videos according to your choice. Further, save the resized video or simply upload it.
04Top 6 Tips for TikTok Video Ads
Vertical videos: For TikTok videos ads, the easiest way to share them is in the vertical mode. This mode is specially optimized for smartphones and also it gives the best possible view of what you are sharing.
Attention of the audience: It is very essential to grab the attention of your audience. As there is so much traffic on social platforms, it is very important to get the views properly. For this, you will have to make your video eye-catching as well as insert some such things that hold the user back to your video.
Magic of music: TikTok is the platform which has a different magic of music. So don’t forget to add music in your video ads. Keep yourself updated with what is trending in the market so that you can make your videos accordingly.
Centralize the content: It is important to centralize your content or else it will not give you the expected results. Do not add stuff in your video. Make sure that your video is up to the mark and you are offering only what you want to.
Length of videos: The ideal length for TikTok videos is suggested to be 9 to 15 seconds. So assure that your video is not so lengthy and free from stuff.
Use the proper tools: like all the other things, it is also very important to use the proper tools to create and edit the videos. No matter if you creating a video or editing it, all you need to do is use the latest Wondershare Filmora Video Editor tool. By using this tool, you can make your videos exceptionally outstanding. Here you get a number of filters, transitions, text editing and much more to do with your videos. Also the color changing options make this a must using tool.
For Win 7 or later (64-bit)
For macOS 10.12 or later
Key Takeaways from This Episode
● TikTok is a leading app these days that is booming with its visual content. This is loved by the marketers as well as the customers too.
● The audience is keen to see some fresh content and this is what TikTok up to. Videos made with perfect dimensions, sizes, aspect ratios, and background filters get a massive popularity.
● The videos can also be optimized and made better using various latest tools like Wondershare Filmora. These tools are capable of making your video more engaging and interesting.
Top 10 Best Free Game Download Sites [PC & Android]
Top 10 Best Free Game Download Sites [PC & Android][2024]

Ollie Mattison
Mar 27, 2024• Proven solutions


We all know and firmly believe that games are an integral part of our life. But the world has progressed, and we yearn to achieve real-life experiences through virtual reality instead of experiencing the actual thing. Online games are not only mentally stimulating, but they are also very addictive. Not everyone wants to pay to play games for a couple of hours, so here is a list of top free game downloading sites. You can download full versions of your favorite games for free.
Recommended Video Recorder & Editor for Gameplay: Filmora
If you want to edit a video recorded from games with more effects and templates, we recommend using Filmora . It is an easy-to-use video editor. It offers various title templates. You can also use it to record game videos. Just download it to have a try. Don’t know how to make a video? Visit the Wondershare Video Community and get some inspiration in video creation.
Part 1: Best Free PC Game Download Sites
1 Acid Play
Platforms: OS X and Windows

Key Features:
- Huge gaming library
The acid play has a gigantic collection of games of various types. The games at acid play have been categorized into action, arcade, board games, RPG, card games, puzzles, driving games, simulation, etc.
- Custom Search
The customized search helps you find the exact game you are looking for. It saves time since you cannot browse through thousands of games.
- Ratings
If you are new to this site or looking for a new game to play, you can choose only without trying every game to decide the best one. Just check the ratings provided by other players, and it will solve your problem. You can also rate a game according to your liking.
Pros:
- The games are easily downloadable and free.
- There is a large variety of games available to play.
Cons:
- The site is not updated, and no new games are introduced.
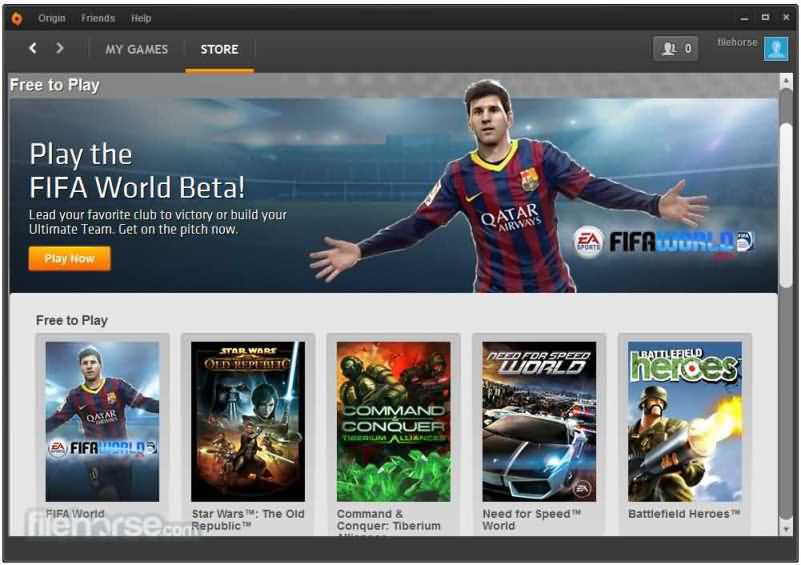
2 Origin Games
Platforms: OS X and Windows
Origin games are another best-known digital distribution platform for a free online gaming experience. It contains a fairly large library of premium games, but origin games provide links for free downloads for a limited time.
Key Features:
- Social Features
Origin provides its users with many social features like profile management, networking with friends through chatting, and video streaming via TwitchTV. You can also share your game library and community integration through social media and networking sites like Facebook, Xbox Live, PlayStation Network, and Nintendo Network.
- Variety in games
It provides various games, from PC games to Fifa and even classic games like Plant Vs. Zombies are also available.
- On-the-house games
The on-the-house features allow the customers to download a free trial of a premium game.
Pros:
- It provides great game streaming features.
- is developed by a renowned and successful company so that it can be trusted.
- The ‘on-the-house specials’ are appreciated by many gamers, allowing them to play a paid game for free now and then.
Cons:
- It has a lot of updates and takes an unreasonable amount of time to install and update the software.
- Customers have complained that they provide expired discount codes.
- Customer service needs to be improved as it is not very responsive.
3 AllGamesAtoZ
Platforms: OS X and Windows
If you want the best full version of a game for free, then AllGamesAtoZ is where you should go.
Key Features:
- The website is full of addictive games from different genres like action, arcade, shooting, role-playing, adventure, racing, simulation, etc.
- Multiple links for downloading a single game are available.
- A customized search bar is available so that you can locate the exact game you are looking for without having to browse through thousands of games.
- The games on AllGamesAtoZ are available on Windows, Linux, and Mac.
- A forum for game reviews is provided, so it is easier to decide which game you want to download without trying them all.
Pros:
- The gaming library is enormous.
- The game reviews make it easier to make a decision and save time.
- The website does not transfer viruses and is entirely safe from scams.
Cons:
- The downloading process is quite long.
- The website is not updated with new games.
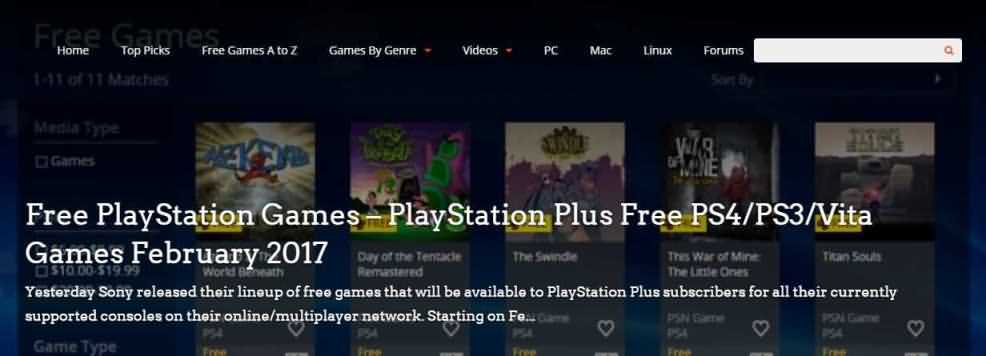
4 Mega Games
Platforms: OS X and Windows
It is another highly recommended online gaming site. It not only provides PC games for free but also offers 3D PlayStation games to be downloaded on your PC without any charge.

Key Features:
- Search and download
Mega games allow a search and download option for every game published on their site.
- PlayStation games
It has provided its customers with not only PC games but also 3D PlayStation games that can be downloaded for free.
- Cheat codes
Apart from all the standard gaming features, mega games also provide free cheat codes for the games.
Pros:
- The games are easily downloaded.
- The games have variety.
Cons:
- The website stops working after a while, and the download gets interrupted
5 Caiman.us
Platforms: OS X and Windows
It is another digital distribution platform for free online gaming. After the death of the site’s developer, the site has gone offline.

Key Features:
- It has a vast collection of games and over twenty free games categories.
- 2D and 3D gaming experiences are also provided.
- A customized search is available to make it easier for players to find the game they are looking for.
Pros:
- There is a vast collection of free games to download and play.
Cons:
- The site is not well organized and confusing.
- The search bar is at the very bottom of the page, so a person might find it hard to locate.
- Since the site has gone offline, the games are not updated, so there are no new games.
Part 2: Best Android Game Download Sites to Download Free Android Games
Android is growing very fast; now, almost everyone uses it and prefers it over any other software. Here are the best websites from where you can download free android apps:
1 Google Play
Google Play is the most common website to download free android apps. It is free, it is fast, and it is efficient. You can not only use this from your android mobile but also operate it and download apps using your laptop.

Key Features:
- The apps are easily downloaded, depending upon your internet connection.
- The purchase methods are through credit cards, and the procedure is straightforward.
- The platform allows everyone and anyone to sell their games.
- Sign up through your Google account is necessary to access these features.
Pros:
- It is easily accessible.
- It is pre-installed on all android supported devices.
- It contains a massive collection of unique apps, from books to music, workout, and games of various types.
Cons:
- Since everyone and anyone can access it without paying any registration fee, it is exposed to scams and harassment.
- A few games do not function and keep crashing.
2 Android Games Room

It contains thousands of free gaming apps in different categories like action, arcade, adventure, simulation, song games, and puzzle games. The download links are readily available; you can even access this site from your mobile by scanning a QR code. This site is a pretty good platform to download free games but has certain flaws. It does not allow a multiplayer gaming experience, and no customer services are provided.
3 Android Apps
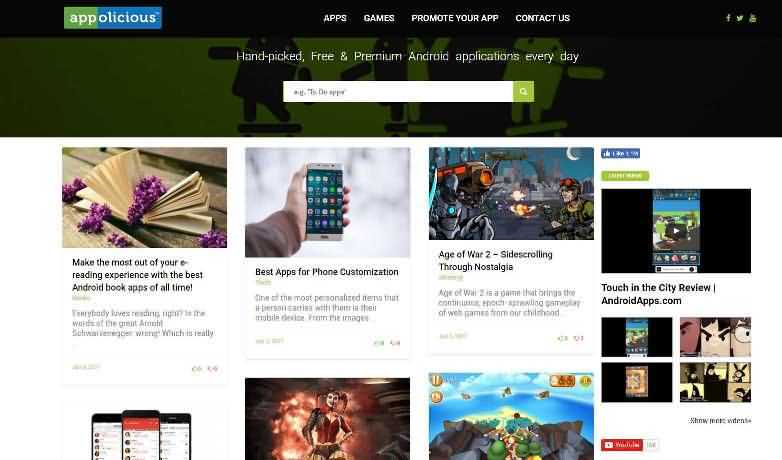
It is another platform to download android apps for free. This site is pretty good since it updates games that developers handpick almost daily. You can also promote your app using the ‘promote your app’ feature. The site has a lot of updates and takes an unreasonable amount of time to install and update the software. Furthermore, you can say that they do not have a customer service function because nobody ever responds to the customer’s queries.
4 1 Mobile
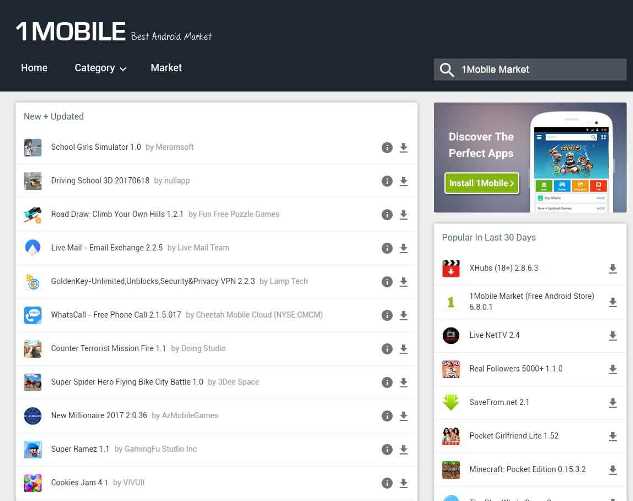
One mobile is a free android store. It provides its users the easiest way to locate, download and manage free apps. 1 Mobile has over eighty (80) million apps. One mobile has just been recently updated, has a brand new interface design, and operates much smoother. The content is more prosperous, smoother, and a thousand times better than before the latest update. All the apps and games are 100% free forever without hidden charges. It supports various languages like English, Korean, Chinese, French, Spanish, Japanese, and Portugal.
5 Approx
It provides the best free apps not only for android but OS as well. You can download it on your phone by scanning a QR code. This software has been functioning for the past six years and is free from viruses or malware.
To furnish your gameplay videos, Filmora also provides some cool effects, transitions, and elements, such as camera shake chaos effects, distortion effects, 3D change, speed blur transitions, and more. Moreover, you can always find some specially designed gaming effects in the Filmstock effects store.
Ollie Mattison
Ollie Mattison is a writer and a lover of all things video.
Follow @Ollie Mattison
Ollie Mattison
Mar 27, 2024• Proven solutions
We all know and firmly believe that games are an integral part of our life. But the world has progressed, and we yearn to achieve real-life experiences through virtual reality instead of experiencing the actual thing. Online games are not only mentally stimulating, but they are also very addictive. Not everyone wants to pay to play games for a couple of hours, so here is a list of top free game downloading sites. You can download full versions of your favorite games for free.
Recommended Video Recorder & Editor for Gameplay: Filmora
If you want to edit a video recorded from games with more effects and templates, we recommend using Filmora . It is an easy-to-use video editor. It offers various title templates. You can also use it to record game videos. Just download it to have a try. Don’t know how to make a video? Visit the Wondershare Video Community and get some inspiration in video creation.
Part 1: Best Free PC Game Download Sites
1 Acid Play
Platforms: OS X and Windows
Key Features:
- Huge gaming library
The acid play has a gigantic collection of games of various types. The games at acid play have been categorized into action, arcade, board games, RPG, card games, puzzles, driving games, simulation, etc.
- Custom Search
The customized search helps you find the exact game you are looking for. It saves time since you cannot browse through thousands of games.
- Ratings
If you are new to this site or looking for a new game to play, you can choose only without trying every game to decide the best one. Just check the ratings provided by other players, and it will solve your problem. You can also rate a game according to your liking.
Pros:
- The games are easily downloadable and free.
- There is a large variety of games available to play.
Cons:
- The site is not updated, and no new games are introduced.
2 Origin Games
Platforms: OS X and Windows
Origin games are another best-known digital distribution platform for a free online gaming experience. It contains a fairly large library of premium games, but origin games provide links for free downloads for a limited time.
Key Features:
- Social Features
Origin provides its users with many social features like profile management, networking with friends through chatting, and video streaming via TwitchTV. You can also share your game library and community integration through social media and networking sites like Facebook, Xbox Live, PlayStation Network, and Nintendo Network.
- Variety in games
It provides various games, from PC games to Fifa and even classic games like Plant Vs. Zombies are also available.
- On-the-house games
The on-the-house features allow the customers to download a free trial of a premium game.
Pros:
- It provides great game streaming features.
- is developed by a renowned and successful company so that it can be trusted.
- The ‘on-the-house specials’ are appreciated by many gamers, allowing them to play a paid game for free now and then.
Cons:
- It has a lot of updates and takes an unreasonable amount of time to install and update the software.
- Customers have complained that they provide expired discount codes.
- Customer service needs to be improved as it is not very responsive.
3 AllGamesAtoZ
Platforms: OS X and Windows
If you want the best full version of a game for free, then AllGamesAtoZ is where you should go.
Key Features:
- The website is full of addictive games from different genres like action, arcade, shooting, role-playing, adventure, racing, simulation, etc.
- Multiple links for downloading a single game are available.
- A customized search bar is available so that you can locate the exact game you are looking for without having to browse through thousands of games.
- The games on AllGamesAtoZ are available on Windows, Linux, and Mac.
- A forum for game reviews is provided, so it is easier to decide which game you want to download without trying them all.
Pros:
- The gaming library is enormous.
- The game reviews make it easier to make a decision and save time.
- The website does not transfer viruses and is entirely safe from scams.
Cons:
- The downloading process is quite long.
- The website is not updated with new games.
4 Mega Games
Platforms: OS X and Windows
It is another highly recommended online gaming site. It not only provides PC games for free but also offers 3D PlayStation games to be downloaded on your PC without any charge.
Key Features:
- Search and download
Mega games allow a search and download option for every game published on their site.
- PlayStation games
It has provided its customers with not only PC games but also 3D PlayStation games that can be downloaded for free.
- Cheat codes
Apart from all the standard gaming features, mega games also provide free cheat codes for the games.
Pros:
- The games are easily downloaded.
- The games have variety.
Cons:
- The website stops working after a while, and the download gets interrupted
5 Caiman.us
Platforms: OS X and Windows
It is another digital distribution platform for free online gaming. After the death of the site’s developer, the site has gone offline.
Key Features:
- It has a vast collection of games and over twenty free games categories.
- 2D and 3D gaming experiences are also provided.
- A customized search is available to make it easier for players to find the game they are looking for.
Pros:
- There is a vast collection of free games to download and play.
Cons:
- The site is not well organized and confusing.
- The search bar is at the very bottom of the page, so a person might find it hard to locate.
- Since the site has gone offline, the games are not updated, so there are no new games.
Part 2: Best Android Game Download Sites to Download Free Android Games
Android is growing very fast; now, almost everyone uses it and prefers it over any other software. Here are the best websites from where you can download free android apps:
1 Google Play
Google Play is the most common website to download free android apps. It is free, it is fast, and it is efficient. You can not only use this from your android mobile but also operate it and download apps using your laptop.
Key Features:
- The apps are easily downloaded, depending upon your internet connection.
- The purchase methods are through credit cards, and the procedure is straightforward.
- The platform allows everyone and anyone to sell their games.
- Sign up through your Google account is necessary to access these features.
Pros:
- It is easily accessible.
- It is pre-installed on all android supported devices.
- It contains a massive collection of unique apps, from books to music, workout, and games of various types.
Cons:
- Since everyone and anyone can access it without paying any registration fee, it is exposed to scams and harassment.
- A few games do not function and keep crashing.
2 Android Games Room
It contains thousands of free gaming apps in different categories like action, arcade, adventure, simulation, song games, and puzzle games. The download links are readily available; you can even access this site from your mobile by scanning a QR code. This site is a pretty good platform to download free games but has certain flaws. It does not allow a multiplayer gaming experience, and no customer services are provided.
3 Android Apps
It is another platform to download android apps for free. This site is pretty good since it updates games that developers handpick almost daily. You can also promote your app using the ‘promote your app’ feature. The site has a lot of updates and takes an unreasonable amount of time to install and update the software. Furthermore, you can say that they do not have a customer service function because nobody ever responds to the customer’s queries.
4 1 Mobile
One mobile is a free android store. It provides its users the easiest way to locate, download and manage free apps. 1 Mobile has over eighty (80) million apps. One mobile has just been recently updated, has a brand new interface design, and operates much smoother. The content is more prosperous, smoother, and a thousand times better than before the latest update. All the apps and games are 100% free forever without hidden charges. It supports various languages like English, Korean, Chinese, French, Spanish, Japanese, and Portugal.
5 Approx
It provides the best free apps not only for android but OS as well. You can download it on your phone by scanning a QR code. This software has been functioning for the past six years and is free from viruses or malware.
To furnish your gameplay videos, Filmora also provides some cool effects, transitions, and elements, such as camera shake chaos effects, distortion effects, 3D change, speed blur transitions, and more. Moreover, you can always find some specially designed gaming effects in the Filmstock effects store.
Ollie Mattison
Ollie Mattison is a writer and a lover of all things video.
Follow @Ollie Mattison
Reduce Video Size with These 5 Free iPhone and iPad Apps
5 Best Free Video Compressor Apps That Reduce Video Sizes on iPhone and iPad
Ollie Mattison
Mar 27, 2024• Proven solutions
Capturing full HD or 4K footage with your iPad or iPhone is a straightforward process, but sharing that footage through messaging apps or social media can be a bit more complicated.
The size of video files recorded in 4K resolution is often measured in gigabytes and you have to compress them in order to share them with your friends.
We’ve selected the five best free video compressor apps for iPhones and iPads that will enable you to shrink your videos in minutes and post them on social networks or send them through email and messaging apps.
So, let’s take a look at how you can reduce the size of your videos using free video compressing apps for iOS.
5 Best Video Compressor Apps for iOS that Reduce Video Size
Shrinking a video’s size is easy, even after you record a video clip. Each of the free video compressor apps we included in our top five list allows you to reduce a video’s size quickly before sharing it on social media or sending it to your friends. Read on if you would like to find out more about the best free video compressor apps for iPhones and iPads.
1. Compress Videos & Resize Videos
Price: Free, but contains in-app purchases
With this free video compressor app, you won’t have to worry about the quality of the videos you’re resizing, because it preserves the video’s quality even when videos are shrunk by more than 80%. In this manner, the Compress Videos & Resize Video app can help you free up space on your iPhone or iPad.

How to reduce video size with Compress Videos & Resize Videos?
To start reducing a video’s size you just have to open the app and select all videos, recently added or any other available categories.
After tapping on a particular category, you can proceed to select one or more video clips you would like to reduce. The app is going to display the videos that are stored on your phone or in your iCloud Photo Library and show you the exact size of each video.
Once you’ve selected the videos you’d like to shrink, you should click on the Next button and proceed to the Compression Settings window. Afterward, you can simply change the Frame Rate and Video Dimensions settings by dragging the sliders to the left or to the right. When ready, tap on the Compress button and the Compress Videos & Resize Video app will shrink your videos and save to the Compressed Videos album.
2. Video Compress – Shrink Vids
Price: Free, but offers in-app purchases

You can reduce the size of videos recorded in 4K, Full HD or HD resolution in just a few simple steps. The app lets you resize one or more videos at the same time and choose the resolution of the output video. The only downside is that you must make in-app purchases to remove ads or unlock access to all of the app’s features.
How to compress video with Video Compress – Shrink Vids?
Once you installed this free compressor app for iOS on your device, you should launch it and tap on the + icon to import the video you want to compress into the app. Grant the app permission to access the Photos app and head over to the folder in which the videos you want shrink are stored.
After selecting the videos, you should tap on the Choose Preset button and select one of the available presets. Optionally, you can adjust the bitrate or preview how the videos look before and after the compression. Tap on the Continue button when you are ready and then select the destination album to which the resized videos are going to be exported. After the video compression process is completed the app will ask you if you want to delete the original video files and only keep their resized versions.
3. Video Slimmer App
Price: Free or $2,99 for Pro

Video Slimmer is much more than a simple video compressor app for iOS, as it lets its users trim, rotate or merge videos. The app’s batch processing capabilities are remarkable since you can export resized videos from Video Slimmer quickly. You can free up to 80% of your iPhone’s or iPad’s storage space by compressing videos you store on your iOS-based device.
How to compress videos with Video Slimmer App?
Shrinking multiple videos with Video Slimmer won’t take too much of your time, although the duration of the compression process depends on the size of the video clips. Click on the + icon after you launch the app, in order to select the videos from the camera roll.
Tap on the Gear icon located in the lower right corner of the screen if you would like to adjust the Video Quality and Video Size settings. In addition, the Video Slimmer App lets you choose if you want to delete the original videos from your device after the compression or add a copy of the video to the Photo Library.
Head back to the app’s main menu and tap on the Slim Now button to start compressing the videos you selected. After reducing the size of your videos you can share them on social media or send them to your friends much faster than the original high-resolution files.
4. Video Compress – Reduce Movie Size – Shrink Video
Price: Free

If you are looking for a simple and efficient free video compressor app for iPhone and iPad then Video Compress may be the right choice for you. Its interface is intuitive so you won’t need much time to get used to it even if you never compressed a video before.
How to compress video with it?
All you have to do to start compressing a video is to launch the app and select the videos you’d like to shrink from the Camera Roll. Afterward, you will be taken to the Compress window where you can see the Target Size and the percentage to which the video is going to be compressed. The only limiting factor are the output file formats because the app only allows you to save shrunk videos as MPEG-4 and QuickTime files.
All the compressed videos can be easily shared on social media or sent through email and messaging apps directly from Video Compress.
5. Video Compressor – Shrink Videos
Price: Free, but offers in-app purchases

Video Compressor app makes shrinking videos look easy because it offers a number of presets that let you choose how much you want to reduce the size of a video. Besides saving time this free video compressor for iPhones and iPads can create more storage space on your device.
How to shrink video size with this app?
Identifying large video files on your camera roll won’t take too much time since the app displays the size of all videos. Besides compressing videos, the Video Compressor app also lets you shrink photos you store on your iPhone or iPad.
Select a video you want to compress, by simply tapping on it, and then choose a preset resolution to which that video clip is going to be compressed. Optionally, you can change the Bitrate before tapping on the Compression button.
After the video compression process is over you can organize the shrunk videos effortlessly, however, you must purchase the Pro version of the app if you want to have access to all of the tools Video Compressor has to offer.
Is there any iPhone free video compressor with editor built in?
Editing a video before you share it on social media can help you get rid of unwanted parts and make the colors more vivid. iMovie is an excellent choice if you would like to trim a video or add filters and effects to it and reduce the video size. What’s more, you can use this iOS-native video editing app to reduce the size of the original video files.
Once you complete all video editing tasks you should exit the app’s Edit window by tapping done and then tap on the Share/Save Video option. iMovie offers a variety of output video file formats, so you can choose if you want to save your video in 360p, 540p, HD or 4K resolution. After you pick a preferred output resolution the iMovie is going to add the video to the Photo Library.
Bonus: How to reduce video size on iPhone & iPad when recording?
All recent iPhone and iPad models support recording in a broad spectrum of video resolutions. If you would like to decrease the resolution at which your device captures videos you should head to the Settings menu and tap on the Camera option.

Select Record Video from the Camera menu and then choose the new resolution for your videos. The default resolution is set at 1080p at 30fps, but you can easily reduce it to 720p at 30fps if you want to create videos that don’t take too much storage space.
The Record Slo-Mo option lets you choose between 720p HD at 120fps or 720p HD at 240 fps which allows you to preserve storage space while recording high-quality slow-motion videos.
Conclusion
Videos recorded with iPhones and iPads can be huge in size, and sending them or uploading them to the Internet can be a time-consuming process. Installing a free video compressing app for iOS can be a good idea if you record videos with your iPhone or iPad often. Each of the free video compressor apps we included in this article can shrink videos quickly and efficiently. Which free video compressor app are you going to choose? Leave a comment and let us know.
| Supported iOS | Supported format | User rating | |
|---|---|---|---|
| Video Slimmer | iOS 8.0 or later | MP4, MOV, AVI… | 3.7 |
| Video Compress - Shrink Vids | iOS 10.3 or later | MP4, MOV, AVI | 4.6 |
| iMovie | iOS 10.3 or later | MP4, MOV, AVI, QuickTime… | 3.9 |
| Compress Videos & Resize Video | iOS 8.0 or later | MPEG-4 and QuickTime | 4.6 |
| Video Compressor-Shrink videos | iOS 8.0 or later | MP4, MOV, AVI | 4.7 |
| Video Compress - Reduce Movie Size, Shrink Video | iOS 8.0 or later | MP4, MOV, AVI | 4.6 |
Ollie Mattison
Ollie Mattison is a writer and a lover of all things video.
Follow @Ollie Mattison
Ollie Mattison
Mar 27, 2024• Proven solutions
Capturing full HD or 4K footage with your iPad or iPhone is a straightforward process, but sharing that footage through messaging apps or social media can be a bit more complicated.
The size of video files recorded in 4K resolution is often measured in gigabytes and you have to compress them in order to share them with your friends.
We’ve selected the five best free video compressor apps for iPhones and iPads that will enable you to shrink your videos in minutes and post them on social networks or send them through email and messaging apps.
So, let’s take a look at how you can reduce the size of your videos using free video compressing apps for iOS.
5 Best Video Compressor Apps for iOS that Reduce Video Size
Shrinking a video’s size is easy, even after you record a video clip. Each of the free video compressor apps we included in our top five list allows you to reduce a video’s size quickly before sharing it on social media or sending it to your friends. Read on if you would like to find out more about the best free video compressor apps for iPhones and iPads.
1. Compress Videos & Resize Videos
Price: Free, but contains in-app purchases
With this free video compressor app, you won’t have to worry about the quality of the videos you’re resizing, because it preserves the video’s quality even when videos are shrunk by more than 80%. In this manner, the Compress Videos & Resize Video app can help you free up space on your iPhone or iPad.
How to reduce video size with Compress Videos & Resize Videos?
To start reducing a video’s size you just have to open the app and select all videos, recently added or any other available categories.
After tapping on a particular category, you can proceed to select one or more video clips you would like to reduce. The app is going to display the videos that are stored on your phone or in your iCloud Photo Library and show you the exact size of each video.
Once you’ve selected the videos you’d like to shrink, you should click on the Next button and proceed to the Compression Settings window. Afterward, you can simply change the Frame Rate and Video Dimensions settings by dragging the sliders to the left or to the right. When ready, tap on the Compress button and the Compress Videos & Resize Video app will shrink your videos and save to the Compressed Videos album.
2. Video Compress – Shrink Vids
Price: Free, but offers in-app purchases
You can reduce the size of videos recorded in 4K, Full HD or HD resolution in just a few simple steps. The app lets you resize one or more videos at the same time and choose the resolution of the output video. The only downside is that you must make in-app purchases to remove ads or unlock access to all of the app’s features.
How to compress video with Video Compress – Shrink Vids?
Once you installed this free compressor app for iOS on your device, you should launch it and tap on the + icon to import the video you want to compress into the app. Grant the app permission to access the Photos app and head over to the folder in which the videos you want shrink are stored.
After selecting the videos, you should tap on the Choose Preset button and select one of the available presets. Optionally, you can adjust the bitrate or preview how the videos look before and after the compression. Tap on the Continue button when you are ready and then select the destination album to which the resized videos are going to be exported. After the video compression process is completed the app will ask you if you want to delete the original video files and only keep their resized versions.
3. Video Slimmer App
Price: Free or $2,99 for Pro
Video Slimmer is much more than a simple video compressor app for iOS, as it lets its users trim, rotate or merge videos. The app’s batch processing capabilities are remarkable since you can export resized videos from Video Slimmer quickly. You can free up to 80% of your iPhone’s or iPad’s storage space by compressing videos you store on your iOS-based device.
How to compress videos with Video Slimmer App?
Shrinking multiple videos with Video Slimmer won’t take too much of your time, although the duration of the compression process depends on the size of the video clips. Click on the + icon after you launch the app, in order to select the videos from the camera roll.
Tap on the Gear icon located in the lower right corner of the screen if you would like to adjust the Video Quality and Video Size settings. In addition, the Video Slimmer App lets you choose if you want to delete the original videos from your device after the compression or add a copy of the video to the Photo Library.
Head back to the app’s main menu and tap on the Slim Now button to start compressing the videos you selected. After reducing the size of your videos you can share them on social media or send them to your friends much faster than the original high-resolution files.
4. Video Compress – Reduce Movie Size – Shrink Video
Price: Free
If you are looking for a simple and efficient free video compressor app for iPhone and iPad then Video Compress may be the right choice for you. Its interface is intuitive so you won’t need much time to get used to it even if you never compressed a video before.
How to compress video with it?
All you have to do to start compressing a video is to launch the app and select the videos you’d like to shrink from the Camera Roll. Afterward, you will be taken to the Compress window where you can see the Target Size and the percentage to which the video is going to be compressed. The only limiting factor are the output file formats because the app only allows you to save shrunk videos as MPEG-4 and QuickTime files.
All the compressed videos can be easily shared on social media or sent through email and messaging apps directly from Video Compress.
5. Video Compressor – Shrink Videos
Price: Free, but offers in-app purchases
Video Compressor app makes shrinking videos look easy because it offers a number of presets that let you choose how much you want to reduce the size of a video. Besides saving time this free video compressor for iPhones and iPads can create more storage space on your device.
How to shrink video size with this app?
Identifying large video files on your camera roll won’t take too much time since the app displays the size of all videos. Besides compressing videos, the Video Compressor app also lets you shrink photos you store on your iPhone or iPad.
Select a video you want to compress, by simply tapping on it, and then choose a preset resolution to which that video clip is going to be compressed. Optionally, you can change the Bitrate before tapping on the Compression button.
After the video compression process is over you can organize the shrunk videos effortlessly, however, you must purchase the Pro version of the app if you want to have access to all of the tools Video Compressor has to offer.
Is there any iPhone free video compressor with editor built in?
Editing a video before you share it on social media can help you get rid of unwanted parts and make the colors more vivid. iMovie is an excellent choice if you would like to trim a video or add filters and effects to it and reduce the video size. What’s more, you can use this iOS-native video editing app to reduce the size of the original video files.
Once you complete all video editing tasks you should exit the app’s Edit window by tapping done and then tap on the Share/Save Video option. iMovie offers a variety of output video file formats, so you can choose if you want to save your video in 360p, 540p, HD or 4K resolution. After you pick a preferred output resolution the iMovie is going to add the video to the Photo Library.
Bonus: How to reduce video size on iPhone & iPad when recording?
All recent iPhone and iPad models support recording in a broad spectrum of video resolutions. If you would like to decrease the resolution at which your device captures videos you should head to the Settings menu and tap on the Camera option.
Select Record Video from the Camera menu and then choose the new resolution for your videos. The default resolution is set at 1080p at 30fps, but you can easily reduce it to 720p at 30fps if you want to create videos that don’t take too much storage space.
The Record Slo-Mo option lets you choose between 720p HD at 120fps or 720p HD at 240 fps which allows you to preserve storage space while recording high-quality slow-motion videos.
Conclusion
Videos recorded with iPhones and iPads can be huge in size, and sending them or uploading them to the Internet can be a time-consuming process. Installing a free video compressing app for iOS can be a good idea if you record videos with your iPhone or iPad often. Each of the free video compressor apps we included in this article can shrink videos quickly and efficiently. Which free video compressor app are you going to choose? Leave a comment and let us know.
| Supported iOS | Supported format | User rating | |
|---|---|---|---|
| Video Slimmer | iOS 8.0 or later | MP4, MOV, AVI… | 3.7 |
| Video Compress - Shrink Vids | iOS 10.3 or later | MP4, MOV, AVI | 4.6 |
| iMovie | iOS 10.3 or later | MP4, MOV, AVI, QuickTime… | 3.9 |
| Compress Videos & Resize Video | iOS 8.0 or later | MPEG-4 and QuickTime | 4.6 |
| Video Compressor-Shrink videos | iOS 8.0 or later | MP4, MOV, AVI | 4.7 |
| Video Compress - Reduce Movie Size, Shrink Video | iOS 8.0 or later | MP4, MOV, AVI | 4.6 |
Ollie Mattison
Ollie Mattison is a writer and a lover of all things video.
Follow @Ollie Mattison
Solved: How to Blur Video Online for Free
How to Blur Video Online for Free

Liza Brown
Mar 27, 2024• Proven solutions
Sometimes it becomes important to blur the entire video or a particular part or section of it to draw the viewers’ attention or hide some sensitive or objectionable details from them respectively. Even though you can download and use any efficient app to get the job done, why take the pain when you can blur video online, and that too for free? Right?
With that said, in the following sections, you will learn about some portals available on the Internet that let you blur video background online. In addition, the options present in some of these web apps can also be exploited to blur part of video online free.
Best Online Tools to Blur Videos
A list of some of the best websites and their essential details are given below:
1. PickFrom
Visit: https://pickfrom.net/blur-video
PickFrom is a one-stop shop for almost all types of post-production tasks. For instance, you can blur a video or part of it, convert video to audio, add filters to the clips, and much more.
You Must Know About PickFrom Blur Tool
- No registration is required
- The free version adds a watermark while exporting
- Offers three pricing plans, namely Starter, Premium, and Enterprise
To blur video online with PickFrom:
- Go to the official website using your favorite Internet browser, and then click the Click to add files button
- Locate and upload the source video from your PC, and check the Blur part of the video box from the right pane
- Drag the selection box over the subject that you don’t want to get blurred, and resize the selection box as needed
- Turn off the Blur inside switch from the right pane, and choose a format from the Save As menu present at the bottom-left corner.
- Click Start, and then click Download or Copy the link to download the modified video to your PC or share it online, respectively.

Limitations
- Maximum acceptable video size is up to 2GB and 5GB for Starter and Premium subscriptions respectively.
- Enables you to blur either the full video or a part of it
- At the time of this writing, the ‘Blur video background’ feature isn’t smart enough to differentiate between the background and the main subject (humans)
2. WoFox
Visit: https://www.wofox.com/video-editing-tools/blur-an-object-in-video
WoFox is another website that offers almost every important tool for designing, post-production, and audio and video treatments. For example, you can create animation designs, GIF templates, infographic images, etc., with the web app.
You Must Know About Using WoFox to Blur Video
- No registration or credit card details are required
- Even the free access doesn’t add any watermark to the exported videos
- Offers three types of subscription plans, namely Free, Business Plan, Team Plan, and Virtual Assistant Plan
To blur part of video online free with WoFox:
- Launch your favorite web browser, and use the link given above to visit the portal;
- Click Upload and upload the source video, and then position and scale the selection box to cover the portion of the video that needs to be blurred.
- Optionally click the + button from the navigation pane on the left to add more selection boxes to cover multiple video portions. Click Download from the top-right corner of the page to download the modified clip.

Limitations of using Wo Fox to Blur Video Online
- In this writing, WoFox cannot differentiate between the normal background and humans.
- The free version can create videos only of up to 30 seconds
- The free version can export videos only in 360p resolution
3. Flixier
Visit: https://flixier.com/tools/blur-or-pixelate-video
This online portal offers many tools to make your source videos look more engaging and professional. With Flixier, you can create innovative adverts, slideshows, intros/outros, lyric videos, and even birthday clips. As for the social media part, you can create videos for YouTube, Twitch, Instagram, and Facebook.
Things You Must Know About Flixier
- Registration is required before you can start using Flixier
- The free access adds a watermark to the exported videos
- Offers three subscription plans, namely Creator, Business, and Enterprise
To blur video online with Flixier:
- Use your web browser to visit the URL given above, and then click Get Started;
- Sign up for a new account, or if you already have one, click login from the upper-right corner of the left section of the page;
- Right-click anywhere inside the Personal Library pane on the left, and then click Import;
- Choose your preferred method, and upload the source video to Flixier, and then click Import all when done;
- Close the Pick a layout box and drag the video from the Personal Library pane to the Timeline at the bottom;
- Position the Skimmer (Playhead) on the frame you want to start blurring the video from, and then click to select Shapes from the toolbox on the left;
- Click the Expand arrow next to the Square shape in the Shapes pane, and then click Square mask from the menu;
- Position and scale the square mask in the preview window, and then choose your preferred effect from the available options under the Masks section in the right pane;
- Drag the sides of the mask layer in the Timeline to specify for how long the mask should be applied in the video;
- Click Export from the top-right corner, and customize the output settings, and if need be, choose the target platform(s);
- Click Export Video from the lower area of the right pane, and wait while the video is rendered before you can start downloading it.

Limitations of using Flixier
- The free account can have only up to 2GB of storage
- It supports only 10 minutes of videos per month to be exported with a free account
- The maximum resolution for the videos exported with a free account is 720p
4. Kapwing
Visit: https://www.kapwing.com/studio
Kapwing is a trusted portal known to almost everyone who prefers online resources over PC applications. The website allows you to edit the videos, create memes for social media platforms, add audio and subtitles to the clips, resize them, etc.
Things You Must Know About Kapwing
- Registration is not necessary to blur video background online with Kapwing
- The free version does not add a watermark to the videos while exporting.
- Offers three subscription plans, namely Free, Pro, and For Teams
To blur video background online with Kapwing:
- Launch a web browser and visit the link given above
- Click Upload File, and upload the source video (or paste its URL if the clip is published online)
- Click Duplicate from the LAYER section of the right pane, and click to select the duplicate layer
- Click Crop from the top of the right pane, and crop the portion of the video that needs to be blurred
- Click Done Cropping, and then click Adjust from the top of the right pane
- Use the Blur slider to adjust the intensity of the blur effect
- Click Done Adjustingand use the Forward, Front, Backward, or Back buttons under the LAYER section to make the duplicate layer visible.
- Click Export Video from the top-right corner of the page, and wait while the modified video is rendered.
- Click the Download or Copy link to save the video to your PC or share it online, respectively.

Limitations
- You must register and sign in to a free account before exporting the videos to get rid of the watermark.
- Files of only up to 250MB can be uploaded while using a free account
- Videos of only up to 7 minutes each can be exported with a free account, while the total duration of the videos that can be exported is up to 3 hours.
5. Hippo Video
Visit: https://www.hippovideo.io/users/sign%5Fin
In addition to having various tools to edit the clips, including blur video online, Hippo Video can also record your PC screen and audio and even capture webcam footage. Creating engaging slideshows from the uploaded images is yet another feature that the web app offers.
You Must Know
- Registration is mandatory before you can start using Hippo Video
- The free/trial version doesn’t add a watermark to the exported videos
- Offers four subscription plans, namely Free, Personal, Classroom, and School
To blur video background online for free with Hippo Video:
- Use your favorite web browser to visit the URL given above
- Click Sign Up from the lower area of the Sign In to your account box (or sign in if you already have a Hippo Video account)
- Choose your preferred method to create an account, and then sign in
- Click Get Started and then populate the fields on the next couple of pages with the correct information on the next page.
- After completing the account creation process, click Import Video on the page that appears.
- On the Import Video box, choose your preferred method to locate and upload the source video, i.e., from your local computer or G-Drive.
- Click PROCEED from the bottom-right corner, and on the next page, add the necessary details related to the video (optional)
- Click IMPORT from the bottom-right corner to import the video and click EDIT VIDEO from the upper-right area of the preview window on the next page.
- Click Quick Edit from the list that appears, and then click the Blur tool from the bottom of the preview window.
- Click Add New Blur and position and scale the selection box in the preview window to cover the area that needs to be blurred.
- Drag the Blur marker in the progress bar to define the effect duration, and use the Strength slider to manage the intensity of the blur effect, and then click SAVE
- Back on the previous page, click EXPORT from the lower area of the preview window.
- Choose your preferred platform to export and publish the modified video to

Limitations
- The video resolution remains 480p while using a free account
- With the free version, you only get 1GB of bandwidth per month
6. YouTube Studio
Visit: https://studio.youtube.com/
Being one of the most viewed streaming media portals that offer free uploads and even lets you monetize your creations, YouTube has a separate section called YouTube Studio, where you can edit clips before publishing.
You Must Know
- A Gmail account is required to use YouTube Studio.
- All the videos can be uploaded without a watermark for free without any expiration date
- No subscription plans are enforced
To blur video online with YouTube Studio:
- Visit the URL given above using your favorite web browser (Google Chrome is recommended)
- If not already signed in, do so with your Gmail account when prompted for
- Click UPLOAD VIDEOS from the Channel dashboard section and on the Upload videos box, click SELECT FILES, and select and upload the source video from your PC
- While the video uploads, specify other publishing preferences using the options present on the box that appears
- Click NEXT from the bottom-right corner when done.
- On the Video elements box, add your preferred elements, click NEXT, review the details on the Checks box, click NEXT, choose your visibility preferences on the Visibility box, and click.
- Back on the main page, click Content from the navigation pane on the left and hover the mouse over the thumbnail of the video you uploaded, and click the Details icon that appears on the right.
- Click Editor from the Your video pane on the left and click GET STARTED from the right window and click BLUR PARTS OF YOUR VIDEO from the lower area of the Video editor window on the right.
- Click Custom blur from the list that appears and position and scale the selection box in the preview window to cover the object that needs to be blurred and drag the Blur slider in the Timeline to specify the duration of the effect.
- Optionally click BLUR from the upper-left area of the Video editor window to add another instance of the blur effect to blur another segment of the clip and click SAVE from the upper-right side.
- Click SAVE again on the Save changes confirmation box to save the changes
- Wait while Google reviews the modifications, and the video is made available for viewing
- Once this is done, get back to the Content section as explained earlier
- Hover mouse over the thumbnail, and click the Options icon from the right this time
- Click Download from the list to download the video with the blur effect to your PC

You can check more details of blurring videos with YouTube Studio .
Limitations
- Your YouTube account must be verified before you can publish long videos. Account verification is free.
- No copyright content is allowed to be published on YouTube
- No pornography or unethical content is allowed to be posted on YouTube
Bonus: How to Blur Video with Wondershare Filmora
Download Mac Version ](https://tools.techidaily.com/wondershare/filmora/download/ )
Wondershare Filmora is a versatile post-production application with a built-in video editing tools and effects to edit videos with ease. The tool is usually considered a good competitor of Adobe Premiere Pro, Final Cut Pro X, etc.
Like any other similar program, even Filmora allows you to blur both landscape and portrait videos. The processes of getting these tasks done are given below:
1. Blur a Part of Video (Landscape Video)
Step 1: Import and Add the Source Video to Timeline
Launch Wondershare Filmora on your Windows or Mac computer (MacBook Pro M1 is used here), make sure that the 16:9 (Widescreen) layout preset is selected under the Select Project Aspect Ratio section on the flash screen, and click New Project.

Next, click to select My Media from the menu bar if not already selected, and from the navigation pane on the left, select Project Media.

Then, click Import from the Media box, select and import the source video to the program, drag the clip from the Media box to the Timeline at the bottom, and when the confirmation box appears, choose the option either under the Keep Project Settings or Match to Media sections to add the video to the Timeline.

Step 2: Add Blur Effect
Go to Effects from the menu bar, select Default from the top of the navigation pane on the left, and select Utility from the available list. From the right box, drag the Mosaic effect, and place it on a separate layer above the video track in the Timeline.

Step 3: Customize the Effect to Blur a Part of Video
Double-click the Blur effect in the Timeline, use the scaling handles in the preview window to scale and position the effect to cover your preferred part of the video and place it at your desired location respectively, choose a Mosaic style from the Type list present in the left box, and use the Intensity and Opacity sliders to customize further the appearance of effect as needed. Optionally, you can drag the side handles of the effect in the Timeline to adjust the duration of its visibility, and click OK from the bottom-right area of the upper-left box to save the changes.

2. Blur a Vertical Video
Download Mac Version ](https://tools.techidaily.com/wondershare/filmora/download/ )
Step 1: Import a Vertical Video and Add It to the Timeline
Use the above method to import the source vertical video to Filmora X and add it to the Timeline. However, it is important to choose the button under the Keep Project Settings label when the confirmation box appears, so you get some real estate because of the landscape mode to add the blur effect.
Step 2: Add Background Blur
Go to Effects and choose Default from the left pane, as explained earlier. Next, expand the Filters tree if not already expanded, click to select Background Blur from the list, from the box on the right, choose and drag your preferred blur effect, and place it on a separate layer in the Timeline above the video track.

Step 3: Customize the Blur Effect
Double-click the Blur effect in the Timeline, and use the available sliders to customize the effect that best fits your needs.

You can find more details about how to blur the background in the portrait video with Filmora .
Conclusion
If you want to have full control over the post-production process, having an efficient desktop program like Wondershare Filmora X would be something you might be looking for. On the other hand, if you are not a professional editor or are not much into editing and prefer playing around with the tools for personal use, going for a decent web portal to blur video online is your best bet.
Liza Brown
Liza Brown is a writer and a lover of all things video.
Follow @Liza Brown
Liza Brown
Mar 27, 2024• Proven solutions
Sometimes it becomes important to blur the entire video or a particular part or section of it to draw the viewers’ attention or hide some sensitive or objectionable details from them respectively. Even though you can download and use any efficient app to get the job done, why take the pain when you can blur video online, and that too for free? Right?
With that said, in the following sections, you will learn about some portals available on the Internet that let you blur video background online. In addition, the options present in some of these web apps can also be exploited to blur part of video online free.
Best Online Tools to Blur Videos
A list of some of the best websites and their essential details are given below:
1. PickFrom
Visit: https://pickfrom.net/blur-video
PickFrom is a one-stop shop for almost all types of post-production tasks. For instance, you can blur a video or part of it, convert video to audio, add filters to the clips, and much more.
You Must Know About PickFrom Blur Tool
- No registration is required
- The free version adds a watermark while exporting
- Offers three pricing plans, namely Starter, Premium, and Enterprise
To blur video online with PickFrom:
- Go to the official website using your favorite Internet browser, and then click the Click to add files button
- Locate and upload the source video from your PC, and check the Blur part of the video box from the right pane
- Drag the selection box over the subject that you don’t want to get blurred, and resize the selection box as needed
- Turn off the Blur inside switch from the right pane, and choose a format from the Save As menu present at the bottom-left corner.
- Click Start, and then click Download or Copy the link to download the modified video to your PC or share it online, respectively.
Limitations
- Maximum acceptable video size is up to 2GB and 5GB for Starter and Premium subscriptions respectively.
- Enables you to blur either the full video or a part of it
- At the time of this writing, the ‘Blur video background’ feature isn’t smart enough to differentiate between the background and the main subject (humans)
2. WoFox
Visit: https://www.wofox.com/video-editing-tools/blur-an-object-in-video
WoFox is another website that offers almost every important tool for designing, post-production, and audio and video treatments. For example, you can create animation designs, GIF templates, infographic images, etc., with the web app.
You Must Know About Using WoFox to Blur Video
- No registration or credit card details are required
- Even the free access doesn’t add any watermark to the exported videos
- Offers three types of subscription plans, namely Free, Business Plan, Team Plan, and Virtual Assistant Plan
To blur part of video online free with WoFox:
- Launch your favorite web browser, and use the link given above to visit the portal;
- Click Upload and upload the source video, and then position and scale the selection box to cover the portion of the video that needs to be blurred.
- Optionally click the + button from the navigation pane on the left to add more selection boxes to cover multiple video portions. Click Download from the top-right corner of the page to download the modified clip.
Limitations of using Wo Fox to Blur Video Online
- In this writing, WoFox cannot differentiate between the normal background and humans.
- The free version can create videos only of up to 30 seconds
- The free version can export videos only in 360p resolution
3. Flixier
Visit: https://flixier.com/tools/blur-or-pixelate-video
This online portal offers many tools to make your source videos look more engaging and professional. With Flixier, you can create innovative adverts, slideshows, intros/outros, lyric videos, and even birthday clips. As for the social media part, you can create videos for YouTube, Twitch, Instagram, and Facebook.
Things You Must Know About Flixier
- Registration is required before you can start using Flixier
- The free access adds a watermark to the exported videos
- Offers three subscription plans, namely Creator, Business, and Enterprise
To blur video online with Flixier:
- Use your web browser to visit the URL given above, and then click Get Started;
- Sign up for a new account, or if you already have one, click login from the upper-right corner of the left section of the page;
- Right-click anywhere inside the Personal Library pane on the left, and then click Import;
- Choose your preferred method, and upload the source video to Flixier, and then click Import all when done;
- Close the Pick a layout box and drag the video from the Personal Library pane to the Timeline at the bottom;
- Position the Skimmer (Playhead) on the frame you want to start blurring the video from, and then click to select Shapes from the toolbox on the left;
- Click the Expand arrow next to the Square shape in the Shapes pane, and then click Square mask from the menu;
- Position and scale the square mask in the preview window, and then choose your preferred effect from the available options under the Masks section in the right pane;
- Drag the sides of the mask layer in the Timeline to specify for how long the mask should be applied in the video;
- Click Export from the top-right corner, and customize the output settings, and if need be, choose the target platform(s);
- Click Export Video from the lower area of the right pane, and wait while the video is rendered before you can start downloading it.
Limitations of using Flixier
- The free account can have only up to 2GB of storage
- It supports only 10 minutes of videos per month to be exported with a free account
- The maximum resolution for the videos exported with a free account is 720p
4. Kapwing
Visit: https://www.kapwing.com/studio
Kapwing is a trusted portal known to almost everyone who prefers online resources over PC applications. The website allows you to edit the videos, create memes for social media platforms, add audio and subtitles to the clips, resize them, etc.
Things You Must Know About Kapwing
- Registration is not necessary to blur video background online with Kapwing
- The free version does not add a watermark to the videos while exporting.
- Offers three subscription plans, namely Free, Pro, and For Teams
To blur video background online with Kapwing:
- Launch a web browser and visit the link given above
- Click Upload File, and upload the source video (or paste its URL if the clip is published online)
- Click Duplicate from the LAYER section of the right pane, and click to select the duplicate layer
- Click Crop from the top of the right pane, and crop the portion of the video that needs to be blurred
- Click Done Cropping, and then click Adjust from the top of the right pane
- Use the Blur slider to adjust the intensity of the blur effect
- Click Done Adjustingand use the Forward, Front, Backward, or Back buttons under the LAYER section to make the duplicate layer visible.
- Click Export Video from the top-right corner of the page, and wait while the modified video is rendered.
- Click the Download or Copy link to save the video to your PC or share it online, respectively.
Limitations
- You must register and sign in to a free account before exporting the videos to get rid of the watermark.
- Files of only up to 250MB can be uploaded while using a free account
- Videos of only up to 7 minutes each can be exported with a free account, while the total duration of the videos that can be exported is up to 3 hours.
5. Hippo Video
Visit: https://www.hippovideo.io/users/sign%5Fin
In addition to having various tools to edit the clips, including blur video online, Hippo Video can also record your PC screen and audio and even capture webcam footage. Creating engaging slideshows from the uploaded images is yet another feature that the web app offers.
You Must Know
- Registration is mandatory before you can start using Hippo Video
- The free/trial version doesn’t add a watermark to the exported videos
- Offers four subscription plans, namely Free, Personal, Classroom, and School
To blur video background online for free with Hippo Video:
- Use your favorite web browser to visit the URL given above
- Click Sign Up from the lower area of the Sign In to your account box (or sign in if you already have a Hippo Video account)
- Choose your preferred method to create an account, and then sign in
- Click Get Started and then populate the fields on the next couple of pages with the correct information on the next page.
- After completing the account creation process, click Import Video on the page that appears.
- On the Import Video box, choose your preferred method to locate and upload the source video, i.e., from your local computer or G-Drive.
- Click PROCEED from the bottom-right corner, and on the next page, add the necessary details related to the video (optional)
- Click IMPORT from the bottom-right corner to import the video and click EDIT VIDEO from the upper-right area of the preview window on the next page.
- Click Quick Edit from the list that appears, and then click the Blur tool from the bottom of the preview window.
- Click Add New Blur and position and scale the selection box in the preview window to cover the area that needs to be blurred.
- Drag the Blur marker in the progress bar to define the effect duration, and use the Strength slider to manage the intensity of the blur effect, and then click SAVE
- Back on the previous page, click EXPORT from the lower area of the preview window.
- Choose your preferred platform to export and publish the modified video to
Limitations
- The video resolution remains 480p while using a free account
- With the free version, you only get 1GB of bandwidth per month
6. YouTube Studio
Visit: https://studio.youtube.com/
Being one of the most viewed streaming media portals that offer free uploads and even lets you monetize your creations, YouTube has a separate section called YouTube Studio, where you can edit clips before publishing.
You Must Know
- A Gmail account is required to use YouTube Studio.
- All the videos can be uploaded without a watermark for free without any expiration date
- No subscription plans are enforced
To blur video online with YouTube Studio:
- Visit the URL given above using your favorite web browser (Google Chrome is recommended)
- If not already signed in, do so with your Gmail account when prompted for
- Click UPLOAD VIDEOS from the Channel dashboard section and on the Upload videos box, click SELECT FILES, and select and upload the source video from your PC
- While the video uploads, specify other publishing preferences using the options present on the box that appears
- Click NEXT from the bottom-right corner when done.
- On the Video elements box, add your preferred elements, click NEXT, review the details on the Checks box, click NEXT, choose your visibility preferences on the Visibility box, and click.
- Back on the main page, click Content from the navigation pane on the left and hover the mouse over the thumbnail of the video you uploaded, and click the Details icon that appears on the right.
- Click Editor from the Your video pane on the left and click GET STARTED from the right window and click BLUR PARTS OF YOUR VIDEO from the lower area of the Video editor window on the right.
- Click Custom blur from the list that appears and position and scale the selection box in the preview window to cover the object that needs to be blurred and drag the Blur slider in the Timeline to specify the duration of the effect.
- Optionally click BLUR from the upper-left area of the Video editor window to add another instance of the blur effect to blur another segment of the clip and click SAVE from the upper-right side.
- Click SAVE again on the Save changes confirmation box to save the changes
- Wait while Google reviews the modifications, and the video is made available for viewing
- Once this is done, get back to the Content section as explained earlier
- Hover mouse over the thumbnail, and click the Options icon from the right this time
- Click Download from the list to download the video with the blur effect to your PC
You can check more details of blurring videos with YouTube Studio .
Limitations
- Your YouTube account must be verified before you can publish long videos. Account verification is free.
- No copyright content is allowed to be published on YouTube
- No pornography or unethical content is allowed to be posted on YouTube
Bonus: How to Blur Video with Wondershare Filmora
Download Mac Version ](https://tools.techidaily.com/wondershare/filmora/download/ )
Wondershare Filmora is a versatile post-production application with a built-in video editing tools and effects to edit videos with ease. The tool is usually considered a good competitor of Adobe Premiere Pro, Final Cut Pro X, etc.
Like any other similar program, even Filmora allows you to blur both landscape and portrait videos. The processes of getting these tasks done are given below:
1. Blur a Part of Video (Landscape Video)
Step 1: Import and Add the Source Video to Timeline
Launch Wondershare Filmora on your Windows or Mac computer (MacBook Pro M1 is used here), make sure that the 16:9 (Widescreen) layout preset is selected under the Select Project Aspect Ratio section on the flash screen, and click New Project.
Next, click to select My Media from the menu bar if not already selected, and from the navigation pane on the left, select Project Media.
Then, click Import from the Media box, select and import the source video to the program, drag the clip from the Media box to the Timeline at the bottom, and when the confirmation box appears, choose the option either under the Keep Project Settings or Match to Media sections to add the video to the Timeline.
Step 2: Add Blur Effect
Go to Effects from the menu bar, select Default from the top of the navigation pane on the left, and select Utility from the available list. From the right box, drag the Mosaic effect, and place it on a separate layer above the video track in the Timeline.
Step 3: Customize the Effect to Blur a Part of Video
Double-click the Blur effect in the Timeline, use the scaling handles in the preview window to scale and position the effect to cover your preferred part of the video and place it at your desired location respectively, choose a Mosaic style from the Type list present in the left box, and use the Intensity and Opacity sliders to customize further the appearance of effect as needed. Optionally, you can drag the side handles of the effect in the Timeline to adjust the duration of its visibility, and click OK from the bottom-right area of the upper-left box to save the changes.
2. Blur a Vertical Video
Download Mac Version ](https://tools.techidaily.com/wondershare/filmora/download/ )
Step 1: Import a Vertical Video and Add It to the Timeline
Use the above method to import the source vertical video to Filmora X and add it to the Timeline. However, it is important to choose the button under the Keep Project Settings label when the confirmation box appears, so you get some real estate because of the landscape mode to add the blur effect.
Step 2: Add Background Blur
Go to Effects and choose Default from the left pane, as explained earlier. Next, expand the Filters tree if not already expanded, click to select Background Blur from the list, from the box on the right, choose and drag your preferred blur effect, and place it on a separate layer in the Timeline above the video track.
Step 3: Customize the Blur Effect
Double-click the Blur effect in the Timeline, and use the available sliders to customize the effect that best fits your needs.
You can find more details about how to blur the background in the portrait video with Filmora .
Conclusion
If you want to have full control over the post-production process, having an efficient desktop program like Wondershare Filmora X would be something you might be looking for. On the other hand, if you are not a professional editor or are not much into editing and prefer playing around with the tools for personal use, going for a decent web portal to blur video online is your best bet.
Liza Brown
Liza Brown is a writer and a lover of all things video.
Follow @Liza Brown
Also read:
- Updated 2024 Approved Top 10 WebM Converters to MP4 Expert Reviews
- Updated From Photos to Hollywood-Style Videos Top 5 Slideshow Creators for 2024
- No Copyright Worries 10 Best Public Domain Image Sites for 2024
- New In 2024, PC Video Trimming Made Easy Top 10 Tools and Apps
- Updated 2024 Approved Create Stunning Video Invitations for Free Top Tools
- Updated 2024 Approved From Chaos to Control How to Effectively Save and Manage FCP Projects
- New Download Filmora 13 for Free Professional Video Editing Made Easy for 2024
- Updated In 2024, Unlock Creative Possibilities Top Text Animation Apps for Mobile Devices
- Updated In 2024, Make Unforgettable Video Invites with These Mobile Apps
- New 2024 Approved From Novice to Pro Finding the Ideal FLAC Converter for You
- Updated Unlock Efficient Video Editing 6 Adobe Premiere Hacks You Need to Know for 2024
- New In 2024, Easy Ways to Do VHS Effect with Final Cut Pro
- New 2024 Approved Mac Subtitle Editing Software Best Options Beyond Subtitle Edit
- Updated In 2024, How to Easily Make Professional-Looking Movies and Slideshow
- New 2024 Approved Rip and Digitize A Step-by-Step Guide to Converting DVDs to Digital Files
- New Say Goodbye to Crooked Videos 10 Best Online Rotation Tools
- Updated 2024 Approved Fast and Furious The Quickest Video Editing Software for Busy Creators
- New Ubuntu Video Editing Made Easy 10 Free Software Choices for 2024
- In 2024, Streamline Your Workflow Easy GoPro Video Editing on MacBook with Quik
- New Add a Touch of Pro Best Bokeh Effect Apps for iPhone and Android for 2024
- New 2024 Approved Find Three Best Alternatives to Subtitle Edit on Mac - All Are Free and Include the Same Exact Functions as Subtitle Edit
- New The Best of the Best Top MTS Video Editing Software for 2024
- 2024 Approved QuickTime Video Editing Made Easy Top 10 Free Tools
- Updated In 2024, Say Goodbye to Adobe Premiere 10 Linux Alternatives Youll Love
- New Say Goodbye to WMM Top-Rated Video Editing Alternatives for 2024
- New Motion Tracking Software The Ultimate 2023 Roundup
- New In 2024, Mastering Soundcloud Downloads A Step-by-Step Guide
- Top 10 Linux Alternatives to Adobe Premiere (Updated) for 2024
- Updated 2024 Approved Neon Typography Made Easy 10 Online Generators to Try Now
- New 2024 Approved Ditch Premiere Elements 10 Better Video Editing Options for You
- New 2024 Approved Free Video Looper Apps for Windows and Mac Top Picks
- Updated The Ultimate Guide to Changing Video Dimensions for 2024
- Updated 2024 Approved How to Convert Soundcloud Tracks to MP3 A Step-by-Step Guide
- Updated In 2024, Instantly Convert Dailymotion Videos to MP4, AVI, Etc
- In 2024, The Ultimate Guide to Video Editing on Your Smartphone
- New 2024 Approved Take Your Videos to the Next Level Using Slow Motion in Windows Live Movie Maker 2023
- New In 2024, Best Free and Paid Windows Movie Maker Alternatives for Mac
- New Customizing Your LinkedIn Video Thumbnails Best Practices for 2024
- Updated Unbiased Reviews Finding the Perfect YouTube to MP3 Converter
- Updated 2024 Approved Cast Any Video A Step-by-Step Guide to Chromecast Compatibility
- New Minitool Movie Maker Vs. Other Video Editors Which One Is Right for You for 2024
- New In 2024, 10 Best Windows Movie Makers of the Year
- 2024 Approved Mastering TikTok Aspect Ratios A Step-by-Step Guide
- Ways to trade pokemon go from far away On Google Pixel Fold? | Dr.fone
- In 2024, Here are Some of the Best Pokemon Discord Servers to Join On Honor Play 7T | Dr.fone
- How to Unlock iPhone SE without Face ID
- In 2024, Unlock Your Motorola Edge 40 Neos Potential The Top 20 Lock Screen Apps You Need to Try
- 2024 Approved Effortless FLV Video Editing on Windows 8 The Ultimate Guide
- In 2024, How to Fix Locked Apple ID from iPhone X
- Best Video Title Generators
- Hassle-Free Ways to Remove FRP Lock on Itel P55 Phones with/without a PC
- How To Transfer Data From Apple iPhone 6 To Other iPhone 13 Pro Max devices? | Dr.fone
- Learn How To Lock Stolen Your iPhone SE (2020) Properly | Dr.fone
- In 2024, Unlock Your Samsung Galaxy M54 5G Phone with Ease The 3 Best Lock Screen Removal Tools
- Updated 2024 Approved Subtitle Your Videos for Free 10 Top Online Options
- How to Soft Reset Oppo A38 phone? | Dr.fone
- A Step-by-Step Guide on Using ADB and Fastboot to Remove FRP Lock from your Xiaomi Redmi K70
- Does Realme Note 50 Have Find My Friends? | Dr.fone
- In 2024, 3 Methods to Mirror Xiaomi 14 Pro to Roku | Dr.fone
- How to Reset a Locked Nokia C02 Phone
- In 2024, How and Where to Find a Shiny Stone Pokémon For Xiaomi Redmi Note 12 4G? | Dr.fone
- How to Remove Activation Lock From the Apple iPhone SE (2022) Without Previous Owner?
- In 2024, Step-by-Step Tutorial How To Bypass Vivo X100 Pro FRP
- How to recover deleted photos after deleting from Recently Deleted on iPhone 6 Plus | Stellar
- Where Is the Best Place to Catch Dratini On Apple iPhone 14 Pro | Dr.fone
- Things You Dont Know About Honor 90 Lite Reset Code | Dr.fone
- Updated Best Canva 10 Animated Templates
- Finding Some Different Ways to Animated Cartoon of Yourself for 2024
- Stuck at Android System Recovery Of Oppo A38 ? Fix It Easily | Dr.fone
- Title: TikTok Video Size and Aspect Ratio A Beginners Guide for 2024
- Author: Morgan
- Created at : 2024-06-24 14:33:28
- Updated at : 2024-06-25 14:33:28
- Link: https://ai-video-tools.techidaily.com/tiktok-video-size-and-aspect-ratio-a-beginners-guide-for-2024/
- License: This work is licensed under CC BY-NC-SA 4.0.
