
:max_bytes(150000):strip_icc():format(webp)/wimbledonlivestream-c22d5eefbf8f40e9b25ba4cab1734ece.jpg)
New Unlock Your Chromebook How to Run Linux for 2024
Unlock Your Chromebook: How to Run Linux
How to Install Linux on Chromebook

Ollie Mattison
Mar 27, 2024• Proven solutions
Chromebooks are an excellent choice for educational institutions or businesses that require their employees to have constant access to the Internet. Even though these devices are a perfect tool that can accompany you on business trips and enable you to answer important emails or have access to crucial information stored on the cloud, performing more demanding tasks, like video editing, is still a challenge. However, it is far from impossible, although you may have to take a few extra steps before running a video editing software on your Chromebook.
Chrome OS is a Linux based environment and for that reason, Chromebook owners who would like to use professional editing software on their Chromebooks can install a Linux OS that will enable them to use programs such as Lightworks that are perfectly suited for high-end video editing. There are two different ways to install Linux on a Chromebook, you can either do it using Gallium OS or ChrUbuntu or in a Chroot environment using Crouton. Each of these methods is relatively easy and we will take you through the process step by step. Here’s how you can install Linux on your Chromebook.
- Part 1: Preparing before installing Linux OS on Chromebook
- Part 2: How to Install Linux as a Chroot Using Crouton on Chromebook
- Part 3: How to Dual-Boot a Chromebook Using ChrUbuntu
- Part 4: How to Install Linux as a Chroot Using Crouton on Chromebook
- Part 5: Recommended Linux Video Editing Software
Part 1: Preparing before installing Linux OS on Chromebook
The first step of the process of installing the Linux OS is the decision itself, and you need to have all the necessary information before you decide to install a Linux OS on your Chromebook.
- Make sure that the version of Chromebook you have is capable of supporting a Linux OS. Your device must be equipped with an ARM or Intel chip in order to be able to run the version of Linux OS you want to install. Although both chips will allow you to go through the process, running closed source software such the Steam is only possible with Intel chips.
- Regardless of which method of installing Linux OS you choose, you will have to switch to the Developer Mode, a special built-in function that allows you to install the unapproved operating system, among other things.
- Now that you are aware of the requirements and risks, you will have to backup all the files you have on your Chromebook because once you switch to the Developer Mode all the information stored locally will be erased. You can save the files on another computer or on the cloud depending on how much data you need to move and which one is more convenient for you.
Part 2: How to Install Linux as a Chroot Using Crouton on Chromebook
After you have stored all your data safely, your Chromebook is ready for the beginning of the installation process of the secondary operating system. You will have to perform a series of actions that will allow you to start the installation, starting from accessing the Developer Mode.
1. Acessing the developer mode
The first step of the process is to reboot your system, while your Chromebook is on. In order to do so hold Escape and Refresh keys on your keyboard and then hit the power button. Once your device is back online you will find yourself in the recovery mode, and you will see a message telling you to insert a recovery disc. Instead of inserting the disc, hold Ctrl+D and wait for OS verification menu to appear on the screen. At this point, if you are still having second thoughts about this process, you can hit the spacebar to return to recovery mode, or press Enter to proceed. Hitting Enter will delete all the data stored on your device and take you into the Developer Mode. Once your Chromebook lets you know that you are now in the Developer Mode, reboot the system and install a fresh version of the Chrome OS. Insert your login information and follow the instructions until you are looking at the Chrome OS desktop.

2. Installing Chroot
At this stage of the process, your Chromebook is ready for the installation of the Crouton environment. Crouton is a series of scripts that makes running a Linux OS much easier, especially for inexperienced users. In order to download Crouton, go to GitHub and find the download link, detailed instructions or extensions that can add more functionality to your OS. Once the installation file or files are in the Download folder, your next step is to access the Chromebook’s terminal a feature called ‘Crosh’. The fastest way to do this is to hold CTRL + ALT keys and then hit the T key. This action will cause the Chrome window to appear on the screen, and you will need to type the ‘shell’ command without using quotation marks. Afterwards, enter the following command: ‘sudo sh ~/Downloads/crouton -t xfce’ and if you want to install extensions you will have to add ‘xfce,extension’ command at the end.

Press the Enter key and wait for the system to start setting up the Chroot. This process may take a while, so it is important to be patient, but more importantly, do not interfere with it in any way. Installation of your secondary OS is now on the way, and you may be asked to insert your login data, like your Gmail username and password. Wait patiently until the process is over and then return to shell and enter this command: ‘sudo enter-chroot startxfce4’. Your screen will go black for a while, but after the black screen is gone your Chromebook will be in the freshly installed Linux OS.
3. Optimizing your new OS
You may have to optimize your new OS in order to improve the experience of using it. Enabling your keyboard’s brightness and volume keys inside the new OS can be done easily by holding CTRL+ALT+T and then typing shell once you’ve accessed Chrome OS’s shell and hit Enter. Issue the following command: ‘sudo sh -e ~/Downloads/crouton-r precise-t keyboard–u’ and then press Enter again. Removing the screen saver or installing more extensions may also be a good way to enable more options in the new OS. Most importantly, you can now download and install the video editing software you want to use for editing your footage.
4. Remove Chroot from your Chromebook
If for some reason you want to uninstall Linux from your Chromebook, simply reboot the system and press the spacebar when the ‘OS verification is off’ message appears on the screen. In this manner, you will exit the Developer Mode and all locally stored data, including all installed environments, will be deleted.
Part 3: How to Dual-Boot a Chromebook Using ChrUbuntu
An alternative option is available for Chromebook users that have Intel based devices like recently released Haswell models. The ChrUbuntu can be installed on the USB stick or external hard-drive or directly to the local memory of your Chromebook. Even though ARM-based machines can also use ChrUbuntu it isn’t advisable because they may perform poorly due to slower processor speeds and less RAM power. Unlike Chroot, ChrUbuntu will not allow you to switch between operating systems without a reboot, and if the system is stored locally, you may need to go through the full system recovery.
1. Preparation for the installation
Like with the previous method you will have to go into the Developer Mode and make sure that you have access to a WiFi connection. When you are asked to provide your login details, instead of entering them press Ctrl+Alt+Forward and then type ‘chronos’ and press Enter. The next step will require you to issue the following command: ‘curl -L -O http://goo.gl/9sgchs ; sudo bash 9sgchs’ and then once more hit Enter. Again press Enter after the information about the installation is displayed on the screen and then you will be asked to decide how much space you want to allocate for Linux installation. Experts say that 9GB is the upper limit. After you’ve made your choice press Enter.
2. Installing ChrUbuntu
Once the partitioning of your hard-drive is completed, you will have to repeat the first several steps from typing ‘chronos’ to pressing enter when information about the installation is displayed on the screen. The installation process is now in progress and you will be occasionally asked to select a few settings, make sure you always click on default. At the end of the installation process, you will have to choose the location where GRUB should be installed, please select /dev/sda, because the failure to do so may interrupt the installation.
Once the installation is completed, restart your Chromebook to finalize the process, and when you see the ‘OS Verification is Off’ notification press Ctrl+L to access Linux or Ctrl+D boot into Chrome OS.

3. Uninstall ChrUbuntu
Removing ChrUbuntu is a relatively painless process that can be completed with just a few simple commands. If the OS is stored locally the only way to erase it is to perform a full system recovery. While all your data located on the cloud will re-sync with your Chromebook, the data stored locally will be deleted, which is why it is important to backup all the important files before starting a system recovery process. The fastest and easiest way to perform a system recovery is by creating a recovery disk from your device. Insert ‘chrome://imageburner’ in your browser’s address bar, and carefully read and follow the instructions.
This Linux removal method will also require you to have a USB stick with a minimum of 4GB of storage space. After you created the disk, you can go into the Recovery Mode, by holding Esc and Refresh buttons simultaneously and then pressing the Power button. In the Recovery Mode, you will be asked to insert the recovery disk and the process will be on the way.
Part 4: How to Dual-Boot a Chromebook Using Gallium OS
If neither Chroot nor ChrUbuntu work for you, using Gallium OS may be the right choice. The Gallium is Xbuntu-based OS that is equipped with touchpad mouse drivers among other advantages it offers over other operating systems. The installation process isn’t complicated, although it may require more effort than installing Crouton.
1. Preparation for the installation
In order to be aware of all the preparation steps, you need to take, you must first find out your device’s Hardware ID number and you can obtain this information by navigating to Chrome://System, Hardware Class within the Chrome OS. Hardware Compatibility page will provide the information regarding the CPU’s family, which can be crucial for the OS’ performance. You can run the installation either from an ISO image on an external USB drive or from the Chrome OS command line using Chrx. We will describe how to install Gallium OS from the Chrome OS command line because the other option doesn’t allow you to dual-boot your Chromebook.
2. Enabling the Legacy Mode
Like previously described, enter the Developer Mode and when the ‘ OS verification is OFF’ notification appears on the screen proceed to enable the Legacy Mode. You can do this by holding CTRL+D keys to enable the Chrome OS to boot in the Developer Mode. After you’ve successfully made this step, press CTRl+ALT+T to access the ‘Crosh’ terminal and then type ‘shell’. At the ‘chronos/localhost/$ issue the following command: ‘sudo crossystem dev_boot_legacy=1’. Update and install all the necessary firmware by running the Firmware Utility Script.
3. Installation process
If you choose to install Gallium OS through Chrome OS command line using Chrx that will enable you to dual-boot your Chromebook, you should start by booting the device into Chrome OS and configuring networking. The next step you’ll need to take is switching to a virtual terminal by holding Ctrl+Alt+F2, and then you should log in as user chronos without a password. Once you’ve completed this step issue the following command: ‘curl -O https://chrx.org/go && sh go’ and follow the on-screen instructions to repartition your hard-drive and install the Gallium OS. Once the installation is over reboot the device and press Ctrl+L when the ‘OS Verification is Off’ notification appears on the screen to boot Gallium OS or hold Ctrl+D to access Chrome OS. After the Gallium OS is successfully installed on your Chromebook you can start using programs such as Skype or Lightworks.
Which Method is the Best?
Each of the options to install a Linux OS on your Chromebook we described has its advantages and disadvantages. It is our opinion that the Crouton method is the easiest and the fastest. Furthermore, this method enables you to switch between your primary and secondary OS without the need to reboot the device and the Downloads folder makes working in both environments much easier.
On the other hand, other methods require more knowledge about the Linux OS installation process and switching between OS’ is not that simple. If you are looking for an easy way to dual-boot your Chromebook that best way to do it is to install Linux as a Chroot using Crouton.
Part 5: Recommended Linux Video Editing Software: Lightworks
Price: $24.99/month, although free versions of the software are also available.
What we like: A powerful video and audio editor perfectly suited for the production of professional video content.
What we don’t like: The software isn’t easy to use and inexperienced editors will find it difficult to use at first.
Lightworks Resolve may not be as popular as Adobe Premiere Pro or Final Cut Pro, but that doesn’t mean that this video editing software isn’t as capable as its more popular counterparts.
The software is compatible with Mac, Windows, and Linux OS, which makes it a perfect choice for Chromebook users that have a Linux OS installed on their devices. Lightworks features literally every editing tool imaginable and for that reason, it is a perfect choice for editing videos you would like to upload to Vimeo or YouTube or high-end professional projects. This editing software offers plenty of transitions and visual effects that will help its users to create seamless jumps between shots and visually impressive videos.
Ollie Mattison
Ollie Mattison is a writer and a lover of all things video.
Follow @Ollie Mattison
Ollie Mattison
Mar 27, 2024• Proven solutions
Chromebooks are an excellent choice for educational institutions or businesses that require their employees to have constant access to the Internet. Even though these devices are a perfect tool that can accompany you on business trips and enable you to answer important emails or have access to crucial information stored on the cloud, performing more demanding tasks, like video editing, is still a challenge. However, it is far from impossible, although you may have to take a few extra steps before running a video editing software on your Chromebook.
Chrome OS is a Linux based environment and for that reason, Chromebook owners who would like to use professional editing software on their Chromebooks can install a Linux OS that will enable them to use programs such as Lightworks that are perfectly suited for high-end video editing. There are two different ways to install Linux on a Chromebook, you can either do it using Gallium OS or ChrUbuntu or in a Chroot environment using Crouton. Each of these methods is relatively easy and we will take you through the process step by step. Here’s how you can install Linux on your Chromebook.
- Part 1: Preparing before installing Linux OS on Chromebook
- Part 2: How to Install Linux as a Chroot Using Crouton on Chromebook
- Part 3: How to Dual-Boot a Chromebook Using ChrUbuntu
- Part 4: How to Install Linux as a Chroot Using Crouton on Chromebook
- Part 5: Recommended Linux Video Editing Software
Part 1: Preparing before installing Linux OS on Chromebook
The first step of the process of installing the Linux OS is the decision itself, and you need to have all the necessary information before you decide to install a Linux OS on your Chromebook.
- Make sure that the version of Chromebook you have is capable of supporting a Linux OS. Your device must be equipped with an ARM or Intel chip in order to be able to run the version of Linux OS you want to install. Although both chips will allow you to go through the process, running closed source software such the Steam is only possible with Intel chips.
- Regardless of which method of installing Linux OS you choose, you will have to switch to the Developer Mode, a special built-in function that allows you to install the unapproved operating system, among other things.
- Now that you are aware of the requirements and risks, you will have to backup all the files you have on your Chromebook because once you switch to the Developer Mode all the information stored locally will be erased. You can save the files on another computer or on the cloud depending on how much data you need to move and which one is more convenient for you.
Part 2: How to Install Linux as a Chroot Using Crouton on Chromebook
After you have stored all your data safely, your Chromebook is ready for the beginning of the installation process of the secondary operating system. You will have to perform a series of actions that will allow you to start the installation, starting from accessing the Developer Mode.
1. Acessing the developer mode
The first step of the process is to reboot your system, while your Chromebook is on. In order to do so hold Escape and Refresh keys on your keyboard and then hit the power button. Once your device is back online you will find yourself in the recovery mode, and you will see a message telling you to insert a recovery disc. Instead of inserting the disc, hold Ctrl+D and wait for OS verification menu to appear on the screen. At this point, if you are still having second thoughts about this process, you can hit the spacebar to return to recovery mode, or press Enter to proceed. Hitting Enter will delete all the data stored on your device and take you into the Developer Mode. Once your Chromebook lets you know that you are now in the Developer Mode, reboot the system and install a fresh version of the Chrome OS. Insert your login information and follow the instructions until you are looking at the Chrome OS desktop.
2. Installing Chroot
At this stage of the process, your Chromebook is ready for the installation of the Crouton environment. Crouton is a series of scripts that makes running a Linux OS much easier, especially for inexperienced users. In order to download Crouton, go to GitHub and find the download link, detailed instructions or extensions that can add more functionality to your OS. Once the installation file or files are in the Download folder, your next step is to access the Chromebook’s terminal a feature called ‘Crosh’. The fastest way to do this is to hold CTRL + ALT keys and then hit the T key. This action will cause the Chrome window to appear on the screen, and you will need to type the ‘shell’ command without using quotation marks. Afterwards, enter the following command: ‘sudo sh ~/Downloads/crouton -t xfce’ and if you want to install extensions you will have to add ‘xfce,extension’ command at the end.
Press the Enter key and wait for the system to start setting up the Chroot. This process may take a while, so it is important to be patient, but more importantly, do not interfere with it in any way. Installation of your secondary OS is now on the way, and you may be asked to insert your login data, like your Gmail username and password. Wait patiently until the process is over and then return to shell and enter this command: ‘sudo enter-chroot startxfce4’. Your screen will go black for a while, but after the black screen is gone your Chromebook will be in the freshly installed Linux OS.
3. Optimizing your new OS
You may have to optimize your new OS in order to improve the experience of using it. Enabling your keyboard’s brightness and volume keys inside the new OS can be done easily by holding CTRL+ALT+T and then typing shell once you’ve accessed Chrome OS’s shell and hit Enter. Issue the following command: ‘sudo sh -e ~/Downloads/crouton-r precise-t keyboard–u’ and then press Enter again. Removing the screen saver or installing more extensions may also be a good way to enable more options in the new OS. Most importantly, you can now download and install the video editing software you want to use for editing your footage.
4. Remove Chroot from your Chromebook
If for some reason you want to uninstall Linux from your Chromebook, simply reboot the system and press the spacebar when the ‘OS verification is off’ message appears on the screen. In this manner, you will exit the Developer Mode and all locally stored data, including all installed environments, will be deleted.
Part 3: How to Dual-Boot a Chromebook Using ChrUbuntu
An alternative option is available for Chromebook users that have Intel based devices like recently released Haswell models. The ChrUbuntu can be installed on the USB stick or external hard-drive or directly to the local memory of your Chromebook. Even though ARM-based machines can also use ChrUbuntu it isn’t advisable because they may perform poorly due to slower processor speeds and less RAM power. Unlike Chroot, ChrUbuntu will not allow you to switch between operating systems without a reboot, and if the system is stored locally, you may need to go through the full system recovery.
1. Preparation for the installation
Like with the previous method you will have to go into the Developer Mode and make sure that you have access to a WiFi connection. When you are asked to provide your login details, instead of entering them press Ctrl+Alt+Forward and then type ‘chronos’ and press Enter. The next step will require you to issue the following command: ‘curl -L -O http://goo.gl/9sgchs ; sudo bash 9sgchs’ and then once more hit Enter. Again press Enter after the information about the installation is displayed on the screen and then you will be asked to decide how much space you want to allocate for Linux installation. Experts say that 9GB is the upper limit. After you’ve made your choice press Enter.
2. Installing ChrUbuntu
Once the partitioning of your hard-drive is completed, you will have to repeat the first several steps from typing ‘chronos’ to pressing enter when information about the installation is displayed on the screen. The installation process is now in progress and you will be occasionally asked to select a few settings, make sure you always click on default. At the end of the installation process, you will have to choose the location where GRUB should be installed, please select /dev/sda, because the failure to do so may interrupt the installation.
Once the installation is completed, restart your Chromebook to finalize the process, and when you see the ‘OS Verification is Off’ notification press Ctrl+L to access Linux or Ctrl+D boot into Chrome OS.
3. Uninstall ChrUbuntu
Removing ChrUbuntu is a relatively painless process that can be completed with just a few simple commands. If the OS is stored locally the only way to erase it is to perform a full system recovery. While all your data located on the cloud will re-sync with your Chromebook, the data stored locally will be deleted, which is why it is important to backup all the important files before starting a system recovery process. The fastest and easiest way to perform a system recovery is by creating a recovery disk from your device. Insert ‘chrome://imageburner’ in your browser’s address bar, and carefully read and follow the instructions.
This Linux removal method will also require you to have a USB stick with a minimum of 4GB of storage space. After you created the disk, you can go into the Recovery Mode, by holding Esc and Refresh buttons simultaneously and then pressing the Power button. In the Recovery Mode, you will be asked to insert the recovery disk and the process will be on the way.
Part 4: How to Dual-Boot a Chromebook Using Gallium OS
If neither Chroot nor ChrUbuntu work for you, using Gallium OS may be the right choice. The Gallium is Xbuntu-based OS that is equipped with touchpad mouse drivers among other advantages it offers over other operating systems. The installation process isn’t complicated, although it may require more effort than installing Crouton.
1. Preparation for the installation
In order to be aware of all the preparation steps, you need to take, you must first find out your device’s Hardware ID number and you can obtain this information by navigating to Chrome://System, Hardware Class within the Chrome OS. Hardware Compatibility page will provide the information regarding the CPU’s family, which can be crucial for the OS’ performance. You can run the installation either from an ISO image on an external USB drive or from the Chrome OS command line using Chrx. We will describe how to install Gallium OS from the Chrome OS command line because the other option doesn’t allow you to dual-boot your Chromebook.
2. Enabling the Legacy Mode
Like previously described, enter the Developer Mode and when the ‘ OS verification is OFF’ notification appears on the screen proceed to enable the Legacy Mode. You can do this by holding CTRL+D keys to enable the Chrome OS to boot in the Developer Mode. After you’ve successfully made this step, press CTRl+ALT+T to access the ‘Crosh’ terminal and then type ‘shell’. At the ‘chronos/localhost/$ issue the following command: ‘sudo crossystem dev_boot_legacy=1’. Update and install all the necessary firmware by running the Firmware Utility Script.
3. Installation process
If you choose to install Gallium OS through Chrome OS command line using Chrx that will enable you to dual-boot your Chromebook, you should start by booting the device into Chrome OS and configuring networking. The next step you’ll need to take is switching to a virtual terminal by holding Ctrl+Alt+F2, and then you should log in as user chronos without a password. Once you’ve completed this step issue the following command: ‘curl -O https://chrx.org/go && sh go’ and follow the on-screen instructions to repartition your hard-drive and install the Gallium OS. Once the installation is over reboot the device and press Ctrl+L when the ‘OS Verification is Off’ notification appears on the screen to boot Gallium OS or hold Ctrl+D to access Chrome OS. After the Gallium OS is successfully installed on your Chromebook you can start using programs such as Skype or Lightworks.
Which Method is the Best?
Each of the options to install a Linux OS on your Chromebook we described has its advantages and disadvantages. It is our opinion that the Crouton method is the easiest and the fastest. Furthermore, this method enables you to switch between your primary and secondary OS without the need to reboot the device and the Downloads folder makes working in both environments much easier.
On the other hand, other methods require more knowledge about the Linux OS installation process and switching between OS’ is not that simple. If you are looking for an easy way to dual-boot your Chromebook that best way to do it is to install Linux as a Chroot using Crouton.
Part 5: Recommended Linux Video Editing Software: Lightworks
Price: $24.99/month, although free versions of the software are also available.
What we like: A powerful video and audio editor perfectly suited for the production of professional video content.
What we don’t like: The software isn’t easy to use and inexperienced editors will find it difficult to use at first.
Lightworks Resolve may not be as popular as Adobe Premiere Pro or Final Cut Pro, but that doesn’t mean that this video editing software isn’t as capable as its more popular counterparts.
The software is compatible with Mac, Windows, and Linux OS, which makes it a perfect choice for Chromebook users that have a Linux OS installed on their devices. Lightworks features literally every editing tool imaginable and for that reason, it is a perfect choice for editing videos you would like to upload to Vimeo or YouTube or high-end professional projects. This editing software offers plenty of transitions and visual effects that will help its users to create seamless jumps between shots and visually impressive videos.
Ollie Mattison
Ollie Mattison is a writer and a lover of all things video.
Follow @Ollie Mattison
Professional Audio Editing Made Easy: Top Software Picks
8 Best Professional Audio Editing Software for Powerful Editing

Shanoon Cox
Mar 27, 2024• Proven solutions
Audio editing can be quite a challenge for users. The abstraction layers can hide the simple tasks and the audio editing software costing a bomb, making you easily confused and agitated. If you want your audio to enter a higher level, you need professional audio editing software.
Whether you need to convert your cassette collection to Mp3 or just create a soundtrack for your YouTube channel, the powerful and professional audio editing software eases your worries. Here is the 8 best professional audio editing software for powerful editing.
1. Filmora
Filmora is one of the best audio editing software that can give an edge to your videos. Now, perfecting your videos is just a few minutes with Filmora. The features of Filmora include:
- Add only audio to your video if you want.
- Correct the pitch of the audio sound in the video and make it perfect.
- Merge audio and automatically sync it with video.
- You can select an audio compressor and hit the enhance voice to equalize sound.
- You can reduce the background noise from video to enhance the audio quality.
- Allows audio transition.
It also supports advanced audio editing features such as AI audio stretching and audio denoising. Follow the below video intro to know more details.
2. Adobe Audition CC
Adobe Audition CC is a professional workstation for audio. It offers you a great digital audio editing experience, waveform, multi-track, and more within the comprehensive toolkit. The features of Adobe Audition CC are:
- Clean-up and restoration of sound in podcasting and sound effect design with precision using editing tools.
- From a clip, you can record a punch.
- Zoom to the time range of more than one selected clip.
- Select and move a track up and down.
- Add fade in fade out effect, studio reverb, and change volume.
- Music ducking effect where audio of one track automatically lowers when a voiceover is present.
- Come with noise reduction features.
- Record, mix, and export audio for podcast.

3. Apple Logic Pro X
If you are looking for creativity in music, turn to the professional audio editing software Apple Logic Pro X. It offers you the right tools for producing music. With a huge collection of instruments and effects, Apple Logic Pro X simplifies your editing process with Smart Controls. The features are:
- Smart tempo to auto-match the track timing.
- Advanced reverb, creative effects, and vintage EQs with new plugins.
- Transport control, multi-touch mixer, and touch instrument with logic remote.
- Availability of a deep selection of plugins and sounds to fuel your creativity.
- Choose from over 7000 included royalty-free Apple Loops.
- Edit the level and pitch of individual notes quickly and easily with Flex Pitch.
- Control your mix from anywhere in the room with Multi-Touch.
- Use a variety of onscreen instruments, such as keyboards, guitars, and drum pads, to play any software instrument.

4. Cubase Pro 10
With the launch of the new Cubase Pro 10, composing, recording, mixing, and editing have become easier and enhanced. Appropriate for music producers and musicians, Cubase Pro 10 blends intuitive handling and outstanding audio quality, and a collection of highly advanced audio and MIDI tools. The features of Cubase Pro 10 are:
- Come with 5th version drum editor groove agent.
- The pitch editor VariAudio in Cubase Pro 10 hits version three.
- Simplified sidechain function, latency monitor and a new audio alignment system.
- Drag and drop function for plugins to pull them straight from the media rack into your project.
- 5 GB of samples, loops, and sounds, covering numerous genres and produced by famous artists.

5. Reason
One of the best DAW (Digital Audio Workstation) you may try is the Reason. Producing audio files, recording, and editing was never so easy until Reason application software came into the picture. The reason is an amazing software to create music and anything you need to enhance the music. The features of Reason are:
- Easy to start.
- The layout is simple: searching the right instrument and sound, dragging the selected to the rack, using the sequencer to compose, and finally, using the mixer to bring all together.
- You get the range of instruments from stacks of buzzing sawtooths and shimmering sonic explorations in Europa to abstract sound in Grain, semi-modular instruments in Thor to 16 pads drum machine in Kong.
- Multiple reverb models, synchronous’ modulation effects, professional mastering units, and compression, distortion, and modulation filter.
- Quickly and easily overdub, edit, rearrange, comp, and tweak.

6. Reaper
Reaper is an amazingly professional audio editing software that offers computers digital audio applications and production. It provides complete multi-track audio with editing, MIDI recording, mixing, processing, and mastering tools. The features of Reaper are:
- Supports a vast range of hardware, digital formats, and plugins.
- The script, extend and modify comprehensively.
- Highly efficient, fast, and tightly coded.
- Install and run from a portable or network drive.
- 64-bit internal audio processing.
- Import, record, and render to many media formats.
- Hundreds of studio-quality effects for processing audio.

7. Pro Tools
If you wish to create professional-quality music for your YouTube channel, try great-sounding mixes offered by Pro Tools. Known for high-quality sound, this professional audio editing software allows you to track from both computer and audio interfaces. The features of Pro Tools are-
- Take control of mixes.
- Fast and fluid tool to compose, edit, and mix.
- Up to 128 audio tracks, 512 instrument tracks, and 512 MIDI tracks.
- Explore alternative versions of a song or soundtrack with Revisions feature.
- Loop recording and track playlists, and comp together for a flawless performance.
- Polish mixes with a collection of studio-staple effects and sound processing plugins.

8. Studio One
With Studio One, your creativity is not limited to a certain boundary; you may produce as much music you want. This professional audio editing software flawlessly combines the proven and time-tested studio recording way of creating music with the loop-oriented production of today. The features of Studio One are-
- Both PC and Mac digital audio workstation.
- Up to 384kHz audio support and 64-bit resolution.
- Unlimited instrument and audio tracks.
- Easy file exchange with other DAWs with the AAF support.
- Impact XT and SampleOne XT, Chord Track, and Patterns for drum and melody composition.
- 37 effects, 5 instruments, 4 Note FX, plus AU, VST2, VST3, and ReWire support.
- Auto-latency advantage, enabling you to easily mix and match your favorite plugins with your hardware processors.
- Automatic chord identification.

Conclusion
From any basic joining or slicing audio to pitch corrections, modulation frequency, and more, the above professional audio editing software is loaded with features to bring perfection to your videos. Which of the above software are you planning to give a shot? Select the best DAW that is best for you.
| Audio Editing Software | Features |
|---|---|
| Filmora | Correct the pitch of the audio sound professionally.Merge audio automatically and quickly.Supports audio transition. |
| Adobe Audition CC | Noise reduction features.Clean-up and restoration of sound in podcasting effect.Music ducking effect to lower the background music. |
| Apple Logic Pro X | Smart tempo to auto-match the audio track timing.Easy transport control, multi-touch mixer.A variety of onscreen instruments. |
| Cubase Pro 10 | Simplified sidechain function.5 GB of samples, loops, and sounds, covering numerous genres. |
| Reason | The layout is simple and easy to use.Multiple reverb models, synchronous’ modulation effects. |
| Reaper | Highly efficient and tightly coded.Import, record, and render to multiple media formats. |
| Pro Tools | Fast and fluid tool to compose, edit, and mix.Loop recording and track playlists. |
| Studio One | Unlimited instrument and audio tracks.Automatic chord identification. |
Shanoon Cox
Shanoon Cox is a writer and a lover of all things video.
Follow @Shanoon Cox
Shanoon Cox
Mar 27, 2024• Proven solutions
Audio editing can be quite a challenge for users. The abstraction layers can hide the simple tasks and the audio editing software costing a bomb, making you easily confused and agitated. If you want your audio to enter a higher level, you need professional audio editing software.
Whether you need to convert your cassette collection to Mp3 or just create a soundtrack for your YouTube channel, the powerful and professional audio editing software eases your worries. Here is the 8 best professional audio editing software for powerful editing.
1. Filmora
Filmora is one of the best audio editing software that can give an edge to your videos. Now, perfecting your videos is just a few minutes with Filmora. The features of Filmora include:
- Add only audio to your video if you want.
- Correct the pitch of the audio sound in the video and make it perfect.
- Merge audio and automatically sync it with video.
- You can select an audio compressor and hit the enhance voice to equalize sound.
- You can reduce the background noise from video to enhance the audio quality.
- Allows audio transition.
It also supports advanced audio editing features such as AI audio stretching and audio denoising. Follow the below video intro to know more details.
2. Adobe Audition CC
Adobe Audition CC is a professional workstation for audio. It offers you a great digital audio editing experience, waveform, multi-track, and more within the comprehensive toolkit. The features of Adobe Audition CC are:
- Clean-up and restoration of sound in podcasting and sound effect design with precision using editing tools.
- From a clip, you can record a punch.
- Zoom to the time range of more than one selected clip.
- Select and move a track up and down.
- Add fade in fade out effect, studio reverb, and change volume.
- Music ducking effect where audio of one track automatically lowers when a voiceover is present.
- Come with noise reduction features.
- Record, mix, and export audio for podcast.
3. Apple Logic Pro X
If you are looking for creativity in music, turn to the professional audio editing software Apple Logic Pro X. It offers you the right tools for producing music. With a huge collection of instruments and effects, Apple Logic Pro X simplifies your editing process with Smart Controls. The features are:
- Smart tempo to auto-match the track timing.
- Advanced reverb, creative effects, and vintage EQs with new plugins.
- Transport control, multi-touch mixer, and touch instrument with logic remote.
- Availability of a deep selection of plugins and sounds to fuel your creativity.
- Choose from over 7000 included royalty-free Apple Loops.
- Edit the level and pitch of individual notes quickly and easily with Flex Pitch.
- Control your mix from anywhere in the room with Multi-Touch.
- Use a variety of onscreen instruments, such as keyboards, guitars, and drum pads, to play any software instrument.
4. Cubase Pro 10
With the launch of the new Cubase Pro 10, composing, recording, mixing, and editing have become easier and enhanced. Appropriate for music producers and musicians, Cubase Pro 10 blends intuitive handling and outstanding audio quality, and a collection of highly advanced audio and MIDI tools. The features of Cubase Pro 10 are:
- Come with 5th version drum editor groove agent.
- The pitch editor VariAudio in Cubase Pro 10 hits version three.
- Simplified sidechain function, latency monitor and a new audio alignment system.
- Drag and drop function for plugins to pull them straight from the media rack into your project.
- 5 GB of samples, loops, and sounds, covering numerous genres and produced by famous artists.
5. Reason
One of the best DAW (Digital Audio Workstation) you may try is the Reason. Producing audio files, recording, and editing was never so easy until Reason application software came into the picture. The reason is an amazing software to create music and anything you need to enhance the music. The features of Reason are:
- Easy to start.
- The layout is simple: searching the right instrument and sound, dragging the selected to the rack, using the sequencer to compose, and finally, using the mixer to bring all together.
- You get the range of instruments from stacks of buzzing sawtooths and shimmering sonic explorations in Europa to abstract sound in Grain, semi-modular instruments in Thor to 16 pads drum machine in Kong.
- Multiple reverb models, synchronous’ modulation effects, professional mastering units, and compression, distortion, and modulation filter.
- Quickly and easily overdub, edit, rearrange, comp, and tweak.
6. Reaper
Reaper is an amazingly professional audio editing software that offers computers digital audio applications and production. It provides complete multi-track audio with editing, MIDI recording, mixing, processing, and mastering tools. The features of Reaper are:
- Supports a vast range of hardware, digital formats, and plugins.
- The script, extend and modify comprehensively.
- Highly efficient, fast, and tightly coded.
- Install and run from a portable or network drive.
- 64-bit internal audio processing.
- Import, record, and render to many media formats.
- Hundreds of studio-quality effects for processing audio.
7. Pro Tools
If you wish to create professional-quality music for your YouTube channel, try great-sounding mixes offered by Pro Tools. Known for high-quality sound, this professional audio editing software allows you to track from both computer and audio interfaces. The features of Pro Tools are-
- Take control of mixes.
- Fast and fluid tool to compose, edit, and mix.
- Up to 128 audio tracks, 512 instrument tracks, and 512 MIDI tracks.
- Explore alternative versions of a song or soundtrack with Revisions feature.
- Loop recording and track playlists, and comp together for a flawless performance.
- Polish mixes with a collection of studio-staple effects and sound processing plugins.
8. Studio One
With Studio One, your creativity is not limited to a certain boundary; you may produce as much music you want. This professional audio editing software flawlessly combines the proven and time-tested studio recording way of creating music with the loop-oriented production of today. The features of Studio One are-
- Both PC and Mac digital audio workstation.
- Up to 384kHz audio support and 64-bit resolution.
- Unlimited instrument and audio tracks.
- Easy file exchange with other DAWs with the AAF support.
- Impact XT and SampleOne XT, Chord Track, and Patterns for drum and melody composition.
- 37 effects, 5 instruments, 4 Note FX, plus AU, VST2, VST3, and ReWire support.
- Auto-latency advantage, enabling you to easily mix and match your favorite plugins with your hardware processors.
- Automatic chord identification.
Conclusion
From any basic joining or slicing audio to pitch corrections, modulation frequency, and more, the above professional audio editing software is loaded with features to bring perfection to your videos. Which of the above software are you planning to give a shot? Select the best DAW that is best for you.
| Audio Editing Software | Features |
|---|---|
| Filmora | Correct the pitch of the audio sound professionally.Merge audio automatically and quickly.Supports audio transition. |
| Adobe Audition CC | Noise reduction features.Clean-up and restoration of sound in podcasting effect.Music ducking effect to lower the background music. |
| Apple Logic Pro X | Smart tempo to auto-match the audio track timing.Easy transport control, multi-touch mixer.A variety of onscreen instruments. |
| Cubase Pro 10 | Simplified sidechain function.5 GB of samples, loops, and sounds, covering numerous genres. |
| Reason | The layout is simple and easy to use.Multiple reverb models, synchronous’ modulation effects. |
| Reaper | Highly efficient and tightly coded.Import, record, and render to multiple media formats. |
| Pro Tools | Fast and fluid tool to compose, edit, and mix.Loop recording and track playlists. |
| Studio One | Unlimited instrument and audio tracks.Automatic chord identification. |
Shanoon Cox
Shanoon Cox is a writer and a lover of all things video.
Follow @Shanoon Cox
Top-Rated Adobe Premiere Title Templates [Free] for Your Next Project
Top 20 Adobe Premiere Title/Intro Templates [Free Download]

Benjamin Arango
Mar 29, 2024• Proven solutions
One of the things that can make your output stand out from the crowd is the titles. Many people think creating eye-catching title effects is beyond them, but with Premiere Pro, you really couldn’t be more wrong.
As Premiere Pro doesn’t have built-in templates, the ability to import free Premiere Pro templates is a must. Anyone need to find a custom title style that suits the project and looks professional and carries impact.
The great thing is that there are many of these resources that are offered entirely free! If you don’t know how to add text/title to Adobe Premiere, here are steps to add text resources .
In this article, we will share with you 20 Free to download Title Templates for Premiere Pro.
- Part1: Top 15 Free Adobe Premiere Pro Title Templates
- Part2: Best 5 Premiere Pro Intro Templates Free Download
- Part3: How to Import and Customize Title Templates in Premiere
You may also like: 10 Free Star Wars Fonts to Make Your Video Amazing
Part 1: Top 15 Free Adobe Premiere Title Templates
Adding the finishing touches to a project, like creating the opening titles or end credits, is often not at the top of anyone’s priority list during the video editing process.
Nonetheless, making a unique opening sequence along with impressive animations in Adobe Premiere Pro can be a time-consuming endeavor, so instead of spending countless hours on producing a perfect combination of text and images, you can just download a title template from the Internet.
1 Premier Pro
Jarle Leirpoll runs this site, and it is a treasure trove of information, help, and advice on Premiere from a man who wrote the book (literally, it’s for sale on the site!) on Premiere.
His first title collection is consisting of 8 templates, including Lower Thirds templates, end credit template, and some special characters. However, it well worth a look around the site as there is plenty more free stuff including presets, and a whole range of tips and tricks to help with your editing.
Features:
- Free Premiere Pro templates to download
- Easy to import the title template to Premiere
- 100% ready to use
In case that you’re just a beginner of video editing software, you can start with Wondershare Filmora (Latest Filmora version 11) to add text to videos, which is powerful but easy-to-use for green hands. Download the Wondershare Filmora below.
There are hundreds of Text and Titles presets available in Filmora, which allows you to add titles, subtitles, scrolling end credits, lower 3d, and openers with ease. You can also apply some animation effects to the selected title presets.
Check the video below to find out how to add text to video with Wondershare Filmora.
Besides the built-in title presets, Wondershare Filmora (Latest Filmora version X) also provides more title templates in Filmstock , which offers lots of special effects templates.
Currently, there are Title Expansion Set, business title set, wedding title set, and lower third expansion set to download. Check the video below to watch the Title Expansion set templates.
 Download Mac Version ](https://tools.techidaily.com/wondershare/filmora/download/ )
Learn more details about How to Add Text to Video with Filmora.
2 Richard Harrington
This is another site that offers templates for download but is also a great place to visit for ideas and information. Richard approaches Premiere from a photographer’s viewpoint, and so has a slightly different view on many topics that are well worth reading.
He has links to a sizable number of templates on Richard Harrington covering a range of styles and subjects, including DVD menus, animated text, and high-quality models. Still, his blog is updated regularly and often includes free downloads.
Features:
- Supports Adobe Premiere intro templates to use
- It includes various templates and presets on Windows and Mac
- More than title templates also has DVD menus and animated text
3 ProVideoCoalition
Another all-encompassing site has a huge amount of information and knowledge to be gained. The templates are just part of the story. They are available on Pro Video Coalition and include numerous files and even some free video content showing their implementation.
Also on this page are links to some other sites offering free content or advice on various aspects of Premiere, making it well worth a visit and definitely worth its place in this top 10.
Of particular interest on this site is the regularly updated news which focuses on the latest hardware and software announcements.
Features:
- Supports lower thirds for Adobe Premiere
- You can customize the Premiere Pro intro template free download
- You can create graphic elements
4 Coremelt
This is a commercial site that offers a wide variety of high-quality plugins and templates for several video editing platforms. However, we are on the lookout for that fabulous price of free here, so a little digging finds this page , here you will find ten templates from one of their best selling products offered entirely free.
All templates are quality professionally produced products and worth the visit alone. For anyone who is looking to take their editing output to the professional level, the commercial products on offer here are well worth a look, high quality, and a reasonable cost.
Features:
- It includes 3D text and motion graphics templates
- Free and safe download the Premiere template

5 Bestproaction
Another commercial site. This one has a range of free templates and presets to download for Premiere. Fourteen open items altogether can be downloaded. This site at least deserves a browse through their catalog after a download. The emphasis here is on low cost but high quality, useful templates, and plugins to suit any project.
Even for those of us with a limited budget, there may be something that catches the eye. It is an excellent site for browsing when looking for inspiration.
Features:
- Offers multimedia products like free Premiere Pro text, title templates
- Includes professional Premiere Pro template for videographers
- You can create graphic elements

6 FXFactory
This is another commercial site that has a smattering of very high-quality free downloads on offer, including a beautiful template for the original Star Wars movie style scrolling titles.
Again, it is worth browsing the catalog when you are on the site, but all the free products can be found here .
FX Factory has also created some great video tutorials on a variety of aspects of video production that are well worth a view when you are at the site.
Features:
- Free Premiere Pro effects templates to download
- Includes a step by step Premiere Pro tutorial
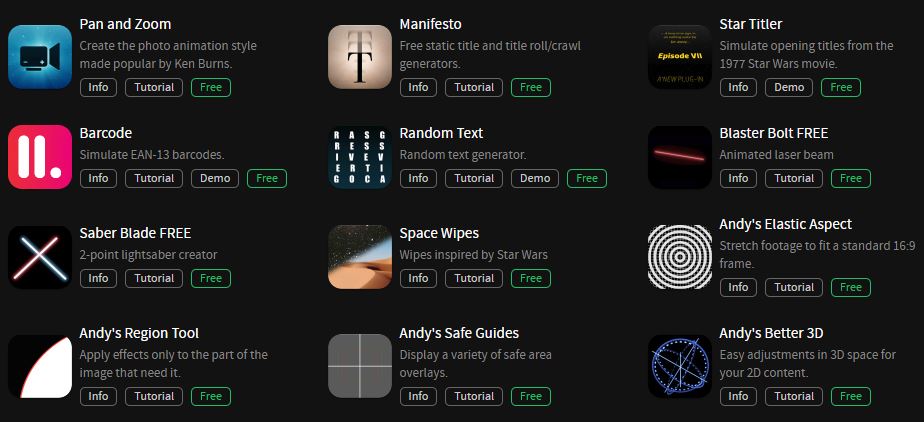
7 Creative Impatience
A fantastic site full of information, tips, and opinion on all aspects of video production, it’s a great place to spend some time, with the bonus of a bunch of free downloads for Premiere.
Of particular note are the tutorials, an excellent source of information and tricks that you may not have seen before, with their YouTube channel being a great source of free guidance for editors of any sort of experience.
Features:
- Apart from free Premiere Pro templates, you can also find blogs
- Easy steps to make Premiere Pro templates
- Safe and clean to use. All real
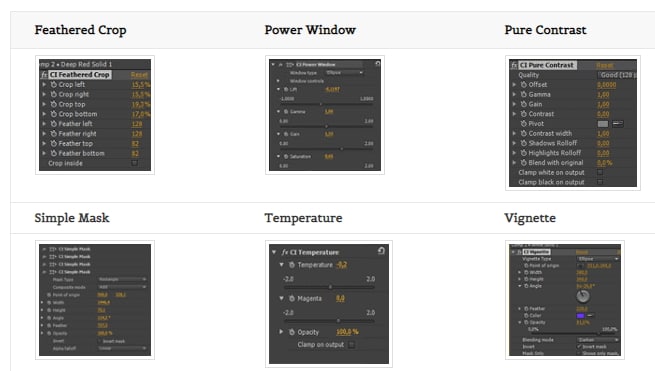
8Filmimpact
A commercial site is offering some great products at competitive prices. At first glance, this may not seem to be a useful place for our search for the free stuff.
However, all the products do have a free trial download, and as a bonus, the trial for pack one includes four free to use templates. They are quality products too, and well worth a look.

9 Style4Type
Style4Type is an exciting site regularly updated with new free templates as well as offering technical advice and having further templates available as commercial products.
And to the side is even a free download for a PDF file that walks you through installing and using the templates within Premiere once you have them.
There are already a lot of free templates on offer covering a wide variety of styles, but they are added to with regularity, so it is a site to bookmark for the future.
Features:
- Free title templates to use including texture templates
- Professional tools to better your video

10 Premiere Beat
Lots of information on this site as its been running for a decade, it is a website that imparts a wealth of knowledge along the way on not just video editing but music.
The pack includes 21 Premiere title templates to use. Another site that you will want to visit again and again.
Features:
- High-quality Premiere Pro templates to download
- A large number of Premiere templates to use
11 Clean Elegant Rotation Title
It is a clean title template without unnecessary parts. If you like simple titles, this one is best for you. You can customize in Premiere easily with a few clicks. For beginners, it also includes free tutorials to use.
Features:
- Simple and clean Premiere title templates
- Customizable in Premiere
12 Unfolding Titles
It is a clean title template with an unfolding effect. Each text has two unfolding effects, which are convenient to use with customization. It supports 4K and HD versions. In this pack, it wons 10 title formats. After importing Premiere, you can also change text size.
Features:
- 20 unfolding title effects
- Supports rendering your video
13 Orange83
These are five modern title packs for Premiere. With it, you don’t need to use After Effects as you can import them to edit. The best part is you can include your logo and other stuff you like.
Features:
- Include 5 title packs
- Modern and clean titles
14 Video Intro Templates - Premiere Pro intro template free download
It is a free download Premiere Pro intro template that you can add to your video. It is highly recommended to use promotion and commercial video.
This intro template can be adjusted after you import it to Premiere Pro. This Premiere Pro intro template is HD, so you don’t need to worry about the whole video quality.
Features:
- 1920X1080 (HD) is supported
- This intro template doesn’t include built-in music
15 Elegant Promo - another Premiere Pro intro template free to use
It is intro template for Premiere Pro is modern and free to use. The whole style is young and energetic, which will give viewers a fresh new feeling. It includes 12 images and 26 text layers, and all of them are free to download.
You can use it for your presentation, promotional video, and product video. Besides, it doesn’t require a plug in to use this intro template in Premiere Pro.
Features:
- It includes animated intro elements.
- Use an HD intro template to make a popular video.

These are free templates, and they are enough to get anyone up and running with a new project. As said before, with the commercial enterprises that offer freebies, it’s always worth checking out their paid for output as well, you may not be in the market for it right now, but something may stick for a later time.
Part 2: Bonus: Best 5 Premiere Pro Intro Templates Free Download
Even though all websites we featured in this article offer some free intro templates for Adobe Premiere Pro. However, it is still a much better solution to buy a subscription plan on a platform if you are working on a large number of projects each month.
Let’s see which websites you can use to download the intro and title templates for Premiere Pro.
16. Motion Array
In addition to an impressive library of intro templates, Motion Array offers presets, sound effects, royalty-free music, and stock footage.
Furthermore, you can choose the software version to make sure that the templates you download can be used with the version of Adobe Premiere Pro you have installed on your computer.
The website provides you with powerful search tools, so you can select the resolution of the template, up to 8K, or choose which types of templates are going to be displayed.
Using the free subscription plan can limit your options since you’ll only be able to download free templates, and your upload storage will be limited to just 1GB.
The Pro subscription plan that can be purchased for $54 per month will grant you access to an almost endless selection of title templates as well as a huge selection of plugins for Adobe Premiere Pro.

17. Cinecom – Simple Intro for Premiere Pro
It is a designer pack that features ten pre-animated lower-thirds intro templates. You can change the duration of the font and color of the text in each template, and you can choose if you want to download a 1080 or the 4K version of the designer pack.
The templates are compatible with CS6, CC2013, CC2014, and CC2016 versions of the Premiere Pro. The Simple Titles pack can be easily installed, as you just have to drag and drop it into the software.
However, before you can download these title templates, you have to subscribe to Cinecom’s mailing list.
Even though this can be a bit inconvenient, it is very well worth the trouble since you’ll be able to transform or build upon the intro templates and use them freely in all videos you edit in Adobe Premiere Pro.
18. EnvatoElements
You can find much more than intro templates on the EnvatoElements platform since you can choose from 740.000 items you can use for anything from creating a WordPress website to preparing your next business presentation.
The Video Templates category alone features over 4000 items, including Logo Stings or Infographics assets.
There are nearly one hundred available intro templates for Adobe Premiere Pro, but downloading any of them requires you to create an account and purchase a subscription plan.
Prices start from $16.50 per month, and packages include virtually unlimited access to stock photos and videos, video templates, and much more. The EnvatoElements platform also offers assets that can be used with Final Cut Pro, Adobe After Effects or Apple Motion.

19. Videohive
Videohive is a part of the Envato Market platform that also features Web Themes and Templates, Code, Audio, or Graphic sections. It is free to use, but only a limited amount of assets can be downloaded for free.
To download an item, you must purchase it, and prices can range from $16 to $50 for a single title template.
Videohive is also a great source of title templates for Adobe After Effects, as it offers more than 5000 titles and intros that are compatible with this software.
Furthermore, you can download presets for both Premiere Pro and After Effects that can be used to create stop-motion animations, perform color correction, or make the footage look like it was captured with a VHS camera.

20. RocketStock
This option is best suited for video editors who want to create their intros because RocketStok’s Cinematic Style Library extends the scope of options provided by Premiere Pro.
Downloading all fonts except Helvetica Neue is free, but you must check which fonts you can use in commercial projects. You will have no trouble installing the fonts since you can just double-click on the font and follow the on-screen instructions.
Once you’ve installed all the fonts from the library, you can use them to replace the software’s default library. You just have to click on the Replace Style Library option that can be accessed from Premiere Pro’s Title Style tab.
If you don’t feel comfortable creating your titles or if you simply don’t have the time to create your own titles, the Free Cinematic Style Library is not the best choice for you.
On the other hand, Premiere Pro’s users who don’t often use title templates can benefit from downloading RocketStock’s intro library.

Part 3: How to Import and Customize Title Templates in Premiere
If you download the template, all the title templates support customization. You can change its size, font, color, and add 3D effects.
It is easy to import and use it to touch up your video. Check out the steps below to know how to import title templates quickly.
- Install the title template. Choose one template you like and download it to your PC. Remember to unzip it before importing it. Now install them.
- Import the title template. You just need to go to click Effects at the top. Then at right, you will find Presets in the effects section.
- Right-click on presets, and choose Import Presets. If the title template format is .mogrt, you need to open it in Essential Graphics Panel. At the bottom right corner, click the plus icon to import the title template and install it.
- Customize the title template. Once the title template is imported, drag it to the timeline. Click the Editing tab. Here you can customize colors, text, opacities, and positions. There are more options for you to explore.
- You can also copy and paste the title template to another place in the timeline. If you change one place of the pasted template, the original one will remain the same.
Note: each version of Premiere’s interface will look different, but the workflow is similar.
Conclusion
Using title templates can help you achieve a certain visual style faster, so you don’t have to spend a lot of time looking for a perfect background or animating the text.
The Internet provides almost unlimited video editing resources, but not all of these resources can be acquired for free.
Which website you will choose as a source of fresh title templates depends on how often you work on new projects in Adobe Premiere Pro.
If you want to make professional video editing and tired of Premiere, try Filmora! It includes various titles templates to use.
You can sync audio automatically, use detailed color correction to make your title and video like a movie. Download it now (FREE)!
Benjamin Arango
Benjamin Arango is a writer and a lover of all things video.
Follow @Benjamin Arango
Benjamin Arango
Mar 29, 2024• Proven solutions
One of the things that can make your output stand out from the crowd is the titles. Many people think creating eye-catching title effects is beyond them, but with Premiere Pro, you really couldn’t be more wrong.
As Premiere Pro doesn’t have built-in templates, the ability to import free Premiere Pro templates is a must. Anyone need to find a custom title style that suits the project and looks professional and carries impact.
The great thing is that there are many of these resources that are offered entirely free! If you don’t know how to add text/title to Adobe Premiere, here are steps to add text resources .
In this article, we will share with you 20 Free to download Title Templates for Premiere Pro.
- Part1: Top 15 Free Adobe Premiere Pro Title Templates
- Part2: Best 5 Premiere Pro Intro Templates Free Download
- Part3: How to Import and Customize Title Templates in Premiere
You may also like: 10 Free Star Wars Fonts to Make Your Video Amazing
Part 1: Top 15 Free Adobe Premiere Title Templates
Adding the finishing touches to a project, like creating the opening titles or end credits, is often not at the top of anyone’s priority list during the video editing process.
Nonetheless, making a unique opening sequence along with impressive animations in Adobe Premiere Pro can be a time-consuming endeavor, so instead of spending countless hours on producing a perfect combination of text and images, you can just download a title template from the Internet.
1 Premier Pro
Jarle Leirpoll runs this site, and it is a treasure trove of information, help, and advice on Premiere from a man who wrote the book (literally, it’s for sale on the site!) on Premiere.
His first title collection is consisting of 8 templates, including Lower Thirds templates, end credit template, and some special characters. However, it well worth a look around the site as there is plenty more free stuff including presets, and a whole range of tips and tricks to help with your editing.
Features:
- Free Premiere Pro templates to download
- Easy to import the title template to Premiere
- 100% ready to use
In case that you’re just a beginner of video editing software, you can start with Wondershare Filmora (Latest Filmora version 11) to add text to videos, which is powerful but easy-to-use for green hands. Download the Wondershare Filmora below.
There are hundreds of Text and Titles presets available in Filmora, which allows you to add titles, subtitles, scrolling end credits, lower 3d, and openers with ease. You can also apply some animation effects to the selected title presets.
Check the video below to find out how to add text to video with Wondershare Filmora.
Besides the built-in title presets, Wondershare Filmora (Latest Filmora version X) also provides more title templates in Filmstock , which offers lots of special effects templates.
Currently, there are Title Expansion Set, business title set, wedding title set, and lower third expansion set to download. Check the video below to watch the Title Expansion set templates.
Download Mac Version ](https://tools.techidaily.com/wondershare/filmora/download/ )
Learn more details about How to Add Text to Video with Filmora.
2 Richard Harrington
This is another site that offers templates for download but is also a great place to visit for ideas and information. Richard approaches Premiere from a photographer’s viewpoint, and so has a slightly different view on many topics that are well worth reading.
He has links to a sizable number of templates on Richard Harrington covering a range of styles and subjects, including DVD menus, animated text, and high-quality models. Still, his blog is updated regularly and often includes free downloads.
Features:
- Supports Adobe Premiere intro templates to use
- It includes various templates and presets on Windows and Mac
- More than title templates also has DVD menus and animated text
3 ProVideoCoalition
Another all-encompassing site has a huge amount of information and knowledge to be gained. The templates are just part of the story. They are available on Pro Video Coalition and include numerous files and even some free video content showing their implementation.
Also on this page are links to some other sites offering free content or advice on various aspects of Premiere, making it well worth a visit and definitely worth its place in this top 10.
Of particular interest on this site is the regularly updated news which focuses on the latest hardware and software announcements.
Features:
- Supports lower thirds for Adobe Premiere
- You can customize the Premiere Pro intro template free download
- You can create graphic elements
4 Coremelt
This is a commercial site that offers a wide variety of high-quality plugins and templates for several video editing platforms. However, we are on the lookout for that fabulous price of free here, so a little digging finds this page , here you will find ten templates from one of their best selling products offered entirely free.
All templates are quality professionally produced products and worth the visit alone. For anyone who is looking to take their editing output to the professional level, the commercial products on offer here are well worth a look, high quality, and a reasonable cost.
Features:
- It includes 3D text and motion graphics templates
- Free and safe download the Premiere template
5 Bestproaction
Another commercial site. This one has a range of free templates and presets to download for Premiere. Fourteen open items altogether can be downloaded. This site at least deserves a browse through their catalog after a download. The emphasis here is on low cost but high quality, useful templates, and plugins to suit any project.
Even for those of us with a limited budget, there may be something that catches the eye. It is an excellent site for browsing when looking for inspiration.
Features:
- Offers multimedia products like free Premiere Pro text, title templates
- Includes professional Premiere Pro template for videographers
- You can create graphic elements
6 FXFactory
This is another commercial site that has a smattering of very high-quality free downloads on offer, including a beautiful template for the original Star Wars movie style scrolling titles.
Again, it is worth browsing the catalog when you are on the site, but all the free products can be found here .
FX Factory has also created some great video tutorials on a variety of aspects of video production that are well worth a view when you are at the site.
Features:
- Free Premiere Pro effects templates to download
- Includes a step by step Premiere Pro tutorial
7 Creative Impatience
A fantastic site full of information, tips, and opinion on all aspects of video production, it’s a great place to spend some time, with the bonus of a bunch of free downloads for Premiere.
Of particular note are the tutorials, an excellent source of information and tricks that you may not have seen before, with their YouTube channel being a great source of free guidance for editors of any sort of experience.
Features:
- Apart from free Premiere Pro templates, you can also find blogs
- Easy steps to make Premiere Pro templates
- Safe and clean to use. All real
8Filmimpact
A commercial site is offering some great products at competitive prices. At first glance, this may not seem to be a useful place for our search for the free stuff.
However, all the products do have a free trial download, and as a bonus, the trial for pack one includes four free to use templates. They are quality products too, and well worth a look.
9 Style4Type
Style4Type is an exciting site regularly updated with new free templates as well as offering technical advice and having further templates available as commercial products.
And to the side is even a free download for a PDF file that walks you through installing and using the templates within Premiere once you have them.
There are already a lot of free templates on offer covering a wide variety of styles, but they are added to with regularity, so it is a site to bookmark for the future.
Features:
- Free title templates to use including texture templates
- Professional tools to better your video
10 Premiere Beat
Lots of information on this site as its been running for a decade, it is a website that imparts a wealth of knowledge along the way on not just video editing but music.
The pack includes 21 Premiere title templates to use. Another site that you will want to visit again and again.
Features:
- High-quality Premiere Pro templates to download
- A large number of Premiere templates to use
11 Clean Elegant Rotation Title
It is a clean title template without unnecessary parts. If you like simple titles, this one is best for you. You can customize in Premiere easily with a few clicks. For beginners, it also includes free tutorials to use.
Features:
- Simple and clean Premiere title templates
- Customizable in Premiere
12 Unfolding Titles
It is a clean title template with an unfolding effect. Each text has two unfolding effects, which are convenient to use with customization. It supports 4K and HD versions. In this pack, it wons 10 title formats. After importing Premiere, you can also change text size.
Features:
- 20 unfolding title effects
- Supports rendering your video
13 Orange83
These are five modern title packs for Premiere. With it, you don’t need to use After Effects as you can import them to edit. The best part is you can include your logo and other stuff you like.
Features:
- Include 5 title packs
- Modern and clean titles
14 Video Intro Templates - Premiere Pro intro template free download
It is a free download Premiere Pro intro template that you can add to your video. It is highly recommended to use promotion and commercial video.
This intro template can be adjusted after you import it to Premiere Pro. This Premiere Pro intro template is HD, so you don’t need to worry about the whole video quality.
Features:
- 1920X1080 (HD) is supported
- This intro template doesn’t include built-in music
15 Elegant Promo - another Premiere Pro intro template free to use
It is intro template for Premiere Pro is modern and free to use. The whole style is young and energetic, which will give viewers a fresh new feeling. It includes 12 images and 26 text layers, and all of them are free to download.
You can use it for your presentation, promotional video, and product video. Besides, it doesn’t require a plug in to use this intro template in Premiere Pro.
Features:
- It includes animated intro elements.
- Use an HD intro template to make a popular video.
These are free templates, and they are enough to get anyone up and running with a new project. As said before, with the commercial enterprises that offer freebies, it’s always worth checking out their paid for output as well, you may not be in the market for it right now, but something may stick for a later time.
Part 2: Bonus: Best 5 Premiere Pro Intro Templates Free Download
Even though all websites we featured in this article offer some free intro templates for Adobe Premiere Pro. However, it is still a much better solution to buy a subscription plan on a platform if you are working on a large number of projects each month.
Let’s see which websites you can use to download the intro and title templates for Premiere Pro.
16. Motion Array
In addition to an impressive library of intro templates, Motion Array offers presets, sound effects, royalty-free music, and stock footage.
Furthermore, you can choose the software version to make sure that the templates you download can be used with the version of Adobe Premiere Pro you have installed on your computer.
The website provides you with powerful search tools, so you can select the resolution of the template, up to 8K, or choose which types of templates are going to be displayed.
Using the free subscription plan can limit your options since you’ll only be able to download free templates, and your upload storage will be limited to just 1GB.
The Pro subscription plan that can be purchased for $54 per month will grant you access to an almost endless selection of title templates as well as a huge selection of plugins for Adobe Premiere Pro.
17. Cinecom – Simple Intro for Premiere Pro
It is a designer pack that features ten pre-animated lower-thirds intro templates. You can change the duration of the font and color of the text in each template, and you can choose if you want to download a 1080 or the 4K version of the designer pack.
The templates are compatible with CS6, CC2013, CC2014, and CC2016 versions of the Premiere Pro. The Simple Titles pack can be easily installed, as you just have to drag and drop it into the software.
However, before you can download these title templates, you have to subscribe to Cinecom’s mailing list.
Even though this can be a bit inconvenient, it is very well worth the trouble since you’ll be able to transform or build upon the intro templates and use them freely in all videos you edit in Adobe Premiere Pro.
18. EnvatoElements
You can find much more than intro templates on the EnvatoElements platform since you can choose from 740.000 items you can use for anything from creating a WordPress website to preparing your next business presentation.
The Video Templates category alone features over 4000 items, including Logo Stings or Infographics assets.
There are nearly one hundred available intro templates for Adobe Premiere Pro, but downloading any of them requires you to create an account and purchase a subscription plan.
Prices start from $16.50 per month, and packages include virtually unlimited access to stock photos and videos, video templates, and much more. The EnvatoElements platform also offers assets that can be used with Final Cut Pro, Adobe After Effects or Apple Motion.
19. Videohive
Videohive is a part of the Envato Market platform that also features Web Themes and Templates, Code, Audio, or Graphic sections. It is free to use, but only a limited amount of assets can be downloaded for free.
To download an item, you must purchase it, and prices can range from $16 to $50 for a single title template.
Videohive is also a great source of title templates for Adobe After Effects, as it offers more than 5000 titles and intros that are compatible with this software.
Furthermore, you can download presets for both Premiere Pro and After Effects that can be used to create stop-motion animations, perform color correction, or make the footage look like it was captured with a VHS camera.
20. RocketStock
This option is best suited for video editors who want to create their intros because RocketStok’s Cinematic Style Library extends the scope of options provided by Premiere Pro.
Downloading all fonts except Helvetica Neue is free, but you must check which fonts you can use in commercial projects. You will have no trouble installing the fonts since you can just double-click on the font and follow the on-screen instructions.
Once you’ve installed all the fonts from the library, you can use them to replace the software’s default library. You just have to click on the Replace Style Library option that can be accessed from Premiere Pro’s Title Style tab.
If you don’t feel comfortable creating your titles or if you simply don’t have the time to create your own titles, the Free Cinematic Style Library is not the best choice for you.
On the other hand, Premiere Pro’s users who don’t often use title templates can benefit from downloading RocketStock’s intro library.
Part 3: How to Import and Customize Title Templates in Premiere
If you download the template, all the title templates support customization. You can change its size, font, color, and add 3D effects.
It is easy to import and use it to touch up your video. Check out the steps below to know how to import title templates quickly.
- Install the title template. Choose one template you like and download it to your PC. Remember to unzip it before importing it. Now install them.
- Import the title template. You just need to go to click Effects at the top. Then at right, you will find Presets in the effects section.
- Right-click on presets, and choose Import Presets. If the title template format is .mogrt, you need to open it in Essential Graphics Panel. At the bottom right corner, click the plus icon to import the title template and install it.
- Customize the title template. Once the title template is imported, drag it to the timeline. Click the Editing tab. Here you can customize colors, text, opacities, and positions. There are more options for you to explore.
- You can also copy and paste the title template to another place in the timeline. If you change one place of the pasted template, the original one will remain the same.
Note: each version of Premiere’s interface will look different, but the workflow is similar.
Conclusion
Using title templates can help you achieve a certain visual style faster, so you don’t have to spend a lot of time looking for a perfect background or animating the text.
The Internet provides almost unlimited video editing resources, but not all of these resources can be acquired for free.
Which website you will choose as a source of fresh title templates depends on how often you work on new projects in Adobe Premiere Pro.
If you want to make professional video editing and tired of Premiere, try Filmora! It includes various titles templates to use.
You can sync audio automatically, use detailed color correction to make your title and video like a movie. Download it now (FREE)!
Benjamin Arango
Benjamin Arango is a writer and a lover of all things video.
Follow @Benjamin Arango
Free Online Invitation Video Creators: Top Picks
Searching for the best free online video invitation maker can be challenging because there are numerous options to pick from. And each online video invitation maker has a different purpose from the next one. Some online video invitation makers are excellent choices for weddings while others are best fitted for naming ceremonies, birthdays, graduations, etc.
If you want to make an invitation video online for any of your events that your recipients will find impressive, then you should know the right one to use. In this article, you are going to learn about the best free online video invitation makers to use for any of your events.
Best Invitation Video Makers Online Free
Here are the ten best free online video invitation makers to use in 2024, you will find the best one fits your needs perfectly.
1. Animaker
Animaker is one of the best free video invitation makers online. You can use it to create, share and edit content. It is perfect for making wedding, baby shower, and birthday video invitations. Animaker runs on a powerful HTML5 engine that ensures a seamless user experience. It has over 100 million-plus stock assets. It also has an extensive template library that you can use to make your invitations. Using these awesome video templates, you can personalize them and add your photos and event info.
Animaker allows you to edit videos and export in 4k quality. You can also subtitle to your videos , add an overlay to videos with a single click, watermark your video content and so much more. It also has numerous royalty-free music tracks and sound effects that you can add to your videos without the fear of copyright.
2. FlexClip

This is another invitation video maker online for free that you can use to make good invitation videos. You should go for FlexClip if you are a beginner because it has an easy-to-use user interface. If you want to do a wedding, online webinar, or graduation invitation video, FlexClip is your best bet. It has a free extensive video template that you can add to your storyboard to make excellent video invitations for your events.
One of its distinctive features is that you can export your video invitation without a watermark online . FlexClip has amazing images and footage that allows you to decorate your invitation nicely. You can resize, trim and add voice-over to your invitation.
3. Promo

Promo is one of the best free online invitation video makers. If you want to do an office event, baby shower, wedding party, or retirement celebration and you need a good online invitation video maker, Promo is a perfect choice. Promo allows you to either upload your video or choose out of its numerous rich invitation templates. It’s also user-friendly and very easy to use.
Promo has over 110 million photo and video libraries. You can customize the template you choose with your texts, brand, and images with a few clicks. It also has a vast collection of royalty-free music you can add to your content. Another great feature is the ability to filter these pieces of music by mood, genre, and tempo to find the perfect one for your invitation. Promo will create your video invitations in minutes.
4. Biteable

Biteable is another great online video invitation maker that will help you to create the perfect invitation video for your events. It is the perfect invitation maker for birthdays, work functions, and weddings. With Biteable, you will turn ordinary videos into sensational video invitations. You can get inspiration from the tons of video templates in Biteable. It has a library of over 80,000 animated graphics and Shutterstock clips and over 1.8 million video clips and images to pick from.
Biteable allows you to add logos and your brand colors to your content. You can customize your invite with photos, texts, animations, etc. You can also export your video invites to your emails.
5. InVideo

Like its name, InVideo is an online video invitation maker that allows you to create and edit video invites with awesome templates. Whether it is a birthday party, wedding celebration, work party, or a sales event, you can use InVideo to make stunning, attention-grabbing invites that will wow your guests. InVideo allows you to pick a theme and then pick a template that matches your theme.
You can also add fonts to your content. In addition, it has an automated voice-over and power transitions. You can also add smart frames to beautify your invite. With Invideo, you can confidently say goodbye to boring video invites.
6. Veed.io
If you want to create dynamic videos that work perfectly as digital invites, Veed is what you are looking for. Veed is a perfect choice if you want video invites for your baby shower, company event, birthday, and wedding. It has powerful yet simple tools that give optimal results in a few minutes. Veed also has an extensive library of rich customizable templates you can pick from.
You can also drag and drop your video into the video editor. In addition, you can add power transitions and camera effects that allow you to make insanely clear video invites. Veed also enables you to split your videos into various clips and add different filters to each clip. Other features include background music, stickers, personalized texts, etc.
7. Renderforest

This is another great free online video invitation maker you can use to create eye-catching invites within a few minutes. You can also use Renderforest to create stunning invites for weddings, graduation ceremonies, birthday parties, etc. It has numerous professionally designed and outstanding templates you can edit to fit your needs. It has drag-and-drop where you can upload video and images directly to your storyboard.
It has numerous video editing features that include, adjusting colors, muting of projects, uploading of voiceovers, changing the duration, choosing the best background music that fits your theme, etc. If you want an easy-to-use video invitation maker with a track record of stunning video invites and satisfied customers, Renderforest is a perfect fit.
8. Typito
Typito is one of the best online video invitation makers. Typito is best used for weddings, webinars, conferences, birthdays, and engagements. It has numerous templates you can choose from and edit to fit your needs. You can also create your invitation from scratch by uploading your videos and images using drag-and-drop, text templates, and motion graphics.
Typito allows you to personalize each video invitation to fit your chosen theme. It has numerous background music that has been made to fit every theme you choose. In addition, you can change colors, filters, animations, photos, and texts. If you want user-friendly software to make video invitations with a few clicks, go for Typito.
9. VideoCreek

VideoCreek is very easy to use. If you want a DIY online video invitation maker that will give you the needed tools to create awesome custom invitations that will delight your guest, VideoCreek fits perfectly. VideoCreek is a great choice for farewells, anniversaries, bachelor parties, and birthdays. It has a vast library that contains thousands of free invitation templates that you edit to your preference.
You can add graphics, music, texts, and images to your content. You can also customize your invitation by adding animations, favorite stickers, effects, emoji, etc. Making stunning video invitations without stress is possible with VideoCreek.
10. Design Wizard

Design Wizard is another free online video invitation maker that makes creating video invitations fun. It is perfect for birthdays, housewarmings, bridal showers, and retirement parties. It has more than enough customizable templates with over twenty categories that you can choose from and edit to fit your video invite idea. It also has an entire library of TV and quality videos. Design Wizard’s drag and drop templates make online video editing easy for beginners and novices. You can also add texts to your video invitation.
Other notable features include an online video trimmer , adding a logo to the video, adding images to videos, etc. Design Wizard can get you hooked with its friendly user interface, and you will love the experience.
Bonus: Best Video Invitation Makers for Windows and Mac – Wondershare Filmora
Filmora is one of the best video invitation makers because of its music library, title templates, and plentiful effects.
For users who are running Wondershare Filmora V10.5 and later version, you can search birthday, wedding, baby shower in the effects search bar to navigate to the related effects easily.
For Win 7 or later (64-bit)
For macOS 10.12 or later
Final Thoughts
When selecting the software to use for editing video invitations, you must know the one that will fit your events. With this article, Choosing the best online video invitation maker to use has been made easy for you. You now know the right free online video invitation maker to use for any of your events. Now, you can create stunning, eye-catching video invitations that will wow your guests and make them look forward to your event.
Animaker is one of the best free video invitation makers online. You can use it to create, share and edit content. It is perfect for making wedding, baby shower, and birthday video invitations. Animaker runs on a powerful HTML5 engine that ensures a seamless user experience. It has over 100 million-plus stock assets. It also has an extensive template library that you can use to make your invitations. Using these awesome video templates, you can personalize them and add your photos and event info.
Animaker allows you to edit videos and export in 4k quality. You can also subtitle to your videos , add an overlay to videos with a single click, watermark your video content and so much more. It also has numerous royalty-free music tracks and sound effects that you can add to your videos without the fear of copyright.
2. FlexClip
This is another invitation video maker online for free that you can use to make good invitation videos. You should go for FlexClip if you are a beginner because it has an easy-to-use user interface. If you want to do a wedding, online webinar, or graduation invitation video, FlexClip is your best bet. It has a free extensive video template that you can add to your storyboard to make excellent video invitations for your events.
One of its distinctive features is that you can export your video invitation without a watermark online . FlexClip has amazing images and footage that allows you to decorate your invitation nicely. You can resize, trim and add voice-over to your invitation.
3. Promo
Promo is one of the best free online invitation video makers. If you want to do an office event, baby shower, wedding party, or retirement celebration and you need a good online invitation video maker, Promo is a perfect choice. Promo allows you to either upload your video or choose out of its numerous rich invitation templates. It’s also user-friendly and very easy to use.
Promo has over 110 million photo and video libraries. You can customize the template you choose with your texts, brand, and images with a few clicks. It also has a vast collection of royalty-free music you can add to your content. Another great feature is the ability to filter these pieces of music by mood, genre, and tempo to find the perfect one for your invitation. Promo will create your video invitations in minutes.
4. Biteable
Biteable is another great online video invitation maker that will help you to create the perfect invitation video for your events. It is the perfect invitation maker for birthdays, work functions, and weddings. With Biteable, you will turn ordinary videos into sensational video invitations. You can get inspiration from the tons of video templates in Biteable. It has a library of over 80,000 animated graphics and Shutterstock clips and over 1.8 million video clips and images to pick from.
Biteable allows you to add logos and your brand colors to your content. You can customize your invite with photos, texts, animations, etc. You can also export your video invites to your emails.
5. InVideo
Like its name, InVideo is an online video invitation maker that allows you to create and edit video invites with awesome templates. Whether it is a birthday party, wedding celebration, work party, or a sales event, you can use InVideo to make stunning, attention-grabbing invites that will wow your guests. InVideo allows you to pick a theme and then pick a template that matches your theme.
You can also add fonts to your content. In addition, it has an automated voice-over and power transitions. You can also add smart frames to beautify your invite. With Invideo, you can confidently say goodbye to boring video invites.
6. Veed.io
If you want to create dynamic videos that work perfectly as digital invites, Veed is what you are looking for. Veed is a perfect choice if you want video invites for your baby shower, company event, birthday, and wedding. It has powerful yet simple tools that give optimal results in a few minutes. Veed also has an extensive library of rich customizable templates you can pick from.
You can also drag and drop your video into the video editor. In addition, you can add power transitions and camera effects that allow you to make insanely clear video invites. Veed also enables you to split your videos into various clips and add different filters to each clip. Other features include background music, stickers, personalized texts, etc.
7. Renderforest
This is another great free online video invitation maker you can use to create eye-catching invites within a few minutes. You can also use Renderforest to create stunning invites for weddings, graduation ceremonies, birthday parties, etc. It has numerous professionally designed and outstanding templates you can edit to fit your needs. It has drag-and-drop where you can upload video and images directly to your storyboard.
It has numerous video editing features that include, adjusting colors, muting of projects, uploading of voiceovers, changing the duration, choosing the best background music that fits your theme, etc. If you want an easy-to-use video invitation maker with a track record of stunning video invites and satisfied customers, Renderforest is a perfect fit.
8. Typito
Typito is one of the best online video invitation makers. Typito is best used for weddings, webinars, conferences, birthdays, and engagements. It has numerous templates you can choose from and edit to fit your needs. You can also create your invitation from scratch by uploading your videos and images using drag-and-drop, text templates, and motion graphics.
Typito allows you to personalize each video invitation to fit your chosen theme. It has numerous background music that has been made to fit every theme you choose. In addition, you can change colors, filters, animations, photos, and texts. If you want user-friendly software to make video invitations with a few clicks, go for Typito.
9. VideoCreek
VideoCreek is very easy to use. If you want a DIY online video invitation maker that will give you the needed tools to create awesome custom invitations that will delight your guest, VideoCreek fits perfectly. VideoCreek is a great choice for farewells, anniversaries, bachelor parties, and birthdays. It has a vast library that contains thousands of free invitation templates that you edit to your preference.
You can add graphics, music, texts, and images to your content. You can also customize your invitation by adding animations, favorite stickers, effects, emoji, etc. Making stunning video invitations without stress is possible with VideoCreek.
10. Design Wizard
Design Wizard is another free online video invitation maker that makes creating video invitations fun. It is perfect for birthdays, housewarmings, bridal showers, and retirement parties. It has more than enough customizable templates with over twenty categories that you can choose from and edit to fit your video invite idea. It also has an entire library of TV and quality videos. Design Wizard’s drag and drop templates make online video editing easy for beginners and novices. You can also add texts to your video invitation.
Other notable features include an online video trimmer , adding a logo to the video, adding images to videos, etc. Design Wizard can get you hooked with its friendly user interface, and you will love the experience.
Bonus: Best Video Invitation Makers for Windows and Mac – Wondershare Filmora
Filmora is one of the best video invitation makers because of its music library, title templates, and plentiful effects.
For users who are running Wondershare Filmora V10.5 and later version, you can search birthday, wedding, baby shower in the effects search bar to navigate to the related effects easily.
For Win 7 or later (64-bit)
For macOS 10.12 or later
Final Thoughts
When selecting the software to use for editing video invitations, you must know the one that will fit your events. With this article, Choosing the best online video invitation maker to use has been made easy for you. You now know the right free online video invitation maker to use for any of your events. Now, you can create stunning, eye-catching video invitations that will wow your guests and make them look forward to your event.
Also read:
- New Windows 11 Video Editing A Comprehensive List of Free and Paid Solutions
- Updated In 2024, Top 10 Premiere Pro Transition Effects to Elevate Your Videos
- New Subtitle Edit Mac Alternative Find Your New Go-To Subtitle Editor for 2024
- Updated 2024 Approved If You Are Looking for a Free Tool to Slow Down the Playback Speed of a Film Clip without Installing Any Program on Your Computer, Kapwing Is One of the Best Online Video Editors that Can Help You Get the Job Done Proficiently
- Updated Best Free AVI Merger Tools Combine AVI Videos with Ease for 2024
- New 2024 Approved FCPX Mastery Creating Professional-Looking Lower Thirds
- New In 2024, From Glitchy to Great How to Reset Final Cut Pro X
- Streamline Your Workflow Best 4K Proxy Video Editing Software for 2024
- In 2024, S Most Entertaining Video Dubbing Apps for Mobile Devices
- Updated 2024 Approved Split Videos Like a Pro The Best Free Tools
- The Ultimate Guide to AVCHD Video Editing Software Top 5 for 2024
- New Elevate Your Videos A Beginners Guide to Using Ken Burns Effect in Final Cut Pro for 2024
- New 2024 Approved Online Photo Background Blur The Best Free Tools and Websites
- Video to Cartoon Converter Tips, Tricks, and Best Practices for 2024
- Updated 2024 Approved Cracking the Code Twitter Video Aspect Ratio Secrets
- New Top Reasons to Check Out This Mp3 Converter Windows Guide
- Updated 2024 Approved Unleash the Drama Top Slow Motion Video Editing Apps
- New Free Online Subtitle Generators Top 10 Options for Video Creators for 2024
- New A Beginners Guide to M4R Conversion Key Concepts to Grasp for 2024
- New Make Your Own Music Magic Top Lip Sync Video Creation Apps
- 2024 Approved The Ultimate Hack Skip Reddit and Get Filmora Deals Here
- New Best Aspect Ratio Changer Tools for Videos and Images for 2024
- 2024 Approved Top-Rated Slow Motion Video Players You Need
- 2024 Approved S Top 10 Free Chroma Key Apps for Android and iOS
- The Crème De La Crème of 4K Video Top 10 Picks for 2024
- Updated The Ultimate List of Windows Movie Maker Substitutes
- Must-Have iPhone Apps The Complete Roundup for 2024
- Updated Best of the Web Top Free Invitation Video Creation Platforms for 2024
- Updated In 2024, Convert Audio Files with Ease Top 12 Converter Options
- New In 2024, Identify and Improve Image Scale
- Updated 2024 Approved Make Your Own Lyric Videos Best Online Makers and Editors
- New In 2024, Elevate Your Footage Expert Advice for Stunning Home Videos
- New The FCPX Training Hub Top Channels, Sites, and Resources for 2024
- Updated One-Stop Video Editing Shop 35 Editors for Every Operating System for 2024
- New In 2024, The Best Video Editing Software for Those New to Video Production
- Updated Stop Motion on Demand Cloud-Based Solutions and Guidance
- Updated 2024 Approved MP4 to MP3 Conversion Made Easy Top Apps for Mobile
- 2024 Approved Take It Down a Notch How to Enable Slow Motion on VLC for Desktop and Mobile
- New The Ultimate List of Android Video Editors with No Watermark for 2024
- Updated In 2024, Make Your Videos Pop Top Text Animation Apps for Android and iOS
- New In 2024, Best Free Video Cutter Tools for Windows 10 Online and Offline Options
- 2024 Approved Make Unforgettable Video Invites with These Free Online Tools
- In 2024, Revolutionize Your Edits 10 Best FCPX Plugins
- Updated In 2024, Create Epic Gaming Intros Top 10 Tools for Windows and Mac Free & Paid
- Updated Top Considerations for Picking a Reliable Video to Audio Conversion Tool
- Does Samsung Galaxy F54 5G has native MOV support?
- In 2024, How To Change Xiaomi 13T Pro Lock Screen Clock in Seconds
- How to Access Your Apple iPhone 13 mini When You Forget the Passcode?
- Pokémon Go Cooldown Chart On Realme GT 5 | Dr.fone
- How to Unlock Nokia C32 Phone without Any Data Loss
- Why is iPogo not working On Realme Note 50? Fixed | Dr.fone
- New 2024 Approved How to Brighten a Video in Windows 10 | Step-By-Step Guide
- In 2024, How to Screen Mirroring Poco C50? | Dr.fone
- Hassle-Free Ways to Remove FRP Lock from Xiaomi Mix Fold 3 Phones with/without a PC
- How to Speed Up Video with Canva Online Tool for 2024
- In 2024, How to Delete iCloud Account From iPhone 14 Pro without Password?
- Easy Tutorial for Activating iCloud from Apple iPhone SE (2020) Safe and Legal
- In 2024, Nokia C12 Pro ADB Format Tool for PC vs. Other Unlocking Tools Which One is the Best?
- Detailed Review of doctorSIM Unlock Service For iPhone 13 Pro Max | Dr.fone
- How To Update or Downgrade iPhone 14 Plus Without Data Loss? | Dr.fone
- Oppo A1 5G Bootloop Problem, How to Fix it Without Data Loss | Dr.fone
- 11 Ways to Fix it When My Realme 12 Pro 5G Wont Charge | Dr.fone
- How To Transfer Data From iPhone 15 Pro To Other iPhone 12 Pro Max devices? | Dr.fone
- How to Fake GPS on Android without Mock Location For your Xiaomi Redmi Note 12R | Dr.fone
- How to restore wiped messages on Poco
- In 2024, Top 10 Oppo A1x 5G Android SIM Unlock APK
- Getting the Pokemon Go GPS Signal Not Found 11 Error in OnePlus Nord CE 3 5G | Dr.fone
- Updated 2024 Approved Top 10 Free WhatsApp Video Converter
- In 2024, List of Pokémon Go Joysticks On Samsung Galaxy Z Flip 5 | Dr.fone
- Life360 Learn How Everything Works On Lava Yuva 2 Pro | Dr.fone
- How Do I Stop Someone From Tracking My Vivo Y100t? | Dr.fone
- Fixes for Apps Keep Crashing on Vivo Y27s | Dr.fone
- What are Location Permissions Life360 On Xiaomi Civi 3 Disney 100th Anniversary Edition? | Dr.fone
- In 2024, Sizing Up Success The Perfect Facebook Video Cover Formula
- In 2024, Guide on How To Change Your Apple ID Email Address On Apple iPhone 6s | Dr.fone
- New Guide How to Attract More NFL Viewers for Your Sports Live Streaming Channel
- In 2024, Trouble with Apple iPhone 6 Swipe-Up? Try These 11 Solutions
- How can I get more stardust in pokemon go On Honor 90 GT? | Dr.fone
- How to Transfer Photos from Realme C67 4G to Laptop Without USB | Dr.fone
- In 2024, iSpoofer is not working On Apple iPhone 13 Pro Max? Fixed | Dr.fone
- In 2024, How to Use Life360 on Windows PC For Vivo S18 Pro? | Dr.fone
- Title: New Unlock Your Chromebook How to Run Linux for 2024
- Author: Morgan
- Created at : 2024-04-28 05:39:19
- Updated at : 2024-04-29 05:39:19
- Link: https://ai-video-tools.techidaily.com/new-unlock-your-chromebook-how-to-run-linux-for-2024/
- License: This work is licensed under CC BY-NC-SA 4.0.
