
:max_bytes(150000):strip_icc():format(webp)/samsung-unveils-new-products-at-its-annual-unpacked-event-1200186175-0a17180ae84e47f488f43d3afbb7daa6.jpg)
New 2024 Approved FCPX Mastery Freeze Frames, Slow Motion, and Beyond
FCPX Mastery: Freeze Frames, Slow Motion, and Beyond
Final Cut Pro X: Freeze-Frames and Slow Motion

Benjamin Arango
Mar 27, 2024• Proven solutions
A very simple, yet very effective effect is changing the speed of a video clip. This could be a simple still-frame (also called “Freeze Frame”) or playing a clip in slow or fast motion.
This article shows you how to do this using Final Cut Pro X.
For more tutorials on slow-motion please refer to this article: Top 10 Slow Motion Video Editing Software.
Freeze-Frames and Slow Motion in Final Cut Pro X
1. STILL FRAMES

A still-frame freezes action. For instance, here is a clip of a hummingbird getting ready to land on a bird feeder. I want to create a freeze-frame of the bird in flight. (Um, yeah, I use “freeze-frame” and “still-frame” interchangeably.)
In Final Cut Pro X, put the playhead (or skimmer) on the frame you want to freeze and type Option+F.

This creates a two-second freeze-frame at the position of the playhead.

Adjust the duration of the frame by trimming the edge; just like any other clip. Here, for example, I’m making the duration of the freeze-frame 11 frames shorter.

In case you were wondering, this is what the freeze looks like. It freezes the flight of the hummingbird in the middle of playback, allowing us to add graphics or other text then resume the action as though nothing had happened.
Very cool, except….
Well, the good news is that this is fast and easy. The bad news is that we can’t change the location of the still frame.
So, here’s another way to do this.
Put the playhead (or skimmer, but I prefer the playhead) on the frame you want to freeze, select the clip, then type Shift+F.

This locates the source clip in the Browser, selects both the Browser and the clip, and matches the position of the In, Out, and playhead.

Now, with the Browser selected, type Option+F. This creates a freeze-frame of the Browser clip and places it at the location of the playhead as a connected clip in the Timeline.
As a connected clip, we can move this new freeze-frame wherever we want. However, be careful in moving the clip, because, unless you mark the original frame with a marker (type “M”), there’s no easy way to match the still frame with the source frame, once the still frame is moved somewhere else.
I use both these techniques in many different projects.
2. HOLD FRAME
A Hold Frame is similar to an in-line still frame, but with more flexibility.

Put the playhead (or skimmer) on the frame you want to hold. Then, Then, using either Modify > Retime or the “Smurf-on-a-headset” Toolbar icon, choose Hold Frame (or type: Shift+H).

This displays the orange Retime editor bar above the clip, with a small red portion indicating the Hold frame.

Change the duration of the Hold frame by dragging the small thumb at the right end of the red bar.

Add a speed ramp transition at the end of the Hold frame by clicking the downward-pointing arrow next to the word “Hold” in the Retime Editor.

To change the actual frame being held, double-click the bar icon to the LEFT of the red Hold section and choose Source Frame (Edit). This allows you to slide the Hold frame selection left or right.
NOTE: Changing the source frame is a feature that I like a LOT!
3. SLOW (or FAST) MOTION

We use slow-motion to show events that are too fast for the unaided eye to see. And fast motion to speed up very slow events. Both of these effects use what’s called a “constant speed change,” where the entire clip changes by the same amount - either faster or slower.
WE create either effect using the same tools, just different values. Here’s how.

Select the clip who’s speed you want to change. Then, using either Modify > Retime or the “Smurf” Toolbar icon, select Slow (or Fast).
Choose one of the available speeds; in this case, 50%. (Yes, you can change this to any value you want, I’ll show you how in a minute.)

Three things happen at once:
- The duration of the clip changes
- The orange Retiming bar appears over the top of the clip
- The speed of the clip changes

To reset the speed back to normal (100%), click the downward-pointing arrow in the Retiming bar and choose Normal (100%).
There are two ways to change the speed of a clip.

The easy way is to grab the small handle at the end of the clip and drag left or right. The speed will change as you drag it.
Or, for more precision, click the downward-pointing arrow in the Retiming bar and choose Custom.

This opens a new dialog allowing a number of changes:
- Reverse. Plays the clip in reverse.
- Rate. Select a specific speed change as a percentage of normal speed for a clip. Less than 100% is slow-motion. More than 100% is fast-motion.
- Duration. Select a specific duration for a clip and FCP X will calculate how fast or slow it needs to go.
- Ripple. When checked, adjusts the duration of a clip based upon the speed. When unchecked, the clip duration remains fixed even when speed changes.
You will get the smoothest speed changes when the percentage you choose divides evenly into 200. For example, 100, 66, 50, 40, 33, 25, 20, 10 and so on.
4. EXTRA CREDIT
There is one more setting to consider when slowing a clip. (This does not apply when creating fast motion.)

Using, again, either Modify > Retime or the “Smurf” menu, select Video Quality.
- Normal. This is the best choice for speeds of 50% or faster.
- Frame Blending. This is the best choice for speeds of about 20% to 50%.
- Optical Flow. This is the best choice for speeds slower than about 20%.
Frame blending puts a short dissolve between frames when running in slow motion to improve the illusion of motion. Optical Flow invents in-between frames to minimize the jerkiness of extremely slow motion.
Frame blending is relatively fast and easy. Optical Flow will look better in most cases, but takes a long time to render.
This is a basic tutorial about Apple Final Cut Pro X, a professional video editing software. However, if video editing is new to you, consider Wondershare Filmora for Mac . This is a powerful but easy-to-use tool for users just starting out. Download the free trial version below.
 Download Mac Version ](https://tools.techidaily.com/wondershare/filmora/download/ )
SUMMARY
Whether you want your clips to speed up, slow down or just plain stop, Final Cut Pro X makes the entire process easy.
Benjamin Arango
Benjamin Arango is a writer and a lover of all things video.
Follow @Benjamin Arango
Benjamin Arango
Mar 27, 2024• Proven solutions
A very simple, yet very effective effect is changing the speed of a video clip. This could be a simple still-frame (also called “Freeze Frame”) or playing a clip in slow or fast motion.
This article shows you how to do this using Final Cut Pro X.
For more tutorials on slow-motion please refer to this article: Top 10 Slow Motion Video Editing Software.
Freeze-Frames and Slow Motion in Final Cut Pro X
1. STILL FRAMES
A still-frame freezes action. For instance, here is a clip of a hummingbird getting ready to land on a bird feeder. I want to create a freeze-frame of the bird in flight. (Um, yeah, I use “freeze-frame” and “still-frame” interchangeably.)
In Final Cut Pro X, put the playhead (or skimmer) on the frame you want to freeze and type Option+F.
This creates a two-second freeze-frame at the position of the playhead.
Adjust the duration of the frame by trimming the edge; just like any other clip. Here, for example, I’m making the duration of the freeze-frame 11 frames shorter.
In case you were wondering, this is what the freeze looks like. It freezes the flight of the hummingbird in the middle of playback, allowing us to add graphics or other text then resume the action as though nothing had happened.
Very cool, except….
Well, the good news is that this is fast and easy. The bad news is that we can’t change the location of the still frame.
So, here’s another way to do this.
Put the playhead (or skimmer, but I prefer the playhead) on the frame you want to freeze, select the clip, then type Shift+F.
This locates the source clip in the Browser, selects both the Browser and the clip, and matches the position of the In, Out, and playhead.
Now, with the Browser selected, type Option+F. This creates a freeze-frame of the Browser clip and places it at the location of the playhead as a connected clip in the Timeline.
As a connected clip, we can move this new freeze-frame wherever we want. However, be careful in moving the clip, because, unless you mark the original frame with a marker (type “M”), there’s no easy way to match the still frame with the source frame, once the still frame is moved somewhere else.
I use both these techniques in many different projects.
2. HOLD FRAME
A Hold Frame is similar to an in-line still frame, but with more flexibility.
Put the playhead (or skimmer) on the frame you want to hold. Then, Then, using either Modify > Retime or the “Smurf-on-a-headset” Toolbar icon, choose Hold Frame (or type: Shift+H).
This displays the orange Retime editor bar above the clip, with a small red portion indicating the Hold frame.
Change the duration of the Hold frame by dragging the small thumb at the right end of the red bar.
Add a speed ramp transition at the end of the Hold frame by clicking the downward-pointing arrow next to the word “Hold” in the Retime Editor.
To change the actual frame being held, double-click the bar icon to the LEFT of the red Hold section and choose Source Frame (Edit). This allows you to slide the Hold frame selection left or right.
NOTE: Changing the source frame is a feature that I like a LOT!
3. SLOW (or FAST) MOTION
We use slow-motion to show events that are too fast for the unaided eye to see. And fast motion to speed up very slow events. Both of these effects use what’s called a “constant speed change,” where the entire clip changes by the same amount - either faster or slower.
WE create either effect using the same tools, just different values. Here’s how.
Select the clip who’s speed you want to change. Then, using either Modify > Retime or the “Smurf” Toolbar icon, select Slow (or Fast).
Choose one of the available speeds; in this case, 50%. (Yes, you can change this to any value you want, I’ll show you how in a minute.)
Three things happen at once:
- The duration of the clip changes
- The orange Retiming bar appears over the top of the clip
- The speed of the clip changes
To reset the speed back to normal (100%), click the downward-pointing arrow in the Retiming bar and choose Normal (100%).
There are two ways to change the speed of a clip.
The easy way is to grab the small handle at the end of the clip and drag left or right. The speed will change as you drag it.
Or, for more precision, click the downward-pointing arrow in the Retiming bar and choose Custom.
This opens a new dialog allowing a number of changes:
- Reverse. Plays the clip in reverse.
- Rate. Select a specific speed change as a percentage of normal speed for a clip. Less than 100% is slow-motion. More than 100% is fast-motion.
- Duration. Select a specific duration for a clip and FCP X will calculate how fast or slow it needs to go.
- Ripple. When checked, adjusts the duration of a clip based upon the speed. When unchecked, the clip duration remains fixed even when speed changes.
You will get the smoothest speed changes when the percentage you choose divides evenly into 200. For example, 100, 66, 50, 40, 33, 25, 20, 10 and so on.
4. EXTRA CREDIT
There is one more setting to consider when slowing a clip. (This does not apply when creating fast motion.)
Using, again, either Modify > Retime or the “Smurf” menu, select Video Quality.
- Normal. This is the best choice for speeds of 50% or faster.
- Frame Blending. This is the best choice for speeds of about 20% to 50%.
- Optical Flow. This is the best choice for speeds slower than about 20%.
Frame blending puts a short dissolve between frames when running in slow motion to improve the illusion of motion. Optical Flow invents in-between frames to minimize the jerkiness of extremely slow motion.
Frame blending is relatively fast and easy. Optical Flow will look better in most cases, but takes a long time to render.
This is a basic tutorial about Apple Final Cut Pro X, a professional video editing software. However, if video editing is new to you, consider Wondershare Filmora for Mac . This is a powerful but easy-to-use tool for users just starting out. Download the free trial version below.
Download Mac Version ](https://tools.techidaily.com/wondershare/filmora/download/ )
SUMMARY
Whether you want your clips to speed up, slow down or just plain stop, Final Cut Pro X makes the entire process easy.
Benjamin Arango
Benjamin Arango is a writer and a lover of all things video.
Follow @Benjamin Arango
Best 12 Free Download Animation Software for Windows and Mac 2022
Best 12 Free Download Animation Software for Windows and Mac

Shanoon Cox
Mar 27, 2024• Proven solutions
In your search for quality animation software, you may have found that many of the programs cost a lot of money no matter it is 2D animation software or 3D animation editor. The good news is that you can choose free animation tools to make different animation types easily.
That is why we created a list of the best animation software on both Mac and Windows. Whether you are a professional editor or just a beginner to start making animation, you will find the tools listed below are easy to use without watermark and won’t cost money to improve your skills.
The best part is you will find these free animation programs are also very useful for content creation on Mac and Windows. Besides, we have listed the pros and cons of each software. Keep reading!
- Part 1: Best Free Animation Software for Mac
- Part 2: Best Free Animation Software for Windows
- Part 3: FAQ about Animation Software for Windows and Mac
Here we have made a table of 12 free animation software without watermark on Windows and macOS. Take a look.
6 Free Animation Software for macOS
5K-3DMiddleIt is a great tool for 3D artists6KritaDifficultPerfect software for 2D animation
| Number | Software | Difficulty Level | Highlight |
|---|---|---|---|
| 1 | Synfig Studio | Easy | Calculate vector shape to animation automatically |
| 2 | Pencil2D Animation | Easiest | Straightforward interface for beginners |
| 3 | Tupi | Middle | Its community is active to offer solutions |
| 4 | Blender | Difficult | It is a powerful animation tool to render and make modeling |
6 Free Animation Software for Windows
| Number | Software | Difficulty Level | Highlight |
|---|---|---|---|
| 1 | DAZ Studio | Difficult | For professional users with the fast animation process |
| 2 | Terragen | Middle | It can make realistic CG environments |
| 3 | Anim8or | Difficult | 3D animation is Anim8or’s main function |
| 4 | Seamless3d | Easy | It has many features for 3d modeling |
| 5 | OpenToonz | Middle | Make cartoon animation with plugins |
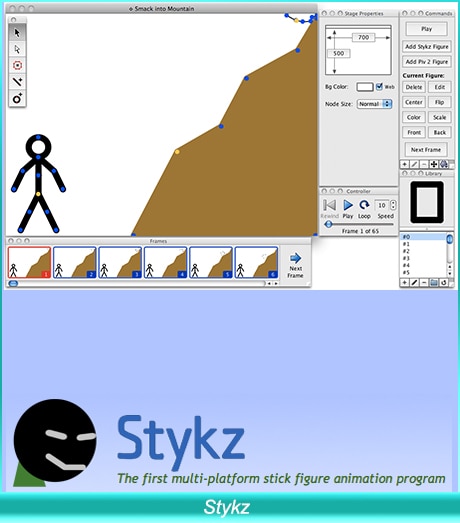
| 6 | Stykz | Easy | Quickly make animation if you have used Pivot StickFigure Animator |
Best Animation Software on Windows and Mac - Filmora
Looking for a simple while powerful Mac video editing tool ? We recommend using Wondershare Filmora. You can use it to create 2D/3D animated texts, shapes, or anything you like for YouTube videos.
The keyframing features will help you make animation effects smooth and precise. When exporting, you can also make it transparent.
Besides, various title templates and transitions are also available for you. Download it now to have a try! Or learn more from Wondershare Video Community .
Key features
- Create various shapes that you like
- Add keyframing to make it move
- Fine-tuning to make it smooth
- Add visual effects/text/color before export it


You can even create photo cut animation which has been very trendy on Tiktok and Instagram. Here is a video to present you how you can do it in Filmora.
Part 1 Best Free Animation Software for Mac
Listed below is free animation software on Mac. Take a look.
01 Synfig Studio - Mac Software to Animate Video
Difficulty Level: Easy
Pro: You can create many layers once a time and sync audio for your animation.
Con: This one needs much time to learn, especially for beginners.
An open-source 2D animation software that works on Macs, Synfig Studio delivers multiple players while you are creating content. Whether you want to add geometric, filters, distortions, or transformations, it is all possible! And thanks to the high-end bone system, you can create cut-out videos using bitmap images!
The thoughtful part is there are two download versions on the homepage: the stable version and the development version. If you want to enjoy a stable and smooth animation editing experience, choose the stable one. However, the development package gives you access to the use of the latest features.
For a novice, you can learn Synfig from step by step guide in Wikipedia and video tutorials. Four languages are available including English, Russian, Dutch, and French for a video course.
You can free download its latest version 1.3.11. The upcoming version is 1.4.
Features:
- It offers support for many layers within the animation.
- The program’s bone system means that you can easily create animations with bitmap images or vector artwork.
- It allows you to sync your creative work with any sound that you want. Has a full-featured audio editor.
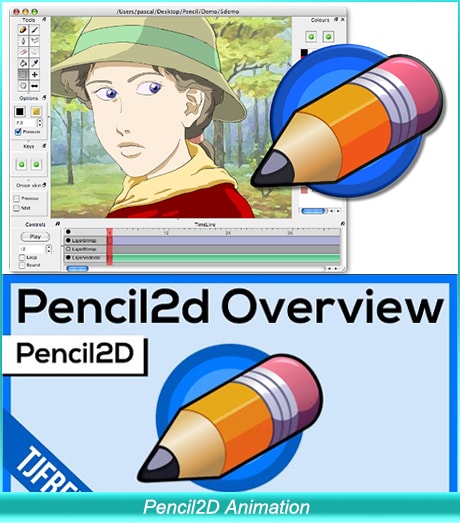
02 Pencil2D Animation - Animation Program for 2D Pencil Lover
Difficulty Level: Easiest
Pro: Easy to start and make animation as the interface is user-friendly for many people.
Con: You need to set your preference every time to open it up, so it takes up some time
Pencil2D Animation is one of the simplest 2D hand-drawn tools available. It will work flawlessly on Mac computers. It is ideal for beginners, as the commands and interface are very easy to understand.
Whether you want to create a simple one, or you want something with many layers for videos on YouTube, you can use Pencil2D animation to get it done. Its timeline is easy to use at first glance. You can add and duplicate different frames on a different track.
The frequency of releasing the new version is very fast as Pencil2D is committed to bringing the lasted features to each user. The newest version is v0.6.4 (as of August 2019). Its user guide is informative with video tutorials, FAQs, and manual material.
Features:
- Lightweight and minimalistic design that makes it very easy for beginners.
- Features raster and vector workflows, with easy switching between them. You can paint and sketch as you want!
- Will run on all platforms - Mac, Windows, and Linux.
- Completely free and open source.
03 TupiTube - Free Animation Application for Mac Users
Difficulty Level: Middle
Pro: It supports vector illustrations. Besides, various formats are available.
Con: If you want to make 3D animation, it will fail. You can only make 2D effects.
A free software application for YouTube, Tupi will allow you to create 2D animations to your heart’s content. The tool was started by animators who wanted to create something that others could use.
It is an open-source tool, which means that users can make tweaks to the program if they have some interesting ideas. The program works on both Windows and Mac. You need to use Tupi and Papagayo to make lip-sync animation with different mouth shapes.
It also offers a solution for schools with related features including academic license, technical support, and ads-free, so many schools choose to use this one to teach kids how to make an animation video.
Features:
- Support for vector illustrations. You can add rectangles, lines, polygons, and other shapes as you please. To fill areas, just use the paint bucket.
- You can import raster images using this program.
- You can export all your finished images into different file formats.
- Support for tweeting positions, scale, shear, and rotations.

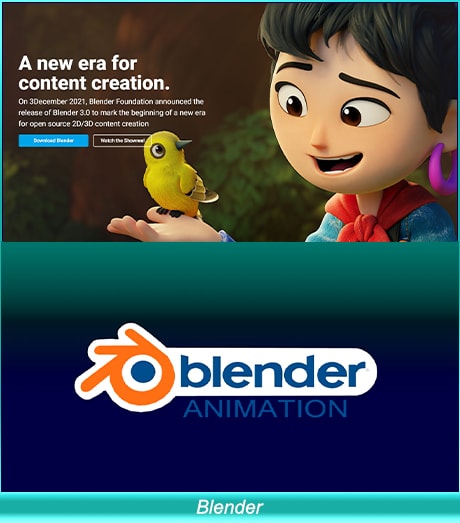
04 Blender - Need Some Time to Learn This Animation Tool
Difficulty Level: Difficult
Pro: Really powerful software that you can make for professional users.
Con: It is not easy to make image animation as it focuses on 3D.
Blender is an open-source 3D animation creation suite without a watermark. If you find that 2D is a little bit limiting, we think that you will be very happy with what this free program offers. You can take your projects to a whole new level when you can use this program on your Mac.
You can use Blender to make a video game, modeling, and high-quality animation. However, it involves a steep learning curve. Luckily, there are many tutorials to guide you through the journey. You can also ask for help in the Blender community that millions of talented people like you are there.
Features:
- Creating renders is no problem with this program.
- Modeling, such as sculpting, retopology, and creating curves is not an issue either.
- VFX and animation features are better than any option on the market.
- It offers powerful simulation tools.
- Integration with pipeline tools is easy.
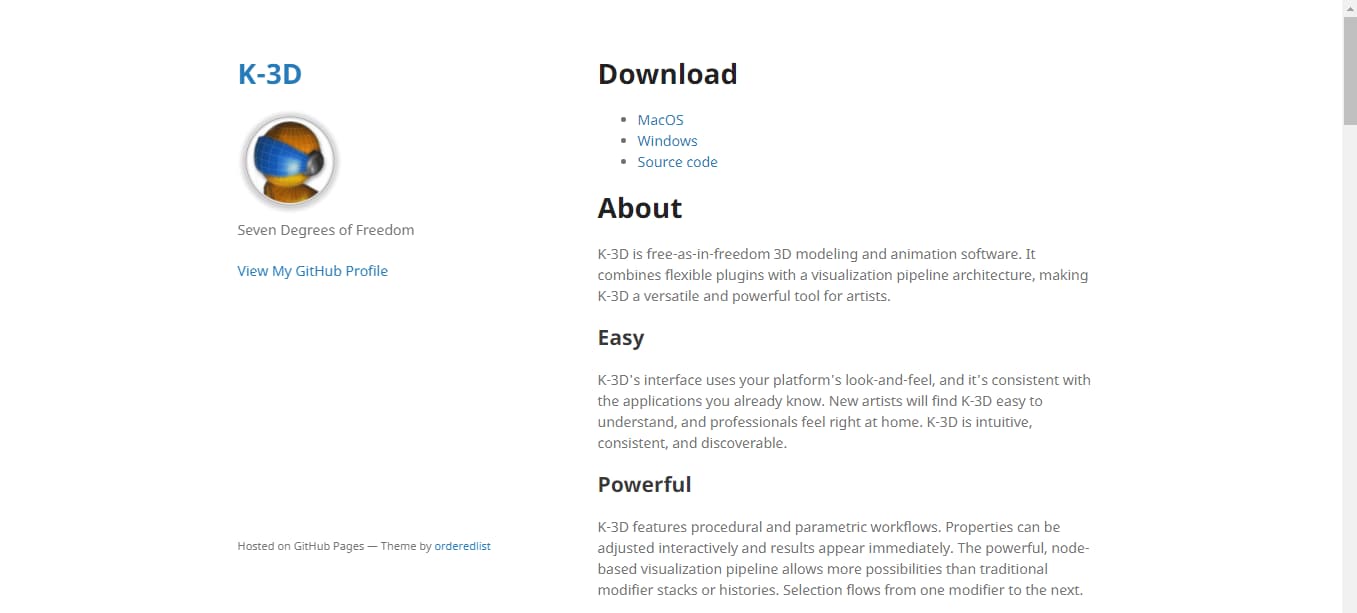
05 K-3D - Best for Animation and Modeling in 3D
Difficulty Level: Middle
Pro: Ideal for designing simple 3D animations and models.
Con: It has an old-fashioned interface. Also, the built-render (RenderMan) feature is difficult to use by beginners.
K-3D is an animation and 3D modeling software. You can download this tool for free on your Mac. Besides, you can also install and run it on your Windows and Linux systems. If you look at the design, you will find that the software is quite old. But don’t judge a book by its cover. Why so? It is because K-3D is one of the strongest and most versatile tools for 3D artists with many options.
For example, K-3D offers extremely systematic and methodological workflows. You can easily adjust the properties of the features in real-time and get instant results. It has a node-oriented visualization pipeline to enjoy more freedom. That means you can create animation using a variety of combinations.
One of the best things about K-3D is that it has three subdivisions of animation. You can work on your model on one side while showing the other side in a mirrored form. Then, experience the final result combined together. And in case you need to make the changes to the end results, you can simply work on the first subdivision and savor automatic changes to the results.
K-3D has an advanced redo and undo mechanism to ensure you can go back or move forward to make corrections or amendments without limits. Additionally, the tool is developed keeping in mind all the industrial standards. For instance, it has complete support and integration of native RenderMan™ to its user interface. This is an excellent feature because most free animation software for Mac requires third-party render plugins.
Features:
- Parametric workflow.
- 2D and 3D animation tools.
- Allows Python and K3DScript scripting.
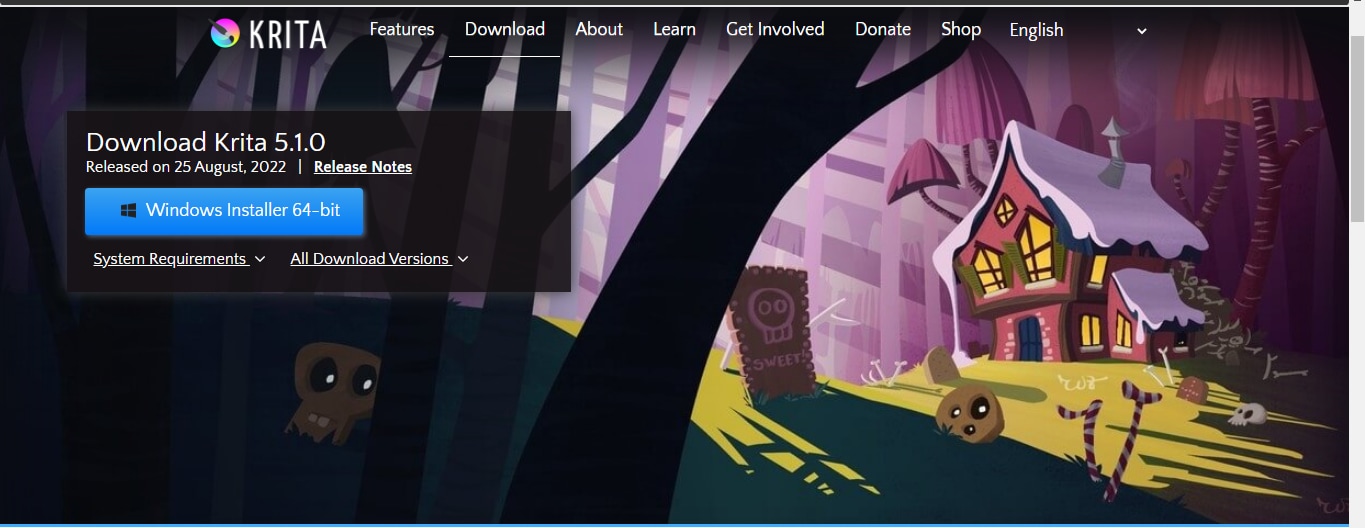
06 Krita - For Professional 2D Animators
Difficulty Level: Difficult
Pro: Advanced tools with numerous animation options and online training material.
Con: Not suitable for beginners.
If you love 2D animation, then you’ll surely love Krita. It is entirely free software available on Mac, Windows, and Linux. Also, it offers a full platform for drawing and frame-by-frame animation.
The number one reason for adoring Krita is its brush library. There are more than 100 professional brushes to give you a wide range of effects. Moreover, the strokes are pretty amazing and similar to Adobe Photoshop or Adobe Illustrator.
Another great thing about Krita is the brush stabilization feature designed for shaky hands. You can add a stabilizer to your chosen brush to smoothen its flow. Besides, there’s a special Dynamic Brush tool to make animation more fun. At the same time, you can also customize your brushes through different brush engines, including filter engines, color smudge engines, and many more.
Apart from the basic brush options, the preloaded vector tools are next to admire. These tools help you make great comic panels. All you need to do is choose and drag the word bubble template on your canvas. Then, make changes with the anchor point to make new shapes. At the same time, you can also add text to your animation by using the text tool.
Last but not least, there’s a wrap-around mode to create seamless patterns and textures. That means the image or drawing makes its own references along the x-axis and y-axis. This gives you the freedom to continue painting and enjoy updates to your animation instantly.
Features:
- HDR painting.
- PSD support.
- Python scripting.
- Selection and transformation tools.
- Proper group, filter, vector, and file layer management.
- Complete color management for extraordinary results.
- Drawing assistant to help you with straight lines and vanishing points.
Part 2 Best Free Animation Software for Windows
Below is free animation software on Windows. Keep reading.
01 Anireel - Easy to Use Animation Software
Difficulty Level: Easy
Anireel is a simple yet powerful Video Creativity tool used to make 2D animated explainer videos. Developed by Wondershare, one of the most popular Windows software and tool developers, Anireel uses rich, ready-to-use, and diverse assets to help one effortlessly make animated videos.
Features:
- There are tons of drag and drop characters, actions, props, text, and audio assets.
- Easy Text-to-Speech conversion via deep studying technology.
- Animate integrated and imported assets.
- Tons of templates that match many script types.

02 DAZ Studio - Free Software for 3D Lovers
Difficulty Level: Difficult
Pro: You can make game animation for fun. It also supports GPU accelerated real-time rendering.
Con: It has a high demand for the device, but owns a steep learning curve.
Daz 3d is a powerful and completely free 3D creation tool that will let you create the short videos that you want. Whether you are using this for business or pleasure, you will find the program is very easy to understand. Within a day, you will be completely used to its interface.
3D effects are the core focus of DAZ Studio. You can build a model, render, and pose animation within the skin texture level. It has a high requirement for the device. For Windows 64 bits, its recommended RAM is 3G.
Features:
- Options for 3D morphing, animation, and rendering.
- GPU accelerated real-time rendering, which delivers the best results.
- Interactive tutorials to help you become a better 3D artist.
- Everything you make is yours, royalty-free!
03 Terragen - Use It to Make CG Animation
Difficulty Level: Middle
Pro: The recently updated version is the best one. Ray-traced preview is a great function to help us make animation.
Con: The interface looks complicated, but it gets easy to know after you are familiar with it.
A completely free program that you can download and install on all Windows computers and tablets, Terragen is the ideal program for you to create the 3D animations and environments that you want. If you want a photo-realistic CG environment, using Terragen is the best way to do it!
Releasing imagination instantly, Terragen Creative is the one tool you’d like to consider. You can use it to make beautiful scenery.
For advanced tools, you can choose FBX to make animation quickly. The featured image gallery on its homepage will give you a deep understanding of the final outcome you can achieve with Terragen.
Features:
- Ray-traced preview. Without watermark after exporting
- Photo-realistic clouds and ozone simulation
- Rendering is twice as fast as the previous version of the program.
- Adding terrain, objects, and shader to your final product is very easy with the intuitive interface.
04 Anim8or - Free Tool to Make 3D Modeling
Difficulty Level: Difficult
Pro: Anim8or supports 3D modeler and TrueType fonts to meet advanced needs.
Con: Beginners will find it difficult to learn.
Anim8or is a free 3D modeling program that will let you create the unique work that you want. It is a personal project from an animator, but the program does get regular updates and troubleshooting.
It is not going to give you the same features as something like Studio Max or Maya, but you will get the basics. Beginners who are getting into animations will love this program.
Anim8or is a great tool to step into 3D animation ff you think other software is too different to start. In some way, it means you need to give up some advanced features. But all in all, it’s still recommended for you.
Features:
- A full 3D modeler that allows you to create spheres, cylinders, platonic solids, and any other objects that you want.
- Features support for TrueType fonts.
- Easy to create 3D scenes and output them as video files or images.
05 Seamless3d - Open-source Free Software
Difficulty Level: Easy
Pro: It is an open-source 3D modeling package. The good thing is the handy infinite Undo/Redo operation.
Con: Some advanced features are missing like drawing.
Seamless3d, an open-source 3D modeling software that you can download, is among the best animation worktables if you want to create specialized images, animated videos, or 3D characters.
It supports FFmpeg video format, so you can use AVI, MP4, and more. Besides, the forum is not active compared with before, but you still can find answers from many tutorials .
Features:
- It comes with infinite undo and redo options for complete flexibility to correct mistakes.
- It allows for partitioned and seamless texture mapping for YouTube videos.
- Has a specialized tree view interface.

06 OpenToonz - Support Plug in to Make Animation Freely
Difficulty Level: Middle
Pro: It is open-source software, so you can change the code freely.
Con: The plug-in effects are limited.
This animation program is made for beginners on Windows. It is among the best 2D animation software in the market. You can use plug-in effects to change image style, add lights, and distort details. It supports Windows 7/8/10 only for 64 bit.
Features:
- You can add provisional colors to make your animation more colorful.
- Smooth correction without frame losing.
- Compatible with black-and-white, colored, or without binarization scanning.
7 Stykz - Simple to Use Animation Program for Beginners
Difficulty Level: Easy
Pro: It is the best stick figure animation if you want to make this kind of video.
Con: The UI is not modern to use and needs time to adapt to using it.
Stykz is completely free to use and without a watermark. If you have used Pivot StickFigure Animator, then you will find Stykz is similar to it, but you can import the previous .stk files to animate it again. You can use it to make animation smooth frame by frame.
With its frame-based feature, Stykz is easy to customize each frame. You can change previous and current frames to get what you want. You can download it to have a try considering its easy-to-use features.
Features:
- There is some animes file on this website, so you can have a reference.
- Edit animation in the software without using another editing window.
- You can share the final work with others including information.
Part 3 FAQ about Animation Software for Windows and Mac
01 Are Macs good for animation?
To be frank, Mac is a better choice to make animation if you want to have a smooth animation experience. For example, screen resolution is a crucial factor to make excellent animation. The good is Mac’s screen will never let you disappointed.
02 What is the best animation software for Mac?
The best animation software on mac includes Synfig Studio, Pencil2D Animation, Tupi, Blender, and more. Mentioned are free-to-use. Maya is also worth considering animation software if you are a professional user. Maya offers a 1-month free trial. After it is ended, the paid plans are month, 1-year, and 3-year.
03 Can you animate in Photoshop?
Yes, you can make basic animation in Photoshop. However, it only supports frame-based animation making. In this case, you need to use other professional software to make animation. But, you still can use Photoshop to meet your needs if you are a beginner.
Conclusion
With any of these free animation maker programs on Mac and Windows, you will have an easy time creating your next 2D or 3D video. Ensure you choose the program that has the features and compatibility that you desire. Then it is up to your creative mind to come up with stunning animations! If you want to make animation easily, you can also find inspiration through classical animated cartoon types with examples .
Shanoon Cox
Shanoon Cox is a writer and a lover of all things video.
Follow @Shanoon Cox
Shanoon Cox
Mar 27, 2024• Proven solutions
In your search for quality animation software, you may have found that many of the programs cost a lot of money no matter it is 2D animation software or 3D animation editor. The good news is that you can choose free animation tools to make different animation types easily.
That is why we created a list of the best animation software on both Mac and Windows. Whether you are a professional editor or just a beginner to start making animation, you will find the tools listed below are easy to use without watermark and won’t cost money to improve your skills.
The best part is you will find these free animation programs are also very useful for content creation on Mac and Windows. Besides, we have listed the pros and cons of each software. Keep reading!
- Part 1: Best Free Animation Software for Mac
- Part 2: Best Free Animation Software for Windows
- Part 3: FAQ about Animation Software for Windows and Mac
Here we have made a table of 12 free animation software without watermark on Windows and macOS. Take a look.
6 Free Animation Software for macOS
5K-3DMiddleIt is a great tool for 3D artists6KritaDifficultPerfect software for 2D animation
| Number | Software | Difficulty Level | Highlight |
|---|---|---|---|
| 1 | Synfig Studio | Easy | Calculate vector shape to animation automatically |
| 2 | Pencil2D Animation | Easiest | Straightforward interface for beginners |
| 3 | Tupi | Middle | Its community is active to offer solutions |
| 4 | Blender | Difficult | It is a powerful animation tool to render and make modeling |
6 Free Animation Software for Windows
| Number | Software | Difficulty Level | Highlight |
|---|---|---|---|
| 1 | DAZ Studio | Difficult | For professional users with the fast animation process |
| 2 | Terragen | Middle | It can make realistic CG environments |
| 3 | Anim8or | Difficult | 3D animation is Anim8or’s main function |
| 4 | Seamless3d | Easy | It has many features for 3d modeling |
| 5 | OpenToonz | Middle | Make cartoon animation with plugins |
| 6 | Stykz | Easy | Quickly make animation if you have used Pivot StickFigure Animator |
Best Animation Software on Windows and Mac - Filmora
Looking for a simple while powerful Mac video editing tool ? We recommend using Wondershare Filmora. You can use it to create 2D/3D animated texts, shapes, or anything you like for YouTube videos.
The keyframing features will help you make animation effects smooth and precise. When exporting, you can also make it transparent.
Besides, various title templates and transitions are also available for you. Download it now to have a try! Or learn more from Wondershare Video Community .
Key features
- Create various shapes that you like
- Add keyframing to make it move
- Fine-tuning to make it smooth
- Add visual effects/text/color before export it
You can even create photo cut animation which has been very trendy on Tiktok and Instagram. Here is a video to present you how you can do it in Filmora.
Part 1 Best Free Animation Software for Mac
Listed below is free animation software on Mac. Take a look.
01 Synfig Studio - Mac Software to Animate Video
Difficulty Level: Easy
Pro: You can create many layers once a time and sync audio for your animation.
Con: This one needs much time to learn, especially for beginners.
An open-source 2D animation software that works on Macs, Synfig Studio delivers multiple players while you are creating content. Whether you want to add geometric, filters, distortions, or transformations, it is all possible! And thanks to the high-end bone system, you can create cut-out videos using bitmap images!
The thoughtful part is there are two download versions on the homepage: the stable version and the development version. If you want to enjoy a stable and smooth animation editing experience, choose the stable one. However, the development package gives you access to the use of the latest features.
For a novice, you can learn Synfig from step by step guide in Wikipedia and video tutorials. Four languages are available including English, Russian, Dutch, and French for a video course.
You can free download its latest version 1.3.11. The upcoming version is 1.4.
Features:
- It offers support for many layers within the animation.
- The program’s bone system means that you can easily create animations with bitmap images or vector artwork.
- It allows you to sync your creative work with any sound that you want. Has a full-featured audio editor.
02 Pencil2D Animation - Animation Program for 2D Pencil Lover
Difficulty Level: Easiest
Pro: Easy to start and make animation as the interface is user-friendly for many people.
Con: You need to set your preference every time to open it up, so it takes up some time
Pencil2D Animation is one of the simplest 2D hand-drawn tools available. It will work flawlessly on Mac computers. It is ideal for beginners, as the commands and interface are very easy to understand.
Whether you want to create a simple one, or you want something with many layers for videos on YouTube, you can use Pencil2D animation to get it done. Its timeline is easy to use at first glance. You can add and duplicate different frames on a different track.
The frequency of releasing the new version is very fast as Pencil2D is committed to bringing the lasted features to each user. The newest version is v0.6.4 (as of August 2019). Its user guide is informative with video tutorials, FAQs, and manual material.
Features:
- Lightweight and minimalistic design that makes it very easy for beginners.
- Features raster and vector workflows, with easy switching between them. You can paint and sketch as you want!
- Will run on all platforms - Mac, Windows, and Linux.
- Completely free and open source.
03 TupiTube - Free Animation Application for Mac Users
Difficulty Level: Middle
Pro: It supports vector illustrations. Besides, various formats are available.
Con: If you want to make 3D animation, it will fail. You can only make 2D effects.
A free software application for YouTube, Tupi will allow you to create 2D animations to your heart’s content. The tool was started by animators who wanted to create something that others could use.
It is an open-source tool, which means that users can make tweaks to the program if they have some interesting ideas. The program works on both Windows and Mac. You need to use Tupi and Papagayo to make lip-sync animation with different mouth shapes.
It also offers a solution for schools with related features including academic license, technical support, and ads-free, so many schools choose to use this one to teach kids how to make an animation video.
Features:
- Support for vector illustrations. You can add rectangles, lines, polygons, and other shapes as you please. To fill areas, just use the paint bucket.
- You can import raster images using this program.
- You can export all your finished images into different file formats.
- Support for tweeting positions, scale, shear, and rotations.
04 Blender - Need Some Time to Learn This Animation Tool
Difficulty Level: Difficult
Pro: Really powerful software that you can make for professional users.
Con: It is not easy to make image animation as it focuses on 3D.
Blender is an open-source 3D animation creation suite without a watermark. If you find that 2D is a little bit limiting, we think that you will be very happy with what this free program offers. You can take your projects to a whole new level when you can use this program on your Mac.
You can use Blender to make a video game, modeling, and high-quality animation. However, it involves a steep learning curve. Luckily, there are many tutorials to guide you through the journey. You can also ask for help in the Blender community that millions of talented people like you are there.
Features:
- Creating renders is no problem with this program.
- Modeling, such as sculpting, retopology, and creating curves is not an issue either.
- VFX and animation features are better than any option on the market.
- It offers powerful simulation tools.
- Integration with pipeline tools is easy.
05 K-3D - Best for Animation and Modeling in 3D
Difficulty Level: Middle
Pro: Ideal for designing simple 3D animations and models.
Con: It has an old-fashioned interface. Also, the built-render (RenderMan) feature is difficult to use by beginners.
K-3D is an animation and 3D modeling software. You can download this tool for free on your Mac. Besides, you can also install and run it on your Windows and Linux systems. If you look at the design, you will find that the software is quite old. But don’t judge a book by its cover. Why so? It is because K-3D is one of the strongest and most versatile tools for 3D artists with many options.
For example, K-3D offers extremely systematic and methodological workflows. You can easily adjust the properties of the features in real-time and get instant results. It has a node-oriented visualization pipeline to enjoy more freedom. That means you can create animation using a variety of combinations.
One of the best things about K-3D is that it has three subdivisions of animation. You can work on your model on one side while showing the other side in a mirrored form. Then, experience the final result combined together. And in case you need to make the changes to the end results, you can simply work on the first subdivision and savor automatic changes to the results.
K-3D has an advanced redo and undo mechanism to ensure you can go back or move forward to make corrections or amendments without limits. Additionally, the tool is developed keeping in mind all the industrial standards. For instance, it has complete support and integration of native RenderMan™ to its user interface. This is an excellent feature because most free animation software for Mac requires third-party render plugins.
Features:
- Parametric workflow.
- 2D and 3D animation tools.
- Allows Python and K3DScript scripting.
06 Krita - For Professional 2D Animators
Difficulty Level: Difficult
Pro: Advanced tools with numerous animation options and online training material.
Con: Not suitable for beginners.
If you love 2D animation, then you’ll surely love Krita. It is entirely free software available on Mac, Windows, and Linux. Also, it offers a full platform for drawing and frame-by-frame animation.
The number one reason for adoring Krita is its brush library. There are more than 100 professional brushes to give you a wide range of effects. Moreover, the strokes are pretty amazing and similar to Adobe Photoshop or Adobe Illustrator.
Another great thing about Krita is the brush stabilization feature designed for shaky hands. You can add a stabilizer to your chosen brush to smoothen its flow. Besides, there’s a special Dynamic Brush tool to make animation more fun. At the same time, you can also customize your brushes through different brush engines, including filter engines, color smudge engines, and many more.
Apart from the basic brush options, the preloaded vector tools are next to admire. These tools help you make great comic panels. All you need to do is choose and drag the word bubble template on your canvas. Then, make changes with the anchor point to make new shapes. At the same time, you can also add text to your animation by using the text tool.
Last but not least, there’s a wrap-around mode to create seamless patterns and textures. That means the image or drawing makes its own references along the x-axis and y-axis. This gives you the freedom to continue painting and enjoy updates to your animation instantly.
Features:
- HDR painting.
- PSD support.
- Python scripting.
- Selection and transformation tools.
- Proper group, filter, vector, and file layer management.
- Complete color management for extraordinary results.
- Drawing assistant to help you with straight lines and vanishing points.
Part 2 Best Free Animation Software for Windows
Below is free animation software on Windows. Keep reading.
01 Anireel - Easy to Use Animation Software
Difficulty Level: Easy
Anireel is a simple yet powerful Video Creativity tool used to make 2D animated explainer videos. Developed by Wondershare, one of the most popular Windows software and tool developers, Anireel uses rich, ready-to-use, and diverse assets to help one effortlessly make animated videos.
Features:
- There are tons of drag and drop characters, actions, props, text, and audio assets.
- Easy Text-to-Speech conversion via deep studying technology.
- Animate integrated and imported assets.
- Tons of templates that match many script types.
02 DAZ Studio - Free Software for 3D Lovers
Difficulty Level: Difficult
Pro: You can make game animation for fun. It also supports GPU accelerated real-time rendering.
Con: It has a high demand for the device, but owns a steep learning curve.
Daz 3d is a powerful and completely free 3D creation tool that will let you create the short videos that you want. Whether you are using this for business or pleasure, you will find the program is very easy to understand. Within a day, you will be completely used to its interface.
3D effects are the core focus of DAZ Studio. You can build a model, render, and pose animation within the skin texture level. It has a high requirement for the device. For Windows 64 bits, its recommended RAM is 3G.
Features:
- Options for 3D morphing, animation, and rendering.
- GPU accelerated real-time rendering, which delivers the best results.
- Interactive tutorials to help you become a better 3D artist.
- Everything you make is yours, royalty-free!
03 Terragen - Use It to Make CG Animation
Difficulty Level: Middle
Pro: The recently updated version is the best one. Ray-traced preview is a great function to help us make animation.
Con: The interface looks complicated, but it gets easy to know after you are familiar with it.
A completely free program that you can download and install on all Windows computers and tablets, Terragen is the ideal program for you to create the 3D animations and environments that you want. If you want a photo-realistic CG environment, using Terragen is the best way to do it!
Releasing imagination instantly, Terragen Creative is the one tool you’d like to consider. You can use it to make beautiful scenery.
For advanced tools, you can choose FBX to make animation quickly. The featured image gallery on its homepage will give you a deep understanding of the final outcome you can achieve with Terragen.
Features:
- Ray-traced preview. Without watermark after exporting
- Photo-realistic clouds and ozone simulation
- Rendering is twice as fast as the previous version of the program.
- Adding terrain, objects, and shader to your final product is very easy with the intuitive interface.
04 Anim8or - Free Tool to Make 3D Modeling
Difficulty Level: Difficult
Pro: Anim8or supports 3D modeler and TrueType fonts to meet advanced needs.
Con: Beginners will find it difficult to learn.
Anim8or is a free 3D modeling program that will let you create the unique work that you want. It is a personal project from an animator, but the program does get regular updates and troubleshooting.
It is not going to give you the same features as something like Studio Max or Maya, but you will get the basics. Beginners who are getting into animations will love this program.
Anim8or is a great tool to step into 3D animation ff you think other software is too different to start. In some way, it means you need to give up some advanced features. But all in all, it’s still recommended for you.
Features:
- A full 3D modeler that allows you to create spheres, cylinders, platonic solids, and any other objects that you want.
- Features support for TrueType fonts.
- Easy to create 3D scenes and output them as video files or images.
05 Seamless3d - Open-source Free Software
Difficulty Level: Easy
Pro: It is an open-source 3D modeling package. The good thing is the handy infinite Undo/Redo operation.
Con: Some advanced features are missing like drawing.
Seamless3d, an open-source 3D modeling software that you can download, is among the best animation worktables if you want to create specialized images, animated videos, or 3D characters.
It supports FFmpeg video format, so you can use AVI, MP4, and more. Besides, the forum is not active compared with before, but you still can find answers from many tutorials .
Features:
- It comes with infinite undo and redo options for complete flexibility to correct mistakes.
- It allows for partitioned and seamless texture mapping for YouTube videos.
- Has a specialized tree view interface.
06 OpenToonz - Support Plug in to Make Animation Freely
Difficulty Level: Middle
Pro: It is open-source software, so you can change the code freely.
Con: The plug-in effects are limited.
This animation program is made for beginners on Windows. It is among the best 2D animation software in the market. You can use plug-in effects to change image style, add lights, and distort details. It supports Windows 7/8/10 only for 64 bit.
Features:
- You can add provisional colors to make your animation more colorful.
- Smooth correction without frame losing.
- Compatible with black-and-white, colored, or without binarization scanning.
7 Stykz - Simple to Use Animation Program for Beginners
Difficulty Level: Easy
Pro: It is the best stick figure animation if you want to make this kind of video.
Con: The UI is not modern to use and needs time to adapt to using it.
Stykz is completely free to use and without a watermark. If you have used Pivot StickFigure Animator, then you will find Stykz is similar to it, but you can import the previous .stk files to animate it again. You can use it to make animation smooth frame by frame.
With its frame-based feature, Stykz is easy to customize each frame. You can change previous and current frames to get what you want. You can download it to have a try considering its easy-to-use features.
Features:
- There is some animes file on this website, so you can have a reference.
- Edit animation in the software without using another editing window.
- You can share the final work with others including information.
Part 3 FAQ about Animation Software for Windows and Mac
01 Are Macs good for animation?
To be frank, Mac is a better choice to make animation if you want to have a smooth animation experience. For example, screen resolution is a crucial factor to make excellent animation. The good is Mac’s screen will never let you disappointed.
02 What is the best animation software for Mac?
The best animation software on mac includes Synfig Studio, Pencil2D Animation, Tupi, Blender, and more. Mentioned are free-to-use. Maya is also worth considering animation software if you are a professional user. Maya offers a 1-month free trial. After it is ended, the paid plans are month, 1-year, and 3-year.
03 Can you animate in Photoshop?
Yes, you can make basic animation in Photoshop. However, it only supports frame-based animation making. In this case, you need to use other professional software to make animation. But, you still can use Photoshop to meet your needs if you are a beginner.
Conclusion
With any of these free animation maker programs on Mac and Windows, you will have an easy time creating your next 2D or 3D video. Ensure you choose the program that has the features and compatibility that you desire. Then it is up to your creative mind to come up with stunning animations! If you want to make animation easily, you can also find inspiration through classical animated cartoon types with examples .
Shanoon Cox
Shanoon Cox is a writer and a lover of all things video.
Follow @Shanoon Cox
How to Calculate Pixel Calculator Ratio
How to Calculate Pixel Calculator Ratio
An easy yet powerful editor
Numerous effects to choose from
Detailed tutorials provided by the official channel
Size, formats, and resolution… What are pixels exactly doing with it?
![]()
So let’s review some basics on pixel calculator ratio to create an easy life, your workflow more productive, and your photos of the ideal size for the intended purpose.
In this article
01 [What is Pixel Aspect Ratio?](#Part 1)
02 [How is Pixel Ratio Calculated?](#Part 2)
03 [Par (pixel Aspect Ratio) in Adobe Premiere Pro/Filmora?](#Part 3)
04 [Difference among Pixel Aspect Ratio, Display Aspect Ratio, and Storage Aspect Ratio](#Part 4)
05 [How Aspect Ratios Affect UI/UX Design?](#Part 5)
Part 1 What is Pixel Aspect Ratio?
A digital image is not a single non-dividable thing. You’ll see that your photo is like a mosaic formed by small tiles if you zoom in far enough, which are known as pixels in photography.
The amount of these pixels and the way they are divided are the two elements that you’re required to take into account to know more about the resolution and pixel calculator ratio.
The Pixel Aspect Ratio is simply the latest way of defining the length of one side of a pixel in context to the length of the other.
Let’s say the ratio is 1:1; each side of the pixel is the same length as the other, also known as a square in pixels.
If the ratio is 2:1, it means that one side is twice the length of the other.
NOTE: The ‘Aspect Ratio’ does not define the actual or exact length of the side of a pixel is, just its “relative” size of one side to the other. The actual length will depend on how much you shrink or stretch a photo when recreating it. But if the Pixel Calculator Ratio is 1:1, then the pixels will always be square irrespective of the size of that particular photo.
![]()
Part 2 How is Pixel Ratio Calculated?
You can use a pixel ratio calculator to calculate the pixels within a screen. So, we’d like to suggest a calculator by xwebtools.com.
Here, you can see tabs, namely the Common Ratios Ratio Width, Ratio Height, Pixels Width, and Pixels Height.
![]()
How it works:
This pixel ratio calculator converts pixel dimensions to aspect ratios. It is an online free tool that assists you in calculating the aspect ratio value of an object or a photo.
The conversion can be carried in both ways, aspect ratio to pixels and pixels to aspect ratio. This screen resolution calculator offers a powerful and simple tool that can convert the ratio of images to pixels resolution and pixels to ratio dimensions.
You need to provide Pixels Width and Pixels Height to calculate the aspect ratio; the aspect ratio will be automatically calculated.
You need to provide Ratio Height and Ratio Width to calculate pixel resolutions. Both the Pixels Width and Height will get automatically calculated.
Part 3 What is Par (pixel Aspect Ratio) in Adobe Premiere Pro/Filmora?
Pixel ratio: Adobe Premiere Pro
As we already discussed, an aspect ratio defines width to height. The still picture and video frames have a frame aspect ratio. The pixels that create the frame have a pixel aspect ratio (sometimes called PAR).
Different video recording standards have different aspect ratios. For instance, you record video for television in either a 16:9 or a 4:3 frame aspect ratio.
You set the frame and pixel aspect when you create a project in Adobe Premiere Pro. Once you set these ratios, you can’t change them for that project. However, you can edit the aspect ratio of a sequence. You can also use assets made with different aspect ratios in the project.
Premiere Pro automatically compensates for the pixel aspect ratio of source files.
If an asset still feels distorted, you can manually mention its pixel aspect ratio. But that isn’t very clear, especially for a beginner. This is why we recommend doing the following.
Pixel ratio: Wondershare Filmora
You need a converter or a video editor to change the aspect ratio permanently. Here we humbly recommend an excellent aspect ratio changer - Wondershare Filmora video editor, which helps you make 4:3, 9:16, 16:9, and 1:1 aspect ratio videos pretty quickly.
Wondershare Filmora
Get started easily with Filmora’s powerful performance, intuitive interface, and countless effects!
Try It Free Try It Free Try It Free Learn More >

Furthermore, you can conveniently share these videos on YouTube, Apple TV, Vimeo, and mobile devices.
Transform aspect ratio at the beginning interface
Wondershare Filmora Video Editor helps you change the project aspect ratio right after launching the video editor program.
If you click the drop-down menu, you will see the usual 16:9, 1:1, 9:16, 4:3, and 21:9 aspect ratios.
![]()
Unlike Adobe Premiere Pro, Wondershare Filmora offers you four more ways of setting aspect ratios efficiently.
Method 2: You can change the aspect ratio under Project Settings
![]()
Method 3: Change the aspect ratio of video with Auto-Reframe
![]()
Method 4: Change aspect ratio during Editing
![]()
Method 5: Change aspect ratio while Exporting
![]()
Thus, using the Wondershare Filmora along with the pixel ratio calculator makes a difference!
Part 4 Difference among Pixel Aspect Ratio, Display Aspect Ratio, and Storage Aspect Ratio
Although the image aspect ratio comes from its width and height, it also contains multiple subsets that help to define image proportions properly.
1 - Pixel aspect ratio
Pixel aspect ratio (PAR) is the proportion of the specific pixels within an image. They are generally square within the pixel aspect ratio of 1:1.
But sometimes, specific images are optimized for certain types of displays. And, they have rectangular pixels with an aspect ratio of 4:3 or similar.
2 - Display aspect ratio
The display aspect ratio (DAR) is the designers’ most frequent aspect ratio and gets generally synced with the general term.
As the name suggests, the display aspect ratio refers to the proportions of an image as it appears on different screens out there.
Some devices, such as televisions and cameras, have a fixed DAR for images to display nicely on these devices.
They need optimization for their specific or respective aspect ratio. For instance, a typical display aspect ratio for the widescreen video on a television screen or monitor screen is 16:9.
They appear distorted when images with different aspect ratios are presented on these devices. Digital SLR camera sensors also consist of a fixed display aspect ratio, which controls how pictures captured by the camera will be displayed and saved.
3 - Storage aspect ratio
Storage aspect ratio, commonly known as (SAR) is an aspect ratio formula that concerns specifically to encoded digital video files. SAR refers to the height and the width relationship in video frame size, and it is required to be consistent among all individual frames.
SAR x PAR = DAR for max widescreen videos in a usual used formula.
Part 1 Part 5: How Aspect Ratios Affect UI/UX Design?
Aspect ratios play a vital part in any project that consists of displaying and capturing photographs, videos, or other image-based files in an ideal manner. The camera’s fixed aspect ratio can considerably impact, especially for photographers.
And for videographers or anyone working with slideshows, animations, and other motion projects, the aspect ratio is a prominent element for correct display on mobile devices and widescreen.
But even in the environment of responsive web design, problems can arise, such as when an image is not adjustable for display without compromising its quality or content.
A small example is when you need a square image with a 1:1 aspect ratio to insert into a rectangular box on a web page. To accommodate varying image size requirements, proportions and size may need adjustment.
In an increasingly picture-driven digital world, videos and images that look even slightly out of the way add to a visitor’s negative impression of a site. Besides those forced into the wrong configurations can even interfere with a site’s usability.
Poorly proportioned user guide or product images video that’s too stretched to check clearly can affect both a visitor’s want and their ability to use the site. Developers, designers, and anyone working with images will need to know how aspect ratios work and manipulate them for the best visual effect.
Various pixel calculator ratios, both paid and free, have popped up on the web to streamline the process.
Key Takeaways from This Episode
● An overview of pixels
● Understanding the importance of pixel ratio calculators
● Different pixel ratios and their impact on UI/UX design
Size, formats, and resolution… What are pixels exactly doing with it?
![]()
So let’s review some basics on pixel calculator ratio to create an easy life, your workflow more productive, and your photos of the ideal size for the intended purpose.
In this article
01 [What is Pixel Aspect Ratio?](#Part 1)
02 [How is Pixel Ratio Calculated?](#Part 2)
03 [Par (pixel Aspect Ratio) in Adobe Premiere Pro/Filmora?](#Part 3)
04 [Difference among Pixel Aspect Ratio, Display Aspect Ratio, and Storage Aspect Ratio](#Part 4)
05 [How Aspect Ratios Affect UI/UX Design?](#Part 5)
Part 1 What is Pixel Aspect Ratio?
A digital image is not a single non-dividable thing. You’ll see that your photo is like a mosaic formed by small tiles if you zoom in far enough, which are known as pixels in photography.
The amount of these pixels and the way they are divided are the two elements that you’re required to take into account to know more about the resolution and pixel calculator ratio.
The Pixel Aspect Ratio is simply the latest way of defining the length of one side of a pixel in context to the length of the other.
Let’s say the ratio is 1:1; each side of the pixel is the same length as the other, also known as a square in pixels.
If the ratio is 2:1, it means that one side is twice the length of the other.
NOTE: The ‘Aspect Ratio’ does not define the actual or exact length of the side of a pixel is, just its “relative” size of one side to the other. The actual length will depend on how much you shrink or stretch a photo when recreating it. But if the Pixel Calculator Ratio is 1:1, then the pixels will always be square irrespective of the size of that particular photo.
![]()
Part 2 How is Pixel Ratio Calculated?
You can use a pixel ratio calculator to calculate the pixels within a screen. So, we’d like to suggest a calculator by xwebtools.com.
Here, you can see tabs, namely the Common Ratios Ratio Width, Ratio Height, Pixels Width, and Pixels Height.
![]()
How it works:
This pixel ratio calculator converts pixel dimensions to aspect ratios. It is an online free tool that assists you in calculating the aspect ratio value of an object or a photo.
The conversion can be carried in both ways, aspect ratio to pixels and pixels to aspect ratio. This screen resolution calculator offers a powerful and simple tool that can convert the ratio of images to pixels resolution and pixels to ratio dimensions.
You need to provide Pixels Width and Pixels Height to calculate the aspect ratio; the aspect ratio will be automatically calculated.
You need to provide Ratio Height and Ratio Width to calculate pixel resolutions. Both the Pixels Width and Height will get automatically calculated.
Part 3 What is Par (pixel Aspect Ratio) in Adobe Premiere Pro/Filmora?
Pixel ratio: Adobe Premiere Pro
As we already discussed, an aspect ratio defines width to height. The still picture and video frames have a frame aspect ratio. The pixels that create the frame have a pixel aspect ratio (sometimes called PAR).
Different video recording standards have different aspect ratios. For instance, you record video for television in either a 16:9 or a 4:3 frame aspect ratio.
You set the frame and pixel aspect when you create a project in Adobe Premiere Pro. Once you set these ratios, you can’t change them for that project. However, you can edit the aspect ratio of a sequence. You can also use assets made with different aspect ratios in the project.
Premiere Pro automatically compensates for the pixel aspect ratio of source files.
If an asset still feels distorted, you can manually mention its pixel aspect ratio. But that isn’t very clear, especially for a beginner. This is why we recommend doing the following.
Pixel ratio: Wondershare Filmora
You need a converter or a video editor to change the aspect ratio permanently. Here we humbly recommend an excellent aspect ratio changer - Wondershare Filmora video editor, which helps you make 4:3, 9:16, 16:9, and 1:1 aspect ratio videos pretty quickly.
Wondershare Filmora
Get started easily with Filmora’s powerful performance, intuitive interface, and countless effects!
Try It Free Try It Free Try It Free Learn More >
Furthermore, you can conveniently share these videos on YouTube, Apple TV, Vimeo, and mobile devices.
Transform aspect ratio at the beginning interface
Wondershare Filmora Video Editor helps you change the project aspect ratio right after launching the video editor program.
If you click the drop-down menu, you will see the usual 16:9, 1:1, 9:16, 4:3, and 21:9 aspect ratios.
![]()
Unlike Adobe Premiere Pro, Wondershare Filmora offers you four more ways of setting aspect ratios efficiently.
Method 2: You can change the aspect ratio under Project Settings
![]()
Method 3: Change the aspect ratio of video with Auto-Reframe
![]()
Method 4: Change aspect ratio during Editing
![]()
Method 5: Change aspect ratio while Exporting
![]()
Thus, using the Wondershare Filmora along with the pixel ratio calculator makes a difference!
Part 4 Difference among Pixel Aspect Ratio, Display Aspect Ratio, and Storage Aspect Ratio
Although the image aspect ratio comes from its width and height, it also contains multiple subsets that help to define image proportions properly.
1 - Pixel aspect ratio
Pixel aspect ratio (PAR) is the proportion of the specific pixels within an image. They are generally square within the pixel aspect ratio of 1:1.
But sometimes, specific images are optimized for certain types of displays. And, they have rectangular pixels with an aspect ratio of 4:3 or similar.
2 - Display aspect ratio
The display aspect ratio (DAR) is the designers’ most frequent aspect ratio and gets generally synced with the general term.
As the name suggests, the display aspect ratio refers to the proportions of an image as it appears on different screens out there.
Some devices, such as televisions and cameras, have a fixed DAR for images to display nicely on these devices.
They need optimization for their specific or respective aspect ratio. For instance, a typical display aspect ratio for the widescreen video on a television screen or monitor screen is 16:9.
They appear distorted when images with different aspect ratios are presented on these devices. Digital SLR camera sensors also consist of a fixed display aspect ratio, which controls how pictures captured by the camera will be displayed and saved.
3 - Storage aspect ratio
Storage aspect ratio, commonly known as (SAR) is an aspect ratio formula that concerns specifically to encoded digital video files. SAR refers to the height and the width relationship in video frame size, and it is required to be consistent among all individual frames.
SAR x PAR = DAR for max widescreen videos in a usual used formula.
Part 1 Part 5: How Aspect Ratios Affect UI/UX Design?
Aspect ratios play a vital part in any project that consists of displaying and capturing photographs, videos, or other image-based files in an ideal manner. The camera’s fixed aspect ratio can considerably impact, especially for photographers.
And for videographers or anyone working with slideshows, animations, and other motion projects, the aspect ratio is a prominent element for correct display on mobile devices and widescreen.
But even in the environment of responsive web design, problems can arise, such as when an image is not adjustable for display without compromising its quality or content.
A small example is when you need a square image with a 1:1 aspect ratio to insert into a rectangular box on a web page. To accommodate varying image size requirements, proportions and size may need adjustment.
In an increasingly picture-driven digital world, videos and images that look even slightly out of the way add to a visitor’s negative impression of a site. Besides those forced into the wrong configurations can even interfere with a site’s usability.
Poorly proportioned user guide or product images video that’s too stretched to check clearly can affect both a visitor’s want and their ability to use the site. Developers, designers, and anyone working with images will need to know how aspect ratios work and manipulate them for the best visual effect.
Various pixel calculator ratios, both paid and free, have popped up on the web to streamline the process.
Key Takeaways from This Episode
● An overview of pixels
● Understanding the importance of pixel ratio calculators
● Different pixel ratios and their impact on UI/UX design
The Ultimate DVD Conversion Guide: From Physical to Digital in No Time
Best DVD to Digital Format Converters

Liza Brown
Mar 27, 2024• Proven solutions
DVDs are not as nearly as popular as they were in the 2000s, simply because USB flash drives are much more durable than DVD discs. One of the easiest ways to back up the data stored on DVDs is to convert it to digital video file formats, like MOV or MP4 .
You cannot just copy and paste the data from a DVD or Blu-ray to a computer since you need file conversion software in order to change the format of a video file . Read on if you are looking for a way to convert a DVD to a digital video file format because in this article we are going to take you through some of the best DVD to digital format converters.
How to convert DVDs to Digital Video File Formats?
The process of converting a video file is simple, and anyone can perform it in just a few minutes even if they have never done it before. However, converting DVDs to digital file formats without permission is punishable by the law, so you must make sure that you have the right to use the file you created freely. Let’s take a look at some of the best DVD to digital format converters.
1. Vudu
Price: $2 - $5 per conversion
Compatibility: Android, iOS
Having a source of entertainment in your pocket wherever you go can make dull long journeys much more fun. Vudu allows you to manage your film collection directly from your Smartphone and have access to all your DVD and Blu-ray discs at any moment.

In order to start the conversion process, you just have to scan a disc’s barcode and the app will automatically convert it to a digital video file format. You can choose to convert a Blu-ray to HDX, DVD to SD or DVD to HDX, however, you will have to pay between $2 and $5 plus the tax for each file you convert with Vudu. Furthermore, the app features an impressive movie collection with more than 100,000 titles you can watch anytime and anywhere.
2. HandBrake
Price: Free
Compatibility: Windows
This open-source file converter can help you convert any DVD to a file format you choose effortlessly. PC users that have Windows 7 or later can install HandBrake for free, although the application only works on 64-bit versions of the OS.
You can choose from a variety of device presets that automatically adjust the conversion settings to a device on which the converted DVD video is going to be played. In addition, HandBrake lets you choose the output file format, set the preferred framerate or apply video filters such as Denoise , Grayscale or Deinterlacing. Nonetheless, HandBrake can only convert DVDs to MP4 or MKV file formats, which can considerably limit your conversion options.
3. Wondershare Uniconverter
Price: Freemium, $55.99 for the perpetual plan
Compatibility: Windows, macOS
If you are looking for a software product that enables you to burn DVDs, edit or transfer videos and convert them to more than a thousand video file formats, then Wondershare Unicoverter is undoubtedly one of the best choices you have at your disposal.

This cross-platform app converts files 30 times faster than any of its competitors because it supports GPU acceleration. In addition to excellent DVD file conversion capabilities, Uniconverter also offers VR conversion features and it allows you to combine and merge multiple video clips . Optionally, you can use this cross-platform app to add srt and other subtitle files to the videos you convert with it. You should keep in mind that the free version of Wondershare Uniconverter only lets you convert 1/3 of the output file and prevents recording videos that are longer than one minute.
4. DVDVideoSoft Free Video Converter
Price: Free
Compatibility: Windows
This is a simple tool that makes the process of converting a DVD to a digital video or audio file effortless. You just have to specify the source of the input video, then select the file format of the output video and optimize it for playback on a particular device by choosing one of the available Device presets.
You can easily convert DVDs to AVI, MP4, MKV, iPod, iPhone, Apple TV, Xbox or PS3 files with this video file converter. Extracting audio from DVD is yet another option DVDVideo Soft Free Video Converter provides, which enables you to extract dialogue or narration from video files. Even so, the software can only convert unprotected files, so you must make sure that the DVD you are trying to convert doesn’t have regional protection or any other form of encryption.
5. DVDFab DVD Ripper
Price: Free version available, pricing options start at $69
Compatibility: Windows, macOS
The range of the file conversion options this tool provides depends on the subscription model you’ve selected. In case you choose to convert your DVDs with the free version of the software, the number of discs you can open will not be limited but you won’t have access to all conversion profiles. Furthermore, you won’t have access to 4K and profiles and you will only get a free DVD Ripper account.
Both Full Trial and Paid versions of this DVD converter let you export multichannel audio files, but the free version limits the number of audio channels to just two. The resolution of the output videos cannot be higher than 480p regardless of the subscription model you choose, but you can purchase the Enlarger AI app separately and use it to upscale the videos up to 1080p.
6. WinX DVD Ripper Platinum
Price: $59.95
Compatibility: macOS, Windows
Backing up old DVDs, fixing playback errors on DVDs, or ripping a DVD to MP4 are some of the most common reasons why PC and Mac users choose to convert their DVDs with WinX DVD Ripper Platinum.

You can also convert encrypted or regional DVDs or choose to clone DVD to ISO without any quality losses. This DVD converter also offers simple video editing tools that allow you to trim videos, remove black bars, add subtitles or change the resolution of a video file. WinX DVD Ripper Platinum supports Level-3 Hardware Acceleration for Intel CPU, Nvidia or AMD GPU, so that you can convert an entire DVD into MP4 in just a few minutes.
Conclusion
Even though DVDs are no longer as popular as they once were, movie or music collectors can benefit from converting them to digital formats. Damaging a DVD is relatively easy, and backing up the data from your DVDs is probably the easiest way of ensuring that all your files are safe. Which DVD to digital format converter are you going to choose to convert your DVDs to digital video file format? Leave a comment and let us know.
Liza Brown
Liza Brown is a writer and a lover of all things video.
Follow @Liza Brown
Liza Brown
Mar 27, 2024• Proven solutions
DVDs are not as nearly as popular as they were in the 2000s, simply because USB flash drives are much more durable than DVD discs. One of the easiest ways to back up the data stored on DVDs is to convert it to digital video file formats, like MOV or MP4 .
You cannot just copy and paste the data from a DVD or Blu-ray to a computer since you need file conversion software in order to change the format of a video file . Read on if you are looking for a way to convert a DVD to a digital video file format because in this article we are going to take you through some of the best DVD to digital format converters.
How to convert DVDs to Digital Video File Formats?
The process of converting a video file is simple, and anyone can perform it in just a few minutes even if they have never done it before. However, converting DVDs to digital file formats without permission is punishable by the law, so you must make sure that you have the right to use the file you created freely. Let’s take a look at some of the best DVD to digital format converters.
1. Vudu
Price: $2 - $5 per conversion
Compatibility: Android, iOS
Having a source of entertainment in your pocket wherever you go can make dull long journeys much more fun. Vudu allows you to manage your film collection directly from your Smartphone and have access to all your DVD and Blu-ray discs at any moment.
In order to start the conversion process, you just have to scan a disc’s barcode and the app will automatically convert it to a digital video file format. You can choose to convert a Blu-ray to HDX, DVD to SD or DVD to HDX, however, you will have to pay between $2 and $5 plus the tax for each file you convert with Vudu. Furthermore, the app features an impressive movie collection with more than 100,000 titles you can watch anytime and anywhere.
2. HandBrake
Price: Free
Compatibility: Windows
This open-source file converter can help you convert any DVD to a file format you choose effortlessly. PC users that have Windows 7 or later can install HandBrake for free, although the application only works on 64-bit versions of the OS.
You can choose from a variety of device presets that automatically adjust the conversion settings to a device on which the converted DVD video is going to be played. In addition, HandBrake lets you choose the output file format, set the preferred framerate or apply video filters such as Denoise , Grayscale or Deinterlacing. Nonetheless, HandBrake can only convert DVDs to MP4 or MKV file formats, which can considerably limit your conversion options.
3. Wondershare Uniconverter
Price: Freemium, $55.99 for the perpetual plan
Compatibility: Windows, macOS
If you are looking for a software product that enables you to burn DVDs, edit or transfer videos and convert them to more than a thousand video file formats, then Wondershare Unicoverter is undoubtedly one of the best choices you have at your disposal.
This cross-platform app converts files 30 times faster than any of its competitors because it supports GPU acceleration. In addition to excellent DVD file conversion capabilities, Uniconverter also offers VR conversion features and it allows you to combine and merge multiple video clips . Optionally, you can use this cross-platform app to add srt and other subtitle files to the videos you convert with it. You should keep in mind that the free version of Wondershare Uniconverter only lets you convert 1/3 of the output file and prevents recording videos that are longer than one minute.
4. DVDVideoSoft Free Video Converter
Price: Free
Compatibility: Windows
This is a simple tool that makes the process of converting a DVD to a digital video or audio file effortless. You just have to specify the source of the input video, then select the file format of the output video and optimize it for playback on a particular device by choosing one of the available Device presets.
You can easily convert DVDs to AVI, MP4, MKV, iPod, iPhone, Apple TV, Xbox or PS3 files with this video file converter. Extracting audio from DVD is yet another option DVDVideo Soft Free Video Converter provides, which enables you to extract dialogue or narration from video files. Even so, the software can only convert unprotected files, so you must make sure that the DVD you are trying to convert doesn’t have regional protection or any other form of encryption.
5. DVDFab DVD Ripper
Price: Free version available, pricing options start at $69
Compatibility: Windows, macOS
The range of the file conversion options this tool provides depends on the subscription model you’ve selected. In case you choose to convert your DVDs with the free version of the software, the number of discs you can open will not be limited but you won’t have access to all conversion profiles. Furthermore, you won’t have access to 4K and profiles and you will only get a free DVD Ripper account.
Both Full Trial and Paid versions of this DVD converter let you export multichannel audio files, but the free version limits the number of audio channels to just two. The resolution of the output videos cannot be higher than 480p regardless of the subscription model you choose, but you can purchase the Enlarger AI app separately and use it to upscale the videos up to 1080p.
6. WinX DVD Ripper Platinum
Price: $59.95
Compatibility: macOS, Windows
Backing up old DVDs, fixing playback errors on DVDs, or ripping a DVD to MP4 are some of the most common reasons why PC and Mac users choose to convert their DVDs with WinX DVD Ripper Platinum.
You can also convert encrypted or regional DVDs or choose to clone DVD to ISO without any quality losses. This DVD converter also offers simple video editing tools that allow you to trim videos, remove black bars, add subtitles or change the resolution of a video file. WinX DVD Ripper Platinum supports Level-3 Hardware Acceleration for Intel CPU, Nvidia or AMD GPU, so that you can convert an entire DVD into MP4 in just a few minutes.
Conclusion
Even though DVDs are no longer as popular as they once were, movie or music collectors can benefit from converting them to digital formats. Damaging a DVD is relatively easy, and backing up the data from your DVDs is probably the easiest way of ensuring that all your files are safe. Which DVD to digital format converter are you going to choose to convert your DVDs to digital video file format? Leave a comment and let us know.
Liza Brown
Liza Brown is a writer and a lover of all things video.
Follow @Liza Brown
Also read:
- New Easy Cartoon Making Top 10 Online and Offline Solutions for 2024
- New Take Your Audio to the Next Level Top 10 Editing Software for 2024
- New 2024 Approved The Great Video Editing Debate Sony Vegas vs Adobe Premiere Pro
- New 2024 Approved Mobile Time-Lapse Magic Top Apps for Creatives (2023 Edition)
- New In 2024, 10 Powerful Video Editing Software Alternatives to Final Cut Pro X
- New In 2024, The Ultimate Guide to LinkedIn Video Dimensions for Maximum Engagement
- New Free and Fast The Best WMV Video Splitters for 2024
- WebM Video Shrinking Made Simple Top Online Compressors for 2024
- Updated In 2024, The Fast Lane How to Resize Your Video in No Time
- Updated 2024 Approved Free Online Movie Making Software Top Picks
- In 2024, Videopad Video Editor Review and Comparison Best Video Editing Software
- Updated In 2024, Steady Shots Best Apps for Video Stabilization
- Updated In 2024, Experience the Best 90-Day Free Trial of Final Cut Pro Now
- 2024 Approved The Best Free Online Video Reversers
- New Easy Video Editing on Mac with AVS Editor for 2024
- Updated Neon Font Creator Top-Rated Online Tools for Custom Neon Text for 2024
- Updated In 2024, Combine Videos Freely 7 Watermark-Free Editors
- S Hottest Bokeh Effect Apps for Mobile Photography for 2024
- Updated VN Video Editor APK A Comprehensive Review for Android Users for 2024
- Updated AVI File Trimming and Splitting Simplified A 2023 Update for 2024
- In 2024, Picture-in-Picture Made Easy Final Cut Pro Tutorial
- New In 2024, Beyond PowerDirector The Best Mobile Video Editing Apps Of
- Updated In 2024, 10 Best Aspect Ratio Editor Software for Perfect Proportions
- Updated Video Editing Made Easy for Kids Top Free and Paid Apps
- New Unlock Stunning Time-Lapses Top-Rated Apps for iPhone and Android
- Updated Not Sure How to Install LumaFusion on an M1-Based Mac? Find Out Here. Also, Find the Best Alternatives to LumaFusion for Mac
- New The Best Ways to Convert MP4 to MP3 on Your iPhone or Android Device
- Updated Streamline Your Video Collection 8 Best Mac Metadata Editors
- New After Effects VS Adobe Premiere, Whats the Difference for 2024
- New In 2024, The Best Video Editing Software for Mac (Besides Pinnacle Studio)
- New Pixel Perfect Calculating Aspect Ratios with Ease
- Updated Why Mp3 Converter Windows Should Be Your Go-To Tool An Insiders Look for 2024
- New 2024 Approved The Social Media Designers Handbook Aspect Ratios and Beyond
- Updated 10 Leading Intro Creator Platforms Free and Paid Options for 2024
- New In 2024, The Ultimate List of Free DVD Players for Windows 10 2023 Update
- Updated Mastering Compressor A Step-by-Step Guide for FCPX Users
- Updated 2024 Approved Video Editing on Windows Made Easy IMovie Alternatives and More
- New The Best of Google Play Top Android Apps
- New In 2024, The Ultimate List of 3D Video Software You Cant Miss
- Updated 2024 Approved Shrink Your WebM Videos Best Online Compression Services
- Updated In 2024, Getting Started with HD Video Understanding Pixel Size and Resolution
- 2024 Approved The Ultimate Guide to Cutting AVI Videos Top Tools for Windows, MAC, and Android
- Updated 2024 Approved Elevate Your Storytelling Adding Picture-in-Picture Elements to Your FCP Projects
- New In 2024, Translate Video From Japanese to English Online for Free
- In 2024, 8 Best Apps for Screen Mirroring Nubia Red Magic 8S Pro+ PC | Dr.fone
- How Do I Stop Someone From Tracking My Apple iPhone 6 Plus? | Dr.fone
- How can I get more stardust in pokemon go On Nokia C300? | Dr.fone
- How To Transfer WhatsApp From Apple iPhone 8 to other iPhone 11 Pro devices? | Dr.fone
- How To Remove or Bypass Knox Enrollment Service On Poco C65
- How to Transfer Data from Vivo Y27s to Other Android Devices? | Dr.fone
- New 2024 Approved Need to Learn About Halftone Effects? Learn How to Quickly Create a Halftone Effect in Adobe Photoshop with Simple, Easy-to-Follow Instructions
- Reset iTunes Backup Password Of iPhone 12 Pro Prevention & Solution
- Easy Ways to Manage Your Tecno Camon 20 Premier 5G Location Settings | Dr.fone
- Quickly Remove Google FRP Lock on Realme C67 4G
- Best GIF Croppers How to Crop an Animated GIF for 2024
- Simple ways to get lost music back from Spark 20
- How to Track Asus ROG Phone 7 Location by Number | Dr.fone
- How to Screen Mirroring Vivo V30 Pro? | Dr.fone
- Your Complete Guide To Reset OnePlus 11 5G | Dr.fone
- Updated In 2024, How to Use LUTs Perfectly in Final Cut Pro
- In 2024, How to Transfer Data from Realme C33 2023 to BlackBerry | Dr.fone
- In 2024, How To Remove Passcode From Apple iPhone 11? Complete Guide | Dr.fone
- In 2024, Top 5 Vivo X100 Pro Bypass FRP Tools for PC That Actually Work
- Proven Ways in How To Hide Location on Life360 For Motorola Moto G24 | Dr.fone
- How to Unlock iPhone 14 Pro with a Mask On
- How to Unlock OnePlus Nord 3 5G Without Password?
- Gmail Not Working on Motorola Edge 2023 7 Common Problems & Fixes | Dr.fone
- Updated 2024 Approved 10 Popular Cartoon Characters That Should Top Your List
- 5 Easy Ways to Change Location on YouTube TV On Realme C67 5G | Dr.fone
- Here Are Some Reliable Ways to Get Pokemon Go Friend Codes For Honor 90 Lite | Dr.fone
- New 2024 Approved Never Miss a Moment With Free World Cup Live Streaming
- Updated 2024 Approved From Shaky to Steady 3 Proven Methods for AE Video Stabilization
- Detailed guide of ispoofer for pogo installation On Xiaomi Redmi Note 12 Pro+ 5G | Dr.fone
- How to Copy Contacts from Apple iPhone 14 Pro to SIM? | Dr.fone
- Can Life360 Track Or See Text Messages? What Can You Do with Life360 On Honor 90? | Dr.fone
- In 2024, Unlock Your Boost Mobile Apple iPhone 13 Pro Max Before the Plan Expires
- Title: New 2024 Approved FCPX Mastery Freeze Frames, Slow Motion, and Beyond
- Author: Morgan
- Created at : 2024-04-28 05:20:34
- Updated at : 2024-04-29 05:20:34
- Link: https://ai-video-tools.techidaily.com/new-2024-approved-fcpx-mastery-freeze-frames-slow-motion-and-beyond/
- License: This work is licensed under CC BY-NC-SA 4.0.
