
:max_bytes(150000):strip_icc():format(webp)/how-to-safely-use-airport-charging-stations-4690583-01-6085c56e46b34f84b5f5d2d976e20677.jpg)
In 2024, Say Goodbye to Shaky Footage Top Free Video Stabilizers
Say Goodbye to Shaky Footage: Top Free Video Stabilizers
Are you having issues regarding your video quality and looking for a video stabilizer to improve it? Guess what? You can create high-quality videos through free video stabilization software, either for your professional or personal use.
It helps to remove the shakiness you get on videos recorded on handheld devices such as mobile phones. It makes your clips and home movies look more stable and standard. Why upload the same boring and shady videos all the time when you can stabilize them and look more professional? This article takes you through some of the best video stabilization software to stabilize your videos and stand out.
Top 10 Best Free Video Stabilization Software for Windows and Mac
1. iMovie
iMovie is a video editing software available exclusively for iOS and macOS users. It is a complete video editing software that enables users to make professional cinematic movies. Additionally, it allows you to smooth out the shaky footage and create high-quality videos. You also get access to a handful of themes and templates that you can use to customize your videos.
iMovie’s user-friendly interface does not require you to be tech-savvy to operate it. It allows any ordinary user to stabilize videos and yield elegant videos.
Key features:
- It enables easy sharing of movies across mobile devices.
- You can freely adjust the levels of your audio clip.
- Easy green-screen control
- It essentializes professional movie creation
Steps to stabilize shaky clips on iMovie
Step 1: Import the video you want to stabilize into the iMovie application on Mac computer;
Step 2: In the adjustment tab, click on the Stabilization button and turn on Stabilize Shaky Video tool.

Step 3: To adjust the amount of stabilization, click and drag the stabilize shaky video slider.
2. Windows movie maker
Windows Movie Maker is another video stabilizer available exclusively for Windows users. It allows you to make personalized movies and incorporate video, still images, background music, and narration. It is also beneficial for stabilizing videos, adding titles and transactions.
Key features:
- It enables you to add special effects to your videos.
- Options for extensive audio track selection.
- Timeline narration options.
If you are using Windows 7, you are lucky to use Windows Movie Maker to stabilize the shaky videos easily. Watch the video tutorial to find out how.
Steps to stabilize shaky clips on Windows Movie Maker
Step 1: Open the app and click on the Add videos and photos icon, and select the video clip you want to stabilize.
Step 2: Select the portion of the clip that you want to stabilize. You can do this by selecting the shaky video selection option on the right side of the software’s windows.
Step 3: Click on the Edit tab to access the Video stabilization feature.
Step 4: Under the video stabilization feature, you will see three options, namely Anti-shake, Anti-shake and wobble correction- low, Anti-shake and wobble correction- high. Select the most suitable option.

3. HitFilm express
The HitFilm Express is one of the best video stabilization software. It is available for both macOS and Windows. It is an all-in-one video editing software that allows you to import clips and add visual effects and audio to the videos. You can also import your 3D model and create themes like star wars or other animation themes.
Key features:-
- Advance tracking
- Lighting effects
- Muzzle flash effects
- Masking and layering technique
- Screen simulation
Steps to stabilize shaky clips on HitFilm Express
Step 1: Import the clip you want to stabilize and navigate to the control panel.
Step 2: Under the control panel menu, select the track option, and locate your tracking points.
Step 3: It will provide you with two options under the type menu, Single-point position only and double-point position scale/rotation. Select the most appropriate option.
Step 4: Under the purpose-tab, select stabilize options and hit apply.
4. FilmForth
FilmForth is a new name in the video editing industry but it allows you to create videos easily with powerful features. If you are looking for free video stabilization software, FilmForth might be one of them for you. It is compact with powerful and easy-to-apply features.
You can edit video, add filters and transitions, titles, record voiceover, or add background music to video. What’s more, it allows you to save the video without watermark.
Key features:-
- Slideshow maker with photos, videos, music, and effects;
- Change the video background or make the logo transparent;
Steps to stabilize videos using FilmForth
Step 1: Select the stabilize video option under the quick tool menu.
Step 2: Select the video file that you want to stabilize.
Step 3: Manually fill the video resolution, video quality, and frame rate settings.
Step 4: Give the file an output name, and choose the video to save the video file.
5. Video DeShake
Video DeShake is solely developed for video stabilization. You can easily download it from av2video.com. It is an effective solution for video stabilization. However, it does not provide you with fancy video editing features, but if you are looking for an instant solution for video stabilization, it is one of the best options.
Steps to stabilize videos using video Deshake:
Step 1: Download and install video Deshake software from av2video.com.
Step 2: Select the plus icon from the left-aligned menu bar.
Step 3: Select the video file that you want to stabilize.
Step 4: Select your preferred format for the output video, and click on the stabilize option present at the bottom of the interface.
6. Shotcut
Shotcut is a free video stabilizer. You don’t need to sign up or log in to begin. There is no sales funnel waiting for you once you get addicted to using it. Another reason for its popularity is beginner-focused design. It is easy to learn and use. However, it lacks advanced editing features like iMovie or HitFilm Express.
Key features:-
- It can load videos recorded in high resolution or above 60 fps.
- Single frame image extraction options.
- Video stabilization feature
- Blurring effect
Steps to stabilize videos using Shotcut:-
Step 1: Drag the video file you want to stabilize into the software interface. Select the timeline feature to select the portion of the video clip that you want to stabilize.
Step 2: Select the filter tab and follow by selecting the plus button. Under the plus icon, select the monitor option and find the stabilize option under the menu.
Step 3: Customize the stabilizations options according to your specific needs and click on analyze to monitor the stabilization. After stabilization is complete, select the file option and click on save to save the video.
7. Blender
The Blender is free and one of the best video editing software for professionals . Besides video editing, it provides you with 3D modeling, rigging animation, simulation, and motion tracking features . It allows you to perform basic actions like video cuts and splicing and complex tasks like video masking or color grading.
Key features:-
- Live preview, chroma vectorscope, and histogram displays.
- Scrubbing and waveform visualization.
- Audion mixing and syncing.
- Speed control, adjustment layers, transitions, and keyframe options.
Steps to stabilize videos using Blender
Step 1: Begin by going to the motion tracking workspace.
Step 2: Click on open and select the video file you want to stabilize.
Step 3: Select the tracking option from the toolbar and click on the movie to set tracking points.
Step 4: Set the tracking point size and press the right arrow to start tracking.
Step 5: Select the file menu and navigate the save option to save the stabilized video.
8. AVS video stabilizer
AVS video editor is suitable for both beginners and professionals. It enables you to create videos of any resolution and length. It allows you to cut, trim, join, and rotate videos. It also amazes you with the freedom of using over 300 effects. With AVS video editor, you can edit VHS videos and convert them into digital format.
Key features:-
- Audio capture
- Brand overlay
- Customizable templates
- Easy to use interface with drag and drop features
- Multimedia format support
Steps to stabilize videos using AVS video editor:
Step 1: Click on the import option under the media library tab and import the video you want to stabilize.
Step 2: Press the video stabilization button present over the timeline.
Step 3: Under the stabilization video, drag the compensation bar to adjust the degree of stabilization.
Step 4: Click on the ok button at the bottom of the stabilization menu to save the changes.
9. VSDC
VSDC is a free video stabilizer that allows you to stabilize and edit videos of any complexity. It is compact with advanced features to cut and merge video files and apply visual and audio effects to make a slideshow and add appropriate soundtracks. It also facilitates easy video conversion for playback on specific media devices.
Key features:-
- Side by side and split-screen videos
- Videos in the text effects
- Green screen removal
- Double exposure
Steps to stabilize videos using VSDC
Step 1: Open the VSDC video editor, and navigate to the video stabilization feature from the Tools tab.
Step2: Select the open file option and export the video file you want to stabilize.
Step 3: In the stabilization, tab adjust the settings that best suit your specific requirements.
Step 4: Complete the process by clicking on the export project to view the outcome.
10. Openshot
OpenShot video editor is an easy-to-use video stabilization and edition software. It is helping professionals around the world with its excellent video editing features. Another factor that makes it different from other software is its compatibility with multiple operating software. It goes with Mac, Linux and Windows and is easily downloadable from its website.
Key features:-
- Compatible with multiple operating systems (Linux, Mac, and Windows)
- It supports a handful of video audio and image formats.
- Video transition along with the real-time preview.
- Options for creating title and sub-title creation
- Titles formation with 3D animation
Steps to stabilize videos using Openshot
Step 1: Open the video you want to stabilize using the project file tab.
Step 2: Drag the video timeline tab and locate the shaky part of the video you want to stabilize.
Step 3: Select the effects tab and navigate the stabilizer feature from the menu.
Step 4: Drag the stabilizer feature to your video clip in the timeline.
Step 5: You will see the stabilizer: initialize effect window. Select the degree of percentage as per your specific requirements.
Step 6: Select the process effects option.
Bonus: Stabilize shaky videos using Filmora video editor
Filmora video editor is a powerful video stabilizing software filled with powerful editing features. Unlike other editing software, Filmora is compatible with both Windows and Mac.
Some of the above video stabilizers are complex and require expertise. On the other hand, Wondershare Filmora video editor provides you with an easy-to-use interface and easy navigation options.
Key features:
- Modern and intuitive interface.
- Video stabilization in one click.
- Powerful edition features.
- Rich effects and templates.
Steps to stabilize videos using Wondershare Filmora video editor
For Win 7 or later (64-bit)
For macOS 10.12 or later
Step 1: Drag shaky videos into the Filmora video editor timeline.
Step 2: Click on the edit option in the toolbar to access the editing panel.
Step 3: Select the stabilization option from the editing panel.
Step 4: Click the play button to preview the stabilized video clip. It also allows you to stabilize the smooth level to obtain better results.
Conclusion
Videos are the most popular types of content. They instantly convey the message and engage the consumers. However, the quality of your video is crucial from your business perspective. Video stabilizing software provides stability to videos and makes them look professional and smooth.
Even if you don’t use video stabilizers for stabilizing videos for your business purposes, they can still come in handy while stabilizing your private videos.
Steps to stabilize shaky clips on iMovie
Step 1: Import the video you want to stabilize into the iMovie application on Mac computer;
Step 2: In the adjustment tab, click on the Stabilization button and turn on Stabilize Shaky Video tool.
Step 3: To adjust the amount of stabilization, click and drag the stabilize shaky video slider.
2. Windows movie maker
Windows Movie Maker is another video stabilizer available exclusively for Windows users. It allows you to make personalized movies and incorporate video, still images, background music, and narration. It is also beneficial for stabilizing videos, adding titles and transactions.
Key features:
- It enables you to add special effects to your videos.
- Options for extensive audio track selection.
- Timeline narration options.
If you are using Windows 7, you are lucky to use Windows Movie Maker to stabilize the shaky videos easily. Watch the video tutorial to find out how.
Steps to stabilize shaky clips on Windows Movie Maker
Step 1: Open the app and click on the Add videos and photos icon, and select the video clip you want to stabilize.
Step 2: Select the portion of the clip that you want to stabilize. You can do this by selecting the shaky video selection option on the right side of the software’s windows.
Step 3: Click on the Edit tab to access the Video stabilization feature.
Step 4: Under the video stabilization feature, you will see three options, namely Anti-shake, Anti-shake and wobble correction- low, Anti-shake and wobble correction- high. Select the most suitable option.
3. HitFilm express
The HitFilm Express is one of the best video stabilization software. It is available for both macOS and Windows. It is an all-in-one video editing software that allows you to import clips and add visual effects and audio to the videos. You can also import your 3D model and create themes like star wars or other animation themes.
Key features:-
- Advance tracking
- Lighting effects
- Muzzle flash effects
- Masking and layering technique
- Screen simulation
Steps to stabilize shaky clips on HitFilm Express
Step 1: Import the clip you want to stabilize and navigate to the control panel.
Step 2: Under the control panel menu, select the track option, and locate your tracking points.
Step 3: It will provide you with two options under the type menu, Single-point position only and double-point position scale/rotation. Select the most appropriate option.
Step 4: Under the purpose-tab, select stabilize options and hit apply.
4. FilmForth
FilmForth is a new name in the video editing industry but it allows you to create videos easily with powerful features. If you are looking for free video stabilization software, FilmForth might be one of them for you. It is compact with powerful and easy-to-apply features.
You can edit video, add filters and transitions, titles, record voiceover, or add background music to video. What’s more, it allows you to save the video without watermark.
Key features:-
- Slideshow maker with photos, videos, music, and effects;
- Change the video background or make the logo transparent;
Steps to stabilize videos using FilmForth
Step 1: Select the stabilize video option under the quick tool menu.
Step 2: Select the video file that you want to stabilize.
Step 3: Manually fill the video resolution, video quality, and frame rate settings.
Step 4: Give the file an output name, and choose the video to save the video file.
5. Video DeShake
Video DeShake is solely developed for video stabilization. You can easily download it from av2video.com. It is an effective solution for video stabilization. However, it does not provide you with fancy video editing features, but if you are looking for an instant solution for video stabilization, it is one of the best options.
Steps to stabilize videos using video Deshake:
Step 1: Download and install video Deshake software from av2video.com.
Step 2: Select the plus icon from the left-aligned menu bar.
Step 3: Select the video file that you want to stabilize.
Step 4: Select your preferred format for the output video, and click on the stabilize option present at the bottom of the interface.
6. Shotcut
Shotcut is a free video stabilizer. You don’t need to sign up or log in to begin. There is no sales funnel waiting for you once you get addicted to using it. Another reason for its popularity is beginner-focused design. It is easy to learn and use. However, it lacks advanced editing features like iMovie or HitFilm Express.
Key features:-
- It can load videos recorded in high resolution or above 60 fps.
- Single frame image extraction options.
- Video stabilization feature
- Blurring effect
Steps to stabilize videos using Shotcut:-
Step 1: Drag the video file you want to stabilize into the software interface. Select the timeline feature to select the portion of the video clip that you want to stabilize.
Step 2: Select the filter tab and follow by selecting the plus button. Under the plus icon, select the monitor option and find the stabilize option under the menu.
Step 3: Customize the stabilizations options according to your specific needs and click on analyze to monitor the stabilization. After stabilization is complete, select the file option and click on save to save the video.
7. Blender
The Blender is free and one of the best video editing software for professionals . Besides video editing, it provides you with 3D modeling, rigging animation, simulation, and motion tracking features . It allows you to perform basic actions like video cuts and splicing and complex tasks like video masking or color grading.
Key features:-
- Live preview, chroma vectorscope, and histogram displays.
- Scrubbing and waveform visualization.
- Audion mixing and syncing.
- Speed control, adjustment layers, transitions, and keyframe options.
Steps to stabilize videos using Blender
Step 1: Begin by going to the motion tracking workspace.
Step 2: Click on open and select the video file you want to stabilize.
Step 3: Select the tracking option from the toolbar and click on the movie to set tracking points.
Step 4: Set the tracking point size and press the right arrow to start tracking.
Step 5: Select the file menu and navigate the save option to save the stabilized video.
8. AVS video stabilizer
AVS video editor is suitable for both beginners and professionals. It enables you to create videos of any resolution and length. It allows you to cut, trim, join, and rotate videos. It also amazes you with the freedom of using over 300 effects. With AVS video editor, you can edit VHS videos and convert them into digital format.
Key features:-
- Audio capture
- Brand overlay
- Customizable templates
- Easy to use interface with drag and drop features
- Multimedia format support
Steps to stabilize videos using AVS video editor:
Step 1: Click on the import option under the media library tab and import the video you want to stabilize.
Step 2: Press the video stabilization button present over the timeline.
Step 3: Under the stabilization video, drag the compensation bar to adjust the degree of stabilization.
Step 4: Click on the ok button at the bottom of the stabilization menu to save the changes.
9. VSDC
VSDC is a free video stabilizer that allows you to stabilize and edit videos of any complexity. It is compact with advanced features to cut and merge video files and apply visual and audio effects to make a slideshow and add appropriate soundtracks. It also facilitates easy video conversion for playback on specific media devices.
Key features:-
- Side by side and split-screen videos
- Videos in the text effects
- Green screen removal
- Double exposure
Steps to stabilize videos using VSDC
Step 1: Open the VSDC video editor, and navigate to the video stabilization feature from the Tools tab.
Step2: Select the open file option and export the video file you want to stabilize.
Step 3: In the stabilization, tab adjust the settings that best suit your specific requirements.
Step 4: Complete the process by clicking on the export project to view the outcome.
10. Openshot
OpenShot video editor is an easy-to-use video stabilization and edition software. It is helping professionals around the world with its excellent video editing features. Another factor that makes it different from other software is its compatibility with multiple operating software. It goes with Mac, Linux and Windows and is easily downloadable from its website.
Key features:-
- Compatible with multiple operating systems (Linux, Mac, and Windows)
- It supports a handful of video audio and image formats.
- Video transition along with the real-time preview.
- Options for creating title and sub-title creation
- Titles formation with 3D animation
Steps to stabilize videos using Openshot
Step 1: Open the video you want to stabilize using the project file tab.
Step 2: Drag the video timeline tab and locate the shaky part of the video you want to stabilize.
Step 3: Select the effects tab and navigate the stabilizer feature from the menu.
Step 4: Drag the stabilizer feature to your video clip in the timeline.
Step 5: You will see the stabilizer: initialize effect window. Select the degree of percentage as per your specific requirements.
Step 6: Select the process effects option.
Bonus: Stabilize shaky videos using Filmora video editor
Filmora video editor is a powerful video stabilizing software filled with powerful editing features. Unlike other editing software, Filmora is compatible with both Windows and Mac.
Some of the above video stabilizers are complex and require expertise. On the other hand, Wondershare Filmora video editor provides you with an easy-to-use interface and easy navigation options.
Key features:
- Modern and intuitive interface.
- Video stabilization in one click.
- Powerful edition features.
- Rich effects and templates.
Steps to stabilize videos using Wondershare Filmora video editor
For Win 7 or later (64-bit)
For macOS 10.12 or later
Step 1: Drag shaky videos into the Filmora video editor timeline.
Step 2: Click on the edit option in the toolbar to access the editing panel.
Step 3: Select the stabilization option from the editing panel.
Step 4: Click the play button to preview the stabilized video clip. It also allows you to stabilize the smooth level to obtain better results.
Conclusion
Videos are the most popular types of content. They instantly convey the message and engage the consumers. However, the quality of your video is crucial from your business perspective. Video stabilizing software provides stability to videos and makes them look professional and smooth.
Even if you don’t use video stabilizers for stabilizing videos for your business purposes, they can still come in handy while stabilizing your private videos.
Boost Your Videos: Top 10 Free Online Video Enhancement Tools
Top 9 Best Online Video Quality Enhancer for FREE

Ollie Mattison
Apr 24, 2024• Proven solutions
In 2024, the average person will watch 17 hours of video content every week. Improving the quality of your videos can make your content more noticeable.
Fortunately, there are many excellent video quality enhancer tools to choose from. These tools can enhance both the visual and audio clarity of your content. Ultimately, this will enhance your professionalism and reputation as a trustworthy creator.
Are you wondering where to start when selecting an effective, user-friendly video enhancer? Here are some of our top recommendations to help you begin.
- Part 2: 5 Free AI Video Enhancers [Software Options]
- Part 3: Top 2 4K Video Enhancer Online Free Options
- Part 4: How to Choose the Best Video Enhancer
- In this article
Why Do You Need an AI Video Enhancer?
AI video enhancers utilize generative AI to remove noise, stabilize shaky videos, upscale, or enhance their overall appearance. These tools employ machine learning and neural network techniques to analyze videos and apply different effects for enhancement. Trained on extensive datasets, most AI video enhancers can understand video content like faces, scenes, and objects, automatically adjusting imperfections.
Using an AI video enhancer is an excellent way to boost video quality quickly. Unlike traditional methods, AI speeds up the enhancement process significantly. There are additional benefits, such as:
- **Enhanced Media Quality:**AI video enhancers enhance videos automatically with advanced algorithms, maintaining quality, clarity, and detail.
- Noise Reduction: Many AI video enhancer tools effectively reduce visual noise in videos, resulting in cleaner and clearer footage.
- **Reviving Old Clip:**AI video enhancers are adept at restoring old video footage to make it appear more vibrant.
5 Free AI Video Enhancers [Software Options]
Are blurry videos on your large screen getting on your nerves? Thanks to advancements in artificial intelligence (AI), you can now enhance your low-resolution videos for a crystal-clear viewing experience.
Whether you’re a video editor, content creator, or streamer, incorporating an AI video upscaler into your toolkit is a wise choice. Here are the top 5 picks for the best free AI video enhancer software to improve your video editing.
1.Wondershare Filmora - AI Video Enhancer

Pricing:Filmora offers a free trial without exporting.
Wondershare Filmora stands out in video editing by combining comprehensive editing features with AI-powered enhancement tools. With 4K editing, Filmora ensures videos are improved and future-proofed.
In addition to enhancement, Filmora offers over 300 unique transitions and effects catering to creative minds. Audio enthusiasts will enjoy advanced audio tools like audio ducking and equalizers.
Filmora’s standout feature is its motion tracking capability, enabling dynamic video compositions. While beginners may find the abundance of features overwhelming, regular updates and an active online community provide ample support.
Features
- Filmora’s advanced AI video-enhancing algorithms let you convert black-and-white footage to colored ones.
- It boosts frame rates up to 240 FPS using AI-enhanced frame interpolation technology and 4x super-resolution algorithms.
- Filmora enhances videos’ clarity and quality through audio ducking, equalizers, and more.
- This AI Video Enhancer tracks and attaches objects in videos.
- The tool preserves details and enhances quality in slow-motion scenes.
- Offers over 300 unique transitions and effects.
Pros
- Versatile editing and enhancement options.
- This AI video enhancer is designed to assist both beginners and professionals.
- It supports batch processing, enhancing 10+ videos simultaneously.
Cons
- The free version adds a watermark.
2.AVCLabs Video Enhancer AI
Pricing:AVCLabs offers new users a 7-day free trial.
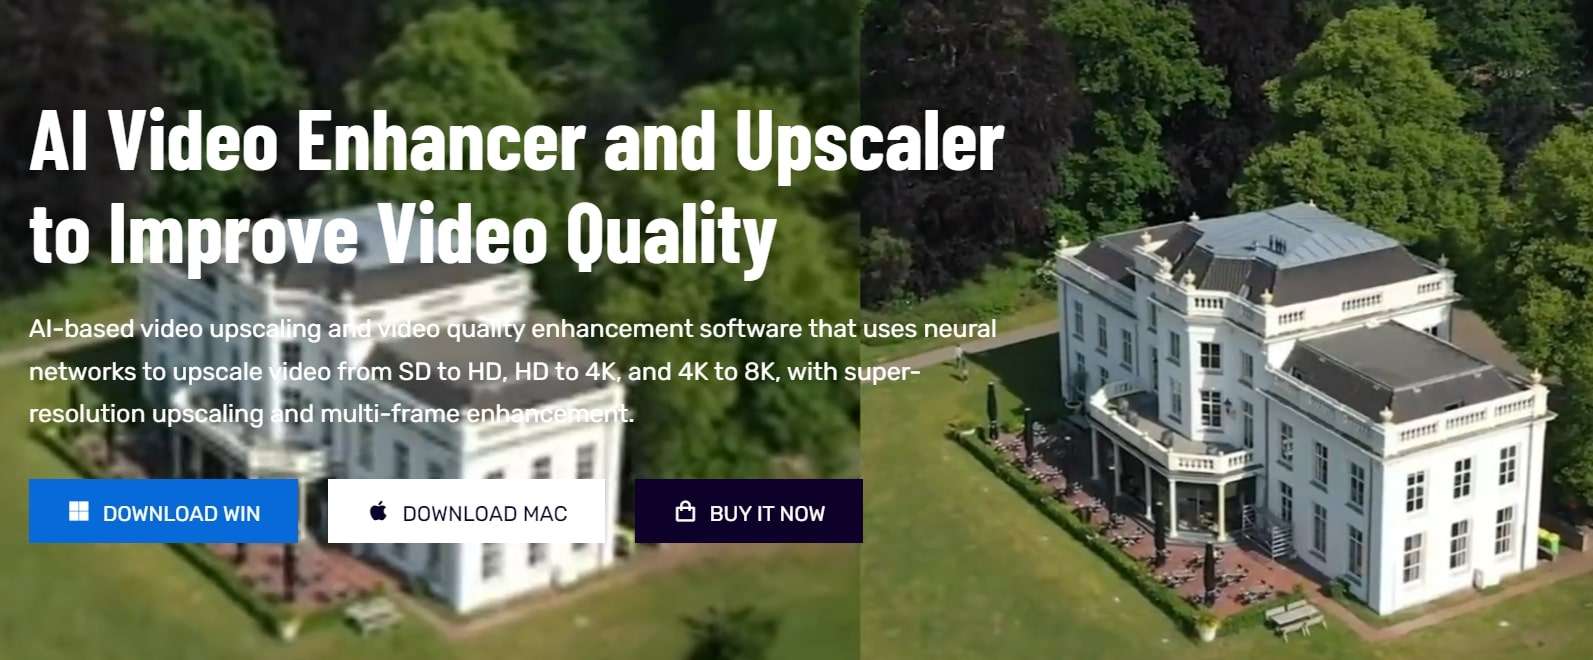
AVCLabs Video Enhancer AI utilizes a neural network to improve video clip quality. With super-resolution AI video upscaling and multi-frame enhancement, it can easily upscale video from SD to HD (720p or 1080p) to 4K and up to 8K in just one click.
With support for various video and audio formats, users can work seamlessly without compatibility issues. A notable feature is its batch processing capability, enabling users to upscale and enhance multiple videos simultaneously, saving time. The real-time preview feature is invaluable for those who wish to see the software’s results before finalizing their project.
Features
- AVCLabs seamlessly enhances any video footage without quality loss. Whether single or multi-frame, you’ll experience smooth transitions and improved frames.
- With AVCLabs’ color correction feature, you can easily adjust each video frame’s brightness, saturation, and contrast. This tool employs AI video upscaling to create larger, more detailed images without sacrificing quality.
- This video enhancement tool offers automatic face refinement to enhance facial details, which is ideal for improving low-quality videos with excessive noise and blurriness.
- The Super Resolution feature recovers high-resolution videos from low-resolution materials by generating additional pixel data to fill gaps, resulting in enhanced output.
- AVCLabs Video Enhancer AI uses a multi-frame convolutional neural network to stabilize video shakes and remove motion artifacts, overlay noise, and grain, producing natural and enhanced results.
Pros
- AVCLabs features a color calibration algorithm that accurately portrays natural colors.
- It allows you to add color to old black-and-white videos.
- The video processing is fully automatic, requiring no manual fine-tuning.
Cons
- The app demands a significant amount of free space, up to 15 GB.
- It is only compatible with Windows and Mac operating systems.
- The free trial adds a watermark from AVC Labs to the videos.
3.UniFab Video Enhancer
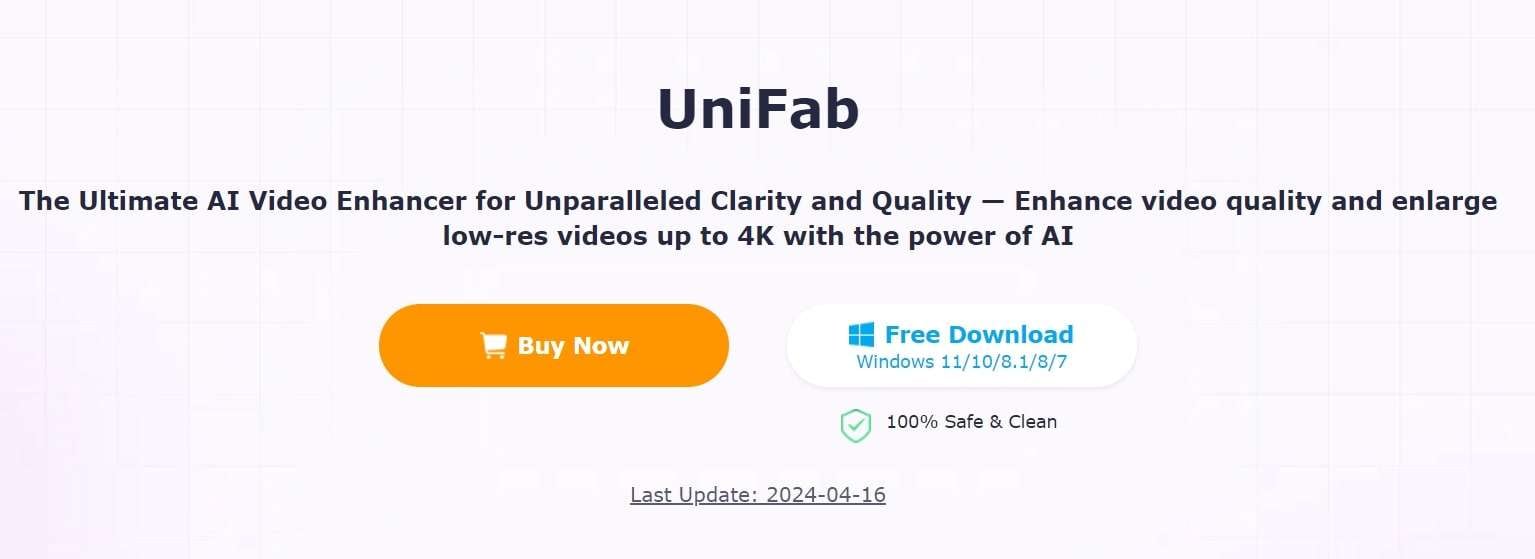
Pricing: UniFab provides a 30-day free trial for new AI users and a 30-day money-back guarantee for paid.
UniFab is a comprehensive AI-powered video enhancer to enhance video quality for all types of videos. Standout features like upscaling video to HDR10/Dolby Vision, denoising, and deinterlacing set this tool apart.
The models are regularly updated with the latest advancements in Deep Learning. Whether you’re a novice or an expert, UniFab offers both automatic and manual modes for video enhancement, making it easy to use without requiring complex settings.
Features
- Upgrade any video to 720p, 1080p, or even 4k resolution with remarkable clarity.
- Convert SDR videos to stunning HDR formats like HDR10+ and Dolby Vision. This feature revitalizes your videos, making them significantly more vibrant and immersive.
- Utilize AI technology to deinterlace your videos, ensuring smooth playback and a pristine viewing experience on modern displays.
- Specifically designed for videos captured in low-light conditions or with high ISO settings, this tool intuitively reduces grain and noise, restoring your footage’s true essence without sacrificing detail.
- Experience unprecedented fluidity as the software boosts your videos to an impressive 120FPS using AI. This transforms your content into a smooth motion stream, ideal for high-definition screens and attentive audiences.
Pros
- It allows audio up-mixing to EAC3 5.1/DTS 7.1 through AI.
- Utilizes GPU-accelerated technology.
- Supports video conversion, compression, and editing.
Cons
- The free trial is limited to 3 videos.
- Does not support Mac systems.
4.Topaz Video Enhance AI
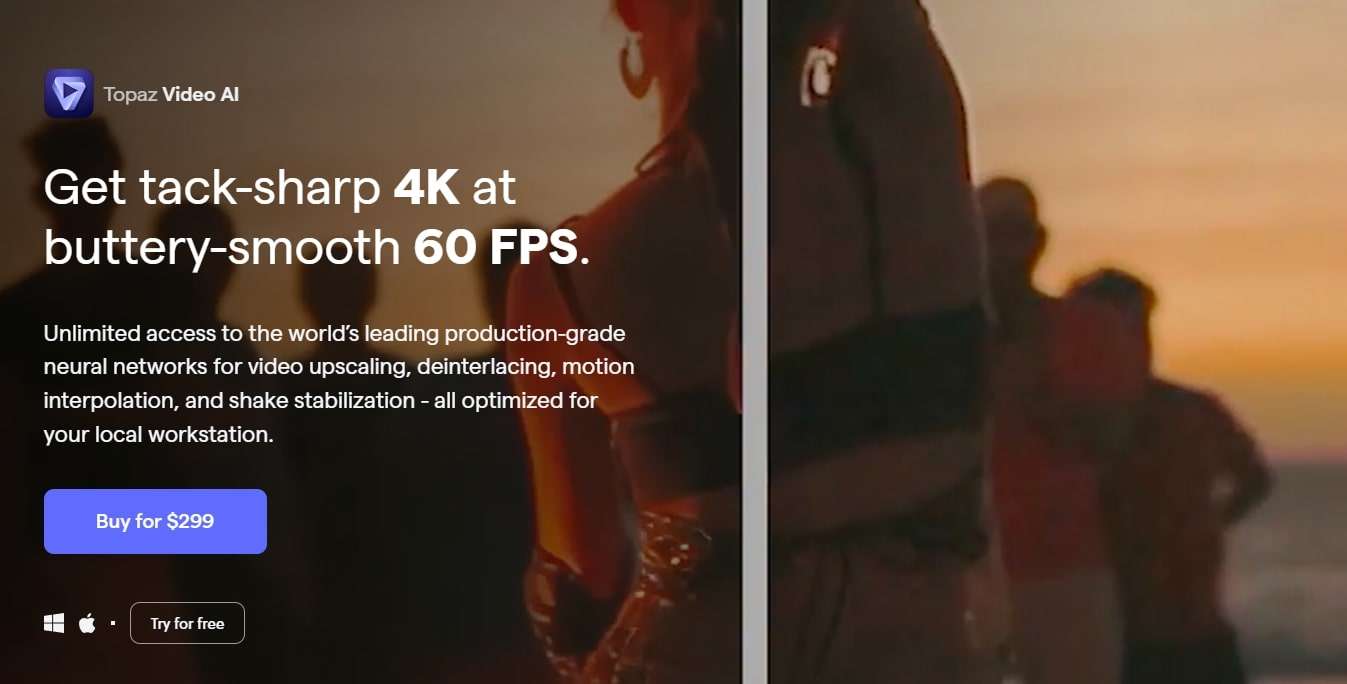
Pricing:Topaz video enhancement tool offers a 30-day no-questions-asked refund policy.
Topaz Video Enhance AI enhances video quality by increasing its resolution. It supports batch upscaling of videos and is compatible with DVD, DSLR, Game, and HD stock footage.
Many notable film studios consider Topaz Video Enhance AI one of the best video editing software tools. It is suitable for various uses, such as commercials, movie content, and YouTube videos.
Features
- This free video upscaling software swiftly analyzes video footage quality using AI tools and recreates it into high-resolution videos.
- Topaz offers Gaia CGI and Theia for enhancing CG and animated videos, along with Proteus and Artemis for noise removal and sharpening.
- Easily recover details from any video footage by injecting original details using adjacent frames’ additional information. It detects and corrects visual artifacts formed during compression.
- Topaz provides an automatic mode for quick video quality enhancement and manual fine-tuning options using available controls.
- With this free video enhancer software, preserve video audio tracks and select from different conversion options for optimal output in the final project.
Pros
- Reduces motion artifacts.
- Adds extra frames for smooth, slow-motion videos.
- Enhances video quality up to 8K.
Cons
- AI processing can be time-consuming, sometimes taking hours.
- Requires a high-quality graphics card.
5.HitPaw Video Enhancer

Pricing:HitPaw AI video enhancer offers a 30-day refund guarantee on paid plans.
HitPaw is a user-friendly video enhancer suitable for both beginners and professionals. It features an easy-to-navigate interface, ensuring even those with minimal experience can improve their videos. Despite its simplicity, HitPaw offers robust enhancement tools, including color correction and stabilization. Its extensive support for various video formats eliminates compatibility concerns.
The software prioritizes efficient video enhancement without compromising quality or speed. Comprehensive tutorials help users explore different editing tasks and unlock their content’s full potential.
Features
- Utilize advanced AI algorithms to upscale low-resolution videos for a more appealing look. The AI feature optimizes content for sharper and more vibrant visuals.
- The HitPaw video quality enhancer app uses AI tools to improve detailing on human faces. Apply filters and adjust settings to enhance facial output in videos.
- The app includes a video stabilization feature that eliminates shaky camera movements, producing smoother and clearer videos with a professional touch.
- HitPaw offers an AI video repair option to restore damaged, corrupted, and old videos. It can also use deep learning AI to colorize black-and-white videos.
- Remove noise from videos with the General Denoise feature, making them look sharper, clearer, and newer.
Pros
- Supports various video formats.
- Has a user-friendly and intuitive interface.
- Can repair and enhance animation videos.
Cons
- The free plan has limited editing features.
Top 2 4K Video Enhancer Online Free Options
The AI-enhanced video tools mentioned above excel in their field. However, there are times when you might run out of storage or need a quick fix through your browser. So, here are some online AI tools that can enhance your videos. Unlike offline video enhancer AIs, online tools are easily accessible. While they may offer fewer features than desktop solutions, they are still useful for some editors.
1.Cutout.Pro
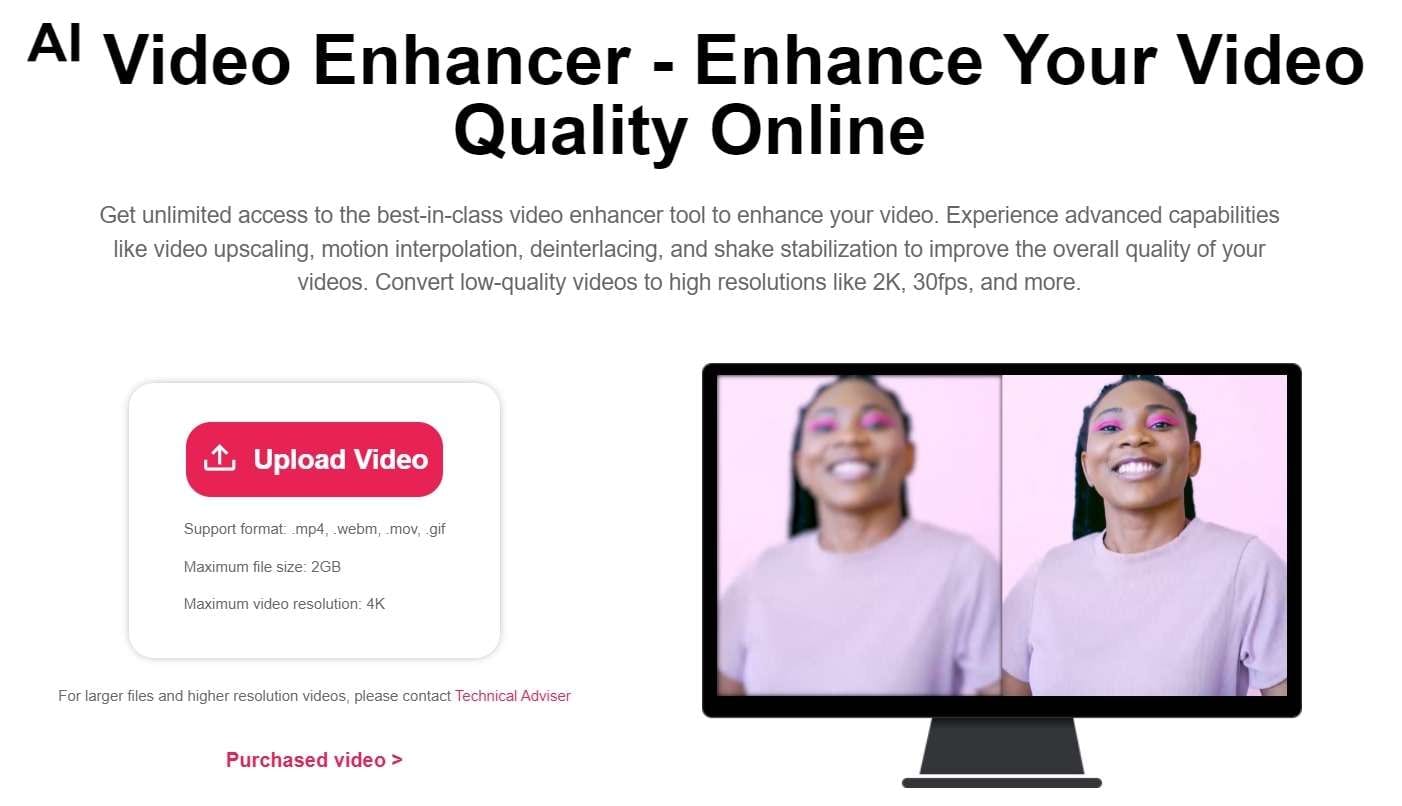
Many editing professionals rely on this free AI video enhancer for unlimited video improvements. Cutout.Pro utilizes advanced features such as video upscaling, motion interpolation, deinterlacing, and shake stabilization to enhance overall quality. This tool converts low-quality videos to higher resolutions like 2K, 30fps, and beyond. Moreover, this online tool swiftly reduces visual noise and other motion artifacts from clips using AI.
Features
- Reduce noise, motion artifacts, and improve video resolution significantly with this powerful online video quality enhancer and upscaler. Perfect for enhancing low-resolution videos like 240p, 360p, 480p, and more.
- Pro increases video frame rates without sacrificing quality. Smooth out shaky footage for better slow-motion effects.
- This tool enhances video resolution up to 2K at a maximum of 30fps effortlessly. It sharpens and defines your videos, bringing your story to life like a professional.
- This is perfect for filmmakers seeking to enhance footage quality and create professional-looking films. Improve video resolution and quality to unblur, upscale, and smooth videos for cinematic results.
- Enhance the quality of personal videos as this tool features shake stabilization for professional results.
- This video enhancer is ideal for professionals creating cinematic frames and restoring old footage. It’s also great for individuals looking to improve the quality of compressed videos downloaded from social media platforms like YouTube, Netflix, and TikTok.
Pros
- It boosts video frame rates and enables HD clip exports.
- Users can upload videos in MP4, MOV, WebM, and GIF formats for processing.
Cons
- It only offers a 5-second preview of the results after enhancement.
2.Clideo Video Enhancer
Clideo is an online video-enhancing tool that can completely transform any random video. It lets you add special AI effects and filters to adjust the video’s brightness, saturation, and contrast, making it stunning, vibrant, and attractive. You can enhance any video professionally for social media attention or business branding.
When it comes to video-enhancing tools, users seek maximum customization options. Clideo offers various features, functions, and facilities to transform average-looking videos into 4k video resolutions.
Features
- The interface is intuitive, so you don’t need any video editing experience to use it.
- You can enhance your video regardless of format because Clideo works with MP4, WMV, MOV, VOB, AVI, and other popular formats.
- You don’t need to download and install the video enhancer to your device. It’s not only faster but also more secure.
- Enhance multiple videos or images simultaneously.
- Add subtitles with customizable text fonts.
- Text Overlay feature with support for HD resolution.
- Access a media library with social sharing options.
Pros
- User-friendly tool is ideal for beginners.
- Supports multiple formats.
- As an online tool, it saves device storage space.
- Reasonable pricing.
- Provides uninterrupted video editing with customizable features.
Cons
- A premium subscription is required to remove watermarking.
- No offline app available; internet connection always necessary.
- No dedicated mobile app.
How to Choose the Best Video Enhancer
Consider the following to ensure you select the right video enhancer for your needs and creative vision.
1.Type of Content
Think about the type of content you’re working with. Are you creating short-form clips for social media or longer, more complex videos? Different enhancers may better suit different content types, so consider your file type and potential quality issues.
2.Consider The Features You Need
Consider the tools and features you need from your video quality enhancer software. Each system offers different capabilities, so planning can help you find the option that best fits your requirements.
3.Sharing Formats and Requirements
Determine the purpose of your video project and any specific sharing requirements. Understanding your goals will help you plan accordingly, whether for online sharing or commercial use.
4.Your Budget
Keep your budget in mind. Some enhancers offer free features, while others may require a purchase or subscription fee for full access. Budgeting effectively ensures you get the best value for your money while achieving great video results.
Conclusion
The video enhancement landscape has been transformed by artificial intelligence, providing numerous options to enhance your videos’ quality. Whether a professional filmmaker or a casual content creator, free AI video enhancers offer a chance to take your productions to the next level.
Each software has unique strengths, from Wondershare Filmora’s comprehensive editing features to AVCLabs’ neural network-powered upscaling and UniFab’s HDR conversion capabilities. User-friendly options like HitPaw cater to beginners while providing robust enhancement tools.
Moreover, for quick fixes or limited storage, online options like Cutout.Pro and Clideo offer accessible solutions with impressive results. With these advancements, achieving professional-quality videos is now achievable for everyone.
Ollie Mattison
Ollie Mattison is a writer and a lover of all things video.
Follow @Ollie Mattison
Ollie Mattison
Apr 24, 2024• Proven solutions
In 2024, the average person will watch 17 hours of video content every week. Improving the quality of your videos can make your content more noticeable.
Fortunately, there are many excellent video quality enhancer tools to choose from. These tools can enhance both the visual and audio clarity of your content. Ultimately, this will enhance your professionalism and reputation as a trustworthy creator.
Are you wondering where to start when selecting an effective, user-friendly video enhancer? Here are some of our top recommendations to help you begin.
- Part 2: 5 Free AI Video Enhancers [Software Options]
- Part 3: Top 2 4K Video Enhancer Online Free Options
- Part 4: How to Choose the Best Video Enhancer
- In this article
Why Do You Need an AI Video Enhancer?
AI video enhancers utilize generative AI to remove noise, stabilize shaky videos, upscale, or enhance their overall appearance. These tools employ machine learning and neural network techniques to analyze videos and apply different effects for enhancement. Trained on extensive datasets, most AI video enhancers can understand video content like faces, scenes, and objects, automatically adjusting imperfections.
Using an AI video enhancer is an excellent way to boost video quality quickly. Unlike traditional methods, AI speeds up the enhancement process significantly. There are additional benefits, such as:
- **Enhanced Media Quality:**AI video enhancers enhance videos automatically with advanced algorithms, maintaining quality, clarity, and detail.
- Noise Reduction: Many AI video enhancer tools effectively reduce visual noise in videos, resulting in cleaner and clearer footage.
- **Reviving Old Clip:**AI video enhancers are adept at restoring old video footage to make it appear more vibrant.
5 Free AI Video Enhancers [Software Options]
Are blurry videos on your large screen getting on your nerves? Thanks to advancements in artificial intelligence (AI), you can now enhance your low-resolution videos for a crystal-clear viewing experience.
Whether you’re a video editor, content creator, or streamer, incorporating an AI video upscaler into your toolkit is a wise choice. Here are the top 5 picks for the best free AI video enhancer software to improve your video editing.
1.Wondershare Filmora - AI Video Enhancer
Pricing:Filmora offers a free trial without exporting.
Wondershare Filmora stands out in video editing by combining comprehensive editing features with AI-powered enhancement tools. With 4K editing, Filmora ensures videos are improved and future-proofed.
In addition to enhancement, Filmora offers over 300 unique transitions and effects catering to creative minds. Audio enthusiasts will enjoy advanced audio tools like audio ducking and equalizers.
Filmora’s standout feature is its motion tracking capability, enabling dynamic video compositions. While beginners may find the abundance of features overwhelming, regular updates and an active online community provide ample support.
Features
- Filmora’s advanced AI video-enhancing algorithms let you convert black-and-white footage to colored ones.
- It boosts frame rates up to 240 FPS using AI-enhanced frame interpolation technology and 4x super-resolution algorithms.
- Filmora enhances videos’ clarity and quality through audio ducking, equalizers, and more.
- This AI Video Enhancer tracks and attaches objects in videos.
- The tool preserves details and enhances quality in slow-motion scenes.
- Offers over 300 unique transitions and effects.
Pros
- Versatile editing and enhancement options.
- This AI video enhancer is designed to assist both beginners and professionals.
- It supports batch processing, enhancing 10+ videos simultaneously.
Cons
- The free version adds a watermark.
2.AVCLabs Video Enhancer AI
Pricing:AVCLabs offers new users a 7-day free trial.
AVCLabs Video Enhancer AI utilizes a neural network to improve video clip quality. With super-resolution AI video upscaling and multi-frame enhancement, it can easily upscale video from SD to HD (720p or 1080p) to 4K and up to 8K in just one click.
With support for various video and audio formats, users can work seamlessly without compatibility issues. A notable feature is its batch processing capability, enabling users to upscale and enhance multiple videos simultaneously, saving time. The real-time preview feature is invaluable for those who wish to see the software’s results before finalizing their project.
Features
- AVCLabs seamlessly enhances any video footage without quality loss. Whether single or multi-frame, you’ll experience smooth transitions and improved frames.
- With AVCLabs’ color correction feature, you can easily adjust each video frame’s brightness, saturation, and contrast. This tool employs AI video upscaling to create larger, more detailed images without sacrificing quality.
- This video enhancement tool offers automatic face refinement to enhance facial details, which is ideal for improving low-quality videos with excessive noise and blurriness.
- The Super Resolution feature recovers high-resolution videos from low-resolution materials by generating additional pixel data to fill gaps, resulting in enhanced output.
- AVCLabs Video Enhancer AI uses a multi-frame convolutional neural network to stabilize video shakes and remove motion artifacts, overlay noise, and grain, producing natural and enhanced results.
Pros
- AVCLabs features a color calibration algorithm that accurately portrays natural colors.
- It allows you to add color to old black-and-white videos.
- The video processing is fully automatic, requiring no manual fine-tuning.
Cons
- The app demands a significant amount of free space, up to 15 GB.
- It is only compatible with Windows and Mac operating systems.
- The free trial adds a watermark from AVC Labs to the videos.
3.UniFab Video Enhancer
Pricing: UniFab provides a 30-day free trial for new AI users and a 30-day money-back guarantee for paid.
UniFab is a comprehensive AI-powered video enhancer to enhance video quality for all types of videos. Standout features like upscaling video to HDR10/Dolby Vision, denoising, and deinterlacing set this tool apart.
The models are regularly updated with the latest advancements in Deep Learning. Whether you’re a novice or an expert, UniFab offers both automatic and manual modes for video enhancement, making it easy to use without requiring complex settings.
Features
- Upgrade any video to 720p, 1080p, or even 4k resolution with remarkable clarity.
- Convert SDR videos to stunning HDR formats like HDR10+ and Dolby Vision. This feature revitalizes your videos, making them significantly more vibrant and immersive.
- Utilize AI technology to deinterlace your videos, ensuring smooth playback and a pristine viewing experience on modern displays.
- Specifically designed for videos captured in low-light conditions or with high ISO settings, this tool intuitively reduces grain and noise, restoring your footage’s true essence without sacrificing detail.
- Experience unprecedented fluidity as the software boosts your videos to an impressive 120FPS using AI. This transforms your content into a smooth motion stream, ideal for high-definition screens and attentive audiences.
Pros
- It allows audio up-mixing to EAC3 5.1/DTS 7.1 through AI.
- Utilizes GPU-accelerated technology.
- Supports video conversion, compression, and editing.
Cons
- The free trial is limited to 3 videos.
- Does not support Mac systems.
4.Topaz Video Enhance AI
Pricing:Topaz video enhancement tool offers a 30-day no-questions-asked refund policy.
Topaz Video Enhance AI enhances video quality by increasing its resolution. It supports batch upscaling of videos and is compatible with DVD, DSLR, Game, and HD stock footage.
Many notable film studios consider Topaz Video Enhance AI one of the best video editing software tools. It is suitable for various uses, such as commercials, movie content, and YouTube videos.
Features
- This free video upscaling software swiftly analyzes video footage quality using AI tools and recreates it into high-resolution videos.
- Topaz offers Gaia CGI and Theia for enhancing CG and animated videos, along with Proteus and Artemis for noise removal and sharpening.
- Easily recover details from any video footage by injecting original details using adjacent frames’ additional information. It detects and corrects visual artifacts formed during compression.
- Topaz provides an automatic mode for quick video quality enhancement and manual fine-tuning options using available controls.
- With this free video enhancer software, preserve video audio tracks and select from different conversion options for optimal output in the final project.
Pros
- Reduces motion artifacts.
- Adds extra frames for smooth, slow-motion videos.
- Enhances video quality up to 8K.
Cons
- AI processing can be time-consuming, sometimes taking hours.
- Requires a high-quality graphics card.
5.HitPaw Video Enhancer
Pricing:HitPaw AI video enhancer offers a 30-day refund guarantee on paid plans.
HitPaw is a user-friendly video enhancer suitable for both beginners and professionals. It features an easy-to-navigate interface, ensuring even those with minimal experience can improve their videos. Despite its simplicity, HitPaw offers robust enhancement tools, including color correction and stabilization. Its extensive support for various video formats eliminates compatibility concerns.
The software prioritizes efficient video enhancement without compromising quality or speed. Comprehensive tutorials help users explore different editing tasks and unlock their content’s full potential.
Features
- Utilize advanced AI algorithms to upscale low-resolution videos for a more appealing look. The AI feature optimizes content for sharper and more vibrant visuals.
- The HitPaw video quality enhancer app uses AI tools to improve detailing on human faces. Apply filters and adjust settings to enhance facial output in videos.
- The app includes a video stabilization feature that eliminates shaky camera movements, producing smoother and clearer videos with a professional touch.
- HitPaw offers an AI video repair option to restore damaged, corrupted, and old videos. It can also use deep learning AI to colorize black-and-white videos.
- Remove noise from videos with the General Denoise feature, making them look sharper, clearer, and newer.
Pros
- Supports various video formats.
- Has a user-friendly and intuitive interface.
- Can repair and enhance animation videos.
Cons
- The free plan has limited editing features.
Top 2 4K Video Enhancer Online Free Options
The AI-enhanced video tools mentioned above excel in their field. However, there are times when you might run out of storage or need a quick fix through your browser. So, here are some online AI tools that can enhance your videos. Unlike offline video enhancer AIs, online tools are easily accessible. While they may offer fewer features than desktop solutions, they are still useful for some editors.
1.Cutout.Pro
Many editing professionals rely on this free AI video enhancer for unlimited video improvements. Cutout.Pro utilizes advanced features such as video upscaling, motion interpolation, deinterlacing, and shake stabilization to enhance overall quality. This tool converts low-quality videos to higher resolutions like 2K, 30fps, and beyond. Moreover, this online tool swiftly reduces visual noise and other motion artifacts from clips using AI.
Features
- Reduce noise, motion artifacts, and improve video resolution significantly with this powerful online video quality enhancer and upscaler. Perfect for enhancing low-resolution videos like 240p, 360p, 480p, and more.
- Pro increases video frame rates without sacrificing quality. Smooth out shaky footage for better slow-motion effects.
- This tool enhances video resolution up to 2K at a maximum of 30fps effortlessly. It sharpens and defines your videos, bringing your story to life like a professional.
- This is perfect for filmmakers seeking to enhance footage quality and create professional-looking films. Improve video resolution and quality to unblur, upscale, and smooth videos for cinematic results.
- Enhance the quality of personal videos as this tool features shake stabilization for professional results.
- This video enhancer is ideal for professionals creating cinematic frames and restoring old footage. It’s also great for individuals looking to improve the quality of compressed videos downloaded from social media platforms like YouTube, Netflix, and TikTok.
Pros
- It boosts video frame rates and enables HD clip exports.
- Users can upload videos in MP4, MOV, WebM, and GIF formats for processing.
Cons
- It only offers a 5-second preview of the results after enhancement.
2.Clideo Video Enhancer
Clideo is an online video-enhancing tool that can completely transform any random video. It lets you add special AI effects and filters to adjust the video’s brightness, saturation, and contrast, making it stunning, vibrant, and attractive. You can enhance any video professionally for social media attention or business branding.
When it comes to video-enhancing tools, users seek maximum customization options. Clideo offers various features, functions, and facilities to transform average-looking videos into 4k video resolutions.
Features
- The interface is intuitive, so you don’t need any video editing experience to use it.
- You can enhance your video regardless of format because Clideo works with MP4, WMV, MOV, VOB, AVI, and other popular formats.
- You don’t need to download and install the video enhancer to your device. It’s not only faster but also more secure.
- Enhance multiple videos or images simultaneously.
- Add subtitles with customizable text fonts.
- Text Overlay feature with support for HD resolution.
- Access a media library with social sharing options.
Pros
- User-friendly tool is ideal for beginners.
- Supports multiple formats.
- As an online tool, it saves device storage space.
- Reasonable pricing.
- Provides uninterrupted video editing with customizable features.
Cons
- A premium subscription is required to remove watermarking.
- No offline app available; internet connection always necessary.
- No dedicated mobile app.
How to Choose the Best Video Enhancer
Consider the following to ensure you select the right video enhancer for your needs and creative vision.
1.Type of Content
Think about the type of content you’re working with. Are you creating short-form clips for social media or longer, more complex videos? Different enhancers may better suit different content types, so consider your file type and potential quality issues.
2.Consider The Features You Need
Consider the tools and features you need from your video quality enhancer software. Each system offers different capabilities, so planning can help you find the option that best fits your requirements.
3.Sharing Formats and Requirements
Determine the purpose of your video project and any specific sharing requirements. Understanding your goals will help you plan accordingly, whether for online sharing or commercial use.
4.Your Budget
Keep your budget in mind. Some enhancers offer free features, while others may require a purchase or subscription fee for full access. Budgeting effectively ensures you get the best value for your money while achieving great video results.
Conclusion
The video enhancement landscape has been transformed by artificial intelligence, providing numerous options to enhance your videos’ quality. Whether a professional filmmaker or a casual content creator, free AI video enhancers offer a chance to take your productions to the next level.
Each software has unique strengths, from Wondershare Filmora’s comprehensive editing features to AVCLabs’ neural network-powered upscaling and UniFab’s HDR conversion capabilities. User-friendly options like HitPaw cater to beginners while providing robust enhancement tools.
Moreover, for quick fixes or limited storage, online options like Cutout.Pro and Clideo offer accessible solutions with impressive results. With these advancements, achieving professional-quality videos is now achievable for everyone.
Ollie Mattison
Ollie Mattison is a writer and a lover of all things video.
Follow @Ollie Mattison
The Ultimate List of Aspect Ratio Converter Tools
10 Most Popular Aspect Ratio Changer Tools
An easy yet powerful editor
Numerous effects to choose from
Detailed tutorials provided by the official channel
The screen size of the media players, devices, and platforms differ, and thus while uploading or playing videos the aspect ratio of the videos has to be adjusted accordingly.

Learn about aspect ratio changer video tools in the following parts of the topic.
In this article
01 [What is Aspect Ratio and Its Importance?](#Part 1)
02 [Need for Changing the Aspect Ratio](#Part 2)
03 [Top 10 Free Aspect Ratio Changing Tools](#Part 3)
04 [The Best Alternative to Free Tools for Changing Aspect Ratio- Wondershare Filmora](#Part 4)
Part 1 What is Aspect Ratio and its importance?
In simplest terms, the Aspect ratio defines the relationship between the width and the height of a graphic. The values mentioned in the aspect ratio are not the actual value but refer to the relation of the width and height. Aspect ratio is expressed in terms of X: Y where X refers to the width while Y refers to the height of the video. Several aspect ratio standards are used in the present times like 16:9, 4:3, 3:2, 1.85:1, and more.
An aspect ratio defines the resolution of the display and thus for proper video playback that fits in within the screen size, the right aspect ratio has to be selected. Aspect ratio plays an important role in video resizing. To ensure that the videos do not look distorted while resizing, its aspect ratio has to be maintained.
Part 2 Need for changing the aspect ratio
Videos recorded on different devices have different aspect ratios and thus to make them compatible with other players and platforms, the need for change in the aspect ratio arises. Moreover, platforms like YouTube, IGTV, Twitter, Facebook, and others have their recommendations for aspect ratio and to play your videos on these platforms, you need to match these requirements.
Additionally, when you want to resize a video or an image without making it appear distorted, you need to maintain its aspect ratio. So, to change ratio of photo and videos, right tools have to be used.
Part 3 Top 10 free aspect ratio changing tools
Plenty of freeware and online tools to change the video aspect ratio are available. The browser-based programs are free and simple to use and there is no hassle of any software download or installation. Freeware is the software that can be used without any license fee and support decent functions. To prevent you from getting confused, we have shortlisted the top 10 as below.
● Clideo
Videos from your local system, Google Drive, and Dropbox can be added to this online tool for changing the aspect ratio and resizing the videos for Facebook, YouTube, and other social media sites. The interface is user-friendly and the processed videos can be downloaded to the local system.
Steps:
● Open Clideo and click on Choose file to add the video.
● Choose the social media site for which you want to resize the video or use the Custom option.
● Select the Aspect Ratio from the drop-down menu.
● Click on the Export button at the bottom-right corner.

● Veed.io
Using this free browser-based tool, the videos on your system, Dropbox, and link can be added to the tool for processing. The option for adding a YouTube link is also there. Choose the aspect ratio for popular social media sites or the supported ones. Further customization can also be done by changing other elements of the video.
Steps:
● Run the tool and click on Choose Video that will open a new pop-up window. Click on the browse button to add the local file or choose to add it from Dropbox or record the same.
● After the file is uploaded, choose the desired aspect ratio from the drop-down list under the Size tab.
● Finally, click on the Export button at the top-right corner.

● Online UniConverter
Earlier known as media.io, this is a feature-packed online tool supporting all key video-related tasks including changes in the aspect ratio and other editing functions like adjust, rotate, flip, and more. The output format of the processed files can also be selected from the supported options.
Steps
● Open the tool and click on Choose Files to add the video.
● Choose the Crop tab and select the pre-set aspect ratio or use the Customized option to select as needed.
● Select the target format at Save to section and then finally click on the START button.

● FreeConvert
Files up to 1GB from your system, Google, Drive, Dropbox, or using a URL can be added to this online tool for processing. Aspect ratio pre-sets suitable for several social media sites are available to choose from. You can even choose the customized resolution and the output format.
Steps
● Launch the tool and click on Choose Videos.
● At the Video Crop Settings section, choose the aspect ratio from the drop-down menu. Use Freeform for customized settings.
● Enter the desired resolution and select the target format. Finally, click on the Crop Video button.

● CloudConvert
This is another widely used video conversion tool that supports video editing as well. Thus, using the program, you can change the aspect ratio to the key formats. Videos from the system, Google Drive, Dropbox, One Drive, and using a URL can be added to the interface. The user-friendly interface makes the tool apt for all users.
Steps
● Open the tool and click on Select File to add the video.
● Choose the target format in the Convert to section. Click on the settings icon and a pop-up window will open.
● Expand the drop-down list at Aspect Ratio and choose the desired value. Click on the Okay button to confirm.
● Finally, click on the Convert button.

● Kapwing
Using this online video editor, the videos in all ley formats can be customized by changing several parameters including aspect ratio. You can choose from the pre-set profiles of social media sites for quick processing. Local, as well as files from the cloud storage, can be added to the interface.
Steps
● Run the tool and drag and drop the file to the interface or browse to import the same.
● After the file is added, click on the Crop option from the right-side panel and then choose from the available options of aspect ratio. Click on Done Cropping.
● Click on the Export button at the top-right corner.

● FileConverto
This online tool supports video conversion and multiple video editing functions including changes in the aspect ratio. The interface is simple and the process is fast. Files in all key formats up to 500KB can be added to the interface. The pre-set aspect ratio for different social media sites can be selected.
Steps
● Open the tool and click on the Browse button to add the video.
● Choose the aspect ratio from the drop-down list.
● Select the resize type concerning the borders and colors.
● Finally, click on the Submit Now button.

● Free HD Video Converter
This is free-to-use software that can help you perform multiple video editing functions including change of the aspect ratio. The software also supports the conversion of files in over 500 formats and pre-set formats. The software also allows downloading videos from popular streaming sites. A user-friendly interface and quick processing make the software popular among the users.
Steps
● Download, install and run the software on your system. Add the video to the software interface by clicking on + Add Files button.
● At the right-side panel click on the Parameter settings button and a new pop-up window will open. Choose the desired Aspect Ratio from the drop-down list. Click on OK to confirm the selection.
● Finally, click on the Run button to start the processing.

● AV Video Converter
This free software for Windows is majorly a video and audio conversion tool that supports other file editing options as well including changes in aspect ratio. The interface of the software is intuitive and there is an option to create templates for batch processing of files.
Steps
● Download, install and open the software on your PC. At the top-left corner, click on the + sign to browse and import the video. Multiple videos for batch processing can be added.
● The right side of the panel allows to change the added video parameters and from here choose the desired aspect ratio from its drop-down list.
● Click on the Convert all button to start the processing of all the added files.

● TEncoder Video Converter
As the name suggests, this is a video conversion tool that is available for free download and uses on your Windows system. Videos and audio files in all key formats can be processed using the tool. The software allows changing the aspect ratio, codec, resolution, and other parameters of the file. Batch processing is supported for changing the aspect ratio of multiple files at a time.
Steps
● Launch the installed software on your system and add the videos to the interface using the Add button.
● Go to the Video and Audio options menu and from here select the desired Aspect Ratio from the available options. Other parameters can also be changed if needed.
● Finally, click on the Encoder button to start file processing.

Additionally, you can also change video aspect ratio Android and on iOS devices using the apps from their respective app store.
Part 4 The Best Alternative To Free Tools For Changing Aspect Ratio- Wondershare Filmora
The above-listed online tools and freeware software are basic programs for editing the aspect ratio of your videos. If you are looking for a professional alternative that not only allows changing the aspect ratio without affecting the video quality with support to advanced features, Wondershare Filmora Video Editor is the best. This excellent video editing software offers multiple features and functions to customize your videos in all possible ways.

Wondershare Filmora - Best Video Editor for Mac/Windows
5,481,435 people have downloaded it.
Build unique custom animations without breaking a sweat.
Focus on creating epic stories and leave the details to Filmora’s auto features.
Start a creative adventure with drag & drop effects and endless possibilities.
Filmora simplifies advanced features to save you time and effort.
Filmora cuts out repetition so you can move on to your next creative breakthrough.
Files in all key formats are supported by the program and with an intuitive and clean interface, the task becomes much easier and quicker. There are multiple ways by which the aspect ratio of the videos can be changed using the software. You can change the aspect ratio at the starting interface, under the project settings, while editing the videos, by using auto-reframe, or while exporting the video.
Key features of the software
● Works as a complete feature-packed video editing toolbox.
● Allows resizing the video size and the aspect ratio.
● Option to highlight the object in a video by cutting, trimming, and cropping.
● Processed videos can be exported to different platforms and sites like mobile phones, YouTube, and others.
● The software can be quickly downloaded on Windows and Mac systems.

Steps on how Filmora change aspect ratio of videos
Step 1. Download, install and open the Wondershare Filmora software on your system.
Step 2. On the main interface next to the New Project option, choose the desired Aspect Ratio from the drop-down list. Next click on the New Project button.
Step 3. You can also choose the Aspect Ratio by going to File > New Project > select the aspect ratio if you are already in the editing panel.
Step 4. Finally, click on the Export button to start file processing.
Key Takeaways from This Episode
● Aspect Ratio plays an important role to obtain the right resolution and quality of the videos and images.
● Different devices as well as social media platforms recommend different Aspect Ratio and thus to change them accordingly, an aspect ratio change tool is needed.
● Online and freeware programs can be used for basic changes in the aspect ratio but if you are looking for an advanced and professional tool that is also simple to use , Wondershare Filmora is the right choice.
The screen size of the media players, devices, and platforms differ, and thus while uploading or playing videos the aspect ratio of the videos has to be adjusted accordingly.
Learn about aspect ratio changer video tools in the following parts of the topic.
In this article
01 [What is Aspect Ratio and Its Importance?](#Part 1)
02 [Need for Changing the Aspect Ratio](#Part 2)
03 [Top 10 Free Aspect Ratio Changing Tools](#Part 3)
04 [The Best Alternative to Free Tools for Changing Aspect Ratio- Wondershare Filmora](#Part 4)
Part 1 What is Aspect Ratio and its importance?
In simplest terms, the Aspect ratio defines the relationship between the width and the height of a graphic. The values mentioned in the aspect ratio are not the actual value but refer to the relation of the width and height. Aspect ratio is expressed in terms of X: Y where X refers to the width while Y refers to the height of the video. Several aspect ratio standards are used in the present times like 16:9, 4:3, 3:2, 1.85:1, and more.
An aspect ratio defines the resolution of the display and thus for proper video playback that fits in within the screen size, the right aspect ratio has to be selected. Aspect ratio plays an important role in video resizing. To ensure that the videos do not look distorted while resizing, its aspect ratio has to be maintained.
Part 2 Need for changing the aspect ratio
Videos recorded on different devices have different aspect ratios and thus to make them compatible with other players and platforms, the need for change in the aspect ratio arises. Moreover, platforms like YouTube, IGTV, Twitter, Facebook, and others have their recommendations for aspect ratio and to play your videos on these platforms, you need to match these requirements.
Additionally, when you want to resize a video or an image without making it appear distorted, you need to maintain its aspect ratio. So, to change ratio of photo and videos, right tools have to be used.
Part 3 Top 10 free aspect ratio changing tools
Plenty of freeware and online tools to change the video aspect ratio are available. The browser-based programs are free and simple to use and there is no hassle of any software download or installation. Freeware is the software that can be used without any license fee and support decent functions. To prevent you from getting confused, we have shortlisted the top 10 as below.
● Clideo
Videos from your local system, Google Drive, and Dropbox can be added to this online tool for changing the aspect ratio and resizing the videos for Facebook, YouTube, and other social media sites. The interface is user-friendly and the processed videos can be downloaded to the local system.
Steps:
● Open Clideo and click on Choose file to add the video.
● Choose the social media site for which you want to resize the video or use the Custom option.
● Select the Aspect Ratio from the drop-down menu.
● Click on the Export button at the bottom-right corner.
● Veed.io
Using this free browser-based tool, the videos on your system, Dropbox, and link can be added to the tool for processing. The option for adding a YouTube link is also there. Choose the aspect ratio for popular social media sites or the supported ones. Further customization can also be done by changing other elements of the video.
Steps:
● Run the tool and click on Choose Video that will open a new pop-up window. Click on the browse button to add the local file or choose to add it from Dropbox or record the same.
● After the file is uploaded, choose the desired aspect ratio from the drop-down list under the Size tab.
● Finally, click on the Export button at the top-right corner.
● Online UniConverter
Earlier known as media.io, this is a feature-packed online tool supporting all key video-related tasks including changes in the aspect ratio and other editing functions like adjust, rotate, flip, and more. The output format of the processed files can also be selected from the supported options.
Steps
● Open the tool and click on Choose Files to add the video.
● Choose the Crop tab and select the pre-set aspect ratio or use the Customized option to select as needed.
● Select the target format at Save to section and then finally click on the START button.
● FreeConvert
Files up to 1GB from your system, Google, Drive, Dropbox, or using a URL can be added to this online tool for processing. Aspect ratio pre-sets suitable for several social media sites are available to choose from. You can even choose the customized resolution and the output format.
Steps
● Launch the tool and click on Choose Videos.
● At the Video Crop Settings section, choose the aspect ratio from the drop-down menu. Use Freeform for customized settings.
● Enter the desired resolution and select the target format. Finally, click on the Crop Video button.
● CloudConvert
This is another widely used video conversion tool that supports video editing as well. Thus, using the program, you can change the aspect ratio to the key formats. Videos from the system, Google Drive, Dropbox, One Drive, and using a URL can be added to the interface. The user-friendly interface makes the tool apt for all users.
Steps
● Open the tool and click on Select File to add the video.
● Choose the target format in the Convert to section. Click on the settings icon and a pop-up window will open.
● Expand the drop-down list at Aspect Ratio and choose the desired value. Click on the Okay button to confirm.
● Finally, click on the Convert button.
● Kapwing
Using this online video editor, the videos in all ley formats can be customized by changing several parameters including aspect ratio. You can choose from the pre-set profiles of social media sites for quick processing. Local, as well as files from the cloud storage, can be added to the interface.
Steps
● Run the tool and drag and drop the file to the interface or browse to import the same.
● After the file is added, click on the Crop option from the right-side panel and then choose from the available options of aspect ratio. Click on Done Cropping.
● Click on the Export button at the top-right corner.
● FileConverto
This online tool supports video conversion and multiple video editing functions including changes in the aspect ratio. The interface is simple and the process is fast. Files in all key formats up to 500KB can be added to the interface. The pre-set aspect ratio for different social media sites can be selected.
Steps
● Open the tool and click on the Browse button to add the video.
● Choose the aspect ratio from the drop-down list.
● Select the resize type concerning the borders and colors.
● Finally, click on the Submit Now button.
● Free HD Video Converter
This is free-to-use software that can help you perform multiple video editing functions including change of the aspect ratio. The software also supports the conversion of files in over 500 formats and pre-set formats. The software also allows downloading videos from popular streaming sites. A user-friendly interface and quick processing make the software popular among the users.
Steps
● Download, install and run the software on your system. Add the video to the software interface by clicking on + Add Files button.
● At the right-side panel click on the Parameter settings button and a new pop-up window will open. Choose the desired Aspect Ratio from the drop-down list. Click on OK to confirm the selection.
● Finally, click on the Run button to start the processing.
● AV Video Converter
This free software for Windows is majorly a video and audio conversion tool that supports other file editing options as well including changes in aspect ratio. The interface of the software is intuitive and there is an option to create templates for batch processing of files.
Steps
● Download, install and open the software on your PC. At the top-left corner, click on the + sign to browse and import the video. Multiple videos for batch processing can be added.
● The right side of the panel allows to change the added video parameters and from here choose the desired aspect ratio from its drop-down list.
● Click on the Convert all button to start the processing of all the added files.
● TEncoder Video Converter
As the name suggests, this is a video conversion tool that is available for free download and uses on your Windows system. Videos and audio files in all key formats can be processed using the tool. The software allows changing the aspect ratio, codec, resolution, and other parameters of the file. Batch processing is supported for changing the aspect ratio of multiple files at a time.
Steps
● Launch the installed software on your system and add the videos to the interface using the Add button.
● Go to the Video and Audio options menu and from here select the desired Aspect Ratio from the available options. Other parameters can also be changed if needed.
● Finally, click on the Encoder button to start file processing.
Additionally, you can also change video aspect ratio Android and on iOS devices using the apps from their respective app store.
Part 4 The Best Alternative To Free Tools For Changing Aspect Ratio- Wondershare Filmora
The above-listed online tools and freeware software are basic programs for editing the aspect ratio of your videos. If you are looking for a professional alternative that not only allows changing the aspect ratio without affecting the video quality with support to advanced features, Wondershare Filmora Video Editor is the best. This excellent video editing software offers multiple features and functions to customize your videos in all possible ways.
Wondershare Filmora - Best Video Editor for Mac/Windows
5,481,435 people have downloaded it.
Build unique custom animations without breaking a sweat.
Focus on creating epic stories and leave the details to Filmora’s auto features.
Start a creative adventure with drag & drop effects and endless possibilities.
Filmora simplifies advanced features to save you time and effort.
Filmora cuts out repetition so you can move on to your next creative breakthrough.
Files in all key formats are supported by the program and with an intuitive and clean interface, the task becomes much easier and quicker. There are multiple ways by which the aspect ratio of the videos can be changed using the software. You can change the aspect ratio at the starting interface, under the project settings, while editing the videos, by using auto-reframe, or while exporting the video.
Key features of the software
● Works as a complete feature-packed video editing toolbox.
● Allows resizing the video size and the aspect ratio.
● Option to highlight the object in a video by cutting, trimming, and cropping.
● Processed videos can be exported to different platforms and sites like mobile phones, YouTube, and others.
● The software can be quickly downloaded on Windows and Mac systems.
Steps on how Filmora change aspect ratio of videos
Step 1. Download, install and open the Wondershare Filmora software on your system.
Step 2. On the main interface next to the New Project option, choose the desired Aspect Ratio from the drop-down list. Next click on the New Project button.
Step 3. You can also choose the Aspect Ratio by going to File > New Project > select the aspect ratio if you are already in the editing panel.
Step 4. Finally, click on the Export button to start file processing.
Key Takeaways from This Episode
● Aspect Ratio plays an important role to obtain the right resolution and quality of the videos and images.
● Different devices as well as social media platforms recommend different Aspect Ratio and thus to change them accordingly, an aspect ratio change tool is needed.
● Online and freeware programs can be used for basic changes in the aspect ratio but if you are looking for an advanced and professional tool that is also simple to use , Wondershare Filmora is the right choice.
Linux on a Chromebook: The Ultimate Setup Tutorial
How to Install Linux on Chromebook
Ollie Mattison
Mar 27, 2024• Proven solutions
Chromebooks are an excellent choice for educational institutions or businesses that require their employees to have constant access to the Internet. Even though these devices are a perfect tool that can accompany you on business trips and enable you to answer important emails or have access to crucial information stored on the cloud, performing more demanding tasks, like video editing, is still a challenge. However, it is far from impossible, although you may have to take a few extra steps before running a video editing software on your Chromebook.
Chrome OS is a Linux based environment and for that reason, Chromebook owners who would like to use professional editing software on their Chromebooks can install a Linux OS that will enable them to use programs such as Lightworks that are perfectly suited for high-end video editing. There are two different ways to install Linux on a Chromebook, you can either do it using Gallium OS or ChrUbuntu or in a Chroot environment using Crouton. Each of these methods is relatively easy and we will take you through the process step by step. Here’s how you can install Linux on your Chromebook.
- Part 1: Preparing before installing Linux OS on Chromebook
- Part 2: How to Install Linux as a Chroot Using Crouton on Chromebook
- Part 3: How to Dual-Boot a Chromebook Using ChrUbuntu
- Part 4: How to Install Linux as a Chroot Using Crouton on Chromebook
- Part 5: Recommended Linux Video Editing Software
Part 1: Preparing before installing Linux OS on Chromebook
The first step of the process of installing the Linux OS is the decision itself, and you need to have all the necessary information before you decide to install a Linux OS on your Chromebook.
- Make sure that the version of Chromebook you have is capable of supporting a Linux OS. Your device must be equipped with an ARM or Intel chip in order to be able to run the version of Linux OS you want to install. Although both chips will allow you to go through the process, running closed source software such the Steam is only possible with Intel chips.
- Regardless of which method of installing Linux OS you choose, you will have to switch to the Developer Mode, a special built-in function that allows you to install the unapproved operating system, among other things.
- Now that you are aware of the requirements and risks, you will have to backup all the files you have on your Chromebook because once you switch to the Developer Mode all the information stored locally will be erased. You can save the files on another computer or on the cloud depending on how much data you need to move and which one is more convenient for you.
Part 2: How to Install Linux as a Chroot Using Crouton on Chromebook
After you have stored all your data safely, your Chromebook is ready for the beginning of the installation process of the secondary operating system. You will have to perform a series of actions that will allow you to start the installation, starting from accessing the Developer Mode.
1. Acessing the developer mode
The first step of the process is to reboot your system, while your Chromebook is on. In order to do so hold Escape and Refresh keys on your keyboard and then hit the power button. Once your device is back online you will find yourself in the recovery mode, and you will see a message telling you to insert a recovery disc. Instead of inserting the disc, hold Ctrl+D and wait for OS verification menu to appear on the screen. At this point, if you are still having second thoughts about this process, you can hit the spacebar to return to recovery mode, or press Enter to proceed. Hitting Enter will delete all the data stored on your device and take you into the Developer Mode. Once your Chromebook lets you know that you are now in the Developer Mode, reboot the system and install a fresh version of the Chrome OS. Insert your login information and follow the instructions until you are looking at the Chrome OS desktop.

2. Installing Chroot
At this stage of the process, your Chromebook is ready for the installation of the Crouton environment. Crouton is a series of scripts that makes running a Linux OS much easier, especially for inexperienced users. In order to download Crouton, go to GitHub and find the download link, detailed instructions or extensions that can add more functionality to your OS. Once the installation file or files are in the Download folder, your next step is to access the Chromebook’s terminal a feature called ‘Crosh’. The fastest way to do this is to hold CTRL + ALT keys and then hit the T key. This action will cause the Chrome window to appear on the screen, and you will need to type the ‘shell’ command without using quotation marks. Afterwards, enter the following command: ‘sudo sh ~/Downloads/crouton -t xfce’ and if you want to install extensions you will have to add ‘xfce,extension’ command at the end.

Press the Enter key and wait for the system to start setting up the Chroot. This process may take a while, so it is important to be patient, but more importantly, do not interfere with it in any way. Installation of your secondary OS is now on the way, and you may be asked to insert your login data, like your Gmail username and password. Wait patiently until the process is over and then return to shell and enter this command: ‘sudo enter-chroot startxfce4’. Your screen will go black for a while, but after the black screen is gone your Chromebook will be in the freshly installed Linux OS.
3. Optimizing your new OS
You may have to optimize your new OS in order to improve the experience of using it. Enabling your keyboard’s brightness and volume keys inside the new OS can be done easily by holding CTRL+ALT+T and then typing shell once you’ve accessed Chrome OS’s shell and hit Enter. Issue the following command: ‘sudo sh -e ~/Downloads/crouton-r precise-t keyboard–u’ and then press Enter again. Removing the screen saver or installing more extensions may also be a good way to enable more options in the new OS. Most importantly, you can now download and install the video editing software you want to use for editing your footage.
4. Remove Chroot from your Chromebook
If for some reason you want to uninstall Linux from your Chromebook, simply reboot the system and press the spacebar when the ‘OS verification is off’ message appears on the screen. In this manner, you will exit the Developer Mode and all locally stored data, including all installed environments, will be deleted.
Part 3: How to Dual-Boot a Chromebook Using ChrUbuntu
An alternative option is available for Chromebook users that have Intel based devices like recently released Haswell models. The ChrUbuntu can be installed on the USB stick or external hard-drive or directly to the local memory of your Chromebook. Even though ARM-based machines can also use ChrUbuntu it isn’t advisable because they may perform poorly due to slower processor speeds and less RAM power. Unlike Chroot, ChrUbuntu will not allow you to switch between operating systems without a reboot, and if the system is stored locally, you may need to go through the full system recovery.
1. Preparation for the installation
Like with the previous method you will have to go into the Developer Mode and make sure that you have access to a WiFi connection. When you are asked to provide your login details, instead of entering them press Ctrl+Alt+Forward and then type ‘chronos’ and press Enter. The next step will require you to issue the following command: ‘curl -L -O http://goo.gl/9sgchs ; sudo bash 9sgchs’ and then once more hit Enter. Again press Enter after the information about the installation is displayed on the screen and then you will be asked to decide how much space you want to allocate for Linux installation. Experts say that 9GB is the upper limit. After you’ve made your choice press Enter.
2. Installing ChrUbuntu
Once the partitioning of your hard-drive is completed, you will have to repeat the first several steps from typing ‘chronos’ to pressing enter when information about the installation is displayed on the screen. The installation process is now in progress and you will be occasionally asked to select a few settings, make sure you always click on default. At the end of the installation process, you will have to choose the location where GRUB should be installed, please select /dev/sda, because the failure to do so may interrupt the installation.
Once the installation is completed, restart your Chromebook to finalize the process, and when you see the ‘OS Verification is Off’ notification press Ctrl+L to access Linux or Ctrl+D boot into Chrome OS.

3. Uninstall ChrUbuntu
Removing ChrUbuntu is a relatively painless process that can be completed with just a few simple commands. If the OS is stored locally the only way to erase it is to perform a full system recovery. While all your data located on the cloud will re-sync with your Chromebook, the data stored locally will be deleted, which is why it is important to backup all the important files before starting a system recovery process. The fastest and easiest way to perform a system recovery is by creating a recovery disk from your device. Insert ‘chrome://imageburner’ in your browser’s address bar, and carefully read and follow the instructions.
This Linux removal method will also require you to have a USB stick with a minimum of 4GB of storage space. After you created the disk, you can go into the Recovery Mode, by holding Esc and Refresh buttons simultaneously and then pressing the Power button. In the Recovery Mode, you will be asked to insert the recovery disk and the process will be on the way.
Part 4: How to Dual-Boot a Chromebook Using Gallium OS
If neither Chroot nor ChrUbuntu work for you, using Gallium OS may be the right choice. The Gallium is Xbuntu-based OS that is equipped with touchpad mouse drivers among other advantages it offers over other operating systems. The installation process isn’t complicated, although it may require more effort than installing Crouton.
1. Preparation for the installation
In order to be aware of all the preparation steps, you need to take, you must first find out your device’s Hardware ID number and you can obtain this information by navigating to Chrome://System, Hardware Class within the Chrome OS. Hardware Compatibility page will provide the information regarding the CPU’s family, which can be crucial for the OS’ performance. You can run the installation either from an ISO image on an external USB drive or from the Chrome OS command line using Chrx. We will describe how to install Gallium OS from the Chrome OS command line because the other option doesn’t allow you to dual-boot your Chromebook.
2. Enabling the Legacy Mode
Like previously described, enter the Developer Mode and when the ‘ OS verification is OFF’ notification appears on the screen proceed to enable the Legacy Mode. You can do this by holding CTRL+D keys to enable the Chrome OS to boot in the Developer Mode. After you’ve successfully made this step, press CTRl+ALT+T to access the ‘Crosh’ terminal and then type ‘shell’. At the ‘chronos/localhost/$ issue the following command: ‘sudo crossystem dev_boot_legacy=1’. Update and install all the necessary firmware by running the Firmware Utility Script.
3. Installation process
If you choose to install Gallium OS through Chrome OS command line using Chrx that will enable you to dual-boot your Chromebook, you should start by booting the device into Chrome OS and configuring networking. The next step you’ll need to take is switching to a virtual terminal by holding Ctrl+Alt+F2, and then you should log in as user chronos without a password. Once you’ve completed this step issue the following command: ‘curl -O https://chrx.org/go && sh go’ and follow the on-screen instructions to repartition your hard-drive and install the Gallium OS. Once the installation is over reboot the device and press Ctrl+L when the ‘OS Verification is Off’ notification appears on the screen to boot Gallium OS or hold Ctrl+D to access Chrome OS. After the Gallium OS is successfully installed on your Chromebook you can start using programs such as Skype or Lightworks.
Which Method is the Best?
Each of the options to install a Linux OS on your Chromebook we described has its advantages and disadvantages. It is our opinion that the Crouton method is the easiest and the fastest. Furthermore, this method enables you to switch between your primary and secondary OS without the need to reboot the device and the Downloads folder makes working in both environments much easier.
On the other hand, other methods require more knowledge about the Linux OS installation process and switching between OS’ is not that simple. If you are looking for an easy way to dual-boot your Chromebook that best way to do it is to install Linux as a Chroot using Crouton.
Part 5: Recommended Linux Video Editing Software: Lightworks
Price: $24.99/month, although free versions of the software are also available.
What we like: A powerful video and audio editor perfectly suited for the production of professional video content.
What we don’t like: The software isn’t easy to use and inexperienced editors will find it difficult to use at first.
Lightworks Resolve may not be as popular as Adobe Premiere Pro or Final Cut Pro, but that doesn’t mean that this video editing software isn’t as capable as its more popular counterparts.
The software is compatible with Mac, Windows, and Linux OS, which makes it a perfect choice for Chromebook users that have a Linux OS installed on their devices. Lightworks features literally every editing tool imaginable and for that reason, it is a perfect choice for editing videos you would like to upload to Vimeo or YouTube or high-end professional projects. This editing software offers plenty of transitions and visual effects that will help its users to create seamless jumps between shots and visually impressive videos.
Ollie Mattison
Ollie Mattison is a writer and a lover of all things video.
Follow @Ollie Mattison
Ollie Mattison
Mar 27, 2024• Proven solutions
Chromebooks are an excellent choice for educational institutions or businesses that require their employees to have constant access to the Internet. Even though these devices are a perfect tool that can accompany you on business trips and enable you to answer important emails or have access to crucial information stored on the cloud, performing more demanding tasks, like video editing, is still a challenge. However, it is far from impossible, although you may have to take a few extra steps before running a video editing software on your Chromebook.
Chrome OS is a Linux based environment and for that reason, Chromebook owners who would like to use professional editing software on their Chromebooks can install a Linux OS that will enable them to use programs such as Lightworks that are perfectly suited for high-end video editing. There are two different ways to install Linux on a Chromebook, you can either do it using Gallium OS or ChrUbuntu or in a Chroot environment using Crouton. Each of these methods is relatively easy and we will take you through the process step by step. Here’s how you can install Linux on your Chromebook.
- Part 1: Preparing before installing Linux OS on Chromebook
- Part 2: How to Install Linux as a Chroot Using Crouton on Chromebook
- Part 3: How to Dual-Boot a Chromebook Using ChrUbuntu
- Part 4: How to Install Linux as a Chroot Using Crouton on Chromebook
- Part 5: Recommended Linux Video Editing Software
Part 1: Preparing before installing Linux OS on Chromebook
The first step of the process of installing the Linux OS is the decision itself, and you need to have all the necessary information before you decide to install a Linux OS on your Chromebook.
- Make sure that the version of Chromebook you have is capable of supporting a Linux OS. Your device must be equipped with an ARM or Intel chip in order to be able to run the version of Linux OS you want to install. Although both chips will allow you to go through the process, running closed source software such the Steam is only possible with Intel chips.
- Regardless of which method of installing Linux OS you choose, you will have to switch to the Developer Mode, a special built-in function that allows you to install the unapproved operating system, among other things.
- Now that you are aware of the requirements and risks, you will have to backup all the files you have on your Chromebook because once you switch to the Developer Mode all the information stored locally will be erased. You can save the files on another computer or on the cloud depending on how much data you need to move and which one is more convenient for you.
Part 2: How to Install Linux as a Chroot Using Crouton on Chromebook
After you have stored all your data safely, your Chromebook is ready for the beginning of the installation process of the secondary operating system. You will have to perform a series of actions that will allow you to start the installation, starting from accessing the Developer Mode.
1. Acessing the developer mode
The first step of the process is to reboot your system, while your Chromebook is on. In order to do so hold Escape and Refresh keys on your keyboard and then hit the power button. Once your device is back online you will find yourself in the recovery mode, and you will see a message telling you to insert a recovery disc. Instead of inserting the disc, hold Ctrl+D and wait for OS verification menu to appear on the screen. At this point, if you are still having second thoughts about this process, you can hit the spacebar to return to recovery mode, or press Enter to proceed. Hitting Enter will delete all the data stored on your device and take you into the Developer Mode. Once your Chromebook lets you know that you are now in the Developer Mode, reboot the system and install a fresh version of the Chrome OS. Insert your login information and follow the instructions until you are looking at the Chrome OS desktop.
2. Installing Chroot
At this stage of the process, your Chromebook is ready for the installation of the Crouton environment. Crouton is a series of scripts that makes running a Linux OS much easier, especially for inexperienced users. In order to download Crouton, go to GitHub and find the download link, detailed instructions or extensions that can add more functionality to your OS. Once the installation file or files are in the Download folder, your next step is to access the Chromebook’s terminal a feature called ‘Crosh’. The fastest way to do this is to hold CTRL + ALT keys and then hit the T key. This action will cause the Chrome window to appear on the screen, and you will need to type the ‘shell’ command without using quotation marks. Afterwards, enter the following command: ‘sudo sh ~/Downloads/crouton -t xfce’ and if you want to install extensions you will have to add ‘xfce,extension’ command at the end.
Press the Enter key and wait for the system to start setting up the Chroot. This process may take a while, so it is important to be patient, but more importantly, do not interfere with it in any way. Installation of your secondary OS is now on the way, and you may be asked to insert your login data, like your Gmail username and password. Wait patiently until the process is over and then return to shell and enter this command: ‘sudo enter-chroot startxfce4’. Your screen will go black for a while, but after the black screen is gone your Chromebook will be in the freshly installed Linux OS.
3. Optimizing your new OS
You may have to optimize your new OS in order to improve the experience of using it. Enabling your keyboard’s brightness and volume keys inside the new OS can be done easily by holding CTRL+ALT+T and then typing shell once you’ve accessed Chrome OS’s shell and hit Enter. Issue the following command: ‘sudo sh -e ~/Downloads/crouton-r precise-t keyboard–u’ and then press Enter again. Removing the screen saver or installing more extensions may also be a good way to enable more options in the new OS. Most importantly, you can now download and install the video editing software you want to use for editing your footage.
4. Remove Chroot from your Chromebook
If for some reason you want to uninstall Linux from your Chromebook, simply reboot the system and press the spacebar when the ‘OS verification is off’ message appears on the screen. In this manner, you will exit the Developer Mode and all locally stored data, including all installed environments, will be deleted.
Part 3: How to Dual-Boot a Chromebook Using ChrUbuntu
An alternative option is available for Chromebook users that have Intel based devices like recently released Haswell models. The ChrUbuntu can be installed on the USB stick or external hard-drive or directly to the local memory of your Chromebook. Even though ARM-based machines can also use ChrUbuntu it isn’t advisable because they may perform poorly due to slower processor speeds and less RAM power. Unlike Chroot, ChrUbuntu will not allow you to switch between operating systems without a reboot, and if the system is stored locally, you may need to go through the full system recovery.
1. Preparation for the installation
Like with the previous method you will have to go into the Developer Mode and make sure that you have access to a WiFi connection. When you are asked to provide your login details, instead of entering them press Ctrl+Alt+Forward and then type ‘chronos’ and press Enter. The next step will require you to issue the following command: ‘curl -L -O http://goo.gl/9sgchs ; sudo bash 9sgchs’ and then once more hit Enter. Again press Enter after the information about the installation is displayed on the screen and then you will be asked to decide how much space you want to allocate for Linux installation. Experts say that 9GB is the upper limit. After you’ve made your choice press Enter.
2. Installing ChrUbuntu
Once the partitioning of your hard-drive is completed, you will have to repeat the first several steps from typing ‘chronos’ to pressing enter when information about the installation is displayed on the screen. The installation process is now in progress and you will be occasionally asked to select a few settings, make sure you always click on default. At the end of the installation process, you will have to choose the location where GRUB should be installed, please select /dev/sda, because the failure to do so may interrupt the installation.
Once the installation is completed, restart your Chromebook to finalize the process, and when you see the ‘OS Verification is Off’ notification press Ctrl+L to access Linux or Ctrl+D boot into Chrome OS.
3. Uninstall ChrUbuntu
Removing ChrUbuntu is a relatively painless process that can be completed with just a few simple commands. If the OS is stored locally the only way to erase it is to perform a full system recovery. While all your data located on the cloud will re-sync with your Chromebook, the data stored locally will be deleted, which is why it is important to backup all the important files before starting a system recovery process. The fastest and easiest way to perform a system recovery is by creating a recovery disk from your device. Insert ‘chrome://imageburner’ in your browser’s address bar, and carefully read and follow the instructions.
This Linux removal method will also require you to have a USB stick with a minimum of 4GB of storage space. After you created the disk, you can go into the Recovery Mode, by holding Esc and Refresh buttons simultaneously and then pressing the Power button. In the Recovery Mode, you will be asked to insert the recovery disk and the process will be on the way.
Part 4: How to Dual-Boot a Chromebook Using Gallium OS
If neither Chroot nor ChrUbuntu work for you, using Gallium OS may be the right choice. The Gallium is Xbuntu-based OS that is equipped with touchpad mouse drivers among other advantages it offers over other operating systems. The installation process isn’t complicated, although it may require more effort than installing Crouton.
1. Preparation for the installation
In order to be aware of all the preparation steps, you need to take, you must first find out your device’s Hardware ID number and you can obtain this information by navigating to Chrome://System, Hardware Class within the Chrome OS. Hardware Compatibility page will provide the information regarding the CPU’s family, which can be crucial for the OS’ performance. You can run the installation either from an ISO image on an external USB drive or from the Chrome OS command line using Chrx. We will describe how to install Gallium OS from the Chrome OS command line because the other option doesn’t allow you to dual-boot your Chromebook.
2. Enabling the Legacy Mode
Like previously described, enter the Developer Mode and when the ‘ OS verification is OFF’ notification appears on the screen proceed to enable the Legacy Mode. You can do this by holding CTRL+D keys to enable the Chrome OS to boot in the Developer Mode. After you’ve successfully made this step, press CTRl+ALT+T to access the ‘Crosh’ terminal and then type ‘shell’. At the ‘chronos/localhost/$ issue the following command: ‘sudo crossystem dev_boot_legacy=1’. Update and install all the necessary firmware by running the Firmware Utility Script.
3. Installation process
If you choose to install Gallium OS through Chrome OS command line using Chrx that will enable you to dual-boot your Chromebook, you should start by booting the device into Chrome OS and configuring networking. The next step you’ll need to take is switching to a virtual terminal by holding Ctrl+Alt+F2, and then you should log in as user chronos without a password. Once you’ve completed this step issue the following command: ‘curl -O https://chrx.org/go && sh go’ and follow the on-screen instructions to repartition your hard-drive and install the Gallium OS. Once the installation is over reboot the device and press Ctrl+L when the ‘OS Verification is Off’ notification appears on the screen to boot Gallium OS or hold Ctrl+D to access Chrome OS. After the Gallium OS is successfully installed on your Chromebook you can start using programs such as Skype or Lightworks.
Which Method is the Best?
Each of the options to install a Linux OS on your Chromebook we described has its advantages and disadvantages. It is our opinion that the Crouton method is the easiest and the fastest. Furthermore, this method enables you to switch between your primary and secondary OS without the need to reboot the device and the Downloads folder makes working in both environments much easier.
On the other hand, other methods require more knowledge about the Linux OS installation process and switching between OS’ is not that simple. If you are looking for an easy way to dual-boot your Chromebook that best way to do it is to install Linux as a Chroot using Crouton.
Part 5: Recommended Linux Video Editing Software: Lightworks
Price: $24.99/month, although free versions of the software are also available.
What we like: A powerful video and audio editor perfectly suited for the production of professional video content.
What we don’t like: The software isn’t easy to use and inexperienced editors will find it difficult to use at first.
Lightworks Resolve may not be as popular as Adobe Premiere Pro or Final Cut Pro, but that doesn’t mean that this video editing software isn’t as capable as its more popular counterparts.
The software is compatible with Mac, Windows, and Linux OS, which makes it a perfect choice for Chromebook users that have a Linux OS installed on their devices. Lightworks features literally every editing tool imaginable and for that reason, it is a perfect choice for editing videos you would like to upload to Vimeo or YouTube or high-end professional projects. This editing software offers plenty of transitions and visual effects that will help its users to create seamless jumps between shots and visually impressive videos.
Ollie Mattison
Ollie Mattison is a writer and a lover of all things video.
Follow @Ollie Mattison
Also read:
- Updated The Art of Slow Motion A Beginners Guide to VLCs Video Playback Features
- New Effortless Audio Conversion Top 12 Converters Reviewed for 2024
- New MacBook Video Editing Download and Set Up Videoleap in Minutes for 2024
- New In 2024, Avidemux Audio Troubleshooting Quick Solutions
- In 2024, Trim Videos Like a Pro 10 Free Online Editors 2023 Guide
- Updated In 2024, Intro Mastery The Top 10 Online Tools You Need
- New In 2024, Final Cut Pro Unlocking Professional Color Correction
- In 2024, The Complete Guide to Optimizing Your Social Media Visuals
- TikTok Video Magic How to Reverse, Speed Up, and Slow Down Clips for 2024
- New In 2024, Flip It! A Step-by-Step Guide to Rotating Clips in FCP
- Updated The Complete Guide to Video Editors 35 Options for Windows, Mac, and More
- 2024 Approved Online WebM Video Optimization Tools for Smaller Files
- 2024 Approved Proxy Perfection Top Video Editing Software for 4K Creators
- 2024 Approved Video Brightness Boosting Solutions
- Updated Speed Up or Slow Down Best Video Editing Software for 2024
- Updated 2024 Approved Flip and Rotate Videos with Ease Top 10 Free Tools
- New In 2024, Best Video Brighten Apps
- Updated Record Like a Pro Top Webcam Software for Windows 10
- Updated In 2024, What You Dont Know About Mp3 Converter Windows (But Should) A Revealing Article
- Updated 2024 Approved The Fastest Way to Convert 4K Videos to MP4 No Technical Expertise Needed
- New In 2024, Want that Vintage Nostalgia Back in Your Photos? Well, Then You Need a VHS App, and Youre at the Right Place to Find One
- Updated In 2024, Windows 11 Video Editor Roundup Top Picks and Reviews
- Updated In 2024, Top 15 Adobe Premiere Plugins for Effects and Transitions
- New Create Stunning Time Lapses with Final Cut Pro A Beginners Guide for 2024
- Updated In 2024, The Best Things in Life Are Free Top 10 FCPX Plugins at No Cost
- In 2024, The Best Video Editor for Beginners? Videopad Review and Recommendation
- Updated Complete Guide to Editing Movies with Appropriate Movie Editors and Tips for Editing Movies and Videos for 2024
- 2024 Approved Online Dailymotion Converter Fast, Free, and Easy to Use
- New 2024 Approved Time-Lapse Like a Pro Best Apps for iPhone, iPad, and Android Devices
- New In 2024, You Dont Even Need to Have Advanced Video Editing Skills in Order to Create Visually Stunning Video Collages. In This Article, We Are Going to Take You Through some of the Best Video Collage Apps Of
- Updated In 2024, Chromecast Local Media A Comprehensive Guide for Windows, Mac, Android, and iOS Users
- Updated 2024 Approved Best Vlog Editor Apps iOS & Android
- New Unlock New Possibilities Top 10 Free Video Speed Modification Apps
- Updated In 2024, Mastering VLC Slow Motion Video Playback Made Easy
- Updated The Ultimate Guide to Audio Conversion 12 Top-Rated Options
- In 2024, Quik on Windows/Mac Best Options for Editing GoPro Footage
- Updated 2024 Approved Top-Rated Video Editors for Effortless Reframing
- In 2024, The Secret to Eye-Catching LinkedIn Videos Custom Thumbnails
- Updated Discover the Best Free DVD Player for Windows 10 Top 10 List for 2024
- New 2024 Approved Final Cut Pro Time Lapse Tutorial Create Stunning Videos in Minutes
- Updated In 2024, Windows Movie Making Made Easy Top 7 Editor Options
- New 2024 Approved The Art of Cartoonization How to Transform Videos Into Cartoons
- Updated The Ultimate Adobe Premiere Cheat Sheet 6 Time-Saving Tips
- New Design Engaging Video Invites on the Go Best Mobile Apps for 2024
- A Comprehensive Guide to Apple iPhone X Blacklist Removal Tips and Tools | Dr.fone
- In 2024, How to Change Location on TikTok to See More Content On your Realme 12 Pro 5G | Dr.fone
- How to Come up With the Best Pokemon Team On Vivo Y77t? | Dr.fone
- How To Simulate GPS Movement With Location Spoofer On Realme 11 Pro? | Dr.fone
- How to Unlock iPhone XS with a Mask On
- Hassle-Free Ways to Remove FRP Lock from Itel A70 Phones with/without a PC
- In 2024, How To Unlock The Apple iPhone 11 Pro Max SIM Lock 4 Easy Methods
- How to Check Distance and Radius on Google Maps For your Motorola Moto G13 | Dr.fone
- How to Stop Google Chrome from Tracking Your Location On Itel P55 5G? | Dr.fone
- App Wont Open on Your Samsung Galaxy S23+? Here Are All Fixes | Dr.fone
- In 2024, Full Tutorial to Bypass Your Motorola G24 Power Face Lock?
- Best 10 Mock Location Apps Worth Trying On Xiaomi Redmi Note 12 Pro+ 5G | Dr.fone
- In 2024, How To Unlock Apple iPhone SE (2022) Without Passcode? 4 Easy Methods
- Top 15 Augmented Reality Games Like Pokémon GO To Play On Apple iPhone SE (2020) | Dr.fone
- Top 5 Tracking Apps to Track Oppo Reno 8T without Them Knowing | Dr.fone
- How to Easily Hard reset my Vivo V27e | Dr.fone
- The way to get back lost music from Realme
- Solved Photos Disappeared from iPhone 13 mini Suddenly | Stellar
- In 2024, Will Pokémon Go Ban the Account if You Use PGSharp On Huawei Nova Y71 | Dr.fone
- 3 Ways to Fake GPS Without Root On Poco F5 Pro 5G | Dr.fone
- New Top 12 Best Meme Makers Online for FREE
- In 2024, Top 15 Augmented Reality Games Like Pokémon GO To Play On Apple iPhone 15 Pro | Dr.fone
- In 2024, Best Pokemons for PVP Matches in Pokemon Go For Samsung Galaxy S23 | Dr.fone
- How do i add my signature to .csv files
- 2 Ways to Monitor Honor 90 Pro Activity | Dr.fone
- A Comprehensive Guide to iCloud Unlock From iPhone XS Max Online
- Discover the Truth Is VN Video Editor Pro a Top-Notch Video Editor?
- How to Make A Fantastic Café Vlog for 2024
- In 2024, Why is iPogo not working On Motorola Razr 40 Ultra? Fixed | Dr.fone
- In 2024, How to Change/Add Location Filters on Snapchat For your Samsung Galaxy A14 5G | Dr.fone
- Calls on Nubia Red Magic 9 Pro Go Straight to Voicemail? 12 Fixes | Dr.fone
- In 2024, Ultimate Guide to Catch the Regional-Located Pokemon For Samsung Galaxy Z Flip 5 | Dr.fone
- How to Digitally Sign Word online free - (Tutorial)
- Lava Agni 2 5G Screen Unresponsive? Heres How to Fix It | Dr.fone
- How To Remove Phone Number From Your Apple ID on Your iPhone 14 Pro Max?
- In 2024, Dose Life360 Notify Me When Someone Checks My Location On Infinix GT 10 Pro? | Dr.fone
- In 2024, How to Unlock iPhone SE (2022) with/without SIM Card
- New Best Guide for Setting TikTok Countdown Timer
- A Working Guide For Pachirisu Pokemon Go Map On Vivo T2 5G | Dr.fone
- Why does the pokemon go battle league not available On Google Pixel 7a | Dr.fone
- In 2024, What is the best Pokemon for pokemon pvp ranking On Honor 80 Pro Straight Screen Edition? | Dr.fone
- How to Unlock Nokia XR21 Phone without Any Data Loss
- Title: In 2024, Say Goodbye to Shaky Footage Top Free Video Stabilizers
- Author: Morgan
- Created at : 2024-05-19 16:00:38
- Updated at : 2024-05-20 16:00:38
- Link: https://ai-video-tools.techidaily.com/in-2024-say-goodbye-to-shaky-footage-top-free-video-stabilizers/
- License: This work is licensed under CC BY-NC-SA 4.0.
