
:max_bytes(150000):strip_icc():format(webp)/how-to-choose-a-wireless-charger-5191283-cb27ceee3fea4547b5720b4934713a93.jpg)
2024 Approved VLC Tips and Tricks How to Play Videos in Slow Motion
VLC Tips and Tricks: How to Play Videos in Slow Motion
While the files of the most common formats like MP4, WAV, etc. may look identical, they might be compiled using varied codecs which may or may not support any random player that you install on your PC. The reason why VLC media player is used by the majority of users worldwide is the versatility in the codecs that it supports natively.
Furthermore, the app is available for almost every platform, i.e., Windows, Mac, Linux, iOS, and Android, and is absolutely free to download and use.
With that said, the following sections explain how to manage the playback speed of a video while using VLC media player to add a slow motion effect to video. Here you will learn how to play slow motion on VLC on Windows, Mac, and iOS/Android, and also how to set the default speed for the app so that every time a video is played, the speed remains according to your preference.
In this article
01 How to Play Video in Slow Motion Effects on Windows with VLC?
02 How to Play Slow Motion Effects on Mac with VLC?
03 How to Control Playback Speed in VLC Media Player on Android and iOS?
04 How to Set up the Default Playback Speed on VLC?
Part 1: How to Play Video in Slow Motion Effects on Windows with VLC?
VLC is one of the best media players to play videos in slow motion . You can follow the instructions that are given below to learn how to play a video in slow motion in VLC on a Windows PC:
Step 1: Start Video Playback
Launch VLC on your Windows computer (a Windows 11 PC is used here for illustrations), click Media from the menu bar at the top, click Open File from the menu, and locate and open a video that you want to watch in slow motion. If VLC is your default media player, simply double-clicking the clip automatically opens the file in the app.

Step 2: Reduce the Playback Speed (In Decrements of 0.10x)
Once the playback begins, press the Spacebar on the keyboard to pause the video. Next, go to the Playback menu from the top, go to Speed, and click Slower (fine) once. This will reduce the speed to 0.90x. Clicking Slower (fine) again will further slow down the video to 0.80x speed. You can repeat this process until you reduce the speed to your desired level. Press Spacebar again to resume the playback in slow motion.
Note: The lowest speed that you can go to using this process is 0.03x.

Step 3: Reduce the Playback Speed (In Decrements in Percentage)
Pause the playback and go to Playback > Speed as explained in the previous step. From the list that comes up, click Slower (the last option). This will reduce the speed to 0.67x. Click Slower again and the speed will further go down to 0.50x. You can repeat this process until you reach your desired playback speed. Press Spacebar to resume the playback in slow motion. With this method, you can reduce the speed to as low as 0.02x.
Note: You can click Normal from the Speed submenu to play the video at normal speed.

Step 4: Using the Shortcut Keys (Optional)
You can press the left square bracket ‘[‘ on your keyboard to reduce the speed in decrements of 0.10x. To get back to the normal speed, press the equals to ‘=’ key. Likewise, pressing the right square bracket ‘]’ increases the speed by 0.10x.
Note: As it is with the Slower (fine) and Slower options, you can use Faster (fine) to add 0.10x increments to the speed, and Faster to increase percentage-wise. Also, if Faster (fine) is clicked repeatedly or its shortcut key is used multiple times, the speed can be increased up to 31.25x. On the other hand, by using the Faster option repeatedly, the speed can be increased to more than 100x.
Part 2: How to Play Slow Motion Effects on Mac with VLC?
The process of slowing down the video playback in VLC on a Mac computer is almost identical to that in Windows. You can learn how to get this done by following the steps that are given below:
Step 1: Open and Pause the Video
Locate and right-click the video that you want to play in slow motion, go to Open With from the context menu, and click VLC from the submenu. Once the clip opens, click the Pause button from the bottom as explained in the previous section.
Step 2: Reduce the Playback Speed
Click Playback from the menu bar at the top, and drag the Playback Speed slider to the left to reduce the speed of the video.

Step 3: Resume the Playback
Click anywhere on the screen to close the Playback menu, and then click the Play button from the bottom to resume the video playback in slow motion.
Part 3: How to Control Playback Speed in VLC Media Player on Android and iOS?
Although the playback speed of a video on both Android and iOS devices can be controlled with a slider, the location where the controller is placed on the two platforms varies, and so does the process of reaching there. Both the methods are explained below for your convenience:
Play Video in Slow Motion on Android with VLC
Step 1: Pause the Playback
Launch VLC on your Android phone (Samsung Galaxy Note 10+ is used here for illustrations), locate and open the video in VLC, tap anywhere on the screen, and tap the Pause button from the bottom to pause the playback.
Step 2: Set a Slower Playback Speed
Tap the More icon from the bottom-right corner, tap Playback speed from the menu that appears, and drag the slider that is present at the bottom to the left to reduce the speed. Alternatively, you can also repeatedly tap the down arrow that is present at the right of the slider to slow down the speed in the decrements of 0.05x.

Step 3: Resume the Playback
Tap anywhere on the screen, and when the Playback speed slider disappears, tap the screen one more time. Now, tap the Play icon from the bottom to resume the video playback.
Play Video in Slow Motion on iPhone with VLC
Step 1: Pause the Playback
Assuming that you have already added the video to the VLC library by connecting it to iTunes, launch the app on your iOS device (iPhone 13 Pro Max is used here for illustrations). Tap the video that you want to play in slow motion, and then tap the Pause icon from the bottom.
Step 2: Reduce the Playback Speed
Tap anywhere on the screen, and tap the Clock icon from the lower-left corner. Next, drag the Playback speed slider to the left to reduce the playback speed.

Step 3: Resume the Playback
Right after decreasing the speed, tap the Play icon from the bottom to resume the playback. If the controllers disappear, you can tap anywhere on the screen again, and then tap the Play icon.
Part 4: How to Set up the Default Playback Speed on VLC?
The processes of setting up default playback speed on different platforms and devices vary. For your convenience, all of them are explained below:
Set up Default Playback Speed in VLC on Windows
- Go to Tools > Preferences in VLC media player, and then click the All button from the Show settings section at the bottom.
- Select Input / Codecs from the left pane of the Advanced Preferences box, and then specify your preferred speed in the Playback speed field that is present under the Playback control section on the right window
- Click Save to save the changes

Set up Default Playback Speed in VLC on Mac
- Launch VLC, and go to VLC media player from the menu bar, and then click Preferences; and then click Show All from the bottom of the Preferences box to display all preferences setting options;

- Click the Input / Codecs from the left pane, and then define your preferred speed in the Playback speed field under the Playback control section in the right window, and then click Save to save the changes.

How to Change VLC Media Player Default Speed on Android
Note: At the time of this writing, the Android version of VLC doesn’t allow you to set a global default playback speed. However, you can set it on a per video basis. This means that every time that video is played, the playback speed will remain what you set for it. You must do this for each video in your VLC library individually.
- Launch VLC, and then tap More from the bottom-right corner; next, tap SETTINGS from the upper-left area;
- Tap Video from the Extra settings section, and then check the Save Playback Speed box

How to Change VLC Media Player Default Speed on iOS and iPhone
- Tap Settings from the Home screen, and then scroll down and tap VLC
- Tap Default playback speed from the GENERIC section, and then tap to select a playback speed from the available list to set it as the default.

Conclusion
It is pretty convenient to reduce the playback speed in VLC media player regardless of the platform or device you are using. While the processes of getting the job might be different, the principle behind it remains the same. When on Windows, the playback speed can be decreased to 0.02x and can be increased to more than 100x. This facility is not available on Mac, iOS, or Android platforms. Also, if you want, you can set the default playback speed for the videos so that every time a clip is played, the pace remains what you specified as default.
02 How to Play Slow Motion Effects on Mac with VLC?
03 How to Control Playback Speed in VLC Media Player on Android and iOS?
04 How to Set up the Default Playback Speed on VLC?
Part 1: How to Play Video in Slow Motion Effects on Windows with VLC?
VLC is one of the best media players to play videos in slow motion . You can follow the instructions that are given below to learn how to play a video in slow motion in VLC on a Windows PC:
Step 1: Start Video Playback
Launch VLC on your Windows computer (a Windows 11 PC is used here for illustrations), click Media from the menu bar at the top, click Open File from the menu, and locate and open a video that you want to watch in slow motion. If VLC is your default media player, simply double-clicking the clip automatically opens the file in the app.
Step 2: Reduce the Playback Speed (In Decrements of 0.10x)
Once the playback begins, press the Spacebar on the keyboard to pause the video. Next, go to the Playback menu from the top, go to Speed, and click Slower (fine) once. This will reduce the speed to 0.90x. Clicking Slower (fine) again will further slow down the video to 0.80x speed. You can repeat this process until you reduce the speed to your desired level. Press Spacebar again to resume the playback in slow motion.
Note: The lowest speed that you can go to using this process is 0.03x.
Step 3: Reduce the Playback Speed (In Decrements in Percentage)
Pause the playback and go to Playback > Speed as explained in the previous step. From the list that comes up, click Slower (the last option). This will reduce the speed to 0.67x. Click Slower again and the speed will further go down to 0.50x. You can repeat this process until you reach your desired playback speed. Press Spacebar to resume the playback in slow motion. With this method, you can reduce the speed to as low as 0.02x.
Note: You can click Normal from the Speed submenu to play the video at normal speed.
Step 4: Using the Shortcut Keys (Optional)
You can press the left square bracket ‘[‘ on your keyboard to reduce the speed in decrements of 0.10x. To get back to the normal speed, press the equals to ‘=’ key. Likewise, pressing the right square bracket ‘]’ increases the speed by 0.10x.
Note: As it is with the Slower (fine) and Slower options, you can use Faster (fine) to add 0.10x increments to the speed, and Faster to increase percentage-wise. Also, if Faster (fine) is clicked repeatedly or its shortcut key is used multiple times, the speed can be increased up to 31.25x. On the other hand, by using the Faster option repeatedly, the speed can be increased to more than 100x.
Part 2: How to Play Slow Motion Effects on Mac with VLC?
The process of slowing down the video playback in VLC on a Mac computer is almost identical to that in Windows. You can learn how to get this done by following the steps that are given below:
Step 1: Open and Pause the Video
Locate and right-click the video that you want to play in slow motion, go to Open With from the context menu, and click VLC from the submenu. Once the clip opens, click the Pause button from the bottom as explained in the previous section.
Step 2: Reduce the Playback Speed
Click Playback from the menu bar at the top, and drag the Playback Speed slider to the left to reduce the speed of the video.
Step 3: Resume the Playback
Click anywhere on the screen to close the Playback menu, and then click the Play button from the bottom to resume the video playback in slow motion.
Part 3: How to Control Playback Speed in VLC Media Player on Android and iOS?
Although the playback speed of a video on both Android and iOS devices can be controlled with a slider, the location where the controller is placed on the two platforms varies, and so does the process of reaching there. Both the methods are explained below for your convenience:
Play Video in Slow Motion on Android with VLC
Step 1: Pause the Playback
Launch VLC on your Android phone (Samsung Galaxy Note 10+ is used here for illustrations), locate and open the video in VLC, tap anywhere on the screen, and tap the Pause button from the bottom to pause the playback.
Step 2: Set a Slower Playback Speed
Tap the More icon from the bottom-right corner, tap Playback speed from the menu that appears, and drag the slider that is present at the bottom to the left to reduce the speed. Alternatively, you can also repeatedly tap the down arrow that is present at the right of the slider to slow down the speed in the decrements of 0.05x.
Step 3: Resume the Playback
Tap anywhere on the screen, and when the Playback speed slider disappears, tap the screen one more time. Now, tap the Play icon from the bottom to resume the video playback.
Play Video in Slow Motion on iPhone with VLC
Step 1: Pause the Playback
Assuming that you have already added the video to the VLC library by connecting it to iTunes, launch the app on your iOS device (iPhone 13 Pro Max is used here for illustrations). Tap the video that you want to play in slow motion, and then tap the Pause icon from the bottom.
Step 2: Reduce the Playback Speed
Tap anywhere on the screen, and tap the Clock icon from the lower-left corner. Next, drag the Playback speed slider to the left to reduce the playback speed.
Step 3: Resume the Playback
Right after decreasing the speed, tap the Play icon from the bottom to resume the playback. If the controllers disappear, you can tap anywhere on the screen again, and then tap the Play icon.
Part 4: How to Set up the Default Playback Speed on VLC?
The processes of setting up default playback speed on different platforms and devices vary. For your convenience, all of them are explained below:
Set up Default Playback Speed in VLC on Windows
- Go to Tools > Preferences in VLC media player, and then click the All button from the Show settings section at the bottom.
- Select Input / Codecs from the left pane of the Advanced Preferences box, and then specify your preferred speed in the Playback speed field that is present under the Playback control section on the right window
- Click Save to save the changes
Set up Default Playback Speed in VLC on Mac
- Launch VLC, and go to VLC media player from the menu bar, and then click Preferences; and then click Show All from the bottom of the Preferences box to display all preferences setting options;
- Click the Input / Codecs from the left pane, and then define your preferred speed in the Playback speed field under the Playback control section in the right window, and then click Save to save the changes.
How to Change VLC Media Player Default Speed on Android
Note: At the time of this writing, the Android version of VLC doesn’t allow you to set a global default playback speed. However, you can set it on a per video basis. This means that every time that video is played, the playback speed will remain what you set for it. You must do this for each video in your VLC library individually.
- Launch VLC, and then tap More from the bottom-right corner; next, tap SETTINGS from the upper-left area;
- Tap Video from the Extra settings section, and then check the Save Playback Speed box
How to Change VLC Media Player Default Speed on iOS and iPhone
- Tap Settings from the Home screen, and then scroll down and tap VLC
- Tap Default playback speed from the GENERIC section, and then tap to select a playback speed from the available list to set it as the default.
Conclusion
It is pretty convenient to reduce the playback speed in VLC media player regardless of the platform or device you are using. While the processes of getting the job might be different, the principle behind it remains the same. When on Windows, the playback speed can be decreased to 0.02x and can be increased to more than 100x. This facility is not available on Mac, iOS, or Android platforms. Also, if you want, you can set the default playback speed for the videos so that every time a clip is played, the pace remains what you specified as default.
Best Video Editors for Windows/Mac/iOS/Android/Linux [All in One]
Best Video Editors for Windows/Mac/iOS/Android/Linux [All in One]

Ollie Mattison
Mar 27, 2024• Proven solutions
Now, videos are getting increasingly important for you to present your thoughts and feeling on Instagram, YouTube, or Facebook.
But how to make your video looks professional, creative, stunning and deserved to share? A free video editing software can do you a favor.
So, Which is the best video editor available in the market?
If you are not quite certain about the video editing software you should use to edit your videos, you’ve come to the right place. Because we are going to take you through the best video editors including free versions.
Newcomers to the world of the video editing as well as seasoned professionals can use this guide to find the video editing software that will help them produce better visual content.
Let’s dive in and explore all aspects worth considering before you decide which software is best for you. And you can click the Filter button at the left side in this article to find the best video editing software for you.
- Part I: Best Video Editor for PC/Mac/Linux
- Part II: Best Video Editing Software Online
- Part III: Best Video Editor APP for iOS/Android
We spent about a month for researching and testing all popular video making software in the market and now collect 35 best video editors for you. This list of film makers can be used on Windows, Mac OS, iOS, Android, and Linux. Besides, some of them are online video editors you can use directly.
Now, let’s filter through the list to find the best video editor for you. Check it out :
| No. | Product Name | Supported OS | Price | Best for | Overview | Download Link |
|---|---|---|---|---|---|---|
| 1 | Wondershare Filmora | Windows 7/8/10, Mac OS, Android, iOS | Free trial; $79.99 perpetual, $49.99/year | Beginners, Semi-Pros | 4.9 | Download |
| 2 | Windows Movie Maker | Windows7/8/10 | Free | Beginners | 4.1 | Download |
| 3 | iMovie | Mac OS, iOS | Free | Beginners | 4.3 | Download |
| 4 | Final Cut Pro | Mac OS | 30 days free trial; $299.99 | Professionals | 4.4 | Download |
| 5 | Wondershare Filmii | Windows 7/8/10 | Free trial; $9.99 | Beginners | 4.3 | Download |
| 6 | Lightworks | Windows 7/8/10, Mac OS, Linux | Free trial; $437.99 | Professionals | 4.2 | Download |
| 7 | ShotCut | Windows 7/8/10, Mac OS, Linux | Free Open Source Video Editor | Semi-Pros | 3.9 | Download |
| 8 | HitFilm Express | Windows, Mac OS | Free | Semi-Pros | 4.1 | Download |
| 9 | Blender | Windows 7/8/10, Mac OS, Linux | Free; Fund $6/mo for support | Professionals | 3.8 | Download |
| 10 | Avidemux | Windows 7/8/10, Mac OS, Linux | Free | Beginners | 3.5 | Download |
| 11 | VideoPad Video Editor | Windows, Mac OSX, iOS, Kindle | Free | Beginners | 3.9 | Download |
| 12 | OpenShot | Windows 7/8/10, Mac OS, Linux | Free Open Source Video Editor | Beginners | 3.8 | Download |
| 13 | Kdenlive | Windows 7/8/10, Mac OS, Linux | Free | Semi-pros | 4.1 | Download |
| 14 | Adobe Premiere Pro | Windows 7/8/10, Mac OS | 7 days free trial; $20.99/mo; $33.99 /mo | Professionals | 4.5 | Download |
| 15 | Magix Vegas Pro | Windows 7/8/10, Mac OS | $399-$799 | Professionals | 4.2 | Download |
| 16 | Adobe Premiere Elements | Windows 7/8/10, Mac OS | $99.99 | Semi-pros | 4.7 | Download |
| 17 | CyberLink PowerDirector | Windows 7/8/10, Mac OS | $69,99 - $129,99 | Semi-pros | 4.5 | Download |
| 18 | Magix Movie Video Easy | Windows only | Free trial; $49,99 | Semi-pros | 3.6 | Download |
| 19 | Magix Video Pro | Windows 10 | Free trial; $79.99 | Beginners | 4.1 | Download |
| 20 | Media | Online | Free | Beginners | 4.75 | Check |
| 21 | YouTube | Online | Free | Beginners | 4.8 | Check |
| 22 | Online Video Cutter | Online | Free | Beginners | 3.6 | Check |
| 23 | Movie Maker Online | Online | Free | Beginners | 3.7 | Check |
| 24 | ClipChamp | Online | 14 day free trial; $7/mo | Beginners | 4.1 | Check |
| 25 | WeVideo | Online | Free trial; $11.99-$79.99 | Beginners | 4.4 | Check |
| 26 | Kizoa | Online | Freemium | Beginners | 3.8 | Check |
| 27 | Wideo | Online | Freemium | Beginners | 4.3 | Check |
| 28 | Filmora | iOS, Android | Freemium | Beginners | 4.1 | Download |
| 29 | Vlogit | iOS, Android | Free | Beginners | 3.6 | Download |
| 30 | VideoShop | iOS, Android | Freemium | Beginners | 4.8 | Download |
| 31 | Filmmaker Pro | iOS | Freemium; $5.99/mo | Semi-pros | 4.6 | Download |
| 32 | KineMaster | iOS, Android | Freemium | Semi-pros | 4.4 | Download |
| 33 | LumaFusion | iOS | $29.99 | Semi-pros | 4.8 | Download |
| 34 | Vizzywig 2019 | iOS | $79.99 | Semi-pros | 4.1 | Download |
| 35 | PowerDirector | iOS, Android | Freemium | Beginners | 4.5 | Download |
Part I: Best Video Editing Software for Windows/Mac/Linux
1. Wondershare Filmora
Platform: Windows, Mac, Android, iOS
Price: Free trial; $79.99 perpetual, $49.99/year
Level: Beginners
Even though it is widely considered as one of the premium entry-level video editing software options, Wondershare Filmora also offers advanced editing tools. The software product comes with detailed learning resources and provides support to its users who have little editing experience. The wide range of file formats and remarkably diverse Export options make Filmora an interesting choice for those who are just entering the world of video editing, but also for more experienced editors.
Features: Filmora’s rich effect library contains over a thousand modern special effects from niches such as gaming, blockbuster or tutorial, and new effects are added every month. The Action Cam tool is designed to make merging footage shot on action cameras easy and quick. Filmora supports a wide range of file formats including AVI, MP4 or MKV, so you don’t have to worry if your footage was shot in 4K or HD because you can easily edit it with this software.
Advantages:
A large number of professional video editing features Filmora offers as well as its modernly designed interface makes it one of the best options for amateur video creators.
Limitations:
You can use all the features in the free trial version, but have to pay to remove the watermark.
Lear more about Wondershare Filmora here: Filmora Official YouTube Channel
2. Windows Movie Maker
Platform: Windows
Price: Free
Level: Beginners

This is probably one of the oldest if not the oldest video editing software for PCs. Microsoft has announced that Windows Movie Maker will no longer be available for download. This software can still be found online, although not on Microsoft’s website, and currently, there are two different versions of Windows Movie Maker available. Even the least experienced video editors can master each of the Movie Maker versions easily.
Features: The classic video editing software is equipped with all the tools you’ll need for basic editing tasks like trimming, changing the video playback speed or rotating videos. It even features a Video Stabilization option that can be useful if you’d like to stabilize a video and remove the distracting camera shakes. Windows Movie Maker lets you add text effects to your video, insert Transitions between two takes, perform basic audio editing or record a screen.
Advantages:
Free, meets your basic editing demands
Limitations:
Service discontinued
No support for modern file formats
Lacks color correction tools, visual effects or any other advanced video editing options.
Check how to use Windows Movie Maker here: Windows Movie Maker User Guide
3. iMovie
Platform: Mac OS, iOS
Price: Free
Level: Beginners

As the Apple’s version of the Windows Movie Maker, iMovie has a similar status of a classic video editor that is at its best when used for simple video editing tasks. The video editor can also be used on an iPhone or an iPad if you want to edit your videos on the go. Learning your way around iMovie won’t take much of your time since all of its features are easy to use.
Features: Editing 4K videos or making credits or titles are just a few among many options provided by iMovie. Adding transitions, applying split-screen effects or creating PIP videos doesn’t require you to be a skilled video editor, because all of these options are easily accessible and they can be used in any project you are working on.
The iMovie’s audio editing options are equally impressive since the software enables you to add music, use built-in sound effects and record voiceovers. The video editor supports most of the popular file formats.
Advantages:
Free, and comes bundled with your Mac
Intuitive interface
Limitations:
This classic video editor for Apple’s devices doesn’t offer advanced video editing options such as motion tracking or keyframe marking.
Check how to use Windows Movie Maker here: iMovie User Guide
4. Final Cut Pro
Platform: macOS
Price: Paid, $299
Level: Professionals

Final Cut Pro is probably one of the highest praised video editing software ever created. It has been used to edit cinematic masterpieces such as ‘What happened Miss Simone’ or ‘The Girl With a Dragon Tattoo’, which speaks volumes about the software’s capability. Final Cut Pro’s Magnetic Timeline 2 is one of the kind, and it makes organizing large amounts of video and audio files look easy. Although the software’s price may seem discouraging, those who invested in it never had to use another video editor.
Features: A brief look at the list of Final Cut Pro’s video editing tools will leave you wondering if there is anything this software can’t do. Besides basic video editing features, the video editor is also equipped with 360 degrees VR video editing option, Multicam editing, and advanced color grading tools. Final Cut Pro allows its users to add as many audio tracks to the timeline as they want, thus enabling them to create impeccable soundtracks for their videos.
Advantages: Working with large numbers of video files is simplified by the software’s timeline, while options such as 3D titles or VR contribute to the strong impression this editor leaves on all of its users.
Limitations: Final Cut Pro has some lingering glitches that still haven’t been fixed, and its audio editing tool set lacks some important pieces.
If you are new to video editing and you will need a video maker that is tailored for beginners. In such case, you can read this article to get: Best Free Video Editing Software for Beginners >> They are really very easy to use. You can make a stunning video less than an hour.
5. Wondershare Filmii
Platform: Windows
Price: Free, Paid versions
Level: Beginners
This delicate video editing software is one of the best video editors for newbies. The free version of the software offers a lot of powerful video editing tools, but in order to get rid of the watermnark, you have to pay 9.99$ for its monthly plan. One of the advantages of Filmii is that it has a variety of video templates that can help beginners edit amazing videos with ease due to its auto-create functionality. Besides, its audio editing or creative tools are equally impressive.
6. Lightworks
Platform: Windows, macOS, Linux
Price: Free, Paid versions: $437.99
Level: Professionals

Lightworks is one of the best video editing software on this list with a long history in the movie-making business. The free version of the software is available, but it has limited export options. A $25 monthly subscription is required in order to gain access to all of the software’s features. Although it may be a somewhat pricey option, purchasing Lightworks is a profitable investment that may help you improve the quality of your videos.
Features: Both free and paid versions of this video editing suite offer support for wide range of video file formats. This can be very useful for video editors who often work on projects shot on different cameras. Multi-cam editing feature enables the software’s users to work with footage shot from separate angles, using more than just one camera. The videos edited with the free version of the software can only be exported to an MPEG4 file format with the maximum size of 1280X 790 pixels, and they must be uploaded to YouTube directly from the editor.
Advantages: Royalty-free media and a remarkable VFX panel make Lightworks a tempting option for professional and amateur video editors alike.
Limitations: The export options on the free version of the software are extremely limited and the software doesn’t provide much support for inexperienced users.
7. ShotCut
Platform: Windows, macOS, Linux
Price: Free
Level: Semi-Pros
If you need a video editing software just to piece together a few clips you recorded on the family vacation, then ShotCut may be a bit overwhelming choice for such a task. This open-source software is equipped with a rich collection of audio and video editing features, while it also offers support for nearly all video file formats. It is best suited for users in need of powerful video editing software who don’t want to spend a fortune on purchasing a professional editing suite.
Features: Screen capturing, webcam video recording or audio capturing options are all made available by ShotCut. The software’s video and audio editing features surpass all expectations and allow the software’s users to have complete creative control over their projects. Features such as Chroma Key, Crop or Blur are accompanied by a number of amazing video effects that can be used to enhance the colors in a video. Using ShotCut requires you to just download the software and run its executable file, which means that you don’t have to go through the installation process in order to start editing with this software.
Advantages: 4K videos, as well as numerous other video and audio file formats, are supported by this open-source video editing software. To make things even better ShotCut grants you access to fully customizable filters.
Limitations: The software doesn’t feature preset export profiles, and the transitions it offers are a bit scarce.
8. HitFilm Express
Platform: Windows, macOS
Price: Free
Level: Semi-Pros

This cross-platform video editor ranks among best video editing software products currently available on the market. Its secret lies in uniting visual effect compositing and video editing options under the same roof. HitFilm Express is aimed at users with an enviable amount of video editing experience, since inexperienced video editors may find the software’s interface difficult to navigate. This video editing suite offers a lot of video editing tools as well as visual and audio effect, that can be easily used to improve the quality of your videos.
Features: The rare combination of VFX compositing and video editing makes HitFilm Express unique, while its motion design and tracking options offer support for more complex video editing actions. The software supports 2D and 3D effects compositing, as well as 4K and 360-degree videos.
HitFilm Express’ titling options are at the basic level, while its Export options are alarmingly narrow. This free editing software doesn’t provide too many options for color adjustments, but its audio editing features can be used to create a video with a superior soundtrack.
Advantages: The software offers a wide spectrum of transitions and video effects and it supports most popular video file formats. HitFilm Express lets you use semi-professional video editing tools for free.
Limitations: In order to export a video from the software you must share a link on a social media platform and then download the file. People who are not familiar with the video editing process may find using HitFilm Express difficult.
9. Blender
Platform: Windows, macOS, Linux
Price: Free
Level: Professionals

Blender started out as an open-source project and over the years animators, scientists, VFX artists and numerous other people have participated in developing this 3D creation suite. The software can be used for modeling, animation, video editing or compositing, to mention only a few of its many purposes. Editing video footage isn’t Blender’s strong suit, but its video editing features are powerful enough to enable you to perform basic editing tasks. However, this doesn’t mean you can’t use this software to create videos that grab the viewer’s attention.
Features: Cutting or trimming videos, adjusting the video’s playback speed or adding keyframes to a video clip is an easy process in Blender. The software’s true strength lies in its animation, 3D modeling or motion tracking features. The latest version of Blender is equipped with a motion tracking option that allows you to import the footage into the software directly from a camera. You can utilize this feature to mask areas of the shot and see the movement on camera in a 3D environment.
Advantages: Blender’s price and its powerful features make it an interesting choice as your primary video editing software.
Limitations: You must have in-depth knowledge of animation, compositing, and 3D techniques in order to be able to use Blender.
10. Avidemux
Platform: Windows, macOS, Linux
Price: Free
Level: Beginners

This simple video editing software has all the tools you’ll ever need to quickly polish your videos. Its audio and video effects can be utilized to make your videos look and sound professionally, but Avidemux doesn’t offer much more than these basic video editing options.
The software provides support for most of popular video file formats, but its export options are far from perfect. Avidemux doesn’t feature visual effects or transitions, which significantly limits its video editing capabilities.
Features: Newcomers to the video editing world will love the software’s interface, because of its simplicity. The Transform feature allows you to fade in and fade out shots, crop or rotate video clips and even add logos to your videos. Blur or Sharpen effects enable users to enhance their videos, while contrast, brightness, saturation or hue values can be adjusted to make the colors in the video look more vivid. Avidemux also features the Subtitle option, but the software can only add hardcoded subtitles to videos.
Advantages: Solves all your basic video editing problems, and lets you have fun while editing videos. Avidemux also has solid encoding options and its interface is user-friendly.
Limitations: There are no video effects or transitions, which narrows down the software’s video editing options.
11. VideoPad Video Editor
Platform: Windows, macOS
Price: Free
Level: Beginners
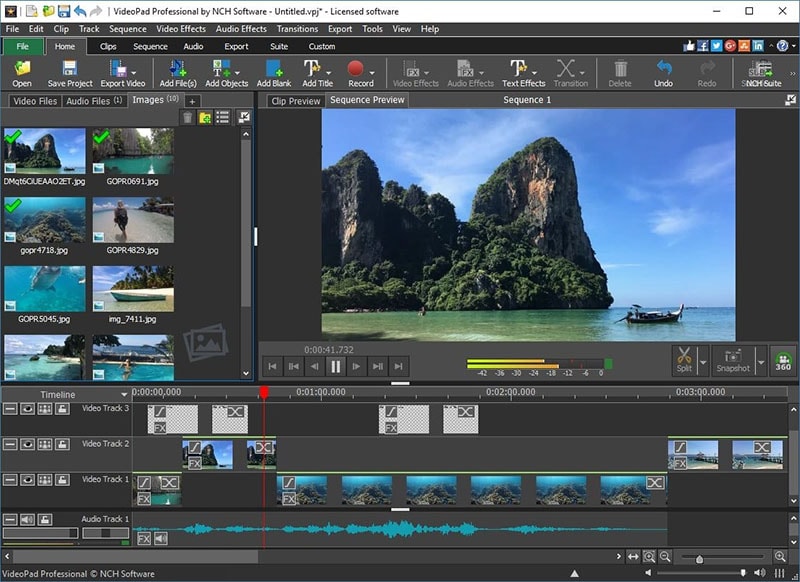
VideoPad is one of the best entry-level cross-platform software products you can use for easy video editing tasks. The free version of the software is available to both Mac and PC users, although the Windows version limits the video exporting options to just two file formats. The VideoPad’s interface doesn’t take much time to get used to, and it perfectly adjusted to the needs of inexperienced video editors. Paid versions of the software are available to advanced editors who want to use VideoPad for more than just basic video editing.
Features: The list of video editing features VideoPad provides includes several pleasant surprises. The 4K video support, as well as 360-video editing features, are aimed at GoPro owners who want a quick and easy way to process their footage. The visual effects this free video editing software provides are impressive, while the Chroma Key option enables its users to create green screen videos. Even though VideoPad allows its users to edit audio files, its audio editing features are fairly modest.
Advantages: Learning how to use VideoPad is simplified by its intuitively designed interface.
Limitations: There are no advanced video editing options like multi-cam editing and motion tracking and certain features become unavailable when using the free version of the software over a longer period of time.
Download link: If you download the trial version instead of the free non-commercial home edition, or do not find a specific link to it on the website, you can trydownloading it from this link , or contact tech support , and they will send you a direct link.
12. OpenShot
Platform: Window, macOS, Linux
Price: Free
Level: Beginners

This award-winning open-source video editor offers a wide range of video editing tools that span from trimming and slicing to Slow Motion and Time effects. OpenShot is an excellent software for training and learning new video editing tricks, but it is best avoided if you are working on a large project. The software’s basic video editing features make it an excellent choice for users who only want to perform simple edits without having to waste too much time.
Features: OpenShot lets you add unlimited video and audio tracks to your projects, but its file management capabilities are far from impressive. The software allows you to trim or arrange the video files in any way you want, and it also provides a lot of different Transitions that can be used to make the videos look smoother. The collection of video and audio effects allows users to try out different solutions for the scenes in their video clips. OpenShot features a Vector Title Editor that can assist you in creating perfect opening titles or end credits.
Advantages: The interface of this open-source video editing software is designed to assist its users through every step of the video editing process. OpenShot is a great choice for all video editors who want to save money and use a powerful video editing software at the same time.
Limitations: More complex video editing options such as Rotoscoping, are not available. You may have to install add-ons if the OS you are using doesn’t meet the software’s system requirements.
13. Kdenlive
Platform: Windows, macOS, Linux
Price: Free
Level: Semi-pros

Almost two decades ago, this open-source project was started by Jason Wood in order to develop a video editing software for Linux OS. Over the years, a small team of developers has created Windows and MacOS versions of the editor that now have a loyal fan base. Even though the software’s features make it a reliable choice for more complex projects, Kdnelive can also be used to perform simple edits. This video editing software combines the simplicity of entry-level video editors with advanced video editing tools frequently used by experienced professionals.
Features: The functionality of this video editor will surprise even the greatest of skeptics. The software’s timeline lets you to add as many videos and audio files to your project as you want, making it a perfect tool for large-scale projects. The visual effects and transitions enable users to manipulate the footage in any way they see fit, while the extremely powerful analysis tools such as histograms, waveforms or vectorscopes enable them to monitor all the adjustments they make on their footage.
Advantages: Kdnlive provides support for nearly all input file formats that can be added easily to the software’s multitrack timeline. The free open-source add-ons can extend the video editor’s capability and thus enable you to perform a wider range of video editing actions.
Limitations: Even though the software provides the screencast recording option, it doesn’t feature the PIP effect. Multi frame-rate editing isn’t possible and software’s updates can last for hours.
14. Adobe Premiere Pro
Platform: Windows, macOS
Price: Paid, $19.99 per month
Level: Professionals

There are very few video editing suites that can offer as much to its users as Adobe Premiere Pro can. It is probably one of the best video editors ever created, as it has been setting the industry standards for a long time. High-end professionals frequently use Adobe Premiere Pro on their projects, while aspiring filmmakers strive to learn every option this unique video editor has to offer. The much-famed software isn’t the best choice for video editors who are just learning the basics of the trade, although it supplies a staggering amount of tutorials and learning materials.
Features: With each new version of Adobe Premiere Pro the list of the software’s features becomes longer. Its timeline is famous for its ease of use because it enables you to add as much new audio or video tracks as your project requires. This is arguably one of the best color correction software packages on the market, while its color grading features are no less impressive. Adobe Premiere Pro provides support for a wide range of video file formats including 4K, HDR, and 360 VR videos.
Advantages: Perfect for collaborative projects that involve large teams of experienced professionals. The software is at its best when used with other Adobe’s products that enable you to develop projects beyond the boundaries set by the Adobe Premiere Pro’s limitations.
Limitations: You cannot purchase the lifetime license to use this video editing software, and paying monthly subscriptions may be hard on the budget of some of its potential users.
15. Magix Vegas Pro
Platform: Windows
**Price:**Paid: $399
Level: Professionals

Successful independent artists, film producers, and all other film and video enthusiasts can only benefit from purchasing this video editing suite. The software belonged to Sony Creative Software for much of its history, but on May 20. 2016 the company sold it to Magix. Previously known as Vegas Pro or just Vegas, this video editing software is widely accepted as one of the best professional video editing tools ever created. There is virtually no video editing task that cannot be completed in Magix Vegas Pro video editing software.
Features: This video editor is designed to provide support to its users from the beginning until the very end of the video editing process. Magix Vegas Pro recognizes almost all video file formats, even those captured with professional RED or ARRI Alexa cameras. You can use this software to edit 3D or 4K videos, while the Multicamera-Editing feature lets you switch between any number of video sources with a single mouse click. Effects such as Automatic Crossfades allow you to create transitions between shots effortlessly.
Advantages: The seemingly unlimited amount of learning resources makes editing with Magix Vegas Pro a lot easier and it enables less experienced video editors to learn new tricks.
Limitations: There aren’t as many visual effects as you would hope for and the software’s interface isn’t aesthetically pleasing, but it is very functional.
16. Adobe Premiere Elements
Platform: Windows, macOS
**Price:**Paid: $99.99
Level: Semi-pros

Although it is often regarded as a simplified version of Premiere Pro, this video editing suite offers enough video editing tools to edit videos at the semi-professional level. Adobe Premiere Elements contains automated versions of Premiere Pro’s features and in this manner it enables its users to utilize professional video editing tools on their prosumer level projects. Even though this Adobe’s software product lacks the power of professional video editing software packages, it still offers enough video editing tools for the production of nicely polished and well-rounded videos.
Features: Adobe Premiere Elements recognizes all popular video file formats, and it offers support for 4K content. In addition to its remarkable file format compatibility, the video editor also features 3D editing and face detection options that can be very useful when working on more complex video projects. The haze-removal effect is extremely efficient at reducing the fog or cigarette smoke in a shot, while the motion titles let you create visually impressive opening titles or end credits. The Adobe Premiere Elements has performed exceptionally well when rendering large video files.
Advantages: The software’s Guided mode provides support to its users and helps them learn how to perform all video editing actions. The asset management tool offers assistance with the organization of large amounts of video and audio files.
Limitations: When compared to other video editors in this guide Adobe Premiere Elements’ device and social media optimization features seem to be in short supply.
17. CyberLink PowerDirector
Platform: Windows, macOS
**Price:**Free trial, Paid version: $69,99 - $129,99
Level: Semi-pros
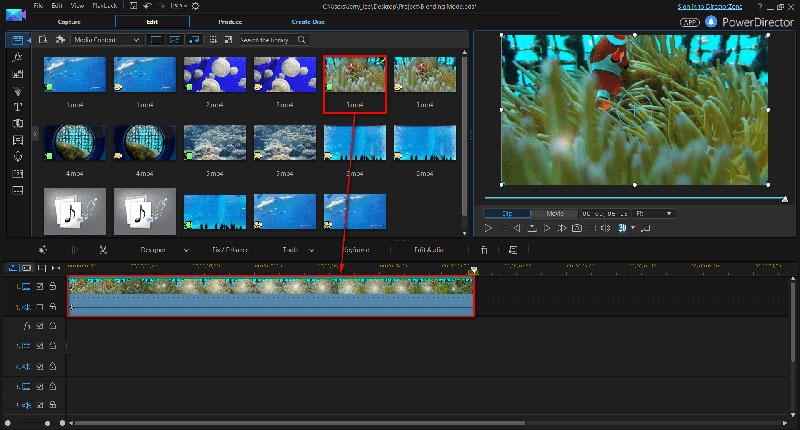
This is probably one of the best and most popular video editing software packages aimed at amateur and semi-professional users. There are several versions of the software available, and each of them contains a different amount of options and video editing tools. Even with somewhat reduced capability, the least expensive version of the editor supports 360-degree as well as VR options for posting on social media such as Vimeo, Facebook or YouTube. CyberLink PowerDirector isn’t a professional video editing software, but it still offers a lot of extraordinary options that can take you a step closer to producing a professional video.
Features: The 360-degree video editing options are probably the first thing that catches the eye when you look at the list of features the software provides, but its true power lies in its color tools. LUTs, HDR effects or Split Toning options are just the tip of the iceberg since PowerDirector offers countless tools for fine-tuning of the colors in your videos. Animated PIP effects and video collages make this video editing software a perfect choice for the production of tutorials and all other types of online videos.
Advantages: The audio editing options provided by CyberLink PowerDirector are nothing short of amazing since they enable the software’s users to manipulate the audio files in any way they see fit.
Limitations: Motion tracking and color lookup features are not always reliable. The software is a bit overpriced when compared with similar video editing suits.
18. Magix Movie Video Easy
Platform: Windows
Price: Free trial, Paid version: $49,99
Level: Semi-pros

This video editor is a great choice for people who have never edited a video before and who want to learn how to perform basic video editing tasks. Video Easy’s intuitive user interface can be mastered by anyone with enough determination to edit videos with this software on a constant basis. Features this editor offers may not be as impressive as to ones provided by professional video editing suites, but they are powerful enough to produce clean edits that give your videos a professional look.
Features: If you choose to make Magix Movie Video Easy your primary video editing software, you will never have to worry about what type of camera you used to record your videos since the software is compatible with all standard camcorders, digital cameras, and Smartphones. The rich collection of transitions and effects, as well as the intro and outro animations, can all be used to create amazing videos. You can export videos to DVDs, Blu-Ray discs or YouTube directly from the software.
Advantages: If you are looking for a video editor that will enable you to add music to your videos, trim or cut videos quickly and choose from hundreds of effects, then you should look no further because Magix Movie Video Easy provides all of these options, and much more.
Limitations: Doesn’t perform well when used for demanding video editing tasks.
19. Magix Video Pro
Platform: Windows, macOS
Price: Free trial, Paid version: $62,99
Level: Beginners

Magix has been the largest European video editing software manufacturer for more than two decades. Its software products may not enjoy the fame of Adobe’s video editing software packages, but this doesn’t mean that a video editor such as Magix Video Pro cannot be used for the production of professional-looking videos. Besides offering basic video editing tools this video editor also features advanced video editing options such as Stop Motion animation or 360-degree video editing. Magix Video Pro is often labeled as ‘one of the best video editing programs out there’.
Features: Audio editing features that come with this video editor include an audio mixer that enables you to reduce noise levels, control the low, mid and high sounds or simply equalize the sound volume across the entire project. The video editing tools supplied by the Magix Video Pro are as impressive as its audio editing options. Lens correction features, Split screen videos or 360-degree video editing options reveal only a fraction of the software’s capabilities. Magix Video Pro delivers professional video editing features to consumer-level users.
Advantages: The software allows you to place any type of media file on its timeline and use it in your project.
Limitations: The effects library installation process can be time-consuming, although it is well worth the wait.
Part II: Best Video Making Editors Online
20. YouTube
Platform: Online
Price: Free
Level: Beginners

The world’s largest video sharing platform also offers basic video editing services. Although Google has discontinued its built-in video editor, it still allows tts users to trim or rotate videos, apply filters or even create time-lapse and slow-motion videos on line. Brightness, contrast or saturation levels can be altered if you want to enhance the colors in your videos. Audio editing features are limited because the platform only allows you to add a single audio file to a project you’re working on. However, some of the most important video editing features like adding the text or creating titles are not available.
Advantages: Allows you to polish your videos before posting them on YouTube for free.
Cons: This online video editor lacks some basic video editing tools such as transitions or audio controls.
21. Online Video Cutter
Platform: Online
Price: Free
Level: Beginners
If you were looking for a web app that contains all the tools required to cut a small video file, then Online Video Cutter is one of your best options. You won’t even have to create an account before you start the video editing process. The videos you upload to this online editor can’t exceed the 500 MB size limit. Besides cutting their videos, users of this editor can also rotate or trim their footage for free. Online Video Cutter provides support for nearly all video file formats, so you don’t have to worry about the file format in which your video was captured.
Advantages: Offers a quick way to trim videos online and it is exceptionally easy to use.
Limitations: Lacks even the most basic video editing features other than cutting, trimming and rotating videos.
22. Movie Maker Online
Platform: Online
Price: Free
Level: Beginners

This free online editing tool lets you process videos without even registering or creating an account. You can add videos, photos, text, and music into a single project and mix them together into an awesome video. The platform grants you access to its rich filter library, and it also allows you to add text overlays, fade audio and video files or create smooth transitions between shots. Movie Maker Online features its own collection of royalty free music and photos you can use to make your videos look and sound better. The webpage’s design is a little odd, and it may take some time to get used to it.
Advantages: The app offers a lot of different video editing tools and it allows you to perform all basic video editing actions online.
Limitations: Movie Maker Online is funded by ads, and requires you to disable your AdBlock app before you can start editing a video.
23. ClipChamp
Platform: Online
Price: Free trial, Paid: $7 per month
Level: Beginners

ClipChamp lets you upload videos you already recorded or capture new footage using your computer’s webcam. The free version of this web app allows you to export in 1080p video files, but you can’t produce more than five videos in a single month. Both versions of the online video editor require you to create an account, and the videos exported from the free version of the app don’t have a watermark. ClipChamp provides numerous video editing tools, including transition, color adjustments or cropping. The exporting process doesn’t last too long and you can choose whether you want to share the video on social media or download it to your computer.
Advantages: Makes creating webcam videos as well as editing preexisting footage look easy while providing excellent export options.
Limitations: The free version of ClipChamp allows you export only five videos in a month.
24. WeVideo
Platform: Online
Price: Freemium
Level: Beginners
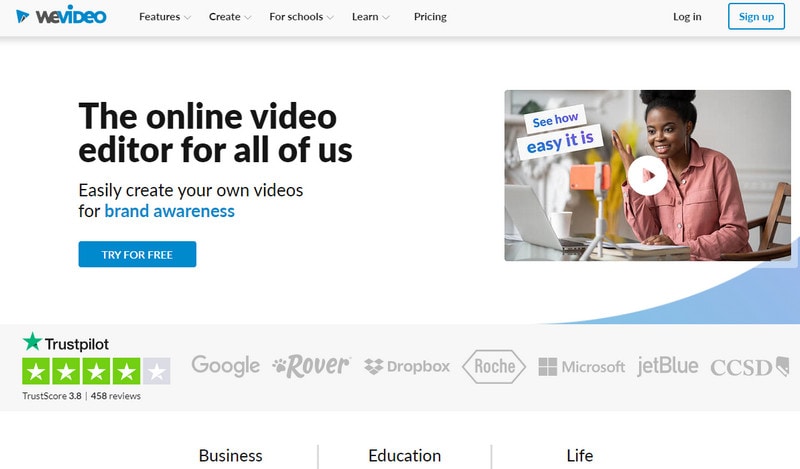
The capabilities of WeVideo online video editor surpass the basic level of video editing. The platform offers support for iOS and Android devices as well as desktop computers. Producing square or horizontal videos, creating motion titles or publishing videos in 720p HD resolution are just a few amazing options this online video editor provides. The paid versions of the web app are best suited for skilled video editing professionals or large teams that are working on demanding projects. WeVideo’s free version doesn’t allow its users to publish more than 30 minutes of video content each month and each exported video contains a watermark.
Advantages: Produces videos with great picture quality and offers tons of advanced video editing options.
Limitations: Creating an account is mandatory even for video editors who want to use the free version of WeVideo.
25. Kizoa
Platform: Online
Price: Freemium
Level: Beginners

Kizoa offers a broad spectrum of transitions, visual effects, animation and text effects to its users for free. The video editing platform is frequently used to create goofy short videos that can be easily shared on Facebook or Twitter. The app allows you to add photos to your video projects and it grants you access to an incredibly rich royalty free music collection. However, you will have to create an account on Kizoa in order to be able to export the videos you created. The editor’s timeline is rudimentary, but still functional enough to enable users to combine audio, video, and photo files.
Advantages: Kizoa is a powerful tool for the creation of entertaining social media videos.
Limitations: You must create an account in order to be able to export your projects, and the online video editor doesn’t feature any advanced video editing options.
26. Wideo
Platform: Online
Price: Freemium
Level: Beginners
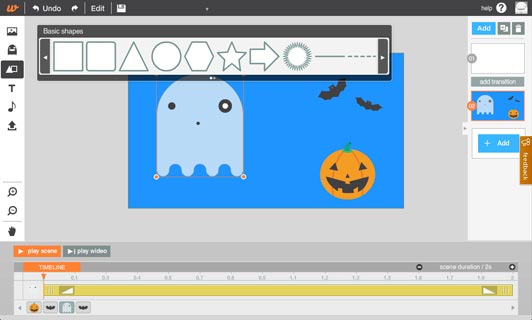
All video enthusiasts can use Wideo platform to edit their videos, regardless of their skill level. In addition to amazing video editing options, this online video editor also features animations that can be used to create professional presentations. All video content uploaded to Wideo is stored on the cloud, and pricing plans for professionals include unlimited storage space. The Basic version of the editor allows for just ten downloads in a month and it doesn’t let its users upload videos to YouTube. Even though this video editor is easy to use, it is better suited for skilled professionals than it is for inexperienced video editors.
Advantages: Even the Basic pricing plan enables users to export HD videos, while Professional and Enterprise pricing plans include the Full HD export option.
Limitations: Limited audio editing options significantly reduce the capabilities of this online video editing platform.
Read More to Get: 10 Best Free Online Video Editors With No Watermark >>
Part III: Best Video APP for iOS/Android
27. Filmora
Platform: iOS, Andoird
Price: Freemium
Level: Beginners
You can edit your videos with Filmora in just three simple steps. All you have to do is choose the videos and photos from your phone’s gallery, Instagram or Facebook account, select a theme, insert transitions or add a song and share the video directly from the app on social media or to your email address. Besides the powerful video editing features, this app for iOS and Android devices also allows you to set your video’s aspect ratio to Square 1:1 if you would like to share the clip on Instagram or Cinema 16:9 if the video is shared to YouTube.
Advantages: Supports HD export options and provides a diverse set of video editing options.
Limitations: The app can’t perform advanced video editing tasks.
28. Vlogit
Platform: iOS, Android
Price: Free
Level: Beginners
The Wondershare’s video editing app for Android and iOS devices is designed to offer assistance to YouTubers and Vloggers who want to edit their videos directly from their Smartphones. Vlogit is equipped with video editing tools that enable you to cut, trim or rotate videos, while its sound editing features include recording voiceovers, adding sound effects or choosing the music you want to use as a soundtrack to your video. The app lets you combine photos and videos within the same project, and it also enables you to create customized openers from animated templates. The videos created and exported with the Vlogit app don’t contain watermarks.
Advantages: Offers powerful video editing features to YouTubers and Vloggers who want to edit their videos from their Smartphones for free.
Limitations: The list of visual effects the app provides could be longer.
29. VideoShop
Platform: iOS, Android
Price: Freemium
Level: Beginners

The extensive list of features VideoShop app offers makes it one of the best options for novice video editors who want to quickly create visually impressive videos. This video editing app allows you to work with multiple video files or merge them into a single video. The animated titles enable users of the VideoShop app to create professional-looking intros for their videos, while the transitions feature allows them to seamlessly piece together all shots featured in a project. Tilt-Shift and Stop Motion options are also available to video editors who want to make their videos look more professional.
Advantages: Fun and easy to use video editing app that lets you manipulate footage in any way you want.
Limitations: VideoShop contains ads, and the app’s version for iOS devices only supports videos recorded with iPhones and iPads.
30. Filmmaker Pro
Platform: iOS
Price: Freemium, $5,99 monthly subscription
Level: Semi-pros

iPhone videographers who need access to semi-professional video editing tools will certainly enjoy using this app. Filmmaker Pro offers support for 4K footage filmed on the latest models of iPhone and it enables its users to add an unlimited number of text overlays, video clips, voiceovers or audio tracks to the app’s timeline. The video editor grants you access to over 30 filters, video grading features, as well as Chroma Key and Ken Burns effects. In addition to impressive video and audio editing features, Filmmaker Pro’s users can also record videos with a camera that lets them adjust settings manually directly from the app, although this option must be paid for.
Advantages: Text overlays, audio editing features and the ability to select the aspect ratio for each video you edit with this app, make it one of the best video editing options for iOS devices.
Limitations: Nearly all of the app’s best features must be purchased.
31. KineMaster
Platform: iOS, Android
Price: Freemium, contains adds
Level: Semi-pros
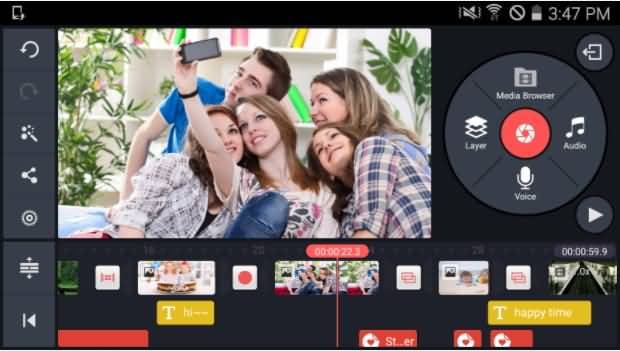
This cross-platform video editor is one of the premier options for mobile video editing on both iOS and Android devices. KineMaster is currently the only app that enables Android Smartphone owners to add as many layers of videos, photos, and text to their projects as they want. However, it only supports a limited number of video file formats, which means that the app shouldn’t be used to edit videos that weren’t recorded on an iPhone or Android phone. KineMaster provides a wide range of video exporting options and allows you to share videos on popular social media networks.
Pros: Above average video and audio editing features.
Limitations: Offers a lot of options mobile video editors seldom use.
32. LumaFusion
Platform: iOS
Price: Paid, $29.99
Level: Semi-pros
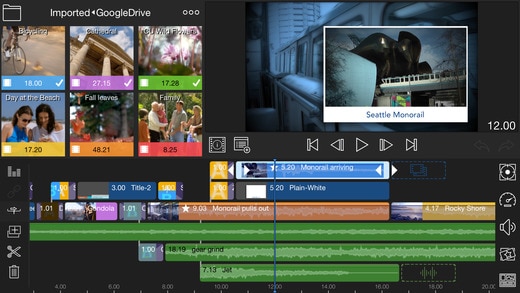
Creating neatly organized projects with LumaFusion is a simple task because the app features a powerful Project Manager that lets you sort files or select aspect ratios for your videos. In addition, the Media Library lets you import all types of files from a cloud storage or drag and drop media from other apps. Producing slow-motion videos that have 120 or 240fps or creating green screen videos using the Chroma Key effect is easy with LumaFusion. The app’s audio editing features are as impressive as its video editing tools since they provide the complete control over the audio files to the video editor’s users.
Advantages: Color correction options, LUTs or numerous visual effects are all part of the reason why LumaFusion is one of the best apps for mobile video editing.
Limitations: Only available for iOS devices.
33. Vizzywig 2019 4K Video Editor
Platform: iOS
Price: Paid, $79.99
Level: Semi-pros

This award-winning app for iOS devices provides all the tools a skilled video editor could desire. Its features include support for 4K videos, wide selection of aspect ratios as well as stylish intros, end credits, and titles. Besides offering professional video editing tools, Vizzywig also features Multi-Camera recording options that can capture videos in 8K resolution. In addition, the app is capable of producing videos that have eight times more pixels than the Apple’s Facetime HD Camera. The non-linear timeline lets you arrange video clips in any way you see fit, and allows you to add multiple media files to each project you are working on.
Advantages: Lets you control the focus and exposure manually and produce videos with stunning picture quality.
Limitations: Single platform compatibility and a high price narrow down the number of the app’s potential users.
34. PowerDirector
Platform: Android
Price: Freemium, contains ads and in-app purchases
Level: Beginners
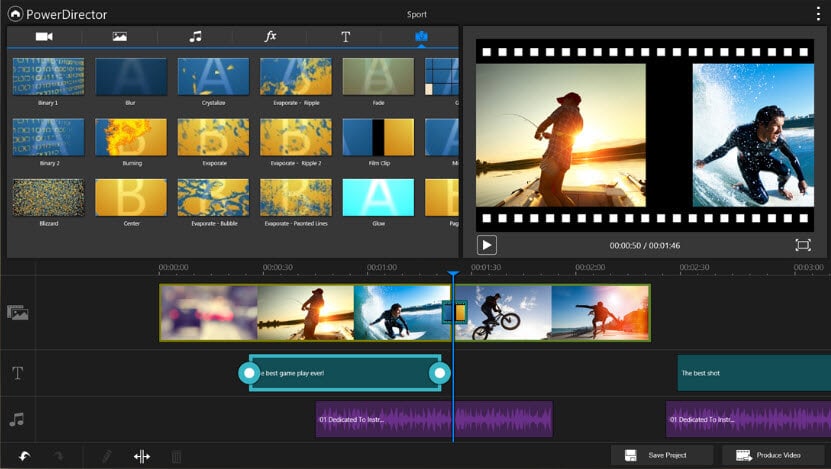
Unlike the Adobe’s app for mobile video editing, PowerDirector lives up to all expectations. This user-friendly app lets you create reverse, 4K, or green screen videos. To make things even better, you can easily apply visual and audio effects or add voiceovers to your projects. In addition to the video editor, the PowerDirector app is also equipped with a powerful photo editor that lets you manipulate images in a professional manner. You can use almost any type of video or audio file in this app because it provides support for all commonly used file formats.
Advantages: PowerDirector is designed to help its users polish their video quickly and effortlessly.
Limitations: Videos in 1080p and 4K resolutions can only be exported after you’ve made an in-app purchase.
Ooops…It looks like there isn’t any tool that matches your demand. Please give it another try.
Which Video Editor Do You Think Is Best for You?
Thank you to read this so far. It’s a long but the most comprehensive reviews ever for all hot video editing software compatible with Windows, Mac, iOS, Android and Linux, as well as online video editors. I hope you find the tools that you like.
If you want to get quick selections without too much reading, here is my recommendation:
- Best video editor for Windows and Mac to download: Filmora
- Best video editing software for Linux to download: Lightworks
- Best video editor for Android, iOS to download: Filmora , VideoShop
- Best online video editor to use: WeVideo
If you still can’t find a one Or we missed one of the tools you think which deserves to be listed above?
Either way, let us know by leaving a comment below.
Ollie Mattison
Ollie Mattison is a writer and a lover of all things video.
Follow @Ollie Mattison
Ollie Mattison
Mar 27, 2024• Proven solutions
Now, videos are getting increasingly important for you to present your thoughts and feeling on Instagram, YouTube, or Facebook.
But how to make your video looks professional, creative, stunning and deserved to share? A free video editing software can do you a favor.
So, Which is the best video editor available in the market?
If you are not quite certain about the video editing software you should use to edit your videos, you’ve come to the right place. Because we are going to take you through the best video editors including free versions.
Newcomers to the world of the video editing as well as seasoned professionals can use this guide to find the video editing software that will help them produce better visual content.
Let’s dive in and explore all aspects worth considering before you decide which software is best for you. And you can click the Filter button at the left side in this article to find the best video editing software for you.
- Part I: Best Video Editor for PC/Mac/Linux
- Part II: Best Video Editing Software Online
- Part III: Best Video Editor APP for iOS/Android
We spent about a month for researching and testing all popular video making software in the market and now collect 35 best video editors for you. This list of film makers can be used on Windows, Mac OS, iOS, Android, and Linux. Besides, some of them are online video editors you can use directly.
Now, let’s filter through the list to find the best video editor for you. Check it out :
| No. | Product Name | Supported OS | Price | Best for | Overview | Download Link |
|---|---|---|---|---|---|---|
| 1 | Wondershare Filmora | Windows 7/8/10, Mac OS, Android, iOS | Free trial; $79.99 perpetual, $49.99/year | Beginners, Semi-Pros | 4.9 | Download |
| 2 | Windows Movie Maker | Windows7/8/10 | Free | Beginners | 4.1 | Download |
| 3 | iMovie | Mac OS, iOS | Free | Beginners | 4.3 | Download |
| 4 | Final Cut Pro | Mac OS | 30 days free trial; $299.99 | Professionals | 4.4 | Download |
| 5 | Wondershare Filmii | Windows 7/8/10 | Free trial; $9.99 | Beginners | 4.3 | Download |
| 6 | Lightworks | Windows 7/8/10, Mac OS, Linux | Free trial; $437.99 | Professionals | 4.2 | Download |
| 7 | ShotCut | Windows 7/8/10, Mac OS, Linux | Free Open Source Video Editor | Semi-Pros | 3.9 | Download |
| 8 | HitFilm Express | Windows, Mac OS | Free | Semi-Pros | 4.1 | Download |
| 9 | Blender | Windows 7/8/10, Mac OS, Linux | Free; Fund $6/mo for support | Professionals | 3.8 | Download |
| 10 | Avidemux | Windows 7/8/10, Mac OS, Linux | Free | Beginners | 3.5 | Download |
| 11 | VideoPad Video Editor | Windows, Mac OSX, iOS, Kindle | Free | Beginners | 3.9 | Download |
| 12 | OpenShot | Windows 7/8/10, Mac OS, Linux | Free Open Source Video Editor | Beginners | 3.8 | Download |
| 13 | Kdenlive | Windows 7/8/10, Mac OS, Linux | Free | Semi-pros | 4.1 | Download |
| 14 | Adobe Premiere Pro | Windows 7/8/10, Mac OS | 7 days free trial; $20.99/mo; $33.99 /mo | Professionals | 4.5 | Download |
| 15 | Magix Vegas Pro | Windows 7/8/10, Mac OS | $399-$799 | Professionals | 4.2 | Download |
| 16 | Adobe Premiere Elements | Windows 7/8/10, Mac OS | $99.99 | Semi-pros | 4.7 | Download |
| 17 | CyberLink PowerDirector | Windows 7/8/10, Mac OS | $69,99 - $129,99 | Semi-pros | 4.5 | Download |
| 18 | Magix Movie Video Easy | Windows only | Free trial; $49,99 | Semi-pros | 3.6 | Download |
| 19 | Magix Video Pro | Windows 10 | Free trial; $79.99 | Beginners | 4.1 | Download |
| 20 | Media | Online | Free | Beginners | 4.75 | Check |
| 21 | YouTube | Online | Free | Beginners | 4.8 | Check |
| 22 | Online Video Cutter | Online | Free | Beginners | 3.6 | Check |
| 23 | Movie Maker Online | Online | Free | Beginners | 3.7 | Check |
| 24 | ClipChamp | Online | 14 day free trial; $7/mo | Beginners | 4.1 | Check |
| 25 | WeVideo | Online | Free trial; $11.99-$79.99 | Beginners | 4.4 | Check |
| 26 | Kizoa | Online | Freemium | Beginners | 3.8 | Check |
| 27 | Wideo | Online | Freemium | Beginners | 4.3 | Check |
| 28 | Filmora | iOS, Android | Freemium | Beginners | 4.1 | Download |
| 29 | Vlogit | iOS, Android | Free | Beginners | 3.6 | Download |
| 30 | VideoShop | iOS, Android | Freemium | Beginners | 4.8 | Download |
| 31 | Filmmaker Pro | iOS | Freemium; $5.99/mo | Semi-pros | 4.6 | Download |
| 32 | KineMaster | iOS, Android | Freemium | Semi-pros | 4.4 | Download |
| 33 | LumaFusion | iOS | $29.99 | Semi-pros | 4.8 | Download |
| 34 | Vizzywig 2019 | iOS | $79.99 | Semi-pros | 4.1 | Download |
| 35 | PowerDirector | iOS, Android | Freemium | Beginners | 4.5 | Download |
Part I: Best Video Editing Software for Windows/Mac/Linux
1. Wondershare Filmora
Platform: Windows, Mac, Android, iOS
Price: Free trial; $79.99 perpetual, $49.99/year
Level: Beginners
Even though it is widely considered as one of the premium entry-level video editing software options, Wondershare Filmora also offers advanced editing tools. The software product comes with detailed learning resources and provides support to its users who have little editing experience. The wide range of file formats and remarkably diverse Export options make Filmora an interesting choice for those who are just entering the world of video editing, but also for more experienced editors.
Features: Filmora’s rich effect library contains over a thousand modern special effects from niches such as gaming, blockbuster or tutorial, and new effects are added every month. The Action Cam tool is designed to make merging footage shot on action cameras easy and quick. Filmora supports a wide range of file formats including AVI, MP4 or MKV, so you don’t have to worry if your footage was shot in 4K or HD because you can easily edit it with this software.
Advantages:
A large number of professional video editing features Filmora offers as well as its modernly designed interface makes it one of the best options for amateur video creators.
Limitations:
You can use all the features in the free trial version, but have to pay to remove the watermark.
Lear more about Wondershare Filmora here: Filmora Official YouTube Channel
2. Windows Movie Maker
Platform: Windows
Price: Free
Level: Beginners
This is probably one of the oldest if not the oldest video editing software for PCs. Microsoft has announced that Windows Movie Maker will no longer be available for download. This software can still be found online, although not on Microsoft’s website, and currently, there are two different versions of Windows Movie Maker available. Even the least experienced video editors can master each of the Movie Maker versions easily.
Features: The classic video editing software is equipped with all the tools you’ll need for basic editing tasks like trimming, changing the video playback speed or rotating videos. It even features a Video Stabilization option that can be useful if you’d like to stabilize a video and remove the distracting camera shakes. Windows Movie Maker lets you add text effects to your video, insert Transitions between two takes, perform basic audio editing or record a screen.
Advantages:
Free, meets your basic editing demands
Limitations:
Service discontinued
No support for modern file formats
Lacks color correction tools, visual effects or any other advanced video editing options.
Check how to use Windows Movie Maker here: Windows Movie Maker User Guide
3. iMovie
Platform: Mac OS, iOS
Price: Free
Level: Beginners
As the Apple’s version of the Windows Movie Maker, iMovie has a similar status of a classic video editor that is at its best when used for simple video editing tasks. The video editor can also be used on an iPhone or an iPad if you want to edit your videos on the go. Learning your way around iMovie won’t take much of your time since all of its features are easy to use.
Features: Editing 4K videos or making credits or titles are just a few among many options provided by iMovie. Adding transitions, applying split-screen effects or creating PIP videos doesn’t require you to be a skilled video editor, because all of these options are easily accessible and they can be used in any project you are working on.
The iMovie’s audio editing options are equally impressive since the software enables you to add music, use built-in sound effects and record voiceovers. The video editor supports most of the popular file formats.
Advantages:
Free, and comes bundled with your Mac
Intuitive interface
Limitations:
This classic video editor for Apple’s devices doesn’t offer advanced video editing options such as motion tracking or keyframe marking.
Check how to use Windows Movie Maker here: iMovie User Guide
4. Final Cut Pro
Platform: macOS
Price: Paid, $299
Level: Professionals
Final Cut Pro is probably one of the highest praised video editing software ever created. It has been used to edit cinematic masterpieces such as ‘What happened Miss Simone’ or ‘The Girl With a Dragon Tattoo’, which speaks volumes about the software’s capability. Final Cut Pro’s Magnetic Timeline 2 is one of the kind, and it makes organizing large amounts of video and audio files look easy. Although the software’s price may seem discouraging, those who invested in it never had to use another video editor.
Features: A brief look at the list of Final Cut Pro’s video editing tools will leave you wondering if there is anything this software can’t do. Besides basic video editing features, the video editor is also equipped with 360 degrees VR video editing option, Multicam editing, and advanced color grading tools. Final Cut Pro allows its users to add as many audio tracks to the timeline as they want, thus enabling them to create impeccable soundtracks for their videos.
Advantages: Working with large numbers of video files is simplified by the software’s timeline, while options such as 3D titles or VR contribute to the strong impression this editor leaves on all of its users.
Limitations: Final Cut Pro has some lingering glitches that still haven’t been fixed, and its audio editing tool set lacks some important pieces.
If you are new to video editing and you will need a video maker that is tailored for beginners. In such case, you can read this article to get: Best Free Video Editing Software for Beginners >> They are really very easy to use. You can make a stunning video less than an hour.
5. Wondershare Filmii
Platform: Windows
Price: Free, Paid versions
Level: Beginners
This delicate video editing software is one of the best video editors for newbies. The free version of the software offers a lot of powerful video editing tools, but in order to get rid of the watermnark, you have to pay 9.99$ for its monthly plan. One of the advantages of Filmii is that it has a variety of video templates that can help beginners edit amazing videos with ease due to its auto-create functionality. Besides, its audio editing or creative tools are equally impressive.
6. Lightworks
Platform: Windows, macOS, Linux
Price: Free, Paid versions: $437.99
Level: Professionals
Lightworks is one of the best video editing software on this list with a long history in the movie-making business. The free version of the software is available, but it has limited export options. A $25 monthly subscription is required in order to gain access to all of the software’s features. Although it may be a somewhat pricey option, purchasing Lightworks is a profitable investment that may help you improve the quality of your videos.
Features: Both free and paid versions of this video editing suite offer support for wide range of video file formats. This can be very useful for video editors who often work on projects shot on different cameras. Multi-cam editing feature enables the software’s users to work with footage shot from separate angles, using more than just one camera. The videos edited with the free version of the software can only be exported to an MPEG4 file format with the maximum size of 1280X 790 pixels, and they must be uploaded to YouTube directly from the editor.
Advantages: Royalty-free media and a remarkable VFX panel make Lightworks a tempting option for professional and amateur video editors alike.
Limitations: The export options on the free version of the software are extremely limited and the software doesn’t provide much support for inexperienced users.
7. ShotCut
Platform: Windows, macOS, Linux
Price: Free
Level: Semi-Pros
If you need a video editing software just to piece together a few clips you recorded on the family vacation, then ShotCut may be a bit overwhelming choice for such a task. This open-source software is equipped with a rich collection of audio and video editing features, while it also offers support for nearly all video file formats. It is best suited for users in need of powerful video editing software who don’t want to spend a fortune on purchasing a professional editing suite.
Features: Screen capturing, webcam video recording or audio capturing options are all made available by ShotCut. The software’s video and audio editing features surpass all expectations and allow the software’s users to have complete creative control over their projects. Features such as Chroma Key, Crop or Blur are accompanied by a number of amazing video effects that can be used to enhance the colors in a video. Using ShotCut requires you to just download the software and run its executable file, which means that you don’t have to go through the installation process in order to start editing with this software.
Advantages: 4K videos, as well as numerous other video and audio file formats, are supported by this open-source video editing software. To make things even better ShotCut grants you access to fully customizable filters.
Limitations: The software doesn’t feature preset export profiles, and the transitions it offers are a bit scarce.
8. HitFilm Express
Platform: Windows, macOS
Price: Free
Level: Semi-Pros
This cross-platform video editor ranks among best video editing software products currently available on the market. Its secret lies in uniting visual effect compositing and video editing options under the same roof. HitFilm Express is aimed at users with an enviable amount of video editing experience, since inexperienced video editors may find the software’s interface difficult to navigate. This video editing suite offers a lot of video editing tools as well as visual and audio effect, that can be easily used to improve the quality of your videos.
Features: The rare combination of VFX compositing and video editing makes HitFilm Express unique, while its motion design and tracking options offer support for more complex video editing actions. The software supports 2D and 3D effects compositing, as well as 4K and 360-degree videos.
HitFilm Express’ titling options are at the basic level, while its Export options are alarmingly narrow. This free editing software doesn’t provide too many options for color adjustments, but its audio editing features can be used to create a video with a superior soundtrack.
Advantages: The software offers a wide spectrum of transitions and video effects and it supports most popular video file formats. HitFilm Express lets you use semi-professional video editing tools for free.
Limitations: In order to export a video from the software you must share a link on a social media platform and then download the file. People who are not familiar with the video editing process may find using HitFilm Express difficult.
9. Blender
Platform: Windows, macOS, Linux
Price: Free
Level: Professionals
Blender started out as an open-source project and over the years animators, scientists, VFX artists and numerous other people have participated in developing this 3D creation suite. The software can be used for modeling, animation, video editing or compositing, to mention only a few of its many purposes. Editing video footage isn’t Blender’s strong suit, but its video editing features are powerful enough to enable you to perform basic editing tasks. However, this doesn’t mean you can’t use this software to create videos that grab the viewer’s attention.
Features: Cutting or trimming videos, adjusting the video’s playback speed or adding keyframes to a video clip is an easy process in Blender. The software’s true strength lies in its animation, 3D modeling or motion tracking features. The latest version of Blender is equipped with a motion tracking option that allows you to import the footage into the software directly from a camera. You can utilize this feature to mask areas of the shot and see the movement on camera in a 3D environment.
Advantages: Blender’s price and its powerful features make it an interesting choice as your primary video editing software.
Limitations: You must have in-depth knowledge of animation, compositing, and 3D techniques in order to be able to use Blender.
10. Avidemux
Platform: Windows, macOS, Linux
Price: Free
Level: Beginners
This simple video editing software has all the tools you’ll ever need to quickly polish your videos. Its audio and video effects can be utilized to make your videos look and sound professionally, but Avidemux doesn’t offer much more than these basic video editing options.
The software provides support for most of popular video file formats, but its export options are far from perfect. Avidemux doesn’t feature visual effects or transitions, which significantly limits its video editing capabilities.
Features: Newcomers to the video editing world will love the software’s interface, because of its simplicity. The Transform feature allows you to fade in and fade out shots, crop or rotate video clips and even add logos to your videos. Blur or Sharpen effects enable users to enhance their videos, while contrast, brightness, saturation or hue values can be adjusted to make the colors in the video look more vivid. Avidemux also features the Subtitle option, but the software can only add hardcoded subtitles to videos.
Advantages: Solves all your basic video editing problems, and lets you have fun while editing videos. Avidemux also has solid encoding options and its interface is user-friendly.
Limitations: There are no video effects or transitions, which narrows down the software’s video editing options.
11. VideoPad Video Editor
Platform: Windows, macOS
Price: Free
Level: Beginners
VideoPad is one of the best entry-level cross-platform software products you can use for easy video editing tasks. The free version of the software is available to both Mac and PC users, although the Windows version limits the video exporting options to just two file formats. The VideoPad’s interface doesn’t take much time to get used to, and it perfectly adjusted to the needs of inexperienced video editors. Paid versions of the software are available to advanced editors who want to use VideoPad for more than just basic video editing.
Features: The list of video editing features VideoPad provides includes several pleasant surprises. The 4K video support, as well as 360-video editing features, are aimed at GoPro owners who want a quick and easy way to process their footage. The visual effects this free video editing software provides are impressive, while the Chroma Key option enables its users to create green screen videos. Even though VideoPad allows its users to edit audio files, its audio editing features are fairly modest.
Advantages: Learning how to use VideoPad is simplified by its intuitively designed interface.
Limitations: There are no advanced video editing options like multi-cam editing and motion tracking and certain features become unavailable when using the free version of the software over a longer period of time.
Download link: If you download the trial version instead of the free non-commercial home edition, or do not find a specific link to it on the website, you can trydownloading it from this link , or contact tech support , and they will send you a direct link.
12. OpenShot
Platform: Window, macOS, Linux
Price: Free
Level: Beginners
This award-winning open-source video editor offers a wide range of video editing tools that span from trimming and slicing to Slow Motion and Time effects. OpenShot is an excellent software for training and learning new video editing tricks, but it is best avoided if you are working on a large project. The software’s basic video editing features make it an excellent choice for users who only want to perform simple edits without having to waste too much time.
Features: OpenShot lets you add unlimited video and audio tracks to your projects, but its file management capabilities are far from impressive. The software allows you to trim or arrange the video files in any way you want, and it also provides a lot of different Transitions that can be used to make the videos look smoother. The collection of video and audio effects allows users to try out different solutions for the scenes in their video clips. OpenShot features a Vector Title Editor that can assist you in creating perfect opening titles or end credits.
Advantages: The interface of this open-source video editing software is designed to assist its users through every step of the video editing process. OpenShot is a great choice for all video editors who want to save money and use a powerful video editing software at the same time.
Limitations: More complex video editing options such as Rotoscoping, are not available. You may have to install add-ons if the OS you are using doesn’t meet the software’s system requirements.
13. Kdenlive
Platform: Windows, macOS, Linux
Price: Free
Level: Semi-pros
Almost two decades ago, this open-source project was started by Jason Wood in order to develop a video editing software for Linux OS. Over the years, a small team of developers has created Windows and MacOS versions of the editor that now have a loyal fan base. Even though the software’s features make it a reliable choice for more complex projects, Kdnelive can also be used to perform simple edits. This video editing software combines the simplicity of entry-level video editors with advanced video editing tools frequently used by experienced professionals.
Features: The functionality of this video editor will surprise even the greatest of skeptics. The software’s timeline lets you to add as many videos and audio files to your project as you want, making it a perfect tool for large-scale projects. The visual effects and transitions enable users to manipulate the footage in any way they see fit, while the extremely powerful analysis tools such as histograms, waveforms or vectorscopes enable them to monitor all the adjustments they make on their footage.
Advantages: Kdnlive provides support for nearly all input file formats that can be added easily to the software’s multitrack timeline. The free open-source add-ons can extend the video editor’s capability and thus enable you to perform a wider range of video editing actions.
Limitations: Even though the software provides the screencast recording option, it doesn’t feature the PIP effect. Multi frame-rate editing isn’t possible and software’s updates can last for hours.
14. Adobe Premiere Pro
Platform: Windows, macOS
Price: Paid, $19.99 per month
Level: Professionals
There are very few video editing suites that can offer as much to its users as Adobe Premiere Pro can. It is probably one of the best video editors ever created, as it has been setting the industry standards for a long time. High-end professionals frequently use Adobe Premiere Pro on their projects, while aspiring filmmakers strive to learn every option this unique video editor has to offer. The much-famed software isn’t the best choice for video editors who are just learning the basics of the trade, although it supplies a staggering amount of tutorials and learning materials.
Features: With each new version of Adobe Premiere Pro the list of the software’s features becomes longer. Its timeline is famous for its ease of use because it enables you to add as much new audio or video tracks as your project requires. This is arguably one of the best color correction software packages on the market, while its color grading features are no less impressive. Adobe Premiere Pro provides support for a wide range of video file formats including 4K, HDR, and 360 VR videos.
Advantages: Perfect for collaborative projects that involve large teams of experienced professionals. The software is at its best when used with other Adobe’s products that enable you to develop projects beyond the boundaries set by the Adobe Premiere Pro’s limitations.
Limitations: You cannot purchase the lifetime license to use this video editing software, and paying monthly subscriptions may be hard on the budget of some of its potential users.
15. Magix Vegas Pro
Platform: Windows
**Price:**Paid: $399
Level: Professionals
Successful independent artists, film producers, and all other film and video enthusiasts can only benefit from purchasing this video editing suite. The software belonged to Sony Creative Software for much of its history, but on May 20. 2016 the company sold it to Magix. Previously known as Vegas Pro or just Vegas, this video editing software is widely accepted as one of the best professional video editing tools ever created. There is virtually no video editing task that cannot be completed in Magix Vegas Pro video editing software.
Features: This video editor is designed to provide support to its users from the beginning until the very end of the video editing process. Magix Vegas Pro recognizes almost all video file formats, even those captured with professional RED or ARRI Alexa cameras. You can use this software to edit 3D or 4K videos, while the Multicamera-Editing feature lets you switch between any number of video sources with a single mouse click. Effects such as Automatic Crossfades allow you to create transitions between shots effortlessly.
Advantages: The seemingly unlimited amount of learning resources makes editing with Magix Vegas Pro a lot easier and it enables less experienced video editors to learn new tricks.
Limitations: There aren’t as many visual effects as you would hope for and the software’s interface isn’t aesthetically pleasing, but it is very functional.
16. Adobe Premiere Elements
Platform: Windows, macOS
**Price:**Paid: $99.99
Level: Semi-pros
Although it is often regarded as a simplified version of Premiere Pro, this video editing suite offers enough video editing tools to edit videos at the semi-professional level. Adobe Premiere Elements contains automated versions of Premiere Pro’s features and in this manner it enables its users to utilize professional video editing tools on their prosumer level projects. Even though this Adobe’s software product lacks the power of professional video editing software packages, it still offers enough video editing tools for the production of nicely polished and well-rounded videos.
Features: Adobe Premiere Elements recognizes all popular video file formats, and it offers support for 4K content. In addition to its remarkable file format compatibility, the video editor also features 3D editing and face detection options that can be very useful when working on more complex video projects. The haze-removal effect is extremely efficient at reducing the fog or cigarette smoke in a shot, while the motion titles let you create visually impressive opening titles or end credits. The Adobe Premiere Elements has performed exceptionally well when rendering large video files.
Advantages: The software’s Guided mode provides support to its users and helps them learn how to perform all video editing actions. The asset management tool offers assistance with the organization of large amounts of video and audio files.
Limitations: When compared to other video editors in this guide Adobe Premiere Elements’ device and social media optimization features seem to be in short supply.
17. CyberLink PowerDirector
Platform: Windows, macOS
**Price:**Free trial, Paid version: $69,99 - $129,99
Level: Semi-pros
This is probably one of the best and most popular video editing software packages aimed at amateur and semi-professional users. There are several versions of the software available, and each of them contains a different amount of options and video editing tools. Even with somewhat reduced capability, the least expensive version of the editor supports 360-degree as well as VR options for posting on social media such as Vimeo, Facebook or YouTube. CyberLink PowerDirector isn’t a professional video editing software, but it still offers a lot of extraordinary options that can take you a step closer to producing a professional video.
Features: The 360-degree video editing options are probably the first thing that catches the eye when you look at the list of features the software provides, but its true power lies in its color tools. LUTs, HDR effects or Split Toning options are just the tip of the iceberg since PowerDirector offers countless tools for fine-tuning of the colors in your videos. Animated PIP effects and video collages make this video editing software a perfect choice for the production of tutorials and all other types of online videos.
Advantages: The audio editing options provided by CyberLink PowerDirector are nothing short of amazing since they enable the software’s users to manipulate the audio files in any way they see fit.
Limitations: Motion tracking and color lookup features are not always reliable. The software is a bit overpriced when compared with similar video editing suits.
18. Magix Movie Video Easy
Platform: Windows
Price: Free trial, Paid version: $49,99
Level: Semi-pros
This video editor is a great choice for people who have never edited a video before and who want to learn how to perform basic video editing tasks. Video Easy’s intuitive user interface can be mastered by anyone with enough determination to edit videos with this software on a constant basis. Features this editor offers may not be as impressive as to ones provided by professional video editing suites, but they are powerful enough to produce clean edits that give your videos a professional look.
Features: If you choose to make Magix Movie Video Easy your primary video editing software, you will never have to worry about what type of camera you used to record your videos since the software is compatible with all standard camcorders, digital cameras, and Smartphones. The rich collection of transitions and effects, as well as the intro and outro animations, can all be used to create amazing videos. You can export videos to DVDs, Blu-Ray discs or YouTube directly from the software.
Advantages: If you are looking for a video editor that will enable you to add music to your videos, trim or cut videos quickly and choose from hundreds of effects, then you should look no further because Magix Movie Video Easy provides all of these options, and much more.
Limitations: Doesn’t perform well when used for demanding video editing tasks.
19. Magix Video Pro
Platform: Windows, macOS
Price: Free trial, Paid version: $62,99
Level: Beginners
Magix has been the largest European video editing software manufacturer for more than two decades. Its software products may not enjoy the fame of Adobe’s video editing software packages, but this doesn’t mean that a video editor such as Magix Video Pro cannot be used for the production of professional-looking videos. Besides offering basic video editing tools this video editor also features advanced video editing options such as Stop Motion animation or 360-degree video editing. Magix Video Pro is often labeled as ‘one of the best video editing programs out there’.
Features: Audio editing features that come with this video editor include an audio mixer that enables you to reduce noise levels, control the low, mid and high sounds or simply equalize the sound volume across the entire project. The video editing tools supplied by the Magix Video Pro are as impressive as its audio editing options. Lens correction features, Split screen videos or 360-degree video editing options reveal only a fraction of the software’s capabilities. Magix Video Pro delivers professional video editing features to consumer-level users.
Advantages: The software allows you to place any type of media file on its timeline and use it in your project.
Limitations: The effects library installation process can be time-consuming, although it is well worth the wait.
Part II: Best Video Making Editors Online
20. YouTube
Platform: Online
Price: Free
Level: Beginners
The world’s largest video sharing platform also offers basic video editing services. Although Google has discontinued its built-in video editor, it still allows tts users to trim or rotate videos, apply filters or even create time-lapse and slow-motion videos on line. Brightness, contrast or saturation levels can be altered if you want to enhance the colors in your videos. Audio editing features are limited because the platform only allows you to add a single audio file to a project you’re working on. However, some of the most important video editing features like adding the text or creating titles are not available.
Advantages: Allows you to polish your videos before posting them on YouTube for free.
Cons: This online video editor lacks some basic video editing tools such as transitions or audio controls.
21. Online Video Cutter
Platform: Online
Price: Free
Level: Beginners
If you were looking for a web app that contains all the tools required to cut a small video file, then Online Video Cutter is one of your best options. You won’t even have to create an account before you start the video editing process. The videos you upload to this online editor can’t exceed the 500 MB size limit. Besides cutting their videos, users of this editor can also rotate or trim their footage for free. Online Video Cutter provides support for nearly all video file formats, so you don’t have to worry about the file format in which your video was captured.
Advantages: Offers a quick way to trim videos online and it is exceptionally easy to use.
Limitations: Lacks even the most basic video editing features other than cutting, trimming and rotating videos.
22. Movie Maker Online
Platform: Online
Price: Free
Level: Beginners
This free online editing tool lets you process videos without even registering or creating an account. You can add videos, photos, text, and music into a single project and mix them together into an awesome video. The platform grants you access to its rich filter library, and it also allows you to add text overlays, fade audio and video files or create smooth transitions between shots. Movie Maker Online features its own collection of royalty free music and photos you can use to make your videos look and sound better. The webpage’s design is a little odd, and it may take some time to get used to it.
Advantages: The app offers a lot of different video editing tools and it allows you to perform all basic video editing actions online.
Limitations: Movie Maker Online is funded by ads, and requires you to disable your AdBlock app before you can start editing a video.
23. ClipChamp
Platform: Online
Price: Free trial, Paid: $7 per month
Level: Beginners
ClipChamp lets you upload videos you already recorded or capture new footage using your computer’s webcam. The free version of this web app allows you to export in 1080p video files, but you can’t produce more than five videos in a single month. Both versions of the online video editor require you to create an account, and the videos exported from the free version of the app don’t have a watermark. ClipChamp provides numerous video editing tools, including transition, color adjustments or cropping. The exporting process doesn’t last too long and you can choose whether you want to share the video on social media or download it to your computer.
Advantages: Makes creating webcam videos as well as editing preexisting footage look easy while providing excellent export options.
Limitations: The free version of ClipChamp allows you export only five videos in a month.
24. WeVideo
Platform: Online
Price: Freemium
Level: Beginners
The capabilities of WeVideo online video editor surpass the basic level of video editing. The platform offers support for iOS and Android devices as well as desktop computers. Producing square or horizontal videos, creating motion titles or publishing videos in 720p HD resolution are just a few amazing options this online video editor provides. The paid versions of the web app are best suited for skilled video editing professionals or large teams that are working on demanding projects. WeVideo’s free version doesn’t allow its users to publish more than 30 minutes of video content each month and each exported video contains a watermark.
Advantages: Produces videos with great picture quality and offers tons of advanced video editing options.
Limitations: Creating an account is mandatory even for video editors who want to use the free version of WeVideo.
25. Kizoa
Platform: Online
Price: Freemium
Level: Beginners
Kizoa offers a broad spectrum of transitions, visual effects, animation and text effects to its users for free. The video editing platform is frequently used to create goofy short videos that can be easily shared on Facebook or Twitter. The app allows you to add photos to your video projects and it grants you access to an incredibly rich royalty free music collection. However, you will have to create an account on Kizoa in order to be able to export the videos you created. The editor’s timeline is rudimentary, but still functional enough to enable users to combine audio, video, and photo files.
Advantages: Kizoa is a powerful tool for the creation of entertaining social media videos.
Limitations: You must create an account in order to be able to export your projects, and the online video editor doesn’t feature any advanced video editing options.
26. Wideo
Platform: Online
Price: Freemium
Level: Beginners
All video enthusiasts can use Wideo platform to edit their videos, regardless of their skill level. In addition to amazing video editing options, this online video editor also features animations that can be used to create professional presentations. All video content uploaded to Wideo is stored on the cloud, and pricing plans for professionals include unlimited storage space. The Basic version of the editor allows for just ten downloads in a month and it doesn’t let its users upload videos to YouTube. Even though this video editor is easy to use, it is better suited for skilled professionals than it is for inexperienced video editors.
Advantages: Even the Basic pricing plan enables users to export HD videos, while Professional and Enterprise pricing plans include the Full HD export option.
Limitations: Limited audio editing options significantly reduce the capabilities of this online video editing platform.
Read More to Get: 10 Best Free Online Video Editors With No Watermark >>
Part III: Best Video APP for iOS/Android
27. Filmora
Platform: iOS, Andoird
Price: Freemium
Level: Beginners
You can edit your videos with Filmora in just three simple steps. All you have to do is choose the videos and photos from your phone’s gallery, Instagram or Facebook account, select a theme, insert transitions or add a song and share the video directly from the app on social media or to your email address. Besides the powerful video editing features, this app for iOS and Android devices also allows you to set your video’s aspect ratio to Square 1:1 if you would like to share the clip on Instagram or Cinema 16:9 if the video is shared to YouTube.
Advantages: Supports HD export options and provides a diverse set of video editing options.
Limitations: The app can’t perform advanced video editing tasks.
28. Vlogit
Platform: iOS, Android
Price: Free
Level: Beginners
The Wondershare’s video editing app for Android and iOS devices is designed to offer assistance to YouTubers and Vloggers who want to edit their videos directly from their Smartphones. Vlogit is equipped with video editing tools that enable you to cut, trim or rotate videos, while its sound editing features include recording voiceovers, adding sound effects or choosing the music you want to use as a soundtrack to your video. The app lets you combine photos and videos within the same project, and it also enables you to create customized openers from animated templates. The videos created and exported with the Vlogit app don’t contain watermarks.
Advantages: Offers powerful video editing features to YouTubers and Vloggers who want to edit their videos from their Smartphones for free.
Limitations: The list of visual effects the app provides could be longer.
29. VideoShop
Platform: iOS, Android
Price: Freemium
Level: Beginners
The extensive list of features VideoShop app offers makes it one of the best options for novice video editors who want to quickly create visually impressive videos. This video editing app allows you to work with multiple video files or merge them into a single video. The animated titles enable users of the VideoShop app to create professional-looking intros for their videos, while the transitions feature allows them to seamlessly piece together all shots featured in a project. Tilt-Shift and Stop Motion options are also available to video editors who want to make their videos look more professional.
Advantages: Fun and easy to use video editing app that lets you manipulate footage in any way you want.
Limitations: VideoShop contains ads, and the app’s version for iOS devices only supports videos recorded with iPhones and iPads.
30. Filmmaker Pro
Platform: iOS
Price: Freemium, $5,99 monthly subscription
Level: Semi-pros
iPhone videographers who need access to semi-professional video editing tools will certainly enjoy using this app. Filmmaker Pro offers support for 4K footage filmed on the latest models of iPhone and it enables its users to add an unlimited number of text overlays, video clips, voiceovers or audio tracks to the app’s timeline. The video editor grants you access to over 30 filters, video grading features, as well as Chroma Key and Ken Burns effects. In addition to impressive video and audio editing features, Filmmaker Pro’s users can also record videos with a camera that lets them adjust settings manually directly from the app, although this option must be paid for.
Advantages: Text overlays, audio editing features and the ability to select the aspect ratio for each video you edit with this app, make it one of the best video editing options for iOS devices.
Limitations: Nearly all of the app’s best features must be purchased.
31. KineMaster
Platform: iOS, Android
Price: Freemium, contains adds
Level: Semi-pros
This cross-platform video editor is one of the premier options for mobile video editing on both iOS and Android devices. KineMaster is currently the only app that enables Android Smartphone owners to add as many layers of videos, photos, and text to their projects as they want. However, it only supports a limited number of video file formats, which means that the app shouldn’t be used to edit videos that weren’t recorded on an iPhone or Android phone. KineMaster provides a wide range of video exporting options and allows you to share videos on popular social media networks.
Pros: Above average video and audio editing features.
Limitations: Offers a lot of options mobile video editors seldom use.
32. LumaFusion
Platform: iOS
Price: Paid, $29.99
Level: Semi-pros
Creating neatly organized projects with LumaFusion is a simple task because the app features a powerful Project Manager that lets you sort files or select aspect ratios for your videos. In addition, the Media Library lets you import all types of files from a cloud storage or drag and drop media from other apps. Producing slow-motion videos that have 120 or 240fps or creating green screen videos using the Chroma Key effect is easy with LumaFusion. The app’s audio editing features are as impressive as its video editing tools since they provide the complete control over the audio files to the video editor’s users.
Advantages: Color correction options, LUTs or numerous visual effects are all part of the reason why LumaFusion is one of the best apps for mobile video editing.
Limitations: Only available for iOS devices.
33. Vizzywig 2019 4K Video Editor
Platform: iOS
Price: Paid, $79.99
Level: Semi-pros
This award-winning app for iOS devices provides all the tools a skilled video editor could desire. Its features include support for 4K videos, wide selection of aspect ratios as well as stylish intros, end credits, and titles. Besides offering professional video editing tools, Vizzywig also features Multi-Camera recording options that can capture videos in 8K resolution. In addition, the app is capable of producing videos that have eight times more pixels than the Apple’s Facetime HD Camera. The non-linear timeline lets you arrange video clips in any way you see fit, and allows you to add multiple media files to each project you are working on.
Advantages: Lets you control the focus and exposure manually and produce videos with stunning picture quality.
Limitations: Single platform compatibility and a high price narrow down the number of the app’s potential users.
34. PowerDirector
Platform: Android
Price: Freemium, contains ads and in-app purchases
Level: Beginners
Unlike the Adobe’s app for mobile video editing, PowerDirector lives up to all expectations. This user-friendly app lets you create reverse, 4K, or green screen videos. To make things even better, you can easily apply visual and audio effects or add voiceovers to your projects. In addition to the video editor, the PowerDirector app is also equipped with a powerful photo editor that lets you manipulate images in a professional manner. You can use almost any type of video or audio file in this app because it provides support for all commonly used file formats.
Advantages: PowerDirector is designed to help its users polish their video quickly and effortlessly.
Limitations: Videos in 1080p and 4K resolutions can only be exported after you’ve made an in-app purchase.
Ooops…It looks like there isn’t any tool that matches your demand. Please give it another try.
Which Video Editor Do You Think Is Best for You?
Thank you to read this so far. It’s a long but the most comprehensive reviews ever for all hot video editing software compatible with Windows, Mac, iOS, Android and Linux, as well as online video editors. I hope you find the tools that you like.
If you want to get quick selections without too much reading, here is my recommendation:
- Best video editor for Windows and Mac to download: Filmora
- Best video editing software for Linux to download: Lightworks
- Best video editor for Android, iOS to download: Filmora , VideoShop
- Best online video editor to use: WeVideo
If you still can’t find a one Or we missed one of the tools you think which deserves to be listed above?
Either way, let us know by leaving a comment below.
Ollie Mattison
Ollie Mattison is a writer and a lover of all things video.
Follow @Ollie Mattison
Cut Video Clips Online: A Step-by-Step Guide to Kapwing Editor
Create High-Quality Video - Wondershare Filmora
An easy and powerful YouTube video editor
Numerous video and audio effects to choose from
Detailed tutorials provided by the official channel
When you make a video, you’re competing for people’s attention. Trimming videos is a fundamental element of editing. Strategic video trimming with Kapwing Trimmer allows you to cut out anything unnecessary, leaving you with the content your audience desires. Many people also use this tool to trim the end or beginning of their videos to help them get the attention they deserve. We’ll explain how to trim videos with the Kapwing Trim online tool.
In this article
02 How to Trim a Video with Kapwing
03 Extra Information About Kapwing Editor
What Is Kapwing Editor?
Kapwing is an online GIF, video, and image editing platform designed to enable digital storytelling. This online tool helps you trim videos and add subtitles. It’s user-friendly, and anyone with an idea of video production can use it. You do not need tutorials or software download to start using this tool; you only need efficient creativity, as you can edit a video as much as your creativity will allow you.
The selling point for Kapwing is how easy you can use the online editing tool, making it suitable for both professional and amateur video producers. For this reason, the popularity of Kapwing Video Trimmer has grown 10x, with over 1 million people using this editing tool.
With Kapwing editor, you can filter, trim, resize, and loop videos. The tool also allows you to add audio to your video and sync it with the video. What’s more? You can convert images to videos and watermark them.
Having multiple templates and tools makes things easy, and this will help you make professional-like videos that people will think you used high-end software.
How to Trim a Video with Kapwing
To start using Kapwing Video Trim, you need to follow the steps below:
Step 1
Visit Kapwing.com with your browser using your tablet, smartphone, or computer.Hit the Start Editing button to enter the Studio; no need to create an account.

Step 2
You have several options to upload your video from the web or your device. The Upload button allows you to upload videos from your system.

Step 3
You can also drag and drop the file onto the workspace or the Studio canvas. Alternatively, you can copy and paste the URL of your video from sites GIPHY, Google Drive, or YouTube and import it directly.
Once you have uploaded your video, you can start using Kapwing Video Trimmer to trim unnecessary content or make it shorter.
Step 4
A box will pop up at the bottom of the screen; this is referred to as the Timeline, and it’s where the different pieces you’re adding to the video will appear, including images layers, text layers, and video clips.

Step 5
Your video plays from the left side to the right side. The Play icon allows you to play the video and preview your project. Use the seeker to go to any point of your video that you want to see how it will look like.

Step 6
If you want more precision while editing individual video clips in the Timeline, use the Zoom In and Zoom out buttons to see a more precise view.

Step 7
To trim the video, click the Trim button.

Click and drag the ends of your video to adjust the end and start times of the video layer. Anything that you remove won’t be in the final video.

If you have more layers on your project, click and select the layer you would like to trim.
Step 8
You can also use the Timing tab to trim your video. To do this, click your clip and head over to the top right side of your screen.

You can now specify the exact time you would like the video to start and end instead of using the clicking and dragging method.

Clicking the numerals will allow you to use the up and down arrow keys and trim the video to start and end where you have specified.
You can also use the seeker to set the time where you would like the video to start and end, and then go to the numerals and click set to the current time.
Kapwing Video Trimmer will create a huge gap when you select this option. You’ll see a blank white canvas until the video starts.
You can leave this white space and add other clips or remove it so that your video starts at zero by clicking it and hitting the Delete key on your keyboard.
Step 9
Once you have finished trimming your video with Video Trimmer Kapwing, click the Export Video button.

You’ll have to sign in to remove the watermark. Click the Download button to download the trimmed video to your device.
Extra Information About Kapwing Editor
Now that you know how to trim videos with Kapwing Video Trimmer let’s look at five things about this online editing tool that you need to know.
1. You Can Cut and Split Parts of Your Videos
With the Kapwing Video Editing tool, you can cut out the middle of your video clip by using the split key. You only need to drag the seeker to where you would like to cut out, then click the Split button. Doing this will turn the original video clip into two clips that you drag to trim down any part that you do not want to appear in your video.

2. How to Collaborate With Kapwing
Kapwing allows you to work as a group remotely and in real-time while accessing each other’s files. The tool is also ideal for teams, outsourced workers, and virtual assistants. All you have to do is invite your peers or colleagues to a Workspace, and Kaping will allow you to work together on GIF, video, and image edits.
To share your Kapwing Workspace to collaborate with other users without giving them your log-in information, follow the steps below.
- Simply go to the folder you would like to share and hit the Share button.
- You’ll then have to type in the email address of the person you want to share the folder with.
- Once you have done this, click the Send Invite button to copy and send a link to an invitation to your folder.
Your collaborator needs to open the email with the link and click Join Now. They’ll also have to create an account by linking their Facebook or Google account and then accept the invite again once they have signed in.
3. You Can Add Audio and Text to Your Video
Kapwing editor allows you to add audio and text using two methods: subtitles and text boxes. Use single text boxes for information, names, titles, and labels. To do this, hit the Text button located in the upper toolbar, then enter the text you want into the box.
All the text editing options will appear on the right, including angle, position, style, outline, color, and font. The Anime tab allows you to add up to 10 different animations to the text box. Additionally, you can add subtitles to your videos if you want your audience to follow along while listening to the spoken words in the video.
4. Share Your Videos With Others
After creating your video project, you can share it with others from the download page. You can share your video directly on Instagram. Twitter, and Facebook. You can also copy the video’s link and then send it to anyone you want, and they will be able to view it.
Desktop solution for video trimming - Filmora
Filmora is also a video editing tool that allows you to create HD videos. The software lets you crop, trim, merge, and rotate videos. This simple-to-use tool empowers your stories by making your videos eyecatching to attract more viewers. You can also adjust contrast, brightness, temperature, saturation, and tint.
Moreover, you can remove background and apply effects. Filmora has tons of effects on its Effects library that you can just drag and drop onto your video clip after placing it on the timeline.
The 4K editing support feature allows you to edit and export your videos at 4K resolution. You can also adjust the dynamic range and white balance of your videos.
Conclusion
● Kapwing Trimmer allows you to trim videos and remove unwanted scenes and let you start the videos where you want them to begin. The best part is: After you have finished working on your videos, the platform allows you to share them with other websites. Use Filmora to edit your videos and enhance their quality.
When you make a video, you’re competing for people’s attention. Trimming videos is a fundamental element of editing. Strategic video trimming with Kapwing Trimmer allows you to cut out anything unnecessary, leaving you with the content your audience desires. Many people also use this tool to trim the end or beginning of their videos to help them get the attention they deserve. We’ll explain how to trim videos with the Kapwing Trim online tool.
In this article
02 How to Trim a Video with Kapwing
03 Extra Information About Kapwing Editor
What Is Kapwing Editor?
Kapwing is an online GIF, video, and image editing platform designed to enable digital storytelling. This online tool helps you trim videos and add subtitles. It’s user-friendly, and anyone with an idea of video production can use it. You do not need tutorials or software download to start using this tool; you only need efficient creativity, as you can edit a video as much as your creativity will allow you.
The selling point for Kapwing is how easy you can use the online editing tool, making it suitable for both professional and amateur video producers. For this reason, the popularity of Kapwing Video Trimmer has grown 10x, with over 1 million people using this editing tool.
With Kapwing editor, you can filter, trim, resize, and loop videos. The tool also allows you to add audio to your video and sync it with the video. What’s more? You can convert images to videos and watermark them.
Having multiple templates and tools makes things easy, and this will help you make professional-like videos that people will think you used high-end software.
How to Trim a Video with Kapwing
To start using Kapwing Video Trim, you need to follow the steps below:
Step 1
Visit Kapwing.com with your browser using your tablet, smartphone, or computer.Hit the Start Editing button to enter the Studio; no need to create an account.
Step 2
You have several options to upload your video from the web or your device. The Upload button allows you to upload videos from your system.
Step 3
You can also drag and drop the file onto the workspace or the Studio canvas. Alternatively, you can copy and paste the URL of your video from sites GIPHY, Google Drive, or YouTube and import it directly.
Once you have uploaded your video, you can start using Kapwing Video Trimmer to trim unnecessary content or make it shorter.
Step 4
A box will pop up at the bottom of the screen; this is referred to as the Timeline, and it’s where the different pieces you’re adding to the video will appear, including images layers, text layers, and video clips.
Step 5
Your video plays from the left side to the right side. The Play icon allows you to play the video and preview your project. Use the seeker to go to any point of your video that you want to see how it will look like.
Step 6
If you want more precision while editing individual video clips in the Timeline, use the Zoom In and Zoom out buttons to see a more precise view.
Step 7
To trim the video, click the Trim button.
Click and drag the ends of your video to adjust the end and start times of the video layer. Anything that you remove won’t be in the final video.
If you have more layers on your project, click and select the layer you would like to trim.
Step 8
You can also use the Timing tab to trim your video. To do this, click your clip and head over to the top right side of your screen.
You can now specify the exact time you would like the video to start and end instead of using the clicking and dragging method.
Clicking the numerals will allow you to use the up and down arrow keys and trim the video to start and end where you have specified.
You can also use the seeker to set the time where you would like the video to start and end, and then go to the numerals and click set to the current time.
Kapwing Video Trimmer will create a huge gap when you select this option. You’ll see a blank white canvas until the video starts.
You can leave this white space and add other clips or remove it so that your video starts at zero by clicking it and hitting the Delete key on your keyboard.
Step 9
Once you have finished trimming your video with Video Trimmer Kapwing, click the Export Video button.
You’ll have to sign in to remove the watermark. Click the Download button to download the trimmed video to your device.
Extra Information About Kapwing Editor
Now that you know how to trim videos with Kapwing Video Trimmer let’s look at five things about this online editing tool that you need to know.
1. You Can Cut and Split Parts of Your Videos
With the Kapwing Video Editing tool, you can cut out the middle of your video clip by using the split key. You only need to drag the seeker to where you would like to cut out, then click the Split button. Doing this will turn the original video clip into two clips that you drag to trim down any part that you do not want to appear in your video.
2. How to Collaborate With Kapwing
Kapwing allows you to work as a group remotely and in real-time while accessing each other’s files. The tool is also ideal for teams, outsourced workers, and virtual assistants. All you have to do is invite your peers or colleagues to a Workspace, and Kaping will allow you to work together on GIF, video, and image edits.
To share your Kapwing Workspace to collaborate with other users without giving them your log-in information, follow the steps below.
- Simply go to the folder you would like to share and hit the Share button.
- You’ll then have to type in the email address of the person you want to share the folder with.
- Once you have done this, click the Send Invite button to copy and send a link to an invitation to your folder.
Your collaborator needs to open the email with the link and click Join Now. They’ll also have to create an account by linking their Facebook or Google account and then accept the invite again once they have signed in.
3. You Can Add Audio and Text to Your Video
Kapwing editor allows you to add audio and text using two methods: subtitles and text boxes. Use single text boxes for information, names, titles, and labels. To do this, hit the Text button located in the upper toolbar, then enter the text you want into the box.
All the text editing options will appear on the right, including angle, position, style, outline, color, and font. The Anime tab allows you to add up to 10 different animations to the text box. Additionally, you can add subtitles to your videos if you want your audience to follow along while listening to the spoken words in the video.
4. Share Your Videos With Others
After creating your video project, you can share it with others from the download page. You can share your video directly on Instagram. Twitter, and Facebook. You can also copy the video’s link and then send it to anyone you want, and they will be able to view it.
Desktop solution for video trimming - Filmora
Filmora is also a video editing tool that allows you to create HD videos. The software lets you crop, trim, merge, and rotate videos. This simple-to-use tool empowers your stories by making your videos eyecatching to attract more viewers. You can also adjust contrast, brightness, temperature, saturation, and tint.
Moreover, you can remove background and apply effects. Filmora has tons of effects on its Effects library that you can just drag and drop onto your video clip after placing it on the timeline.
The 4K editing support feature allows you to edit and export your videos at 4K resolution. You can also adjust the dynamic range and white balance of your videos.
Conclusion
● Kapwing Trimmer allows you to trim videos and remove unwanted scenes and let you start the videos where you want them to begin. The best part is: After you have finished working on your videos, the platform allows you to share them with other websites. Use Filmora to edit your videos and enhance their quality.
How to Download Windows Movie Maker: A Beginner’s Guide
Microsoft produced the movie editing software known as Windows Movie Maker. You can download Movie Maker Windows 10 or even in previous versions. This application can combine video, sound, still photos, and transcripts to make a customized movie. Its functions are simple to use and enjoyable to explore with, and its XML code enables users to create new transitions and effects or change current ones. It’s also simple to upload finished Windows Movie Maker productions to video and social media platforms.
This guide explains everything you need to know about downloading windows movie maker. You can choose to use windows movie maker installation guide as well. With this Windows Movie Maker, you can choose from five different thumb sizes, which is probably plenty, and you can enlarge these clip representations using the zoom button at the bottom. Using the cursor insertion point and edit buttons, you can cut or divide clips. Once you’re used to the app’s distinct editing method, it becomes pretty simple.
Part 1. System Requirements for Windows Movie Maker
Beginners should use Windows Video Maker. Along with fundamental capabilities and workflow components seen in professional video editing systems, it is available for free on Windows PCs. Even inexperienced editors may understand it because to its simple chronology in the form of an understandable interface. Windows Movie Maker allows you to create your own movies. Create professional movies from your still and moving images. To aid in telling your tale, use transitions, sound, subtitles, and special effects.
| Requirements | Compatibility of Windows Movie Maker |
|---|---|
| Support System | Windows Vista, Windows 7, Windows 8, Windows 8.1, and Windows 10 are all versions of Microsoft Windows. |
| Processor | 1GHz Intel/AMD processor or above such as an Intel Pentium III, Advanced Micro Devices (AMD) Athlon, or equivalent processor |
| For Audio | An audio capture device to capture audio from external sources |
| Hardware Memory | 300MB space for installation |
| Graphics Card | Super VGA (800x600) resolution graphics card with at least a 16-bit graphics card |
| Other Requirements | 256MB RAM (512MB or above recommended) |
Part 2. Download and install Windows Movie Maker Windows 10
Anyone who wants to easily modify movies should use Movie Maker. The program offers every fundamental feature you need to create edited videos. Effects, transitions, titles and credits, audio track, timeline narration, and Auto Movie are just a few of the features available in Windows Movie Maker. XML code may be used to create new effects and transitions as well as modify already existing ones. An easy-to-use tool for altering audio tracks is Windows Movie Maker. To audio tracks, Windows Movie Maker can add simple effects like fade-in and fade-out.
Steps to Download and Install Windows Movie Maker on Win 10
Step1 Download the File
You may download Windows Movie Maker to produce videos from photographs. Transitions, a soundtrack, title and credit text, among other things, are simple to add to your video. Complete the necessary file downloads by clicking on the download button(s) below. Depending on your download speed, this might take anything from a few minutes to many hours.
Step2 Run the Downloaded program File
The installation launch screen is given in the following image. To install the program, run “setup.exe” by double-clicking the downloaded setup file that you previously downloaded.

Step3 Set Personalized Installation
Follow the instructions to install Windows Movie Maker. .Net framework is a required for Windows Movie Maker. Launch the Windows Movie Maker Installer program to install Windows Movie Maker on Windows 10.

Step4 Hit Install Button
Press the “Install” button after selecting Messenger, Photo Gallery, and Movie Maker as the apps to be installed. You can now access Windows Movie Maker.

Naturally, Microsoft also offered new video editing tools for Windows users once they ceased upgrading Windows Movie Maker. The complete version of Windows Movie Maker 2022 is now installed on your Windows 10 OS computer without any restrictions.
Part 3. Download and Install Windows Movie Maker Windows 7/8
Windows Movie Maker is a user-friendly and effective movie creation and editing software program created for the most recent versions of Windows 11 and Windows 7/8/10. Windows XP and Vista are compatible with the previous version. Only the Essentials package, a free collection of lifestyle and utility software for Windows 7 and Windows 8, which also contains Windows Photo Gallery, allows you to install Movie Maker. The single installer for all the Essentials applications gives you the choice to install all of them at once or just some of them.
Steps to Download and Install Windows Movie Maker on Win 7/8
Step1 Download the Installer
Start downloading Windows Live Essentials Movie Maker 12 by clicking on one of the links below. Windows Live Essentials Movie Maker has a standalone, complete offline installation available here. Windows XP, Vista, 7, 8, 8.1, and 64-bit versions of Windows are all supported by this offline installation solution for Windows Movie Maker.
Download Installer
Step2 Open and Customize the File
Access the “Patch” folder. Apply the fix by running “windows.movie.maker-patch.exe”. Although Windows Essentials installation is requested by the Windows Movie Maker installer, it is not required. You may click “Choose the programs you wish to install” instead to bypass it. You may now view your selections. We just need the picture gallery and the movie creator, so uncheck the boxes next to Writer, Messenger, and Mail. Click the “Choose the apps you wish to install” button after that.
Step3 Hit Install Button
Following this, the installation of Windows Movie Maker will begin when you click the install button. The installation is finished in a short while. After a successful installation, Windows Movie Maker can be added to your taskbar and a desktop shortcut can be made.

Step4 Launch the Editor
Free video editing software with a simple UI is called Windows Movie Maker. Click the provided download button to start the Windows movie maker download. The Windows Movie Maker utility download is completely secure and virus-free.

Part 4. Best Windows Movie Maker Alternative to Use
While there are now several excellent video editors available on the market, we will here suggest Filmora by Wondershare as the best replacement for Windows Movie Maker. Filmora is an extremely user-friendly video editor in terms of UI. It offers a simple user interface that even beginners may quickly grasp. By holding the mouse over any clip in the Media view, you can navigate through it thanks to a handy UX touch.
You may download Filmora for free on your computer running Windows 10 or Windows 11 and it is a very user-friendly movie editor. For novices who want to create explainer videos, training videos, demo videos, and more rapidly, Filmora is a simple yet advanced feature-packed tool. The great video templates make screen recording more alluring. You can make use of annotation tools like callouts, arrows, and drawing gestures to attract attention to essential information. Its structure is quite straightforward and easy to understand since it utilizes the timeline as the editing UI.
How to Edit Videos with Filmora:
Free Download For Win 7 or later(64-bit)
Free Download For macOS 10.14 or later
Step1 Install Filmora on your Windows PC
You must to download and install Wondershare Filmora on your computer before using it. This TV recorder on the fly may be used for your requirements. You can find every version of the Filmora software, including Windows and Mac versions, as well as the most current version.
You can now install it on your computer once you’ve done downloading it before you can use it with your laptop. It will bring you to the user-friendly UI of Filmora, where you may use the documentation function right away, as illustrated in the following figure:

Step2 Import the Content
A significant component of managing your raw footages is the Media library. All of the imported material, including the images, audio files, and movies, are now kept in Import Window. The media files are also included in the Music, Pictures, and Videos sections. This top free video editing program has new built-in sound tracks to simplify your job. As the video backdrop music, you can either choose the built-in music or local audio files.

Step3 Create the Movies
Finally, you may edit your audio recordings using tools that are completely customizable. Use the editor in Filmora to edit your recorded audio files, using simple to advanced editing techniques. Your recorded video can be improved using Filmora’s Editor by adding animated titles, spectacular effects, audio enhancements, and more.

Step4 Add Special Effects to Your Video
Wondershare Filmora was created primarily to give your films a polished appearance. You may utilize a variety of its eye-catching and adjustable effects to make your video productions stand out from the competition. In this area, we’ve covered some of the best effects for bringing life to your dull, unprofessional films.

Step5 Save or Share the Videos
Finally, you can use the complete Filmora editor as previously mentioned when you’ve done editing the recorded video. When you want to submit your creative work right away to YouTube or another well-known website, click the Export option and choose the platform where you want to share your video clip. If you like, you may even make changes to the video before uploading it.
The Bottom Line
Looking to create captivating movies from video clips? The best tool for the purpose can be Windows Movie Maker. While Windows Movie Maker allows for basic track editing, such as the addition of fade-in and fade-out effects for audio tracks, yet, using Filmora program gives you a variety of tools to create professional-looking films, including timeline narration, transition overlays, animations, and audio choices. This way, you might use the suggested movie maker to make movies with a professional tool and sharing it with others.
Part 2. Download and install Windows Movie Maker Windows 10
Anyone who wants to easily modify movies should use Movie Maker. The program offers every fundamental feature you need to create edited videos. Effects, transitions, titles and credits, audio track, timeline narration, and Auto Movie are just a few of the features available in Windows Movie Maker. XML code may be used to create new effects and transitions as well as modify already existing ones. An easy-to-use tool for altering audio tracks is Windows Movie Maker. To audio tracks, Windows Movie Maker can add simple effects like fade-in and fade-out.
Steps to Download and Install Windows Movie Maker on Win 10
Step1 Download the File
You may download Windows Movie Maker to produce videos from photographs. Transitions, a soundtrack, title and credit text, among other things, are simple to add to your video. Complete the necessary file downloads by clicking on the download button(s) below. Depending on your download speed, this might take anything from a few minutes to many hours.
Step2 Run the Downloaded program File
The installation launch screen is given in the following image. To install the program, run “setup.exe” by double-clicking the downloaded setup file that you previously downloaded.
Step3 Set Personalized Installation
Follow the instructions to install Windows Movie Maker. .Net framework is a required for Windows Movie Maker. Launch the Windows Movie Maker Installer program to install Windows Movie Maker on Windows 10.
Step4 Hit Install Button
Press the “Install” button after selecting Messenger, Photo Gallery, and Movie Maker as the apps to be installed. You can now access Windows Movie Maker.
Naturally, Microsoft also offered new video editing tools for Windows users once they ceased upgrading Windows Movie Maker. The complete version of Windows Movie Maker 2022 is now installed on your Windows 10 OS computer without any restrictions.
Part 3. Download and Install Windows Movie Maker Windows 7/8
Windows Movie Maker is a user-friendly and effective movie creation and editing software program created for the most recent versions of Windows 11 and Windows 7/8/10. Windows XP and Vista are compatible with the previous version. Only the Essentials package, a free collection of lifestyle and utility software for Windows 7 and Windows 8, which also contains Windows Photo Gallery, allows you to install Movie Maker. The single installer for all the Essentials applications gives you the choice to install all of them at once or just some of them.
Steps to Download and Install Windows Movie Maker on Win 7/8
Step1 Download the Installer
Start downloading Windows Live Essentials Movie Maker 12 by clicking on one of the links below. Windows Live Essentials Movie Maker has a standalone, complete offline installation available here. Windows XP, Vista, 7, 8, 8.1, and 64-bit versions of Windows are all supported by this offline installation solution for Windows Movie Maker.
Download Installer
Step2 Open and Customize the File
Access the “Patch” folder. Apply the fix by running “windows.movie.maker-patch.exe”. Although Windows Essentials installation is requested by the Windows Movie Maker installer, it is not required. You may click “Choose the programs you wish to install” instead to bypass it. You may now view your selections. We just need the picture gallery and the movie creator, so uncheck the boxes next to Writer, Messenger, and Mail. Click the “Choose the apps you wish to install” button after that.
Step3 Hit Install Button
Following this, the installation of Windows Movie Maker will begin when you click the install button. The installation is finished in a short while. After a successful installation, Windows Movie Maker can be added to your taskbar and a desktop shortcut can be made.
Step4 Launch the Editor
Free video editing software with a simple UI is called Windows Movie Maker. Click the provided download button to start the Windows movie maker download. The Windows Movie Maker utility download is completely secure and virus-free.
Part 4. Best Windows Movie Maker Alternative to Use
While there are now several excellent video editors available on the market, we will here suggest Filmora by Wondershare as the best replacement for Windows Movie Maker. Filmora is an extremely user-friendly video editor in terms of UI. It offers a simple user interface that even beginners may quickly grasp. By holding the mouse over any clip in the Media view, you can navigate through it thanks to a handy UX touch.
You may download Filmora for free on your computer running Windows 10 or Windows 11 and it is a very user-friendly movie editor. For novices who want to create explainer videos, training videos, demo videos, and more rapidly, Filmora is a simple yet advanced feature-packed tool. The great video templates make screen recording more alluring. You can make use of annotation tools like callouts, arrows, and drawing gestures to attract attention to essential information. Its structure is quite straightforward and easy to understand since it utilizes the timeline as the editing UI.
How to Edit Videos with Filmora:
Free Download For Win 7 or later(64-bit)
Free Download For macOS 10.14 or later
Step1 Install Filmora on your Windows PC
You must to download and install Wondershare Filmora on your computer before using it. This TV recorder on the fly may be used for your requirements. You can find every version of the Filmora software, including Windows and Mac versions, as well as the most current version.
You can now install it on your computer once you’ve done downloading it before you can use it with your laptop. It will bring you to the user-friendly UI of Filmora, where you may use the documentation function right away, as illustrated in the following figure:
Step2 Import the Content
A significant component of managing your raw footages is the Media library. All of the imported material, including the images, audio files, and movies, are now kept in Import Window. The media files are also included in the Music, Pictures, and Videos sections. This top free video editing program has new built-in sound tracks to simplify your job. As the video backdrop music, you can either choose the built-in music or local audio files.
Step3 Create the Movies
Finally, you may edit your audio recordings using tools that are completely customizable. Use the editor in Filmora to edit your recorded audio files, using simple to advanced editing techniques. Your recorded video can be improved using Filmora’s Editor by adding animated titles, spectacular effects, audio enhancements, and more.
Step4 Add Special Effects to Your Video
Wondershare Filmora was created primarily to give your films a polished appearance. You may utilize a variety of its eye-catching and adjustable effects to make your video productions stand out from the competition. In this area, we’ve covered some of the best effects for bringing life to your dull, unprofessional films.
Step5 Save or Share the Videos
Finally, you can use the complete Filmora editor as previously mentioned when you’ve done editing the recorded video. When you want to submit your creative work right away to YouTube or another well-known website, click the Export option and choose the platform where you want to share your video clip. If you like, you may even make changes to the video before uploading it.
The Bottom Line
Looking to create captivating movies from video clips? The best tool for the purpose can be Windows Movie Maker. While Windows Movie Maker allows for basic track editing, such as the addition of fade-in and fade-out effects for audio tracks, yet, using Filmora program gives you a variety of tools to create professional-looking films, including timeline narration, transition overlays, animations, and audio choices. This way, you might use the suggested movie maker to make movies with a professional tool and sharing it with others.
Also read:
- Updated In 2024, 5 Best Free Apps to Compress Videos on iPhone & iPad
- New Top 8 BEST Video Quality Enhancers Free & Paid
- In 2024, Top Free M4A Editor Downloads Expert Reviews
- New In 2024, The Ultimate List of Online Lyric Video Creators
- Updated In 2024, Free Filmora Download A Step-by-Step Guide Virus-Free
- Updated Neon Typography Made Easy 10 Online Generators to Try Now for 2024
- 2024 Approved The Search Is Over Identifying the Best FLAC Converter for You
- Updated This Regularly Updated Mac Video Editor Works Perfectly on Mavericks and Stands Out Attributing to Its Prominent Video Editing Features and Easiness
- Updated The Ultimate List Video Makers with Music for Android, iPhone, and iPad
- Updated The Ultimate List of Free Online Face Generators for Fun and Creativity for 2024
- Updated 2024 Approved Evaluate and Enhance Image Dimensional Harmony
- Updated Breaking Free From G for 2024
- Updated Top WhatsApp Status Creator Tools for 2024
- In 2024, The Complete Guide to Optimizing Your Social Media Visuals
- Updated In 2024, Cant Install Lumafusion on Mac? Try These Best Alternative Apps
- Updated In 2024, Best Gaming Sites Top Picks for Downloading Games
- New 2024 Approved Resize Photos to Perfection 8 Top Online Ratio Editors
- New In 2024, The Ultimate Guide to Video Stabilization Apps for iPhone and Android
- New 2024 Approved Mastering Video Editing A Step-by-Step Guide to Windows Movie Maker
- In 2024, VLC Video Cutter for Mac Trim and Preserve Quality with Ease
- 2024 Approved The Easiest Way to Edit AVI Files Split, Cut, and Trim in Minutes
- New Mac Video Editing 101 Using QuickTime for Stunning Results
- 2024 Approved WhatsApp Video Status Creator Tools Free and Paid Reviews
- Updated Edit Like a Pro 10 Free Video Editing Apps for Chromebook Users for 2024
- Updated 2024 Approved Say Goodbye to Shaky Footage The Best Free Android Video Stabilizers
- 2024 Approved Windows 10 Movie Making Best Apps and Tools
- Updated 2024 Approved Adobe Premiere Pro Tutorial Eliminate Camera Shake and Rolling Shutter
- Updated Get the Right Fit How to Determine Your Images Aspect Ratio for 2024
- Updated In 2024, The Best of the Best Video Editing Programs Compared
- New 2024 Approved Unleash Your Creativity Top 10 Free MP4 Video Editors
- New Free Audio Editing Software for M4A Files Top 5 for 2024
- 2024 Approved The Complete Guide to Downloading and Installing Windows Movie Maker
- Updated In 2024, The Ins and Outs of Converting MP3 Files to MP4 A Beginners Guide
- Updated 2024 Approved The Art of Vertical Video Best Practices for Smartphone Creators
- New Score a Bargain on Final Cut Pro with Our Education Bundle Guide
- Updated 2024 Approved Toon Up Your Photos Top Mobile Apps for Cartoon-Style Editing
- New The Quickest Way to Resize a Video for Any Screen
- In 2024, The Ultimate Guide to Free MOD Video Editors Top 5
- Updated Subtitle Your Videos for Free 10 Top Online Options
- Updated In 2024, Make a Statement with These WhatsApp Status Creator Apps
- Updated Top-Rated Free Video Editing Tools for Chrome OS for 2024
- Updated Make Every Frame Count Best 1080P Video Editing Software for Film-Quality Results
- In 2024, Video Steadicam Top Mobile Apps for Smooth Footage
- The way to convert MTS for Redmi Note 13 Pro 5G
- In 2024, How to Transfer Contacts from Motorola Moto G13 to iPhone XS/11 | Dr.fone
- In 2024, A Perfect Guide To Remove or Disable Google Smart Lock On Vivo Y17s
- Looking For A Location Changer On Oppo Reno 11 Pro 5G? Look No Further | Dr.fone
- In 2024, Here are Different Ways to Find Pokemon Go Trainer Codes to Add to Your Account On Apple iPhone 7 | Dr.fone
- In 2024, How to Share/Fake Location on WhatsApp for OnePlus Ace 3 | Dr.fone
- Overview of the Best Tecno Spark 20 Pro Screen Mirroring App | Dr.fone
- New WhatsApp Status Video Creators A Comprehensive Guide to Free & Paid Options
- Stuck at Android System Recovery Of Xiaomi Redmi 12 ? Fix It Easily | Dr.fone
- In 2024, Why does the pokemon go battle league not available On Honor Play 7T | Dr.fone
- How to Unlock iCloud Activation Lock and iCloud Account From Apple iPhone 8?
- 5 Quick Methods to Bypass Vivo Y27 5G FRP
- New Making Slow Motion Videos in Final Cut Pro The Best Methods
- Unlock Apple ID without Phone Number From Apple iPhone 7
- In 2024, How To Enable USB Debugging on a Locked Samsung Galaxy XCover 7 Phone
- Updated 2024 Approved 8 Excellent Video and Photo Mergers on Desktop/Mobile/Online
- 6 Proven Ways to Unlock Vivo X Fold 2 Phone When You Forget the Password
- Authentication Error Occurred on Honor Play 7T? Here Are 10 Proven Fixes | Dr.fone
- Updated In 2024, Best 8 AI Title Generators for Creating Catchy Titles For All Platform
- Best Android Data Recovery - Retrieve Lost Photos from Realme C67 5G.
- Dose Life360 Notify Me When Someone Checks My Location On Nubia Red Magic 8S Pro? | Dr.fone
- In 2024, Guide to Mirror Your Asus ROG Phone 8 to Other Android devices | Dr.fone
- How To Change Your Apple iPhone 12 Pro Apple ID on MacBook
- Best Lava FRP Bypass Guide
- Top 5 Car Locator Apps for Oppo Find X7 | Dr.fone
- How To Transfer WhatsApp From iPhone SE to other iPhone 13 Pro Max devices? | Dr.fone
- Title: 2024 Approved VLC Tips and Tricks How to Play Videos in Slow Motion
- Author: Morgan
- Created at : 2024-05-19 16:01:07
- Updated at : 2024-05-20 16:01:07
- Link: https://ai-video-tools.techidaily.com/2024-approved-vlc-tips-and-tricks-how-to-play-videos-in-slow-motion/
- License: This work is licensed under CC BY-NC-SA 4.0.
