
:max_bytes(150000):strip_icc():format(webp)/laptop-569944733df78cafda90169f.jpg)
2024 Approved Upgrade Your Videos Best Free Online Quality Improvers
Upgrade Your Videos: Best Free Online Quality Improvers
Top 9 Best Online Video Quality Enhancer for FREE

Ollie Mattison
Apr 24, 2024• Proven solutions
In 2024, the average person will watch 17 hours of video content every week. Improving the quality of your videos can make your content more noticeable.
Fortunately, there are many excellent video quality enhancer tools to choose from. These tools can enhance both the visual and audio clarity of your content. Ultimately, this will enhance your professionalism and reputation as a trustworthy creator.
Are you wondering where to start when selecting an effective, user-friendly video enhancer? Here are some of our top recommendations to help you begin.
- Part 2: 5 Free AI Video Enhancers [Software Options]
- Part 3: Top 2 4K Video Enhancer Online Free Options
- Part 4: How to Choose the Best Video Enhancer
- In this article
Why Do You Need an AI Video Enhancer?
AI video enhancers utilize generative AI to remove noise, stabilize shaky videos, upscale, or enhance their overall appearance. These tools employ machine learning and neural network techniques to analyze videos and apply different effects for enhancement. Trained on extensive datasets, most AI video enhancers can understand video content like faces, scenes, and objects, automatically adjusting imperfections.
Using an AI video enhancer is an excellent way to boost video quality quickly. Unlike traditional methods, AI speeds up the enhancement process significantly. There are additional benefits, such as:
- **Enhanced Media Quality:**AI video enhancers enhance videos automatically with advanced algorithms, maintaining quality, clarity, and detail.
- Noise Reduction: Many AI video enhancer tools effectively reduce visual noise in videos, resulting in cleaner and clearer footage.
- **Reviving Old Clip:**AI video enhancers are adept at restoring old video footage to make it appear more vibrant.
5 Free AI Video Enhancers [Software Options]
Are blurry videos on your large screen getting on your nerves? Thanks to advancements in artificial intelligence (AI), you can now enhance your low-resolution videos for a crystal-clear viewing experience.
Whether you’re a video editor, content creator, or streamer, incorporating an AI video upscaler into your toolkit is a wise choice. Here are the top 5 picks for the best free AI video enhancer software to improve your video editing.
1.Wondershare Filmora - AI Video Enhancer

Pricing:Filmora offers a free trial without exporting.
Wondershare Filmora stands out in video editing by combining comprehensive editing features with AI-powered enhancement tools. With 4K editing, Filmora ensures videos are improved and future-proofed.
In addition to enhancement, Filmora offers over 300 unique transitions and effects catering to creative minds. Audio enthusiasts will enjoy advanced audio tools like audio ducking and equalizers.
Filmora’s standout feature is its motion tracking capability, enabling dynamic video compositions. While beginners may find the abundance of features overwhelming, regular updates and an active online community provide ample support.
Features
- Filmora’s advanced AI video-enhancing algorithms let you convert black-and-white footage to colored ones.
- It boosts frame rates up to 240 FPS using AI-enhanced frame interpolation technology and 4x super-resolution algorithms.
- Filmora enhances videos’ clarity and quality through audio ducking, equalizers, and more.
- This AI Video Enhancer tracks and attaches objects in videos.
- The tool preserves details and enhances quality in slow-motion scenes.
- Offers over 300 unique transitions and effects.
Pros
- Versatile editing and enhancement options.
- This AI video enhancer is designed to assist both beginners and professionals.
- It supports batch processing, enhancing 10+ videos simultaneously.
Cons
- The free version adds a watermark.
2.AVCLabs Video Enhancer AI
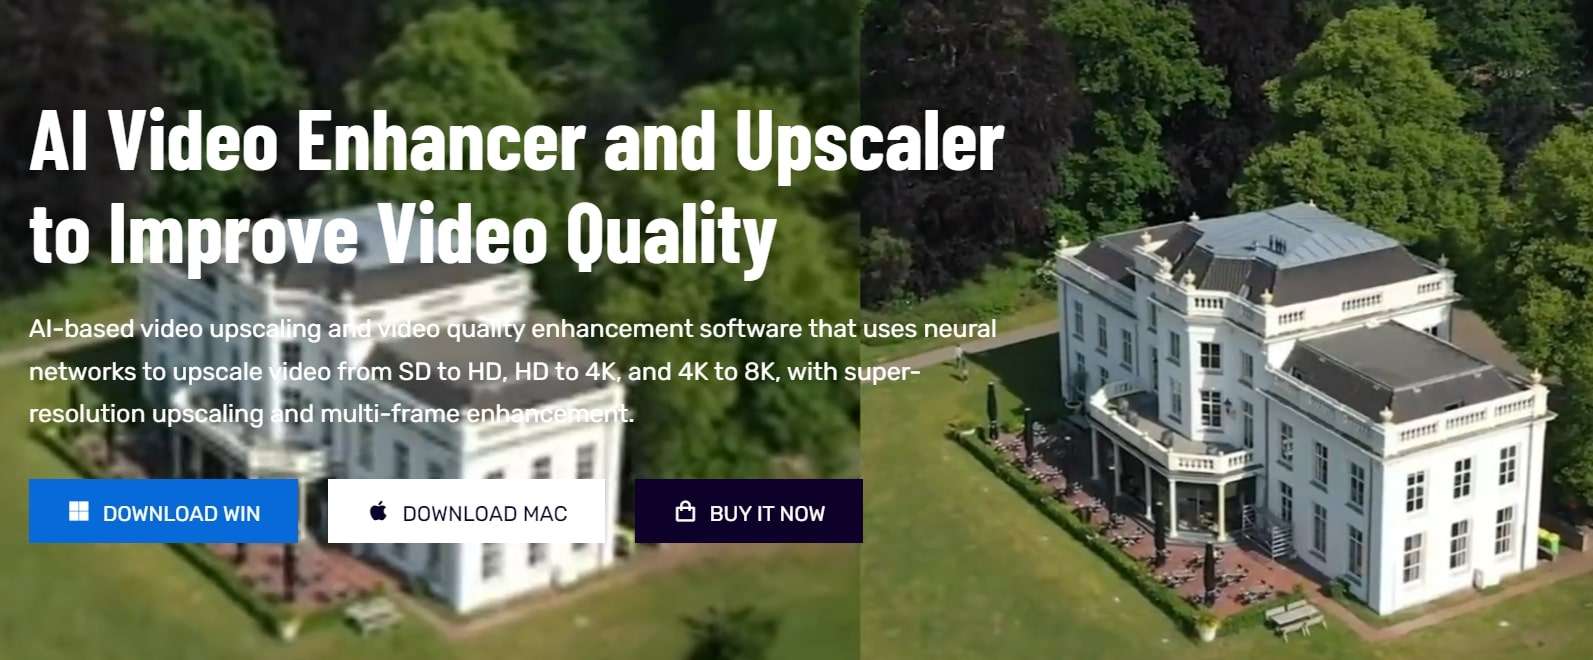
Pricing:AVCLabs offers new users a 7-day free trial.
AVCLabs Video Enhancer AI utilizes a neural network to improve video clip quality. With super-resolution AI video upscaling and multi-frame enhancement, it can easily upscale video from SD to HD (720p or 1080p) to 4K and up to 8K in just one click.
With support for various video and audio formats, users can work seamlessly without compatibility issues. A notable feature is its batch processing capability, enabling users to upscale and enhance multiple videos simultaneously, saving time. The real-time preview feature is invaluable for those who wish to see the software’s results before finalizing their project.
Features
- AVCLabs seamlessly enhances any video footage without quality loss. Whether single or multi-frame, you’ll experience smooth transitions and improved frames.
- With AVCLabs’ color correction feature, you can easily adjust each video frame’s brightness, saturation, and contrast. This tool employs AI video upscaling to create larger, more detailed images without sacrificing quality.
- This video enhancement tool offers automatic face refinement to enhance facial details, which is ideal for improving low-quality videos with excessive noise and blurriness.
- The Super Resolution feature recovers high-resolution videos from low-resolution materials by generating additional pixel data to fill gaps, resulting in enhanced output.
- AVCLabs Video Enhancer AI uses a multi-frame convolutional neural network to stabilize video shakes and remove motion artifacts, overlay noise, and grain, producing natural and enhanced results.
Pros
- AVCLabs features a color calibration algorithm that accurately portrays natural colors.
- It allows you to add color to old black-and-white videos.
- The video processing is fully automatic, requiring no manual fine-tuning.
Cons
- The app demands a significant amount of free space, up to 15 GB.
- It is only compatible with Windows and Mac operating systems.
- The free trial adds a watermark from AVC Labs to the videos.
3.UniFab Video Enhancer
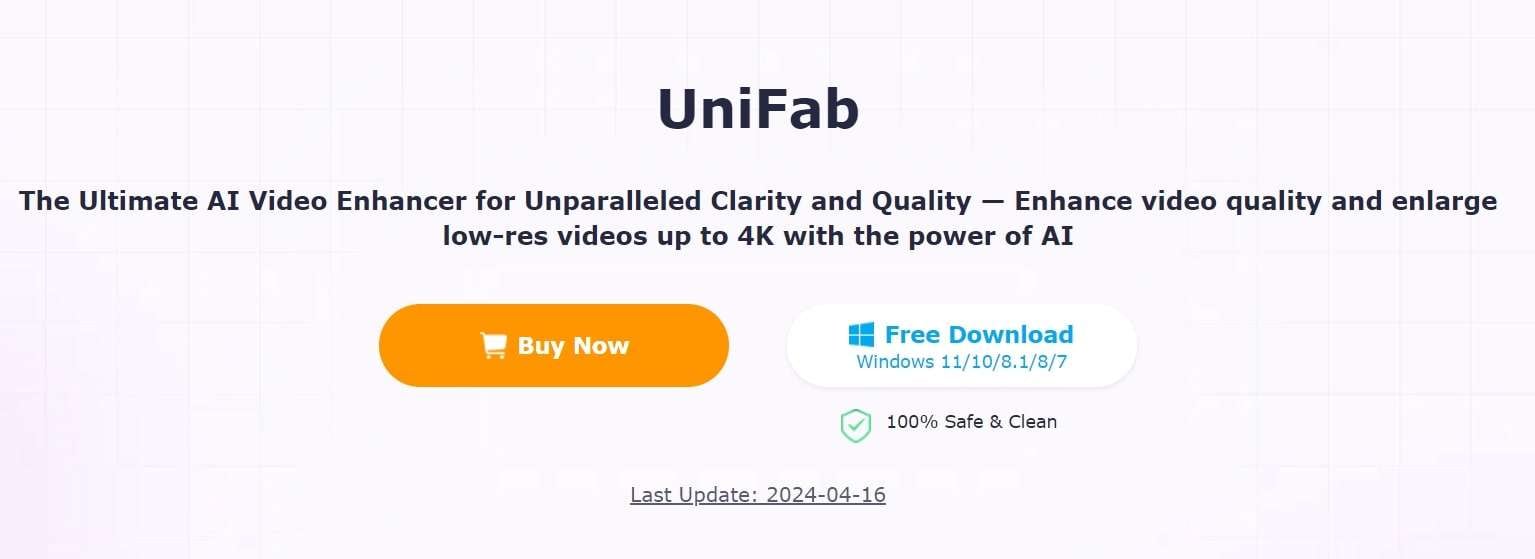
Pricing: UniFab provides a 30-day free trial for new AI users and a 30-day money-back guarantee for paid.
UniFab is a comprehensive AI-powered video enhancer to enhance video quality for all types of videos. Standout features like upscaling video to HDR10/Dolby Vision, denoising, and deinterlacing set this tool apart.
The models are regularly updated with the latest advancements in Deep Learning. Whether you’re a novice or an expert, UniFab offers both automatic and manual modes for video enhancement, making it easy to use without requiring complex settings.
Features
- Upgrade any video to 720p, 1080p, or even 4k resolution with remarkable clarity.
- Convert SDR videos to stunning HDR formats like HDR10+ and Dolby Vision. This feature revitalizes your videos, making them significantly more vibrant and immersive.
- Utilize AI technology to deinterlace your videos, ensuring smooth playback and a pristine viewing experience on modern displays.
- Specifically designed for videos captured in low-light conditions or with high ISO settings, this tool intuitively reduces grain and noise, restoring your footage’s true essence without sacrificing detail.
- Experience unprecedented fluidity as the software boosts your videos to an impressive 120FPS using AI. This transforms your content into a smooth motion stream, ideal for high-definition screens and attentive audiences.
Pros
- It allows audio up-mixing to EAC3 5.1/DTS 7.1 through AI.
- Utilizes GPU-accelerated technology.
- Supports video conversion, compression, and editing.
Cons
- The free trial is limited to 3 videos.
- Does not support Mac systems.
4.Topaz Video Enhance AI
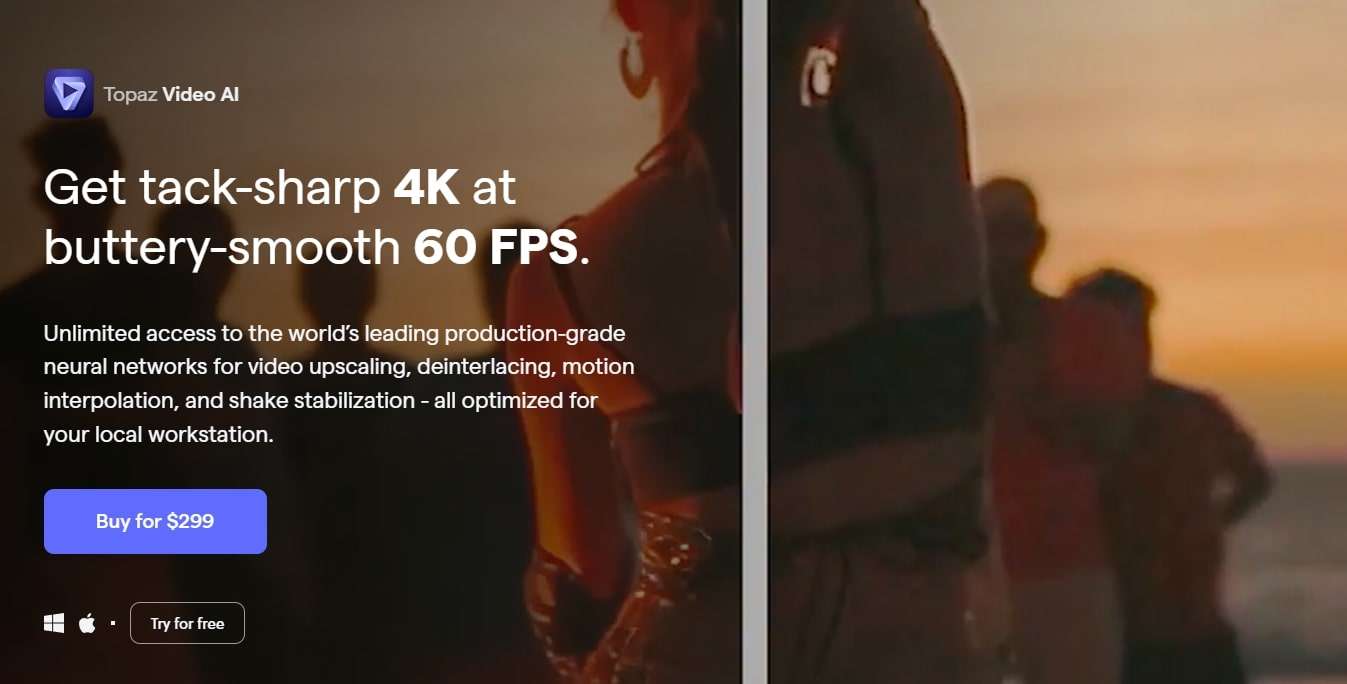
Pricing:Topaz video enhancement tool offers a 30-day no-questions-asked refund policy.
Topaz Video Enhance AI enhances video quality by increasing its resolution. It supports batch upscaling of videos and is compatible with DVD, DSLR, Game, and HD stock footage.
Many notable film studios consider Topaz Video Enhance AI one of the best video editing software tools. It is suitable for various uses, such as commercials, movie content, and YouTube videos.
Features
- This free video upscaling software swiftly analyzes video footage quality using AI tools and recreates it into high-resolution videos.
- Topaz offers Gaia CGI and Theia for enhancing CG and animated videos, along with Proteus and Artemis for noise removal and sharpening.
- Easily recover details from any video footage by injecting original details using adjacent frames’ additional information. It detects and corrects visual artifacts formed during compression.
- Topaz provides an automatic mode for quick video quality enhancement and manual fine-tuning options using available controls.
- With this free video enhancer software, preserve video audio tracks and select from different conversion options for optimal output in the final project.
Pros
- Reduces motion artifacts.
- Adds extra frames for smooth, slow-motion videos.
- Enhances video quality up to 8K.
Cons
- AI processing can be time-consuming, sometimes taking hours.
- Requires a high-quality graphics card.
5.HitPaw Video Enhancer

Pricing:HitPaw AI video enhancer offers a 30-day refund guarantee on paid plans.
HitPaw is a user-friendly video enhancer suitable for both beginners and professionals. It features an easy-to-navigate interface, ensuring even those with minimal experience can improve their videos. Despite its simplicity, HitPaw offers robust enhancement tools, including color correction and stabilization. Its extensive support for various video formats eliminates compatibility concerns.
The software prioritizes efficient video enhancement without compromising quality or speed. Comprehensive tutorials help users explore different editing tasks and unlock their content’s full potential.
Features
- Utilize advanced AI algorithms to upscale low-resolution videos for a more appealing look. The AI feature optimizes content for sharper and more vibrant visuals.
- The HitPaw video quality enhancer app uses AI tools to improve detailing on human faces. Apply filters and adjust settings to enhance facial output in videos.
- The app includes a video stabilization feature that eliminates shaky camera movements, producing smoother and clearer videos with a professional touch.
- HitPaw offers an AI video repair option to restore damaged, corrupted, and old videos. It can also use deep learning AI to colorize black-and-white videos.
- Remove noise from videos with the General Denoise feature, making them look sharper, clearer, and newer.
Pros
- Supports various video formats.
- Has a user-friendly and intuitive interface.
- Can repair and enhance animation videos.
Cons
- The free plan has limited editing features.
Top 2 4K Video Enhancer Online Free Options
The AI-enhanced video tools mentioned above excel in their field. However, there are times when you might run out of storage or need a quick fix through your browser. So, here are some online AI tools that can enhance your videos. Unlike offline video enhancer AIs, online tools are easily accessible. While they may offer fewer features than desktop solutions, they are still useful for some editors.
1.Cutout.Pro
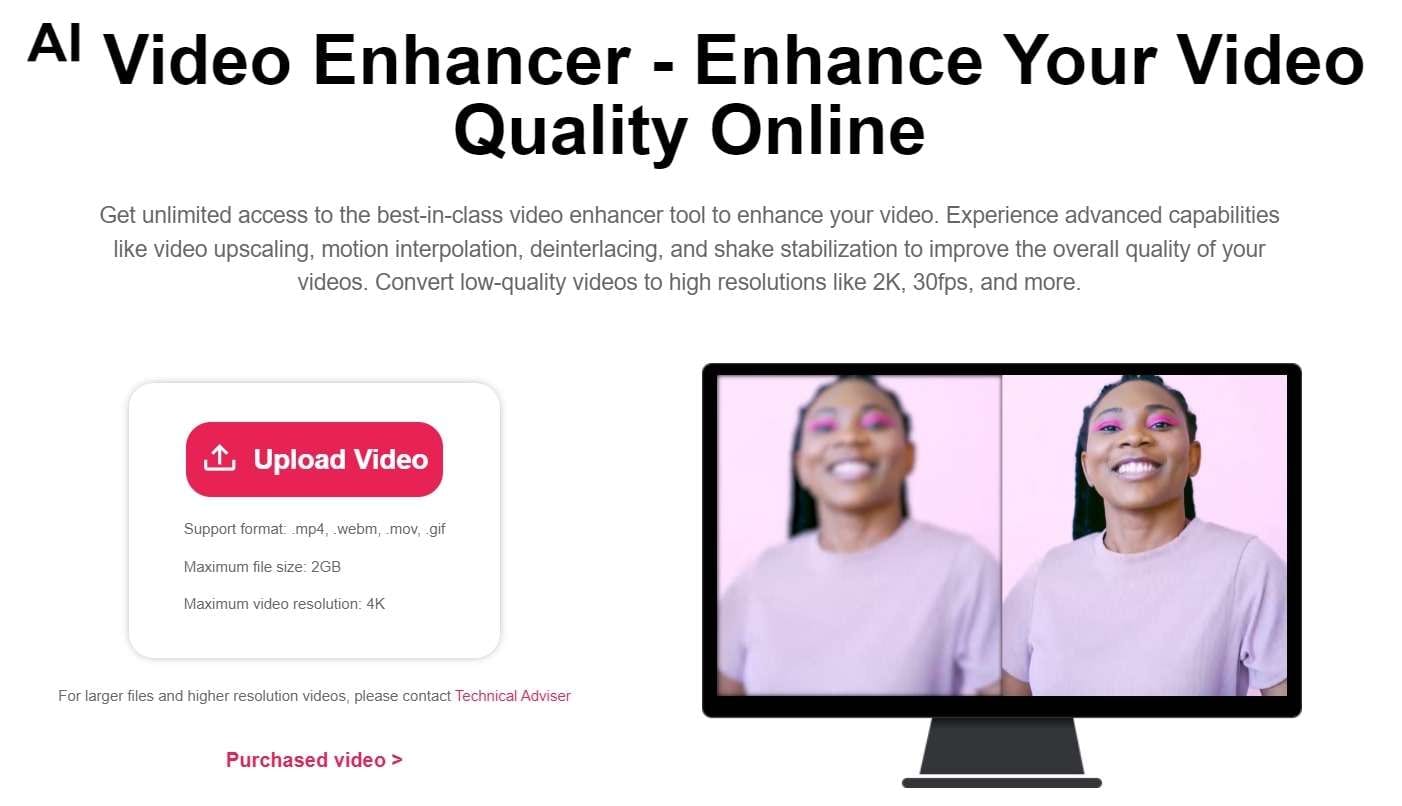
Many editing professionals rely on this free AI video enhancer for unlimited video improvements. Cutout.Pro utilizes advanced features such as video upscaling, motion interpolation, deinterlacing, and shake stabilization to enhance overall quality. This tool converts low-quality videos to higher resolutions like 2K, 30fps, and beyond. Moreover, this online tool swiftly reduces visual noise and other motion artifacts from clips using AI.
Features
- Reduce noise, motion artifacts, and improve video resolution significantly with this powerful online video quality enhancer and upscaler. Perfect for enhancing low-resolution videos like 240p, 360p, 480p, and more.
- Pro increases video frame rates without sacrificing quality. Smooth out shaky footage for better slow-motion effects.
- This tool enhances video resolution up to 2K at a maximum of 30fps effortlessly. It sharpens and defines your videos, bringing your story to life like a professional.
- This is perfect for filmmakers seeking to enhance footage quality and create professional-looking films. Improve video resolution and quality to unblur, upscale, and smooth videos for cinematic results.
- Enhance the quality of personal videos as this tool features shake stabilization for professional results.
- This video enhancer is ideal for professionals creating cinematic frames and restoring old footage. It’s also great for individuals looking to improve the quality of compressed videos downloaded from social media platforms like YouTube, Netflix, and TikTok.
Pros
- It boosts video frame rates and enables HD clip exports.
- Users can upload videos in MP4, MOV, WebM, and GIF formats for processing.
Cons
- It only offers a 5-second preview of the results after enhancement.
2.Clideo Video Enhancer
Clideo is an online video-enhancing tool that can completely transform any random video. It lets you add special AI effects and filters to adjust the video’s brightness, saturation, and contrast, making it stunning, vibrant, and attractive. You can enhance any video professionally for social media attention or business branding.
When it comes to video-enhancing tools, users seek maximum customization options. Clideo offers various features, functions, and facilities to transform average-looking videos into 4k video resolutions.
Features
- The interface is intuitive, so you don’t need any video editing experience to use it.
- You can enhance your video regardless of format because Clideo works with MP4, WMV, MOV, VOB, AVI, and other popular formats.
- You don’t need to download and install the video enhancer to your device. It’s not only faster but also more secure.
- Enhance multiple videos or images simultaneously.
- Add subtitles with customizable text fonts.
- Text Overlay feature with support for HD resolution.
- Access a media library with social sharing options.
Pros
- User-friendly tool is ideal for beginners.
- Supports multiple formats.
- As an online tool, it saves device storage space.
- Reasonable pricing.
- Provides uninterrupted video editing with customizable features.
Cons
- A premium subscription is required to remove watermarking.
- No offline app available; internet connection always necessary.
- No dedicated mobile app.
How to Choose the Best Video Enhancer
Consider the following to ensure you select the right video enhancer for your needs and creative vision.
1.Type of Content
Think about the type of content you’re working with. Are you creating short-form clips for social media or longer, more complex videos? Different enhancers may better suit different content types, so consider your file type and potential quality issues.
2.Consider The Features You Need
Consider the tools and features you need from your video quality enhancer software. Each system offers different capabilities, so planning can help you find the option that best fits your requirements.
3.Sharing Formats and Requirements
Determine the purpose of your video project and any specific sharing requirements. Understanding your goals will help you plan accordingly, whether for online sharing or commercial use.
4.Your Budget
Keep your budget in mind. Some enhancers offer free features, while others may require a purchase or subscription fee for full access. Budgeting effectively ensures you get the best value for your money while achieving great video results.
Conclusion
The video enhancement landscape has been transformed by artificial intelligence, providing numerous options to enhance your videos’ quality. Whether a professional filmmaker or a casual content creator, free AI video enhancers offer a chance to take your productions to the next level.
Each software has unique strengths, from Wondershare Filmora’s comprehensive editing features to AVCLabs’ neural network-powered upscaling and UniFab’s HDR conversion capabilities. User-friendly options like HitPaw cater to beginners while providing robust enhancement tools.
Moreover, for quick fixes or limited storage, online options like Cutout.Pro and Clideo offer accessible solutions with impressive results. With these advancements, achieving professional-quality videos is now achievable for everyone.
Ollie Mattison
Ollie Mattison is a writer and a lover of all things video.
Follow @Ollie Mattison
Ollie Mattison
Apr 24, 2024• Proven solutions
In 2024, the average person will watch 17 hours of video content every week. Improving the quality of your videos can make your content more noticeable.
Fortunately, there are many excellent video quality enhancer tools to choose from. These tools can enhance both the visual and audio clarity of your content. Ultimately, this will enhance your professionalism and reputation as a trustworthy creator.
Are you wondering where to start when selecting an effective, user-friendly video enhancer? Here are some of our top recommendations to help you begin.
- Part 2: 5 Free AI Video Enhancers [Software Options]
- Part 3: Top 2 4K Video Enhancer Online Free Options
- Part 4: How to Choose the Best Video Enhancer
- In this article
Why Do You Need an AI Video Enhancer?
AI video enhancers utilize generative AI to remove noise, stabilize shaky videos, upscale, or enhance their overall appearance. These tools employ machine learning and neural network techniques to analyze videos and apply different effects for enhancement. Trained on extensive datasets, most AI video enhancers can understand video content like faces, scenes, and objects, automatically adjusting imperfections.
Using an AI video enhancer is an excellent way to boost video quality quickly. Unlike traditional methods, AI speeds up the enhancement process significantly. There are additional benefits, such as:
- **Enhanced Media Quality:**AI video enhancers enhance videos automatically with advanced algorithms, maintaining quality, clarity, and detail.
- Noise Reduction: Many AI video enhancer tools effectively reduce visual noise in videos, resulting in cleaner and clearer footage.
- **Reviving Old Clip:**AI video enhancers are adept at restoring old video footage to make it appear more vibrant.
5 Free AI Video Enhancers [Software Options]
Are blurry videos on your large screen getting on your nerves? Thanks to advancements in artificial intelligence (AI), you can now enhance your low-resolution videos for a crystal-clear viewing experience.
Whether you’re a video editor, content creator, or streamer, incorporating an AI video upscaler into your toolkit is a wise choice. Here are the top 5 picks for the best free AI video enhancer software to improve your video editing.
1.Wondershare Filmora - AI Video Enhancer
Pricing:Filmora offers a free trial without exporting.
Wondershare Filmora stands out in video editing by combining comprehensive editing features with AI-powered enhancement tools. With 4K editing, Filmora ensures videos are improved and future-proofed.
In addition to enhancement, Filmora offers over 300 unique transitions and effects catering to creative minds. Audio enthusiasts will enjoy advanced audio tools like audio ducking and equalizers.
Filmora’s standout feature is its motion tracking capability, enabling dynamic video compositions. While beginners may find the abundance of features overwhelming, regular updates and an active online community provide ample support.
Features
- Filmora’s advanced AI video-enhancing algorithms let you convert black-and-white footage to colored ones.
- It boosts frame rates up to 240 FPS using AI-enhanced frame interpolation technology and 4x super-resolution algorithms.
- Filmora enhances videos’ clarity and quality through audio ducking, equalizers, and more.
- This AI Video Enhancer tracks and attaches objects in videos.
- The tool preserves details and enhances quality in slow-motion scenes.
- Offers over 300 unique transitions and effects.
Pros
- Versatile editing and enhancement options.
- This AI video enhancer is designed to assist both beginners and professionals.
- It supports batch processing, enhancing 10+ videos simultaneously.
Cons
- The free version adds a watermark.
2.AVCLabs Video Enhancer AI
Pricing:AVCLabs offers new users a 7-day free trial.
AVCLabs Video Enhancer AI utilizes a neural network to improve video clip quality. With super-resolution AI video upscaling and multi-frame enhancement, it can easily upscale video from SD to HD (720p or 1080p) to 4K and up to 8K in just one click.
With support for various video and audio formats, users can work seamlessly without compatibility issues. A notable feature is its batch processing capability, enabling users to upscale and enhance multiple videos simultaneously, saving time. The real-time preview feature is invaluable for those who wish to see the software’s results before finalizing their project.
Features
- AVCLabs seamlessly enhances any video footage without quality loss. Whether single or multi-frame, you’ll experience smooth transitions and improved frames.
- With AVCLabs’ color correction feature, you can easily adjust each video frame’s brightness, saturation, and contrast. This tool employs AI video upscaling to create larger, more detailed images without sacrificing quality.
- This video enhancement tool offers automatic face refinement to enhance facial details, which is ideal for improving low-quality videos with excessive noise and blurriness.
- The Super Resolution feature recovers high-resolution videos from low-resolution materials by generating additional pixel data to fill gaps, resulting in enhanced output.
- AVCLabs Video Enhancer AI uses a multi-frame convolutional neural network to stabilize video shakes and remove motion artifacts, overlay noise, and grain, producing natural and enhanced results.
Pros
- AVCLabs features a color calibration algorithm that accurately portrays natural colors.
- It allows you to add color to old black-and-white videos.
- The video processing is fully automatic, requiring no manual fine-tuning.
Cons
- The app demands a significant amount of free space, up to 15 GB.
- It is only compatible with Windows and Mac operating systems.
- The free trial adds a watermark from AVC Labs to the videos.
3.UniFab Video Enhancer
Pricing: UniFab provides a 30-day free trial for new AI users and a 30-day money-back guarantee for paid.
UniFab is a comprehensive AI-powered video enhancer to enhance video quality for all types of videos. Standout features like upscaling video to HDR10/Dolby Vision, denoising, and deinterlacing set this tool apart.
The models are regularly updated with the latest advancements in Deep Learning. Whether you’re a novice or an expert, UniFab offers both automatic and manual modes for video enhancement, making it easy to use without requiring complex settings.
Features
- Upgrade any video to 720p, 1080p, or even 4k resolution with remarkable clarity.
- Convert SDR videos to stunning HDR formats like HDR10+ and Dolby Vision. This feature revitalizes your videos, making them significantly more vibrant and immersive.
- Utilize AI technology to deinterlace your videos, ensuring smooth playback and a pristine viewing experience on modern displays.
- Specifically designed for videos captured in low-light conditions or with high ISO settings, this tool intuitively reduces grain and noise, restoring your footage’s true essence without sacrificing detail.
- Experience unprecedented fluidity as the software boosts your videos to an impressive 120FPS using AI. This transforms your content into a smooth motion stream, ideal for high-definition screens and attentive audiences.
Pros
- It allows audio up-mixing to EAC3 5.1/DTS 7.1 through AI.
- Utilizes GPU-accelerated technology.
- Supports video conversion, compression, and editing.
Cons
- The free trial is limited to 3 videos.
- Does not support Mac systems.
4.Topaz Video Enhance AI
Pricing:Topaz video enhancement tool offers a 30-day no-questions-asked refund policy.
Topaz Video Enhance AI enhances video quality by increasing its resolution. It supports batch upscaling of videos and is compatible with DVD, DSLR, Game, and HD stock footage.
Many notable film studios consider Topaz Video Enhance AI one of the best video editing software tools. It is suitable for various uses, such as commercials, movie content, and YouTube videos.
Features
- This free video upscaling software swiftly analyzes video footage quality using AI tools and recreates it into high-resolution videos.
- Topaz offers Gaia CGI and Theia for enhancing CG and animated videos, along with Proteus and Artemis for noise removal and sharpening.
- Easily recover details from any video footage by injecting original details using adjacent frames’ additional information. It detects and corrects visual artifacts formed during compression.
- Topaz provides an automatic mode for quick video quality enhancement and manual fine-tuning options using available controls.
- With this free video enhancer software, preserve video audio tracks and select from different conversion options for optimal output in the final project.
Pros
- Reduces motion artifacts.
- Adds extra frames for smooth, slow-motion videos.
- Enhances video quality up to 8K.
Cons
- AI processing can be time-consuming, sometimes taking hours.
- Requires a high-quality graphics card.
5.HitPaw Video Enhancer
Pricing:HitPaw AI video enhancer offers a 30-day refund guarantee on paid plans.
HitPaw is a user-friendly video enhancer suitable for both beginners and professionals. It features an easy-to-navigate interface, ensuring even those with minimal experience can improve their videos. Despite its simplicity, HitPaw offers robust enhancement tools, including color correction and stabilization. Its extensive support for various video formats eliminates compatibility concerns.
The software prioritizes efficient video enhancement without compromising quality or speed. Comprehensive tutorials help users explore different editing tasks and unlock their content’s full potential.
Features
- Utilize advanced AI algorithms to upscale low-resolution videos for a more appealing look. The AI feature optimizes content for sharper and more vibrant visuals.
- The HitPaw video quality enhancer app uses AI tools to improve detailing on human faces. Apply filters and adjust settings to enhance facial output in videos.
- The app includes a video stabilization feature that eliminates shaky camera movements, producing smoother and clearer videos with a professional touch.
- HitPaw offers an AI video repair option to restore damaged, corrupted, and old videos. It can also use deep learning AI to colorize black-and-white videos.
- Remove noise from videos with the General Denoise feature, making them look sharper, clearer, and newer.
Pros
- Supports various video formats.
- Has a user-friendly and intuitive interface.
- Can repair and enhance animation videos.
Cons
- The free plan has limited editing features.
Top 2 4K Video Enhancer Online Free Options
The AI-enhanced video tools mentioned above excel in their field. However, there are times when you might run out of storage or need a quick fix through your browser. So, here are some online AI tools that can enhance your videos. Unlike offline video enhancer AIs, online tools are easily accessible. While they may offer fewer features than desktop solutions, they are still useful for some editors.
1.Cutout.Pro
Many editing professionals rely on this free AI video enhancer for unlimited video improvements. Cutout.Pro utilizes advanced features such as video upscaling, motion interpolation, deinterlacing, and shake stabilization to enhance overall quality. This tool converts low-quality videos to higher resolutions like 2K, 30fps, and beyond. Moreover, this online tool swiftly reduces visual noise and other motion artifacts from clips using AI.
Features
- Reduce noise, motion artifacts, and improve video resolution significantly with this powerful online video quality enhancer and upscaler. Perfect for enhancing low-resolution videos like 240p, 360p, 480p, and more.
- Pro increases video frame rates without sacrificing quality. Smooth out shaky footage for better slow-motion effects.
- This tool enhances video resolution up to 2K at a maximum of 30fps effortlessly. It sharpens and defines your videos, bringing your story to life like a professional.
- This is perfect for filmmakers seeking to enhance footage quality and create professional-looking films. Improve video resolution and quality to unblur, upscale, and smooth videos for cinematic results.
- Enhance the quality of personal videos as this tool features shake stabilization for professional results.
- This video enhancer is ideal for professionals creating cinematic frames and restoring old footage. It’s also great for individuals looking to improve the quality of compressed videos downloaded from social media platforms like YouTube, Netflix, and TikTok.
Pros
- It boosts video frame rates and enables HD clip exports.
- Users can upload videos in MP4, MOV, WebM, and GIF formats for processing.
Cons
- It only offers a 5-second preview of the results after enhancement.
2.Clideo Video Enhancer
Clideo is an online video-enhancing tool that can completely transform any random video. It lets you add special AI effects and filters to adjust the video’s brightness, saturation, and contrast, making it stunning, vibrant, and attractive. You can enhance any video professionally for social media attention or business branding.
When it comes to video-enhancing tools, users seek maximum customization options. Clideo offers various features, functions, and facilities to transform average-looking videos into 4k video resolutions.
Features
- The interface is intuitive, so you don’t need any video editing experience to use it.
- You can enhance your video regardless of format because Clideo works with MP4, WMV, MOV, VOB, AVI, and other popular formats.
- You don’t need to download and install the video enhancer to your device. It’s not only faster but also more secure.
- Enhance multiple videos or images simultaneously.
- Add subtitles with customizable text fonts.
- Text Overlay feature with support for HD resolution.
- Access a media library with social sharing options.
Pros
- User-friendly tool is ideal for beginners.
- Supports multiple formats.
- As an online tool, it saves device storage space.
- Reasonable pricing.
- Provides uninterrupted video editing with customizable features.
Cons
- A premium subscription is required to remove watermarking.
- No offline app available; internet connection always necessary.
- No dedicated mobile app.
How to Choose the Best Video Enhancer
Consider the following to ensure you select the right video enhancer for your needs and creative vision.
1.Type of Content
Think about the type of content you’re working with. Are you creating short-form clips for social media or longer, more complex videos? Different enhancers may better suit different content types, so consider your file type and potential quality issues.
2.Consider The Features You Need
Consider the tools and features you need from your video quality enhancer software. Each system offers different capabilities, so planning can help you find the option that best fits your requirements.
3.Sharing Formats and Requirements
Determine the purpose of your video project and any specific sharing requirements. Understanding your goals will help you plan accordingly, whether for online sharing or commercial use.
4.Your Budget
Keep your budget in mind. Some enhancers offer free features, while others may require a purchase or subscription fee for full access. Budgeting effectively ensures you get the best value for your money while achieving great video results.
Conclusion
The video enhancement landscape has been transformed by artificial intelligence, providing numerous options to enhance your videos’ quality. Whether a professional filmmaker or a casual content creator, free AI video enhancers offer a chance to take your productions to the next level.
Each software has unique strengths, from Wondershare Filmora’s comprehensive editing features to AVCLabs’ neural network-powered upscaling and UniFab’s HDR conversion capabilities. User-friendly options like HitPaw cater to beginners while providing robust enhancement tools.
Moreover, for quick fixes or limited storage, online options like Cutout.Pro and Clideo offer accessible solutions with impressive results. With these advancements, achieving professional-quality videos is now achievable for everyone.
Ollie Mattison
Ollie Mattison is a writer and a lover of all things video.
Follow @Ollie Mattison
Unlock Audio From Video: Best MP4 to MP3 Conversion Software
MP4 2 MP3: Best MP4 to MP3 Converters
Ollie Mattison
Mar 27, 2024• Proven solutions
The MP4 file format is probably the most commonly used video file format today, as various video recording devices use it as the default video file format. The duration of a video and the resolution in which a video was captured determine its size, so the size of an MP4 file can vary between a couple of hundred of megabytes to a couple of gigabytes. That’s why there is no reason to store huge MP4 files if you only need their audio since converting this type of file to an MP3 file format is a simple process. Read on if you would like to learn more about the best MP4 to MP3 converters you can use online or on PC and Mac computers.
Best Mac and PC-based MP4 to MP3 Converters
Both Mac and PC users have a broad range of free software products at their disposal that enable them to convert MP4 video file to MP3 audio files. So, let’s take a look at some of the easiest ways to turn MP4 to MP3 on a Mac or a PC.
1. Using Filmora to Convert MP4 to MP3 Files
Filmora is a powerful video editing software that is compatible with both macOS and Windows operating systems. Besides offering a plethora of video editing tools you can use to create green-screen videos, stabilize shaky footage captured with action cameras or make the Picture-in-Picture effect, Filmora also lets you edit audio files with ease. The built-in library of royalty-free music and audio effects enables you to create compelling soundtracks for each of your videos, while its Denoise feature helps you reduce background noise in audio files. Converting an MP4 to MP3 in Filmora is a quick process that won’t take much longer than a couple of minutes. Here’s how you can convert an MP4 to MP3 with Filmora.

After you’ve created a new project, you should head over to the editor’s Media Panel to import the MP4 video file you’d like to turn into an MP3 audio file. The file you imported into a project in Filmora will be displayed in the Media Panel and you should simply drag and drop it to the timeline. After you’ve placed the MP4 file to the video track on the timeline, you should click on the Export button.
The Export window will appear on the screen and you just have to select MP3 as the preferred output format and click on the Export button. The rendering process will start immediately, but its duration depends on the size and the quality settings you’ve chosen. Filmora lets you create high-quality MP3 audio files from MP4 video files which makes it a great choice for a broad range of users.
 -
- 
Pros
- Doesn’t watermark the MP3 files even if you’re using the free version of the software
- Quick and easy MP4 to the MP3 conversion process
Cons
- Doesn’t offer the batch conversion option.
2. Converting MP4 to MP3 Files With Windows Media Player For Free
All recent versions of the Windows OS come bundled with the Windows Media Player that lets you play both video and audio files. In order to start converting MP4 to MP3 files you must first open the MP4 file with Windows Media Player, so just click on the File drop-down menu, choose the Open option and select the MP4 file you’d like to open. The video filed you opened will start playing and you have to click on the Menu button to access the player’s home screen.
Once the home screen loads, you should click on the Organize drop-down menu that is located in the upper left corner of the screen and select Options. Click on the Rip Music tab in the Options window that appeared on the screen and then use the Change icon to select the destination on your hard drive where the converted file is going to be saved.

Directly below you will be able to see the Rip Settings section of the tab, click on the Format drop-down menu and select the MP3 option. Hit the OK button to commence the conversion process, and wait for your MP4 file to be converted into an MP3 file.
Pros
- All Windows users can convert MP4 to MP3 files for free
Cons
- No control over the quality of the output file
- Rip Music tab isn’t easily accessible
3. Using the iTunes Library to Convert MP4 to MP3 Files
iTunes is probably one of the best media players ever created so it is hardly a surprise that you can use it as an MP4 to MP3 converter. You just have to add an MP4 file you’d like to convert into an MP3 to iTunes Library by clicking on the File menu and selecting Add File to Library option. Browse the computer’s hard drive until you find the file you want to add to the library and click OK to complete the process.
The MP4 file will be placed in the iTunes’ Music category, and you just have to click on it to select it. Head back to the File menu and choose the Create MP3 Version option from the Convert submenu. The conversion process will commence immediately and once it is completed you can play your freshly created MP3 file directly from iTunes.
Pros
- iTunes makes it easy to organize MP3 files
- The speedy file conversion process
Cons
- Converting large quantities of MP4 files to MP3 can be time-consuming
4. Converting MP4 to MP3 Files on Windows, macOS, and Linux with VLC Player
VLC is an open-source player that enables you to play a broad range of audio and video files. It also offers some video editing and file conversion functionality that allows its users to apply effects and filters or change the format of audio and video files.
Go to the Media menu and click on the Convert/Save option or use the Ctrl+R keyboard shortcut to bring up the Open Media window. Under File Selection, click on the Add icon and proceed to choose the MP4 file you want to convert. At the bottom of this window, you’ll be able to see the Convert/Save button, click on it and wait for the Convert window to appear on the screen. Expand the Profile drop-down menu that is located under Settings, change the output file format to MP3 and then click on the Browse icon next to Destination File to specify the destination where the new audio file is going to be saved. Click on the Start button and wait for the conversion process to be completed.
Pros
- A reliable method of converting MP4 to MP3 regardless of the OS you’re using
- MP4 to MP3 conversion can be completed in just a few steps
Cons
- Produces low-quality MP3 files
You may also like: How to Change Video Format [Free Tutorial] >>
Best Free Online MP4 to MP3 Converters
Besides using MP4 to MP3 converters for Mac and PC computers, you can also try converting MP4 to MP3 with web-based tools. Let’s take a look at some of the best online MP4 to MP3 converters you can use for free.
1. Online Audio Converter
Online Audio Converter lets you convert more than 300 different file formats into MP3, WAV, Ogg and other audio file formats in just three easy steps. Simply upload a file, set the output format to MP3 and adjust the Quality settings. Optionally, you can click on the Advanced Settings button if you want to apply fade-in and fadeout effects, alter the Bitrate and Sample Rate or specify the number of channels. The platform also lets you edit the track info so you can add the name of the artist or the title of a song. In addition, you can also use the batch conversion option if you want to convert multiple MP4 files to MP3 at the same time. Click on the Convert button when ready to complete the file conversion process.
Pros
- Batch conversion features are available
- Users have complete control over the quality of the output file
Cons
- Uploading large MP4 files can take a while
2. Convertio

There is nothing complicated about converting MP4 to MP3 with this online platform. You can just upload an MP4 file from your computer, Dropbox or Google Drive and hit the convert button. The lite version of Convertio doesn’t let you upload files larger than 500MB and it allows you to make 25 concurrent conversions. Uploading MP4 files up to 1GB requires you to purchase the Basic subscription plan, but you can also use the Convertio platform for free if you are not planning on using it frequently to convert MP4 to MP3 files.
Pros
- Simple and efficient MP4 to MP3 converter
Cons
- Choosing a subscription is necessary if you want to convert files larger than 500MB
3. Zamzar

Zamzar is a powerful file converter that lets you convert MP4 files to a broad range of audio and image file formats. The best part is that you can complete the file conversion process effortlessly. Upload a file, select the output file format and click on the Convert Now button. However, before you can start converting MP4 to MP3 you will have to agree to the platform’s terms and conditions. The maximum size of an MP4 file, you can convert to MP3 or any other file format with the free version of the platform can’t exceed 150MB.
Pros
- Huge selection of different output formats
Cons
- Even the pro version of Zamzar doesn’t allow you to upload files larger than 400MB
You may also like:
Free YouTube to MP3 Downloader for Android>>
Tools to Convert YouTube to MP3 for Your iPhone>>
Conclusion
You don’t have to be a seasoned video editing professional to convert an MP4 file to MP3 because there are so many online and computer MP4 to MP3 converters that enable you to complete this task in just a few clicks. What is your favorite MP4 to MP3 file converter? Leave a comment and let us know.
Ollie Mattison
Ollie Mattison is a writer and a lover of all things video.
Follow @Ollie Mattison
Ollie Mattison
Mar 27, 2024• Proven solutions
The MP4 file format is probably the most commonly used video file format today, as various video recording devices use it as the default video file format. The duration of a video and the resolution in which a video was captured determine its size, so the size of an MP4 file can vary between a couple of hundred of megabytes to a couple of gigabytes. That’s why there is no reason to store huge MP4 files if you only need their audio since converting this type of file to an MP3 file format is a simple process. Read on if you would like to learn more about the best MP4 to MP3 converters you can use online or on PC and Mac computers.
Best Mac and PC-based MP4 to MP3 Converters
Both Mac and PC users have a broad range of free software products at their disposal that enable them to convert MP4 video file to MP3 audio files. So, let’s take a look at some of the easiest ways to turn MP4 to MP3 on a Mac or a PC.
1. Using Filmora to Convert MP4 to MP3 Files
Filmora is a powerful video editing software that is compatible with both macOS and Windows operating systems. Besides offering a plethora of video editing tools you can use to create green-screen videos, stabilize shaky footage captured with action cameras or make the Picture-in-Picture effect, Filmora also lets you edit audio files with ease. The built-in library of royalty-free music and audio effects enables you to create compelling soundtracks for each of your videos, while its Denoise feature helps you reduce background noise in audio files. Converting an MP4 to MP3 in Filmora is a quick process that won’t take much longer than a couple of minutes. Here’s how you can convert an MP4 to MP3 with Filmora.
After you’ve created a new project, you should head over to the editor’s Media Panel to import the MP4 video file you’d like to turn into an MP3 audio file. The file you imported into a project in Filmora will be displayed in the Media Panel and you should simply drag and drop it to the timeline. After you’ve placed the MP4 file to the video track on the timeline, you should click on the Export button.
The Export window will appear on the screen and you just have to select MP3 as the preferred output format and click on the Export button. The rendering process will start immediately, but its duration depends on the size and the quality settings you’ve chosen. Filmora lets you create high-quality MP3 audio files from MP4 video files which makes it a great choice for a broad range of users.
-
Pros
- Doesn’t watermark the MP3 files even if you’re using the free version of the software
- Quick and easy MP4 to the MP3 conversion process
Cons
- Doesn’t offer the batch conversion option.
2. Converting MP4 to MP3 Files With Windows Media Player For Free
All recent versions of the Windows OS come bundled with the Windows Media Player that lets you play both video and audio files. In order to start converting MP4 to MP3 files you must first open the MP4 file with Windows Media Player, so just click on the File drop-down menu, choose the Open option and select the MP4 file you’d like to open. The video filed you opened will start playing and you have to click on the Menu button to access the player’s home screen.
Once the home screen loads, you should click on the Organize drop-down menu that is located in the upper left corner of the screen and select Options. Click on the Rip Music tab in the Options window that appeared on the screen and then use the Change icon to select the destination on your hard drive where the converted file is going to be saved.
Directly below you will be able to see the Rip Settings section of the tab, click on the Format drop-down menu and select the MP3 option. Hit the OK button to commence the conversion process, and wait for your MP4 file to be converted into an MP3 file.
Pros
- All Windows users can convert MP4 to MP3 files for free
Cons
- No control over the quality of the output file
- Rip Music tab isn’t easily accessible
3. Using the iTunes Library to Convert MP4 to MP3 Files
iTunes is probably one of the best media players ever created so it is hardly a surprise that you can use it as an MP4 to MP3 converter. You just have to add an MP4 file you’d like to convert into an MP3 to iTunes Library by clicking on the File menu and selecting Add File to Library option. Browse the computer’s hard drive until you find the file you want to add to the library and click OK to complete the process.
The MP4 file will be placed in the iTunes’ Music category, and you just have to click on it to select it. Head back to the File menu and choose the Create MP3 Version option from the Convert submenu. The conversion process will commence immediately and once it is completed you can play your freshly created MP3 file directly from iTunes.
Pros
- iTunes makes it easy to organize MP3 files
- The speedy file conversion process
Cons
- Converting large quantities of MP4 files to MP3 can be time-consuming
4. Converting MP4 to MP3 Files on Windows, macOS, and Linux with VLC Player
VLC is an open-source player that enables you to play a broad range of audio and video files. It also offers some video editing and file conversion functionality that allows its users to apply effects and filters or change the format of audio and video files.
Go to the Media menu and click on the Convert/Save option or use the Ctrl+R keyboard shortcut to bring up the Open Media window. Under File Selection, click on the Add icon and proceed to choose the MP4 file you want to convert. At the bottom of this window, you’ll be able to see the Convert/Save button, click on it and wait for the Convert window to appear on the screen. Expand the Profile drop-down menu that is located under Settings, change the output file format to MP3 and then click on the Browse icon next to Destination File to specify the destination where the new audio file is going to be saved. Click on the Start button and wait for the conversion process to be completed.
Pros
- A reliable method of converting MP4 to MP3 regardless of the OS you’re using
- MP4 to MP3 conversion can be completed in just a few steps
Cons
- Produces low-quality MP3 files
You may also like: How to Change Video Format [Free Tutorial] >>
Best Free Online MP4 to MP3 Converters
Besides using MP4 to MP3 converters for Mac and PC computers, you can also try converting MP4 to MP3 with web-based tools. Let’s take a look at some of the best online MP4 to MP3 converters you can use for free.
1. Online Audio Converter
Online Audio Converter lets you convert more than 300 different file formats into MP3, WAV, Ogg and other audio file formats in just three easy steps. Simply upload a file, set the output format to MP3 and adjust the Quality settings. Optionally, you can click on the Advanced Settings button if you want to apply fade-in and fadeout effects, alter the Bitrate and Sample Rate or specify the number of channels. The platform also lets you edit the track info so you can add the name of the artist or the title of a song. In addition, you can also use the batch conversion option if you want to convert multiple MP4 files to MP3 at the same time. Click on the Convert button when ready to complete the file conversion process.
Pros
- Batch conversion features are available
- Users have complete control over the quality of the output file
Cons
- Uploading large MP4 files can take a while
2. Convertio
There is nothing complicated about converting MP4 to MP3 with this online platform. You can just upload an MP4 file from your computer, Dropbox or Google Drive and hit the convert button. The lite version of Convertio doesn’t let you upload files larger than 500MB and it allows you to make 25 concurrent conversions. Uploading MP4 files up to 1GB requires you to purchase the Basic subscription plan, but you can also use the Convertio platform for free if you are not planning on using it frequently to convert MP4 to MP3 files.
Pros
- Simple and efficient MP4 to MP3 converter
Cons
- Choosing a subscription is necessary if you want to convert files larger than 500MB
3. Zamzar
Zamzar is a powerful file converter that lets you convert MP4 files to a broad range of audio and image file formats. The best part is that you can complete the file conversion process effortlessly. Upload a file, select the output file format and click on the Convert Now button. However, before you can start converting MP4 to MP3 you will have to agree to the platform’s terms and conditions. The maximum size of an MP4 file, you can convert to MP3 or any other file format with the free version of the platform can’t exceed 150MB.
Pros
- Huge selection of different output formats
Cons
- Even the pro version of Zamzar doesn’t allow you to upload files larger than 400MB
You may also like:
Free YouTube to MP3 Downloader for Android>>
Tools to Convert YouTube to MP3 for Your iPhone>>
Conclusion
You don’t have to be a seasoned video editing professional to convert an MP4 file to MP3 because there are so many online and computer MP4 to MP3 converters that enable you to complete this task in just a few clicks. What is your favorite MP4 to MP3 file converter? Leave a comment and let us know.
Ollie Mattison
Ollie Mattison is a writer and a lover of all things video.
Follow @Ollie Mattison
From Zero to Hero: 10 Online Waveform Generators for Beginners and Pros
You might have seen waves moving up and down in song lyrics, karaoke videos, podcasts, and other videos. Well, that’s what is known as waveform, in other words, audiogram. So, if you want to add an audio waveform to your videos, all you need is an audio waveform generator that will let you create fascinating animated waveforms for your videos.
The good news is that there are multiple audio waveform video generators to choose from. However, knowing that you will want only the best online waveform generator, we have hand-picked ten such online sound wave generators that will let you add animated waveform effortlessly.
In this article
01 Part 1: What is a Waveform Generator?
02 Part 2: Best Online Waveform Generators You Should Try!
03 Part 3: Why Should You Use Audio Visualization?
Part 1: What is a Waveform Generator?
Now, to create a waveform to audio and add it to a video, you need an audio waveform generator. So, what’s a waveform generator? It’s a tool that will let you design an attractive waveform to any audio and add it to a video. You can look for soundwave generators online since they are a plethora of them.
Please note that some sound wave generators are available online for free, while for others, you will have to pay a small fee. Waveforms can be both low and high. It’s just that the higher waveforms will signify the louder sounds, and the lower waveforms will signify lower sounds. What’s more? Waveforms look really cool and can enhance the video quality!
Part 2: Best Online Waveform Generators You Should Try
#1 VEED.IO

Price: Free
If you want to create waveform video from audio for free, the first waveform generator that you should try is VEED.IO. This fantastic waveform generator adds animated waveforms to videos. And it is free to use. The supported formats are MKV, M4A, M4V, MOV, MP4, MPEG, OPUS, MPG4, and more! In addition, VEED.IO can convert videos to the same supported formats.
To talk about its features, it’s a free online waveform generator. It allows you to be creative and lets you customize your sound wave just the way you want. You can place the waveform anywhere on the video; it enables you to edit your videos, such as adding text, audio, images, etc.
To use VEED.IO, you will first have to visit the official website and upload your video by clicking on the Choose Videos option. Once done, generate the waveform by clicking on the Elements option. Finally, click on the Export option, and that’s it!
#2 Kapwing

Price: Free plan | Upgrade: $24.00 per month.
Next up is Kapwing. It’s a simple-to-use multimedia editor that allows you to generate waveforms. This tool supports FLAC, MP3, and other popular video formats. It can export in MP4, AVI, FLV, 3GP, and other popular video formats. You can customize the waveform, frame your canvas, add custom text, enhance the video quality, etc.
To start using Kapwing, you will have to upload the video you want to edit. Then, you will have to add a waveform. After that, you can position the waveform as you like. You can change the speed, style, and color of the waveform later. Finally, once the waveform is ready, you can click on the download option.
The best part about Kapwing is that it lets you control the waveform as you like. Moreover, once the waveform is completed, you can share it with anyone you want.
#4 WaveVisual

Price: Free
WaveVisual is a free waveform generator and is an online tool. This means that you will not have to download WaveVisual on your computer. It lets you upload files directly from Spotify as well. It supports WAV, MP3, and many other formats.
There are three easy steps to follow. You need to upload an audio file, else copy the Spotify song link and paste it here on WaveVisual. Then, customize the design to create your unique waveform. Finally, click on the download option. You can even add a background image to make your waveform look extraordinary.
#5 Audiogram

Price Free | Registration required
The next online waveform generator is Audiogram. It not only lets you add waveform to your audios, but you can use the same tool to create editable transcripts as well. This tool is an ideal option for music videos and podcasts. The tool provides you with a fantastic library that consists of multiple templates. It supports MP3, WAV, etc.
The good thing about Audiogram is that it lets you customize the waveform to suit your needs and wants. To use it, please visit getaudiogram.com. Then, upload your audio, choose a design for your waveform, and once done, download, export, and share it!
#6 EchoWave.io

Price: Free
EchoWave.io lets you add different styles of waveforms, such as bar, radial, and line. It accepts MP3 and WAV audio formats and is free to use. EchoWave.io takes away the hard work you might have otherwise done if you didn’t have a waveform generator. You can use it to add a visual component to your lyrical songs, live streams, podcasts, images, and more.
To add a waveform, visit the official website, click on the upload option to upload the audio, choose animation style for the waveform, adjust the waveform as per your style and finally, generate the video and hit the render button to download the waveform video.
#7 RenderForest

Price: Free
RenderForest is a one-of-a-kind platform where you will find customizable waveform templates. Here, you need to choose a template and upload your audio, and RenderForest will take care of the rest. You can even add animated typography to enhance the video-watching experience. It supports all top audio formats, such as MP3, FLAC, etc.
To start using it, click on the template that you like. Then, hit the create now option. You can add a photo, music name, artist name, and more. Then, add the music file and click on the download option to save the file.
You may also like best music visualizer makers .
#8 Motionbox Music Visualizer

Price: Free | Sign up is required
Motionbox Music Visualizer is a super easy tool to use. This tool is often used by voice actors, musicians, and podcasters to add waveforms, mainly because of its easy-to-understand interface. It supports FLAC, WMA, WAV, MP3, and other formats.
To use it, visit Motionbox Music Visualizer’s official website and upload your audio. After that, trim your audio and finally add the waveform visualizer. Just three easy steps, and your video with waveform will be generated.
#9 Specterr Music Visualizer

Price: Pro: $25.00/month | Unlimited: $75.00/month | Free with a watermark
Specterr Music Visualizer provides you with built-in visualizer presets to choose from. The tool is reliable and very easy to use. After you add the waveform to your audio, you will not even have to spend time downloading it. Instead, you can share it directly to your Facebook, Twitter, YouTube, Instagram account.
To get started, you will first have to select a preset. You will see multiple presets. Then, you need to upload an audio file. It accepts MP3 or WAV. Once done, you can customize the visualizer, and finally, click on the Export option to export the video.
#10 Recast Studio

Price: Free
If you have a podcast ready and want to add waveform to it, you should try Recast Studio. It allows you to add unique animated audio waveforms, which will eventually increase conversion and boost social engagement. In addition, it is easy to use and saves your time with its visualizer presets.
To use, you will have to upload the audio. It accepts MP3. Then, you need to clip the audio. After that, browse through the template section and pick your favorite. You can then customize the video to enhance its quality, such as changing the color of the waveform, adding images, editing texts, and more. Finally, download the video.
#11 Clipchamp

Price: Free | Sign up required
Clipchamp is a free online audio visualizer that you can add audio waveforms to your videos. You will not have to spend hours manually creating waveforms. It lets you browse through its multiple templates. You can just choose one for your music videos, podcasts, etc., add the animated visualizer and get it done.
Here’s how you can use it. You need to visit the official website and upload the audio file, MP3, or WAV that you want to edit. After that, you need to apply an audio visualizer. You can add background and effects, too, if you wish. After you are all done, export your video.
Part 3: Why Should You Use Audio Visualization?
Audio entertainment has been around since time immemorial, and there’s no doubt about how big of an impact it has. However, when you add audio visualization, it enhances the listening experience by manifolds. Take podcasts, for example. They have become extremely popular.
In fact, there are currently more than 30 million podcast episodes running across the world. But when you combine audio visualization, it makes the audio even better. It becomes more engaging. Not that it sounds stand-alone can’t have an impact on the audience, but with audio visualization, it doubles itself when it comes to engagement and creating a lasting impression.
Conclusion
So, now you know about the top audio waveform video generators. You can choose one from the list we have mentioned and get started because your audios, such as lyrical music videos and podcasts, deserve the magical touch of an audio visualization. So, don’t miss out on it, and try an audio waveform generator today.
02 Part 2: Best Online Waveform Generators You Should Try!
03 Part 3: Why Should You Use Audio Visualization?
Part 1: What is a Waveform Generator?
Now, to create a waveform to audio and add it to a video, you need an audio waveform generator. So, what’s a waveform generator? It’s a tool that will let you design an attractive waveform to any audio and add it to a video. You can look for soundwave generators online since they are a plethora of them.
Please note that some sound wave generators are available online for free, while for others, you will have to pay a small fee. Waveforms can be both low and high. It’s just that the higher waveforms will signify the louder sounds, and the lower waveforms will signify lower sounds. What’s more? Waveforms look really cool and can enhance the video quality!
Part 2: Best Online Waveform Generators You Should Try
#1 VEED.IO
Price: Free
If you want to create waveform video from audio for free, the first waveform generator that you should try is VEED.IO. This fantastic waveform generator adds animated waveforms to videos. And it is free to use. The supported formats are MKV, M4A, M4V, MOV, MP4, MPEG, OPUS, MPG4, and more! In addition, VEED.IO can convert videos to the same supported formats.
To talk about its features, it’s a free online waveform generator. It allows you to be creative and lets you customize your sound wave just the way you want. You can place the waveform anywhere on the video; it enables you to edit your videos, such as adding text, audio, images, etc.
To use VEED.IO, you will first have to visit the official website and upload your video by clicking on the Choose Videos option. Once done, generate the waveform by clicking on the Elements option. Finally, click on the Export option, and that’s it!
#2 Kapwing
Price: Free plan | Upgrade: $24.00 per month.
Next up is Kapwing. It’s a simple-to-use multimedia editor that allows you to generate waveforms. This tool supports FLAC, MP3, and other popular video formats. It can export in MP4, AVI, FLV, 3GP, and other popular video formats. You can customize the waveform, frame your canvas, add custom text, enhance the video quality, etc.
To start using Kapwing, you will have to upload the video you want to edit. Then, you will have to add a waveform. After that, you can position the waveform as you like. You can change the speed, style, and color of the waveform later. Finally, once the waveform is ready, you can click on the download option.
The best part about Kapwing is that it lets you control the waveform as you like. Moreover, once the waveform is completed, you can share it with anyone you want.
#4 WaveVisual
Price: Free
WaveVisual is a free waveform generator and is an online tool. This means that you will not have to download WaveVisual on your computer. It lets you upload files directly from Spotify as well. It supports WAV, MP3, and many other formats.
There are three easy steps to follow. You need to upload an audio file, else copy the Spotify song link and paste it here on WaveVisual. Then, customize the design to create your unique waveform. Finally, click on the download option. You can even add a background image to make your waveform look extraordinary.
#5 Audiogram
Price Free | Registration required
The next online waveform generator is Audiogram. It not only lets you add waveform to your audios, but you can use the same tool to create editable transcripts as well. This tool is an ideal option for music videos and podcasts. The tool provides you with a fantastic library that consists of multiple templates. It supports MP3, WAV, etc.
The good thing about Audiogram is that it lets you customize the waveform to suit your needs and wants. To use it, please visit getaudiogram.com. Then, upload your audio, choose a design for your waveform, and once done, download, export, and share it!
#6 EchoWave.io
Price: Free
EchoWave.io lets you add different styles of waveforms, such as bar, radial, and line. It accepts MP3 and WAV audio formats and is free to use. EchoWave.io takes away the hard work you might have otherwise done if you didn’t have a waveform generator. You can use it to add a visual component to your lyrical songs, live streams, podcasts, images, and more.
To add a waveform, visit the official website, click on the upload option to upload the audio, choose animation style for the waveform, adjust the waveform as per your style and finally, generate the video and hit the render button to download the waveform video.
#7 RenderForest
Price: Free
RenderForest is a one-of-a-kind platform where you will find customizable waveform templates. Here, you need to choose a template and upload your audio, and RenderForest will take care of the rest. You can even add animated typography to enhance the video-watching experience. It supports all top audio formats, such as MP3, FLAC, etc.
To start using it, click on the template that you like. Then, hit the create now option. You can add a photo, music name, artist name, and more. Then, add the music file and click on the download option to save the file.
You may also like best music visualizer makers .
#8 Motionbox Music Visualizer
Price: Free | Sign up is required
Motionbox Music Visualizer is a super easy tool to use. This tool is often used by voice actors, musicians, and podcasters to add waveforms, mainly because of its easy-to-understand interface. It supports FLAC, WMA, WAV, MP3, and other formats.
To use it, visit Motionbox Music Visualizer’s official website and upload your audio. After that, trim your audio and finally add the waveform visualizer. Just three easy steps, and your video with waveform will be generated.
#9 Specterr Music Visualizer
Price: Pro: $25.00/month | Unlimited: $75.00/month | Free with a watermark
Specterr Music Visualizer provides you with built-in visualizer presets to choose from. The tool is reliable and very easy to use. After you add the waveform to your audio, you will not even have to spend time downloading it. Instead, you can share it directly to your Facebook, Twitter, YouTube, Instagram account.
To get started, you will first have to select a preset. You will see multiple presets. Then, you need to upload an audio file. It accepts MP3 or WAV. Once done, you can customize the visualizer, and finally, click on the Export option to export the video.
#10 Recast Studio
Price: Free
If you have a podcast ready and want to add waveform to it, you should try Recast Studio. It allows you to add unique animated audio waveforms, which will eventually increase conversion and boost social engagement. In addition, it is easy to use and saves your time with its visualizer presets.
To use, you will have to upload the audio. It accepts MP3. Then, you need to clip the audio. After that, browse through the template section and pick your favorite. You can then customize the video to enhance its quality, such as changing the color of the waveform, adding images, editing texts, and more. Finally, download the video.
#11 Clipchamp
Price: Free | Sign up required
Clipchamp is a free online audio visualizer that you can add audio waveforms to your videos. You will not have to spend hours manually creating waveforms. It lets you browse through its multiple templates. You can just choose one for your music videos, podcasts, etc., add the animated visualizer and get it done.
Here’s how you can use it. You need to visit the official website and upload the audio file, MP3, or WAV that you want to edit. After that, you need to apply an audio visualizer. You can add background and effects, too, if you wish. After you are all done, export your video.
Part 3: Why Should You Use Audio Visualization?
Audio entertainment has been around since time immemorial, and there’s no doubt about how big of an impact it has. However, when you add audio visualization, it enhances the listening experience by manifolds. Take podcasts, for example. They have become extremely popular.
In fact, there are currently more than 30 million podcast episodes running across the world. But when you combine audio visualization, it makes the audio even better. It becomes more engaging. Not that it sounds stand-alone can’t have an impact on the audience, but with audio visualization, it doubles itself when it comes to engagement and creating a lasting impression.
Conclusion
So, now you know about the top audio waveform video generators. You can choose one from the list we have mentioned and get started because your audios, such as lyrical music videos and podcasts, deserve the magical touch of an audio visualization. So, don’t miss out on it, and try an audio waveform generator today.
Best FCPX Tutorial Collection [Channels and Websites]
Final Cut Pro alternative - Wondershare Filmora
An easy yet powerful editor
Numerous effects to choose from
Detailed tutorials provided by official channel
Videos have become a vital part of any marketing strategy. You need video material to stay alive digitally, whether you’re a freelance filmmaker, a blogger, a YouTuber, or a member of a full-time agency. However, if you think making movies and editing them in post-production isn’t challenging, you haven’t done it with Final Cut Pro X.
Video editing is a pain. Mastering non-linear editing software like Final Cut Pro is one of the most challenging, soul-crushing, and time-consuming tasks you can do. But that’s why you have us and our comprehensive guide to help you find the best tutorial course on using Final Cut Pro like a pro. After learning from these lessons, you will master the basics and advanced techniques of Final Cut Pro X. Let’s get started, beginners and pros!
In this article
01 The Best Video Courses For Final Cut Pro in YouTube
02 The Best Websites to Learn Final Cut Pro Basics
03 Is Paid Class of FCPX Worth For Beginners?
Part1: The Best Video Courses For Final Cut Pro in YouTube
Finding good Final Cut Pro X tutorials on YouTube may be like looking for a needle in a haystack. Millions of videos on the internet promise to teach Final Cut tips and tricks, but only a handful of them deliver the degree of training you require.
Even if you discover competent video editing teachers on YouTube, there’s a high chance they won’t teach you how to use the particular program function you need. It’s incredibly aggravating to spend so much time looking for what you need!
But don’t lose heart just yet. You can discover a professional video editing instructor that offers a variety of free lessons, tips, and tools for beginners and professionals with a bit of assistance.
Check out our top 5 Recommendations to learn Final Cut Pro on YouTube before you waste hours scanning through dozens of videos:
1.FCPX Tour – Final Cut Pro Tips from Basic to Advance
This isn’t a regular tutorial; instead, it’s a presentation. On the other hand, this channel physically walks you through capturing footage, transferring it to your timeline, and then starting to edit it. Everything from music to speech to light color grading to a quick exporting procedure is covered in this video. After seeing this tutorial, there’s no chance you won’t grasp how to edit a video. It’s just good, reliable information.

Why recommend this channle?
• Learn basic to advanced level techniques.
• Unique workflow gives subscribers a clear understading about the tutorial.
• Practical approach for subscribers to reproduce the work instantly.
2.Shutterstock Tutorials – Learn Tips For Beginners
It takes some time to become familiar with Final Cut Pro X. However, after you’ve mastered the fundamentals, you’ll be able to complete tasks faster than ever before. Follow this channel for a comprehensive explanation of the best beginner techniques for editing in Final Cut Pro X, whether you’re new to editing or need a refresher course.
There are a few essential interface explanations as well as some tips and tricks for using the tools. Enjoy!

Why recommend this channle?
• Informative and easy. Best tips for people who are beginners in Final Cut Pro.
3.Marcos Rocha – A Heaven for Advanced Techniques
Having mastered the basics, let’s move on to some advanced workflow ideas. It takes some time to become comfortable enough (when editing) to experiment with keyboard shortcuts and workflow shortcuts. This is the beauty of editing. Watching lessons on this channel will assist you in putting some of these advanced concepts, shortcuts, and tips into practice as they become second nature to you.

Why recommend this channle?
• Great for shortcuts, tips, and advanced concepts of FCPX.
• Efficient workflow and easy-to-understand videos.
• Even beginners can benefit from these tutorials.
4.Brad and Donna – Game-Changing Plugins
Everyone needs and appreciates free things, whether they’re new to FCPX or a professional editor. Your budget will not always be sufficient, and you will frequently find yourselves at a fork in the road when the funds are few. So, the good news for FCPX editors is that there is a slew of free plugins, including overlays, LUTs, flares, and titles, that are very excellent (and don’t seem like your dingus friend produced them). You can watch the tutorial course if you want to learn more about these free and paid plugins in all price ranges.

Why recommend this channle?
• Informative FCPX videos.
• Tips about various effects, color grading, graphics, keyframes, etc.
• Posts new content every week.
5.Totally Exposed – Complete Guide for Beginners
Are you new to Final Cut Pro X and don’t know where to start? If you’re new to FCPX and want to get started with video editing, you can join this FREE hour-long in-depth training that will get you up and running in no time!

When you’re learning from a seasoned expert, it’s easy to feel left behind as they go through tools and features you’ve never heard of. On the other hand, the Totally Exposed channel puts such concerns to rest with one-of-a-kind lessons in which we learn with Neil, a novice who has never used FCP X before.
Importing, basic terminologies, cutting clips, and adding music, as well as adding effects, titles, and exporting the finished material, are all covered in this video. It’s more of a trawling movie than a fast instruction at over one hour long. However, it’s ideal for novice users who want to take things a little more slowly and absorb knowledge over time.
Why recommend this channle?
• Extensive yet still very well-paced for beginners.
• Amazing teaching skills.
However, all the video tutorials are quite long because FCPX is powerful but not easy to get started with. You can always choose Wondershare Filmora to boost your editing.
For Win 7 or later (64-bit)
For macOS 10.12 or later
Part2: The Best Websites to Read about Final Cut Pro Basics
If you are looking for the best websites to learn Final Cut Pro basics, then you can visit the following web pages:
1.FCP.co

FCP.co is dedicated to all things video on the Mac, focusing on Final Cut Pro X video editing techniques and lessons. They’re continuously updated on the latest FCPX third-party plugins and filters (including many free effects). Unlike Apple’s FCPX user forum, this one is quite active and updated frequently.
2.Apple Support Center

On Apple’s official website, the FCPX support community is active. If you have a specific query regarding the application, this is an excellent resource. The emphasis here is less on editing style, and skill since most content focuses on more technical FCPX software/hardware concerns. It’s worth mentioning that if you contribute to the community by assisting other users with their problems rather than just asking questions, your editing karma will skyrocket!
3.Reddit

If you want to ask a specific question related to Final Cut Pro, you can post it on Reddit. The active community on Reddit will answer it. You can also read the questions posted by other users to increase your knowledge.
4.FCPX.tv

FCPX.tv, with its motto “all things Final Cut Pro X,” is a one-stop shop for the most up-to-date advice and news on this software. An endless list of Final Cut Pro X requests (for future versions and upgrades), FCPX editing lessons, and documentation of known FCPX issues are just a few of the highlights. If you’re an FCPX power editor, this is a must-visit website.
Part3: Is Paid Class of FCPX Worth For Beginners?
The last thing you want to do with your hectic schedule is sitting through hours of aimless video lessons. Buying Final Cut Pro lessons gives you the feel of having a personal trainer working alongside you. You can enroll in FCPX paid courses on Udemy and Coursera. Often a certificate of completion is available for download at the end of the course.
However, if you are a beginner, we won’t recommend you buy paid courses. There is unlimited free content related to Final Cut Pro available on YouTube and other websites that you can access without spending a penny.
When you have to spend too much money and energy on an editing tool, consider if it’s really worth it. Rather, you can always choose a much easier yet still powerful editor like Filmora to save your time for better editing.
Haven’t got FCPX yet? Get your 90-day free trial here or click below to download Filmora for a try.
Wondershare Filmora
Get started easily with Filmora’s powerful performance, intuitive interface, and countless effects!
Try It Free Try It Free Try It Free Learn More >

Videos have become a vital part of any marketing strategy. You need video material to stay alive digitally, whether you’re a freelance filmmaker, a blogger, a YouTuber, or a member of a full-time agency. However, if you think making movies and editing them in post-production isn’t challenging, you haven’t done it with Final Cut Pro X.
Video editing is a pain. Mastering non-linear editing software like Final Cut Pro is one of the most challenging, soul-crushing, and time-consuming tasks you can do. But that’s why you have us and our comprehensive guide to help you find the best tutorial course on using Final Cut Pro like a pro. After learning from these lessons, you will master the basics and advanced techniques of Final Cut Pro X. Let’s get started, beginners and pros!
In this article
01 The Best Video Courses For Final Cut Pro in YouTube
02 The Best Websites to Learn Final Cut Pro Basics
03 Is Paid Class of FCPX Worth For Beginners?
Part1: The Best Video Courses For Final Cut Pro in YouTube
Finding good Final Cut Pro X tutorials on YouTube may be like looking for a needle in a haystack. Millions of videos on the internet promise to teach Final Cut tips and tricks, but only a handful of them deliver the degree of training you require.
Even if you discover competent video editing teachers on YouTube, there’s a high chance they won’t teach you how to use the particular program function you need. It’s incredibly aggravating to spend so much time looking for what you need!
But don’t lose heart just yet. You can discover a professional video editing instructor that offers a variety of free lessons, tips, and tools for beginners and professionals with a bit of assistance.
Check out our top 5 Recommendations to learn Final Cut Pro on YouTube before you waste hours scanning through dozens of videos:
1.FCPX Tour – Final Cut Pro Tips from Basic to Advance
This isn’t a regular tutorial; instead, it’s a presentation. On the other hand, this channel physically walks you through capturing footage, transferring it to your timeline, and then starting to edit it. Everything from music to speech to light color grading to a quick exporting procedure is covered in this video. After seeing this tutorial, there’s no chance you won’t grasp how to edit a video. It’s just good, reliable information.
Why recommend this channle?
• Learn basic to advanced level techniques.
• Unique workflow gives subscribers a clear understading about the tutorial.
• Practical approach for subscribers to reproduce the work instantly.
2.Shutterstock Tutorials – Learn Tips For Beginners
It takes some time to become familiar with Final Cut Pro X. However, after you’ve mastered the fundamentals, you’ll be able to complete tasks faster than ever before. Follow this channel for a comprehensive explanation of the best beginner techniques for editing in Final Cut Pro X, whether you’re new to editing or need a refresher course.
There are a few essential interface explanations as well as some tips and tricks for using the tools. Enjoy!
Why recommend this channle?
• Informative and easy. Best tips for people who are beginners in Final Cut Pro.
3.Marcos Rocha – A Heaven for Advanced Techniques
Having mastered the basics, let’s move on to some advanced workflow ideas. It takes some time to become comfortable enough (when editing) to experiment with keyboard shortcuts and workflow shortcuts. This is the beauty of editing. Watching lessons on this channel will assist you in putting some of these advanced concepts, shortcuts, and tips into practice as they become second nature to you.
Why recommend this channle?
• Great for shortcuts, tips, and advanced concepts of FCPX.
• Efficient workflow and easy-to-understand videos.
• Even beginners can benefit from these tutorials.
4.Brad and Donna – Game-Changing Plugins
Everyone needs and appreciates free things, whether they’re new to FCPX or a professional editor. Your budget will not always be sufficient, and you will frequently find yourselves at a fork in the road when the funds are few. So, the good news for FCPX editors is that there is a slew of free plugins, including overlays, LUTs, flares, and titles, that are very excellent (and don’t seem like your dingus friend produced them). You can watch the tutorial course if you want to learn more about these free and paid plugins in all price ranges.
Why recommend this channle?
• Informative FCPX videos.
• Tips about various effects, color grading, graphics, keyframes, etc.
• Posts new content every week.
5.Totally Exposed – Complete Guide for Beginners
Are you new to Final Cut Pro X and don’t know where to start? If you’re new to FCPX and want to get started with video editing, you can join this FREE hour-long in-depth training that will get you up and running in no time!
When you’re learning from a seasoned expert, it’s easy to feel left behind as they go through tools and features you’ve never heard of. On the other hand, the Totally Exposed channel puts such concerns to rest with one-of-a-kind lessons in which we learn with Neil, a novice who has never used FCP X before.
Importing, basic terminologies, cutting clips, and adding music, as well as adding effects, titles, and exporting the finished material, are all covered in this video. It’s more of a trawling movie than a fast instruction at over one hour long. However, it’s ideal for novice users who want to take things a little more slowly and absorb knowledge over time.
Why recommend this channle?
• Extensive yet still very well-paced for beginners.
• Amazing teaching skills.
However, all the video tutorials are quite long because FCPX is powerful but not easy to get started with. You can always choose Wondershare Filmora to boost your editing.
For Win 7 or later (64-bit)
For macOS 10.12 or later
Part2: The Best Websites to Read about Final Cut Pro Basics
If you are looking for the best websites to learn Final Cut Pro basics, then you can visit the following web pages:
1.FCP.co
FCP.co is dedicated to all things video on the Mac, focusing on Final Cut Pro X video editing techniques and lessons. They’re continuously updated on the latest FCPX third-party plugins and filters (including many free effects). Unlike Apple’s FCPX user forum, this one is quite active and updated frequently.
2.Apple Support Center
On Apple’s official website, the FCPX support community is active. If you have a specific query regarding the application, this is an excellent resource. The emphasis here is less on editing style, and skill since most content focuses on more technical FCPX software/hardware concerns. It’s worth mentioning that if you contribute to the community by assisting other users with their problems rather than just asking questions, your editing karma will skyrocket!
3.Reddit
If you want to ask a specific question related to Final Cut Pro, you can post it on Reddit. The active community on Reddit will answer it. You can also read the questions posted by other users to increase your knowledge.
4.FCPX.tv
FCPX.tv, with its motto “all things Final Cut Pro X,” is a one-stop shop for the most up-to-date advice and news on this software. An endless list of Final Cut Pro X requests (for future versions and upgrades), FCPX editing lessons, and documentation of known FCPX issues are just a few of the highlights. If you’re an FCPX power editor, this is a must-visit website.
Part3: Is Paid Class of FCPX Worth For Beginners?
The last thing you want to do with your hectic schedule is sitting through hours of aimless video lessons. Buying Final Cut Pro lessons gives you the feel of having a personal trainer working alongside you. You can enroll in FCPX paid courses on Udemy and Coursera. Often a certificate of completion is available for download at the end of the course.
However, if you are a beginner, we won’t recommend you buy paid courses. There is unlimited free content related to Final Cut Pro available on YouTube and other websites that you can access without spending a penny.
When you have to spend too much money and energy on an editing tool, consider if it’s really worth it. Rather, you can always choose a much easier yet still powerful editor like Filmora to save your time for better editing.
Haven’t got FCPX yet? Get your 90-day free trial here or click below to download Filmora for a try.
Wondershare Filmora
Get started easily with Filmora’s powerful performance, intuitive interface, and countless effects!
Try It Free Try It Free Try It Free Learn More >
Also read:
- Updated In 2024, FCP Transition Tutorial 3 Easy Steps to Enhance Your Footage
- 2024 Approved Top Picks 28 Best Video to GIF Converters for Windows, Mac, and Online
- Updated In 2024, Calculate and Correct Image Proportion
- 2024 Approved Stop Motion Made Easy Cloud Software, Guidelines, and Inspiring Examples
- 2024 Approved No Budget, No Problem 9 Free Online Movie Makers
- New In 2024, Discover the Best Free and Paid Subtitle Edit Alternatives for Mac
- Updated In 2024, Windows Video Editing Made Easy Top 6 Software Options
- Updated 2024 Approved Here Are 5 Best Free iMovie Online Alternatives that You Can Use on Chromebook, Linux, Windows PC, Mac, Android, iPhone without Downloading
- Updated Editing Nikon Videos Like a Pro Software and Techniques for 2024
- New 2024 Approved A Step-by-Step Guide to Creating Stunning Stop Motion Videos on Instagram
- New 2024 Approved Lets Learn Interestingly About the Pixel Calculator Ratios and Dive Into Their Vast Significance for UI/UX Design
- New Mac Video Editing Made Easy Install Lumafusion or Choose an Alternative for 2024
- Updated In 2024, Create Stunning Animations Top Free and Paid 3D Software Recommendations
- New More than You Could Dream or Imagine, Final Cut Pro X Is a Powerful Software. One Such Hidden Feature From FCPX Is Jump Cuts, and We Shall Know More About Final Cut Pro Jump Cuts in This Article for 2024
- New In 2024, Ditch Adobe 10 Free and Paid Linux Video Editing Solutions
- Updated In 2024, AVI Video Rotation Made Easy Top Free Software
- New Slow Down Time Add Free Slow-Mo Effects to Your Videos with Filmora for 2024
- New In 2024, Video Storytelling Made Easy Best iPhone and iPad Collage Apps 2023
- New The Ultimate Stop Motion Handbook Studio, Alternatives, and More for 2024
- Updated In 2024, Best Free Subtitle Creation Tools on the Web
- Updated The Smart Way to Choose a Video to Audio Converter Top Tips and Tricks for 2024
- New Large Video Files? No Problem! Fast Cutting Techniques for Mac Users for 2024
- The Best Video Trimming Apps for Computer for 2024
- Updated 2024 Approved Top 3D Animation Software for Mobile Devices (Free to Use)
- New Expert Gaming Intro Makers Top Picks for 2024
- The Ultimate Checklist 5 Things to Consider When Choosing a Video to Audio Converter for 2024
- New In 2024, Final Cut Pro X Productivity Hacks Top 40 Keyboard Shortcuts
- New Generate Stunning Audio Waveform Videos with These Tools for 2024
- In 2024, Unleash Your Potential Top Video Resume Creators with Free Templates and Tips
- Updated 2024 Approved Evaluate and Enhance Image Dimensional Harmony
- New 2024 Approved Best Android Video Editor Apps for Chromebook
- New The Ultimate FCPX Plugin Troubleshooting Checklist (Updated 2023) for 2024
- Unlock Chromecasts Full Potential How to Stream Local Videos on Windows, Mac, Android, and iOS for 2024
- Updated Turn Your Photos Into Funny Cartoons Online
- New Try Filmora Video Editor and Download This Powerful and Intuitive Program to Help You Cut, Trim, Split Your Videos
- New The Ultimate Adobe Premiere Shortcut Guide 20 Essentials
- New In 2024, The Art of Lower Thirds Design in Final Cut Pro X
- Updated 2024 Approved Unbiased AVS Video Editor Review What to Expect
- Updated Unlock Your Creativity Best Video Editing Apps with Music for Mobile for 2024
- Updated Windows Live Movie Maker Slow Motion Effect Tips, Tricks, and Techniques
- New In 2024, Unleash Your Creativity How to Edit Videos in Windows Movie Maker
- How to Reset Gmail Password on Realme 11 Pro+ Devices
- In 2024, How To Bypass iCloud By Checkra1n Even From iPhone 14 Pro If Youve Tried Everything
- Updated In 2024, Videopad Video Editor Does It Live Up to the Hype? A Review and Recommendation
- Google Play Services Wont Update? 12 Fixes are Here on Vivo S18 | Dr.fone
- In 2024, How to Detect and Stop mSpy from Spying on Your Samsung Galaxy M14 4G | Dr.fone
- A Detailed VPNa Fake GPS Location Free Review On Itel S23+ | Dr.fone
- In 2024, With Looping Videos, People Stay on Your Site Longer, Boosting Engagement. With Video Being Watched on Mobile over 3X More than Any Other Content, Its an Essential Part of Mobile Advertising
- In 2024, How To Unlock A Found Apple iPhone 13 mini? | Dr.fone
- In 2024, Protecting Your Privacy How To Remove Apple ID From Apple iPhone 6s
- How to Recover Apple iPhone 14 Pro Data From iOS iCloud? | Dr.fone
- How To Unlock iPhone SE (2020) Without Passcode? 4 Easy Methods | Dr.fone
- In 2024, 8 Best Apps for Screen Mirroring Lenovo ThinkPhone PC | Dr.fone
- 9 Best Phone Monitoring Apps for Itel P55+ | Dr.fone
- Updated In 2024, Free Video Editors for Chrome OS A Review of the Top Options
- New In 2024, The Most Complete Guide to Make Fortnite Montage
- What is Fake GPS Location Pro and Is It Good On Vivo S17t? | Dr.fone
- How to Bypass iCloud Lock from Apple iPhone 11 Pro
- New Know All About Animated Business Logos and the Best Tools to Create One
- Latest Guide How To Bypass Motorola Defy 2 FRP Without Computer
- Title: 2024 Approved Upgrade Your Videos Best Free Online Quality Improvers
- Author: Morgan
- Created at : 2024-05-19 16:01:05
- Updated at : 2024-05-20 16:01:05
- Link: https://ai-video-tools.techidaily.com/2024-approved-upgrade-your-videos-best-free-online-quality-improvers/
- License: This work is licensed under CC BY-NC-SA 4.0.
